1970s Shore Home

Ikea Undercabinet Lighting

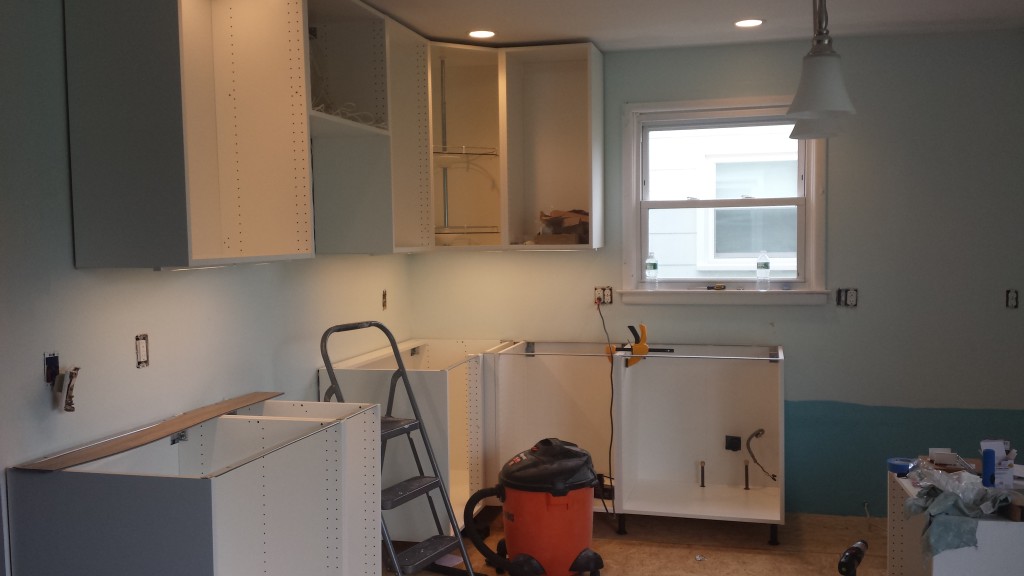
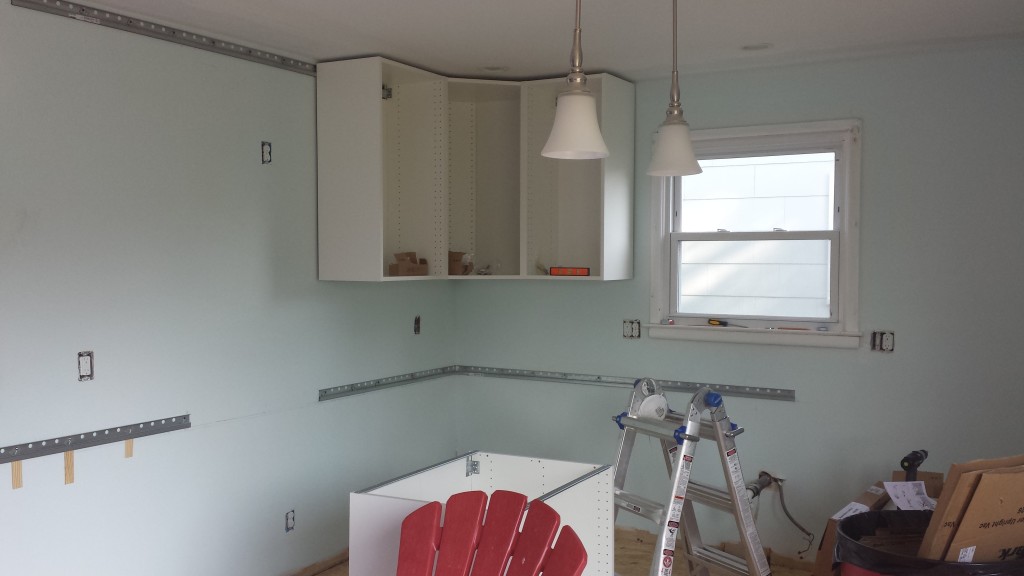
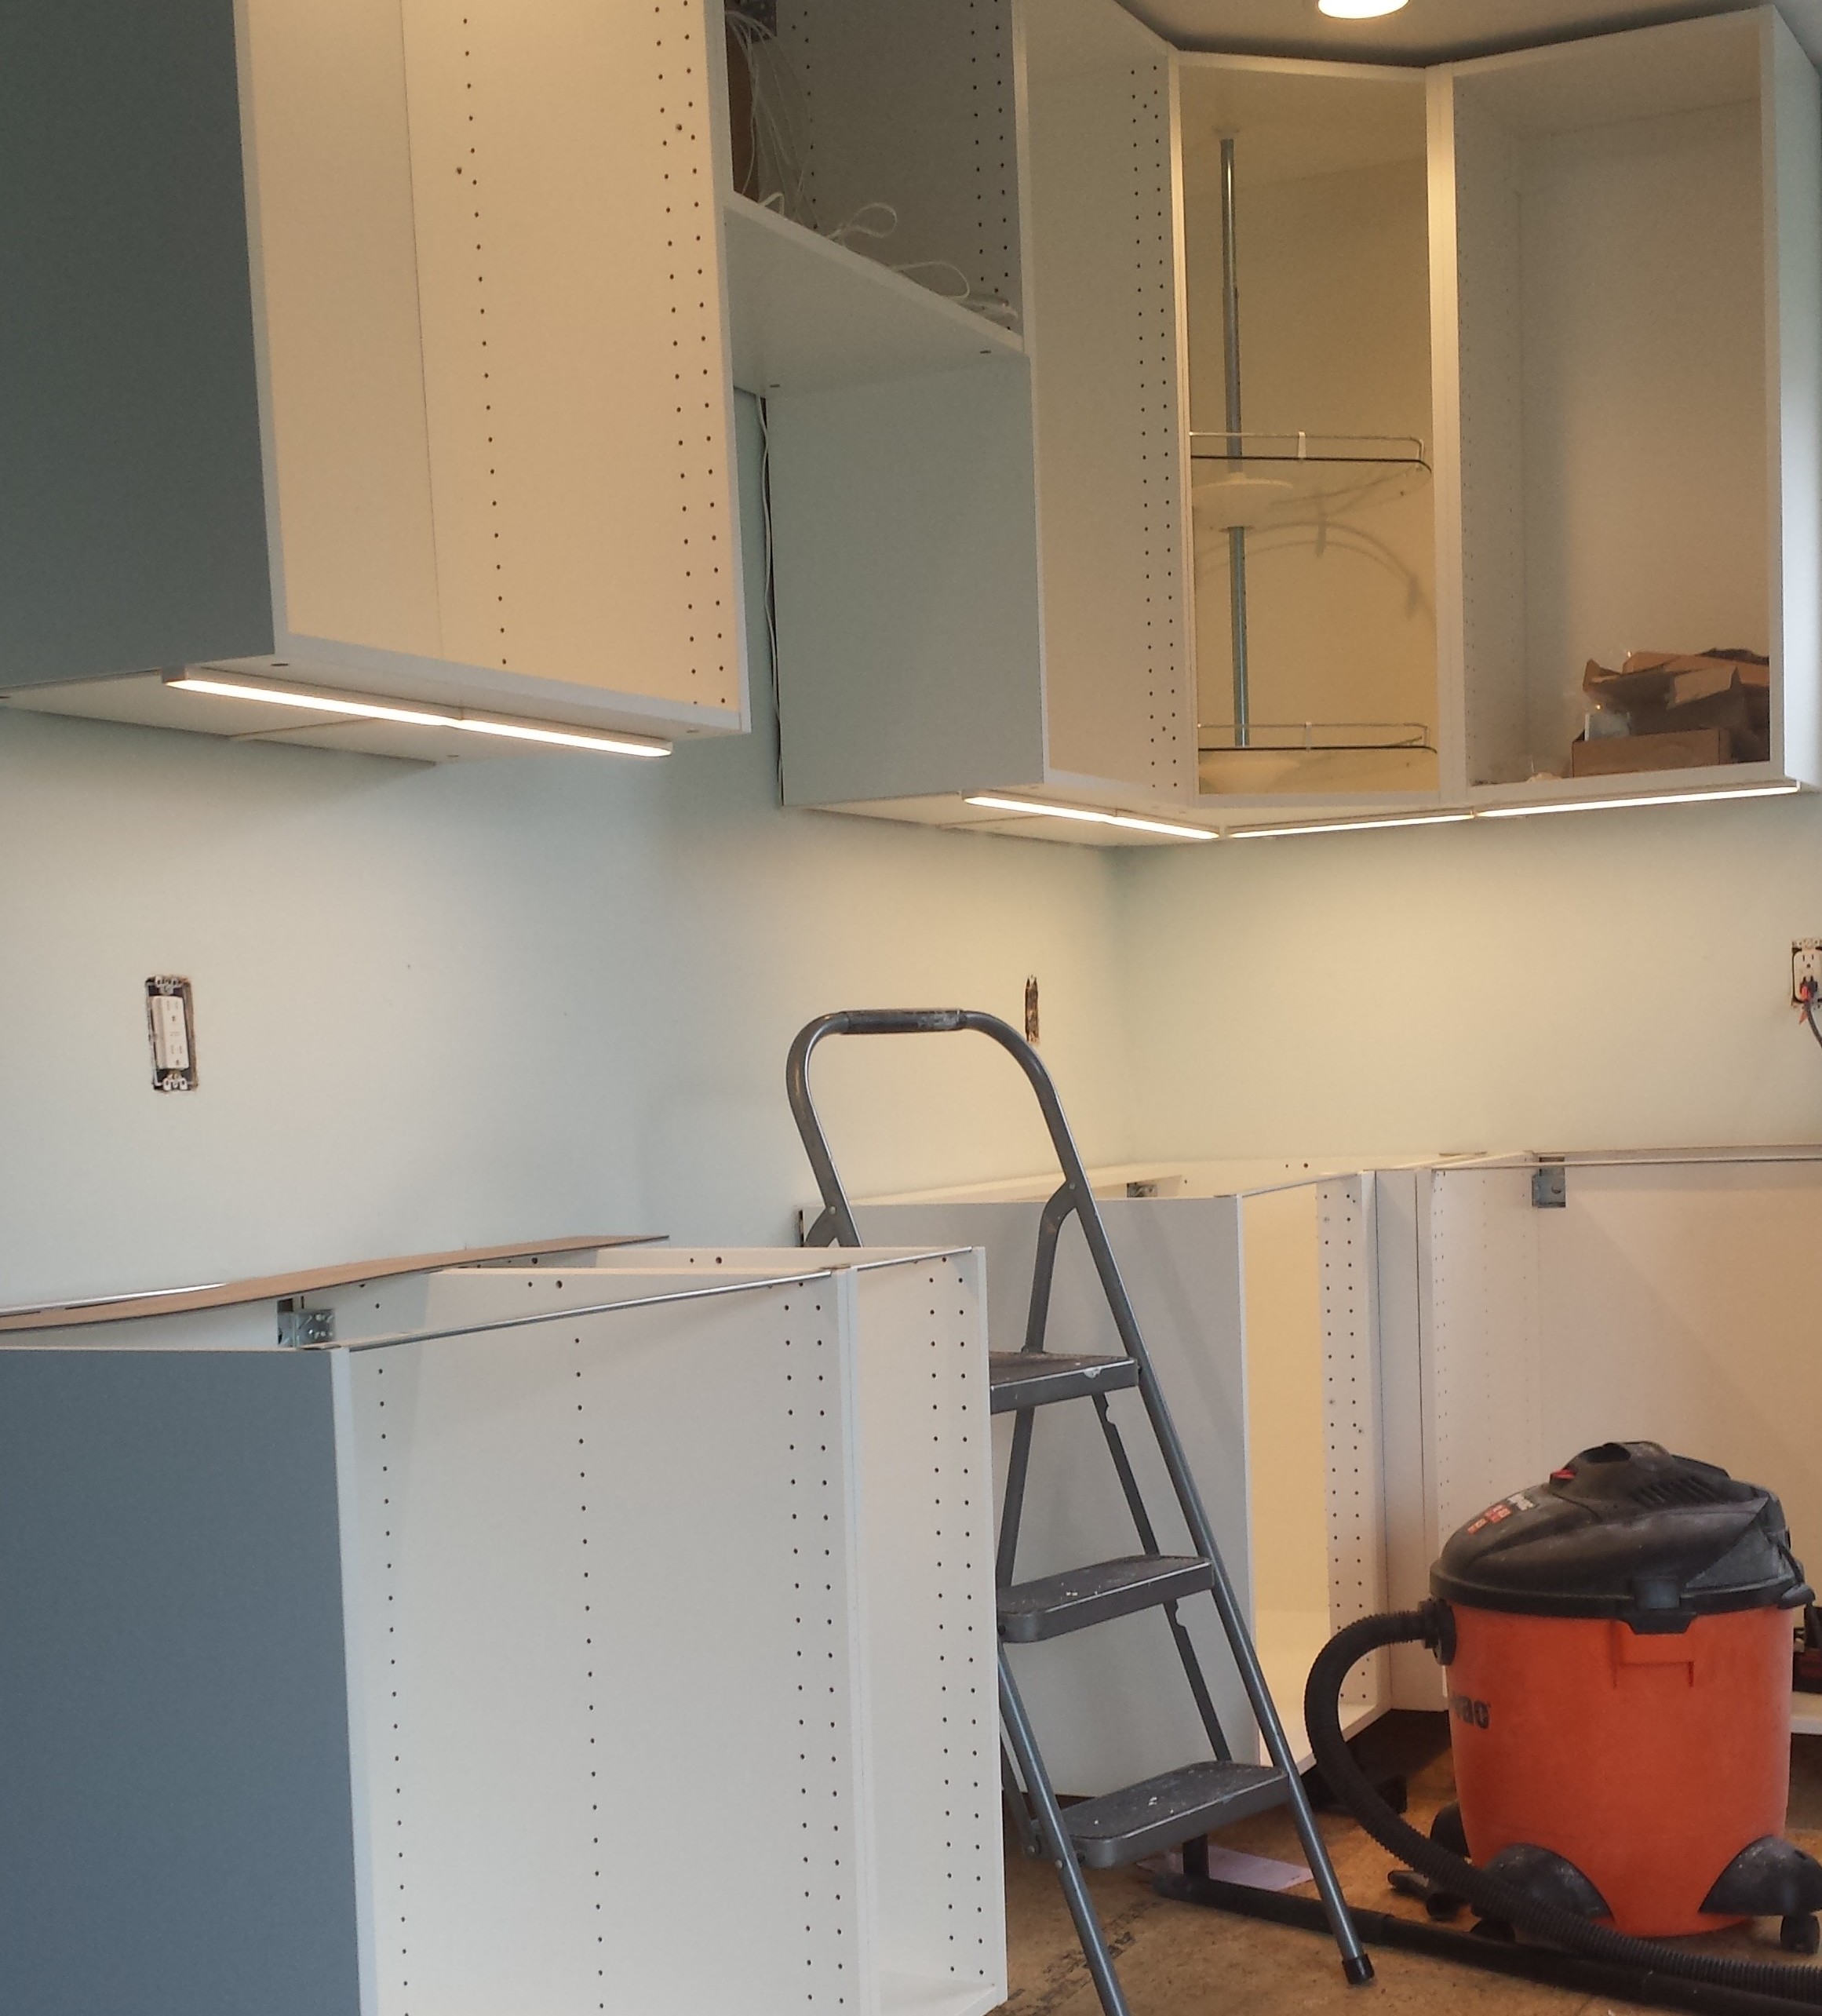
The past few weeks have been a lot of two steps forward / one step back in the kitchen. While tidying up the remaining boxes of kitchen stuff I came across the cabinet lighting, and thought “huh I wonder when I’m supposed to install these.” I’ll tell you…. before you secure the wall cabinets. Oops.

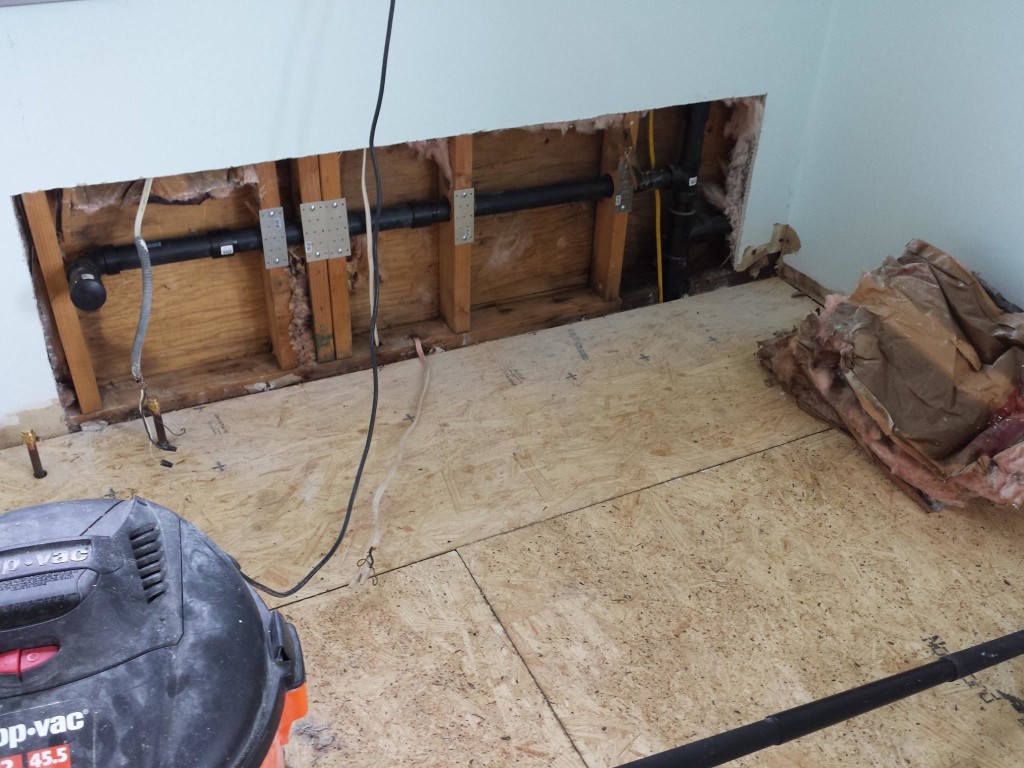
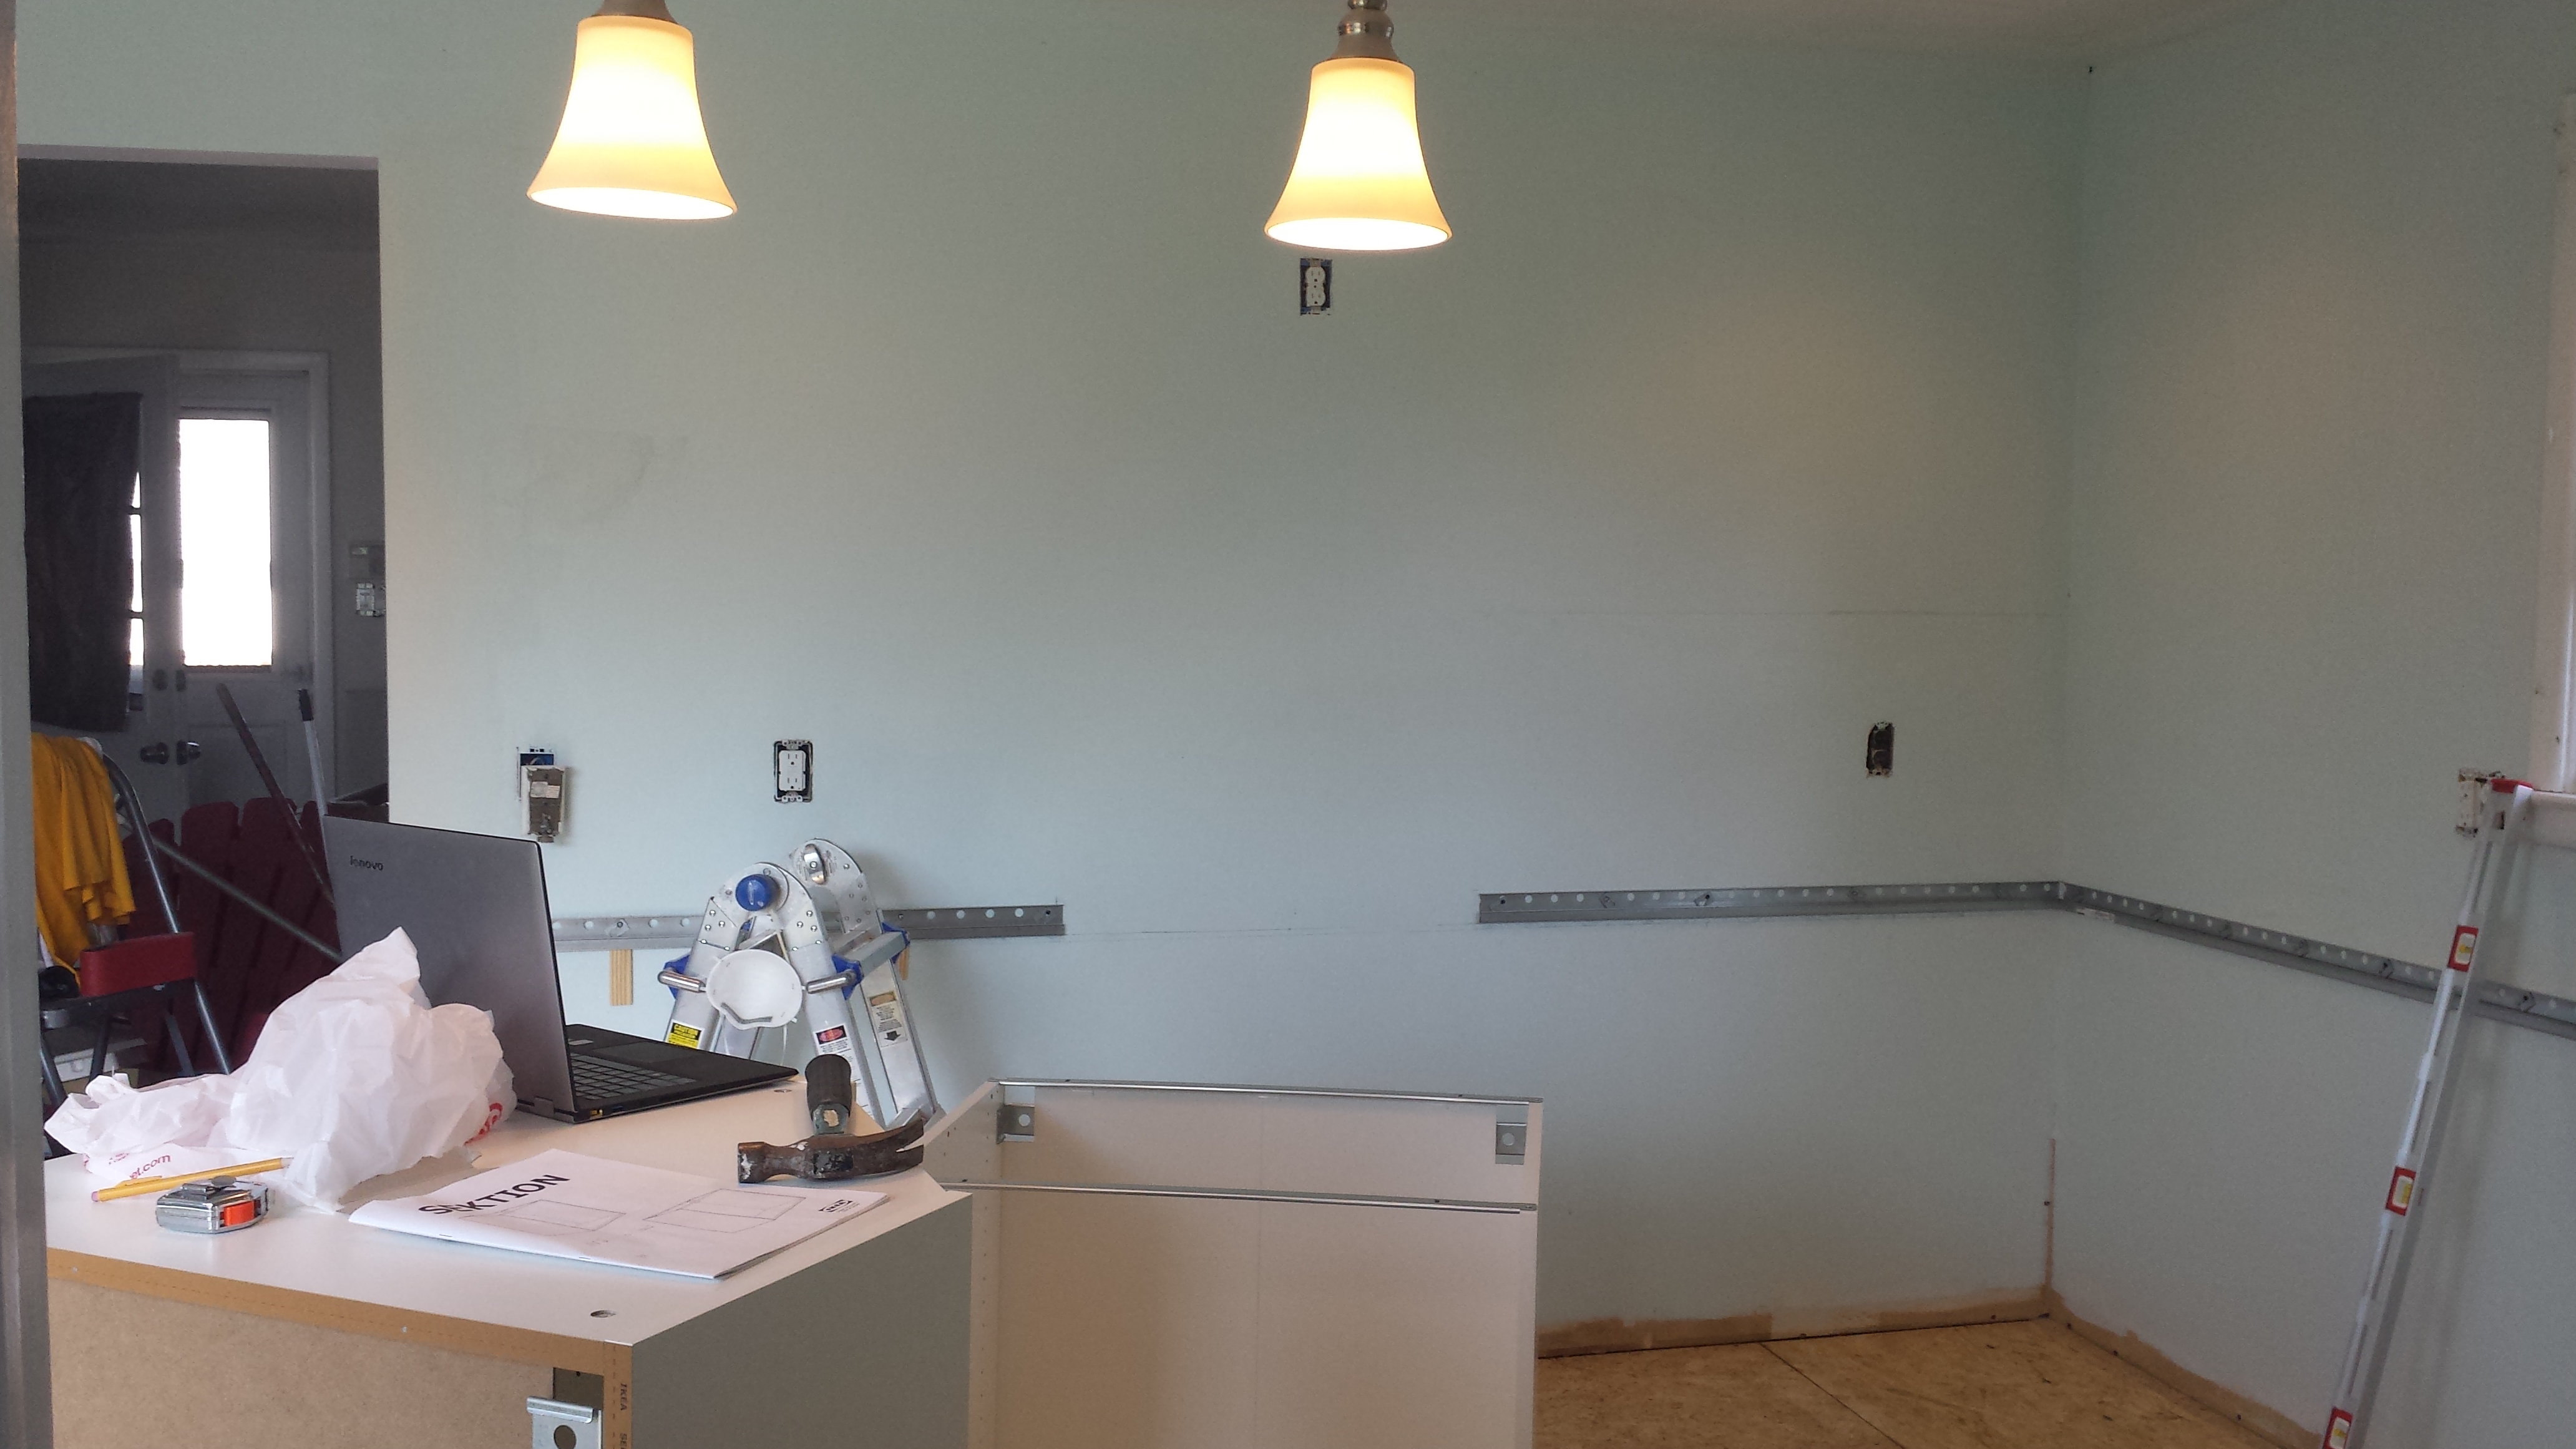
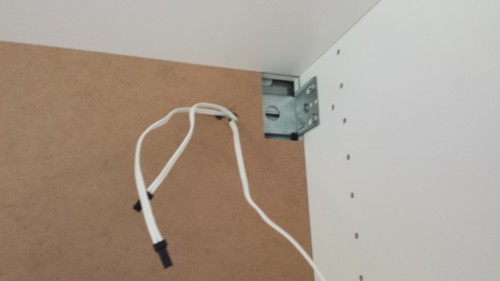
It took a while to figure out how to route all the wires. Then I had to unscrew and take down some of the cabinets, cut holes where appropriate, re-hang them, and then use a combination of fishing line and my tiny hands to fish the wires through. When the cabinets were off the wall I threaded fishing line through the holes. I secured it with painters tape to keep it from falling out, and then once the cabinets were mounted I taped the ends of the wires to the fishing line and dragged them through.

Wires coming out of a hole in the backboard
Wires coming out of a hole in the cabinet above the oven


Omlopp undercabinet light before securing the cord/cover

Installing the  Omlopp lights was kind of a pain. There are 6 light strips under my cabinets and getting them all lined up right was surprisingly tough, despite measuring everything. This is one place where oblong mounting holes that let you adjust would have been greatly appreciated, but weren’t provided. I also found that the directions are sort of backwards. They tell you to install the cord cover first, then the mounting strip,  then clip the light to the mounting strip. But it’s much easier to clip the cord cover loosely over the cord, mount the light, and then just stick the cord cover to cabinet wherever it lands.

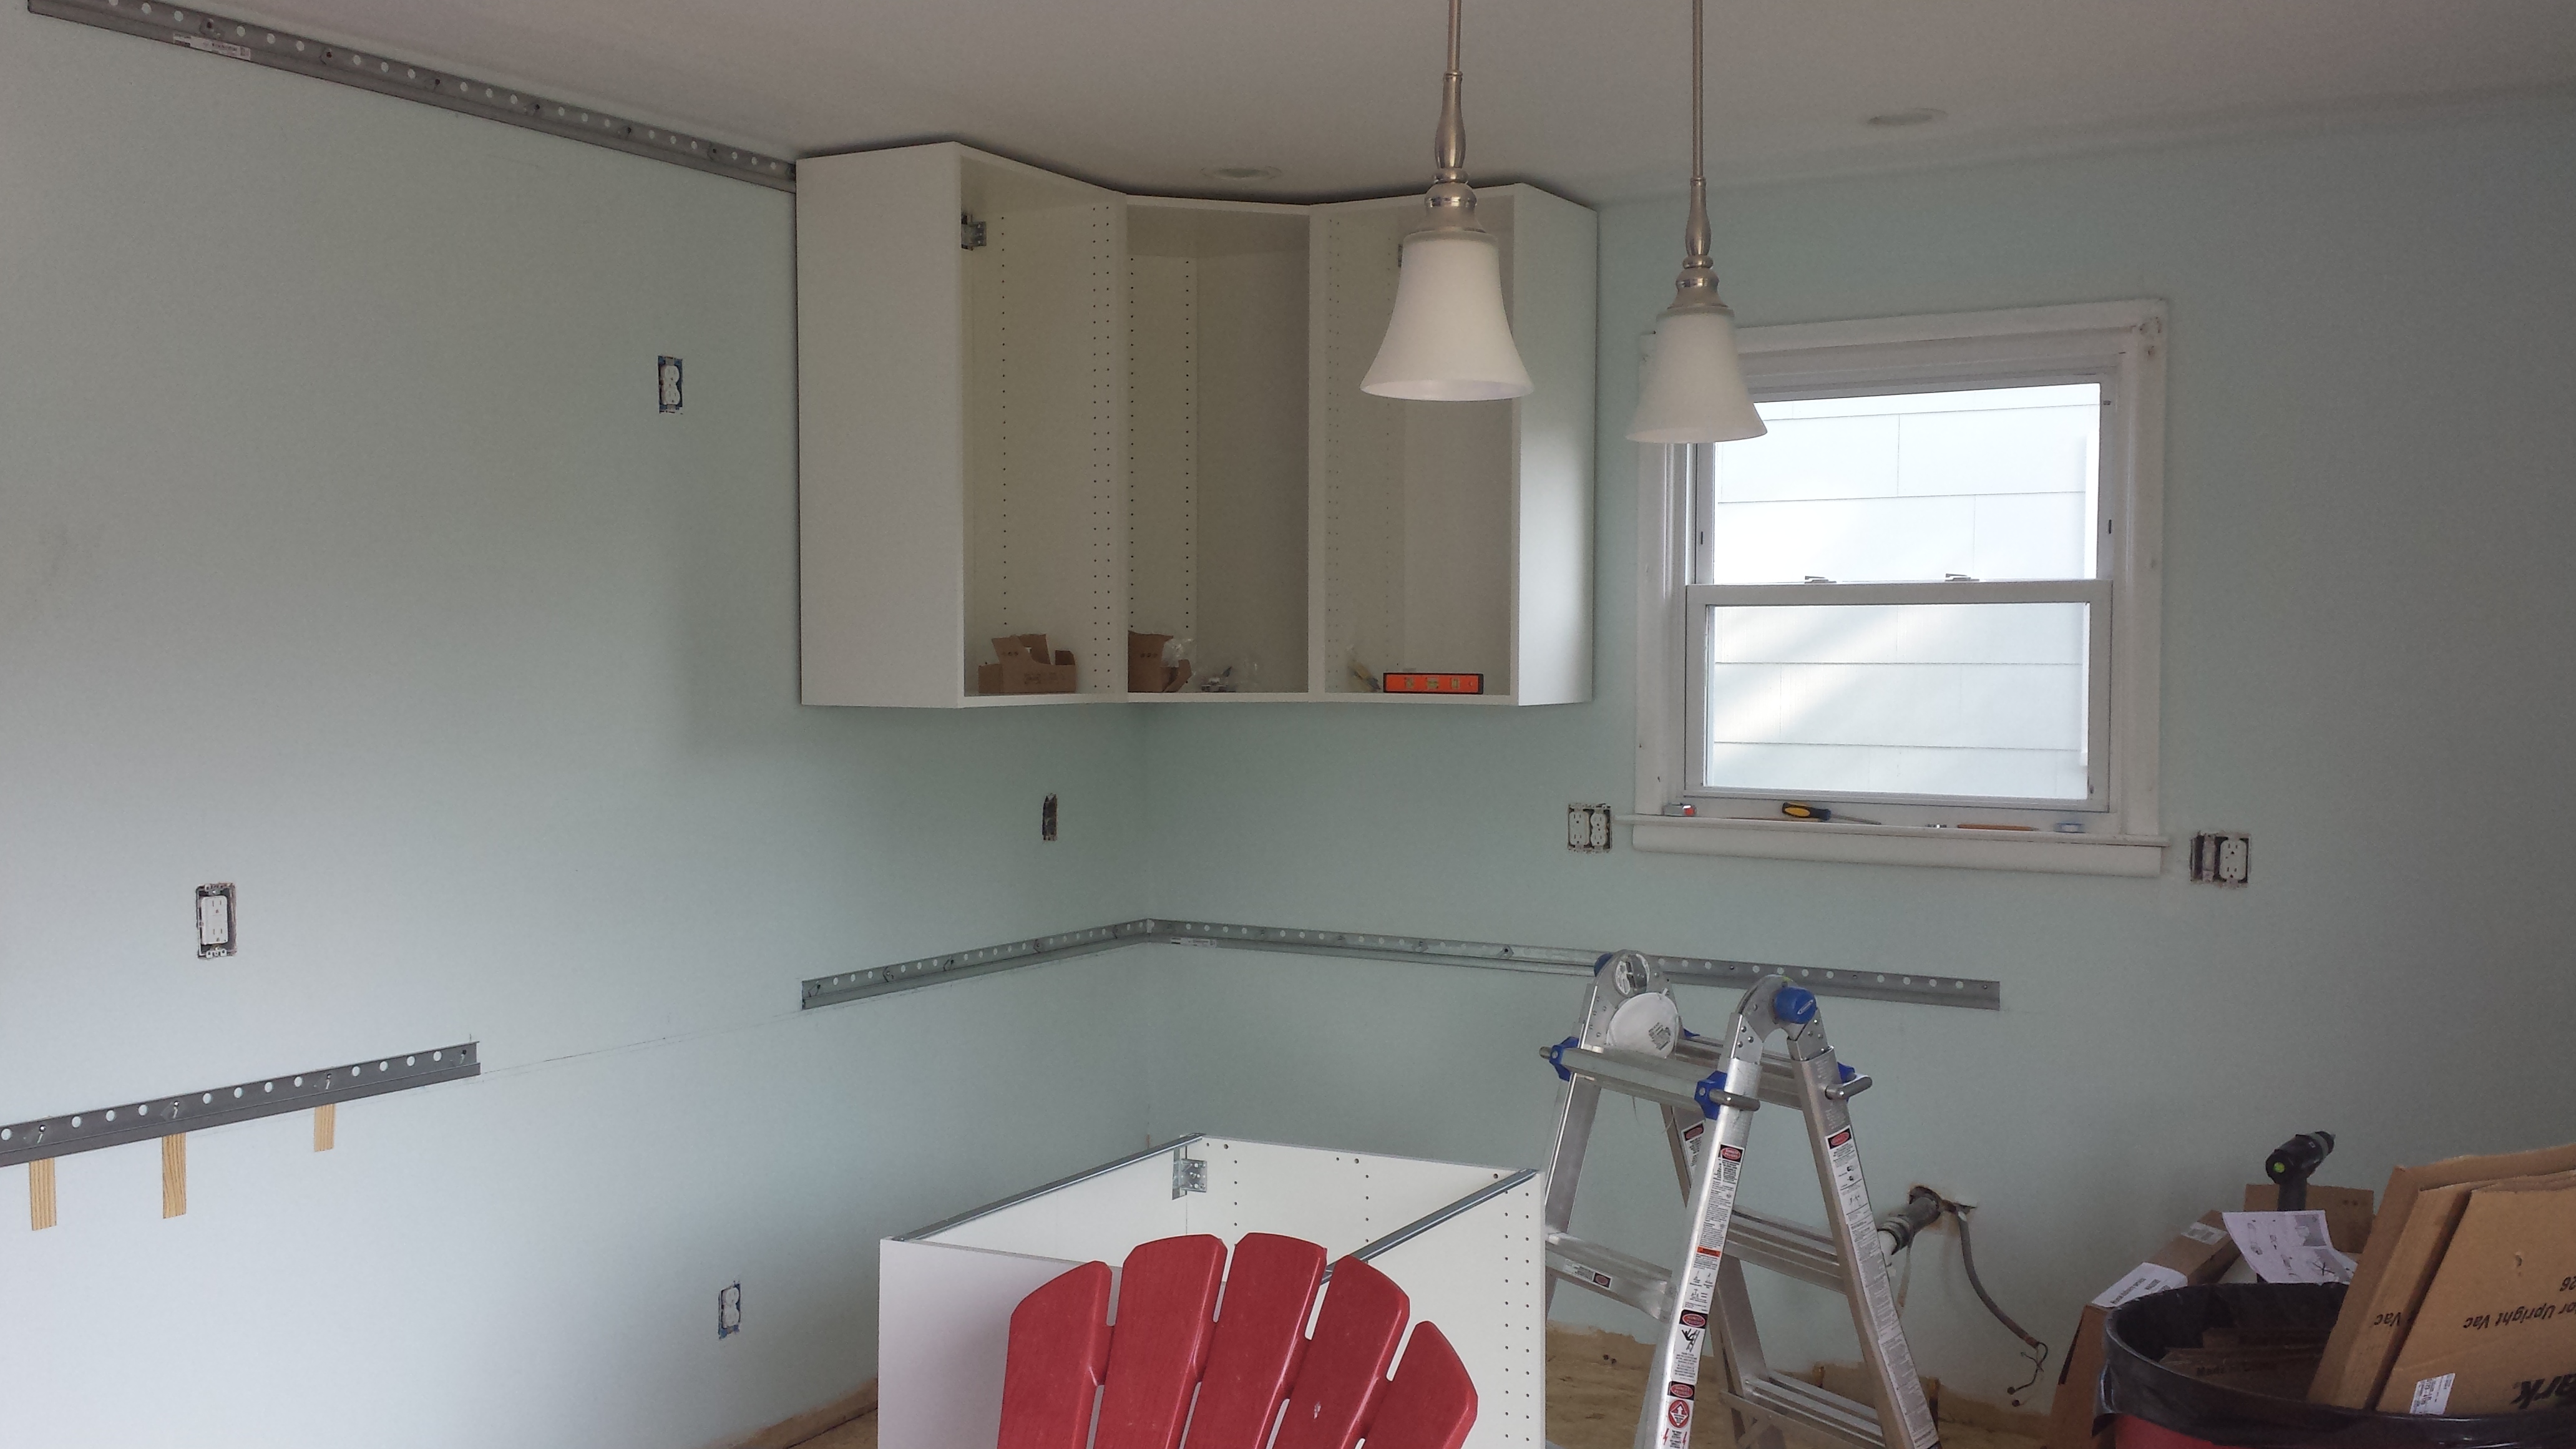
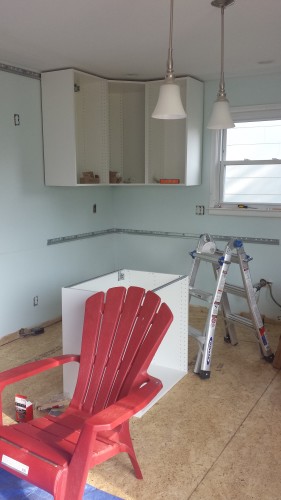
I think most people put the transformers and cords above the cabinets. I don’t have the clearance up there so everything is going in the cabinet above the stove and I’ll put a shelf near the top to keep it mostly hidden away. There’s already an outlet in that cabinet for the microwave so the lights will be on the same circuit.

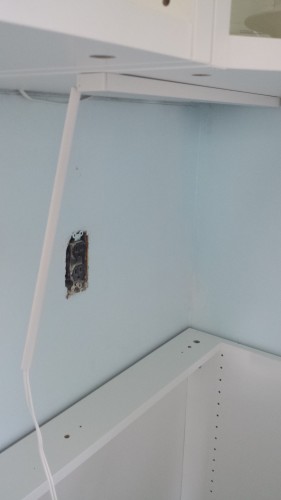
There are also two round recessed lights inside the end cabinet (which has glass doors and shelves). With the cabinet on the ground I used a 2.5″ hole saw to cut holes and then pushed the lights up into them with the cord coming out the top. I used some painter’s tape to keep the wires from flopping around and getting in the way when we put the cabinet back on the wall.

I opted for the plug-in lights because I didn’t want to deal with hardwiring them in. The transformers they plug into have a remote, but the transformers buzz whenever the remote is off. They don’t make noise when the light is on. I don’t know if I just got two duds, or if this is a widespread problem with the Ikea Ansulta transformers. Hopefully replacements will fix the problem.

I’m happy with how they turned out but a little discouraged by the buzzing issue, which I suspect is due to poorly engineered circuits in the transformers. I don’t mind losing the dimmer if it means getting ridding the noise.

Undercabinet lights installed
1970s Shore Home

Plumbing!

A brand new hole in my recently-patched walls

Last week we found out that the drain line for the sink would need to be moved down 3 inches in order to make room for the new, deeper undermount sink. This was a pretty big bummer because in order to to do it the wall would have to be opened up. The wall I just paid someone to patch and paint. Let this be a lesson to you all: do not touch any drywall until all your utilities are EXACTLY where they need to go.

In the end though it turned out to be a good thing. The old drain line was not run correctly (I am jack’s lack of surprise). It had an upward bow in the middle of it, and water does not like to flow uphill. The new line has the appropriate downward slope and some nice metal plates on the studs to keep you from accidentally cutting into them. We’ll put some new insulation in the wall before fixing the drywall, the old stuff is a little sad looking and my dad has half a roll leftover from something else.

We also got the upper cabinets leveled and secured. I didn’t take a photo because it looks exactly the same as it did last week, the only difference is that the cabinets are all attached to each other now. For geometry reasons I don’t entirely understand we had a hell of a time getting the cabinet over the stove to line up right. It’s still not completely perfect but we got it close enough that I’m just gonna tell you not to look that hard at that particular bit of cabinet.

Still looks like this, but with a big hole in the wall on the right

The new AC system is working great, both upstairs and downstairs were comfortable despite it being 80 and sunny out. The cooling system will get a lot of help once we’re done with all the painting and can put some real window coverings up.

Next time we’re down there a trip to the recycling center is NON-OPTIONAL. We tried to go today but only remembered after they were closed. We have a mountain of cardboard in the living room that is starting to take over.

I finally feel like most of the hard stuff is out of the way. We’re still waiting for the HVAC company to install the gas lines (the gas company says the meter is all set). There’s also some more stuff under the house I’d like to have looked at (ughhhhhhhhh) but none of it is super pressing. I don’t think we’ll have counters in time for the 4th of July weekend, but we’ll at least have a couple of bedrooms people can sleep in!

1970s Shore Home

HVAC, Cabinets (mostly) Assembled

The HVAC guys showed up at 8am yesterday, so my dad and I went down late Wednesday night (we got in around midnight) so I could be there to let them in and go over a few things. The installation will take a total of 3 days, but only the first two are scheduled so far. By the end of today (Friday) we’re supposed to have working AC, and then they’ll come back sometime next week to do the furnace setup. I’m really excited that soon our old broken heat pump will be replaced with a new 13 SEER1 air conditioner and 96% efficiency furnace.

So far the only snag we’ve run into is minor: the condensation line from the old system runs straight outside and down the side of the house. Because our new furnace is a condensing furnace it leaks condensate in the winter and an outside run would freeze, back up, and kill the system (which would then let the pipes burst if the water is on). Instead they’re going to run the lines down through a closet. We’ll lose a few square feet of closet space but gain the ability to use the house in the winter. So I think that’s an acceptable trade. They also had to remove the drywall in the back of the utility closet to make room for the slightly-deeper-than-the-old-one furnace.

My dad woke up around 10 and after breakfast we started assembling/hanging cabinets. We did all but the sink cabinet and the island.

2015-06-04 14.25.54
We put one of the cabinet backs in backwards. We decided no one would ever see it so we did not fix it.

We found out that in order to hook up the sink the drain line needs to be moved down about 3 inches. This is because my new sink is undermount, and a little deeper than standard, so in order to have enough room for the garbage disposal the drain line has to go down. What really sucks is that in order to do that they have to cut open the drywall. The drywall we already had fixed. I should have waited until the plumbing was done to even think about contacting the drywall guy. Whoops. Rather than have him come back I’m just going to patch it myself. Though “patch” might not be the right word, it’s going to be about a two foot by 6 foot hole. But it will all be covered by the cabinets, fridge, and dishwasher so it doesn’t have to look perfect. The hardest part will be getting the sheet rock to the house because it’s huge, and I’m 5’3 and drive a Honda Fit. Thankfully multiple family members have offered use of their pickup trucks.

I also realized the outlet for the oven is off by about 10 inches. There’s not a lot of room behind the oven so we’ll have to see if I can make it work as-is, or if I have to have the electrician move it. In general my utility planning for this project has not been excellent, due to designing the kitchen BEFORE choosing appliances.

The cabinets still need to be leveled and secured to the wall (right now they’re literally just hanging there). I wanted to get everything dry fit first before screwing it all in, because I don’t trust my planning skills. It looks like it’s all going to work out though!

I also set up the couch in one of the bedrooms so that you can actually sit on it like a normal person!

Couch!
Couch! Also terrible stick-on fake parquet tile.

This room actually looks way bigger now that it has furniture in it. This is the “little bedroom” and it’s about as wide as a twin bed is long, so the plan is to put a daybed in it and have it be a toy room. I haven’t decided if I’m taking down the chair rail, I don’t really understand why it has one in the first place.

Next steps once the drain line is done: leveling and securing the cabinets, buying a dishwasher, and installing the vinyl floors.

  1. We looked at more efficient systems but due to the salt air down the shore they’re not cost effective. The condensers don’t last long enough to justify the increase in price. []
1970s Shore Home

Cabinet Installation Round 2: Hanging Ikea Cabinets

This is part 2 of my DIY Ikea Kitchen installation adventure. You can check out the whole series if you want to see the sausage get made!

We made a quick trip down this afternoon so we could help Chris unload the truck he rented to bring the furniture down from the condo (which is now officially SOLD!!!). It was a long day for both of us. I had to get the kid to school and get some work in before heading down, and Chris had to take 3 trains to northern New Jersey, pick up the truck, load it, drive it to the shore, and then drive it back to Philly.

I loaded up the car with the microwave (purchased during a memorial day super sale), vacuum cleaner, linens, and the kitchen sink.

My dad doesn't make a lot of "dad jokes" but he thought the kitchen sink was HILARIOUS
My dad doesn’t make a lot of “dad jokes” but he thought the kitchen sink was HILARIOUS

When last we left our kitchen was mid-installation of the rails which the cabinets hang on.

Cabinet construction zone
Lower rails up

Today my dad and I hung the upper rails. This was much easier due to the fact that there are a couple of 2x4s running along the top of the wall, and our cabinets come pretty much all the way to the ceiling. Or rather, the plan was to have them about an inch and a half from the ceiling, but the ceiling is SO BADLY WARPED that it’s gonna be close in a few spots.

After we got the top rails up I got some VERY EXCITING NEWS: The plumbing permit is in! The timing is perfect since we’ll be ready to install the sink soon. It took a little over two weeks to get, which is pretty fast as far as permit stuff goes (we were told to expect up to a month).

Next we assembled a couple upper cabinets and hung them. It’s starting to feel like something that could one day be a kitchen! Amazing!

Corner unit and flanking units hung

By the way I totally understand now why the painter wanted to wait until the cabinets were in to do the final coat of paint. I may have gouged the walls a couple times trying to lift the cabinets up. Thankfully it was in a spot that will be covered by the cabinets.

I was really proud when the corner unit was installed and hung level. Lining up the rails so everything was even was a little fiddly, especially because it’s hard for my dad and I to fit in the corner. Working on the larger sections of wall was much easier. I was really glad my dad is tall, it would have been a lot tougher if we bot had to be on ladders at the same time.

Now that the rails are up I expect hanging the rest of the cabinets to go pretty quickly. We can do one in under 20 minutes. Most people suggest assembling all the cabinets at once beforehand, but these people must have a lot of extra space in their houses. There is no way we could assemble all the cabinets and still have enough room to move around the kitchen. Our living room is full of appliances that are waiting to go into the kitchen.

I learned that Ikea hardware isn’t actually Phillips head screws, it’s a similar-but-different type called Pozidriv. Then my dad explained to me the history of phillips, pozidriv, and roberts screw heads. What my dad lacks in corny jokes he makes up for in WAY MORE THAN YOU NEEDED TO KNOW ABOUT SCREWDRIVER HEADS AND HENRY FORD. Although you can get by with a phillips it is MUCH easier if you have the correct driver for it. It turns out our drill bit set came with one, but if you’re installing an Ikea kitchen it is ABSOLUTELY worth it to spend the couple bucks on a Posidriv driver. You can get them on Amazon if you don’t feel like going to your local hardware store.

After 3 months of work and a few moments of “I’ve made a huge mistake” I finally feel like the end is in sight for the work we’re doing. There’s still a lot to do, like painting and hanging the cabinet doors. And the plumbing. And finishing painting upstairs. And starting painting the downstairs bedrooms. And installing the vinyl flooring. Not so much the home stretch yet, but at least I feel like it’s possible we might actually someday finish this project.

We got the sweet red chair at the grocery store, because the floor is filthy
1970s Shore Home

Ikea SEKTION Cabinet Install: Day 1

Over the long weekend we capped off the leaky pipes in the kitchen, nailed down the OSB flooring, and finished painting one of the upstairs bedrooms. Now all we need to be able to sleep there is a bed!

I'll iron/hem the curtains next time we're down.
I’ll iron/hem the curtains next time we’re down there

On Sunday Chris and Jen started assembling the cabinets for the kitchen while I tried to make sense of the installation instructions. It’s not easy. There are multiple sets of instructions you have to cross reference and some of them are very vague. While Ikea says “you can install it yourself” it’s clear they don’t think anyone is actually going to.

There are 3 basic components to hanging the cabinets: the rail that mounts on the wall, the cabinet box itself, and then the cabinet feet on the lower cabinets. Each of these is sold/packaged separately.

There’s the general install guide, which gives measurements but is pretty vague about how to hang the rails that go on the wall. Then the rail instructions which make sense until you go to install them, at which point you realize there are a number of steps glossed over (more on that in a sec). This plus the fact that I did not have a hacksaw to cut the rails led me to call it quits in frustration early Sunday afternoon.

Normally you can find an endless number of Ikea assembly / installation tips online. But because the kitchen system, SEKTION, is all new as of February there isn’t much available. The system is nearly identical to the European METOD system, so I was able to watch those videos in order to understand the general process. After a lazy Monday morning I went back to give it another shot.

The first step is to hang the lower rails used to align the cabinets. The general process starts like this:

  • Mark 32 3/16″ from the floor all along the wall where your cabinets are going
  • Realize your floor is not even a little bit level
  • Find the highest mark
  • Use a 4′ level to create a new, more level line based from the point where the floor is the highest

You have to go from the highest point because that’s the shortest the cabinet legs can be. If your floor is lower elsewhere that’s fine, the legs can be expanded to fit.

Next you have to hang the actual rail using a combination of drywall anchors and screws. I tried to line up as many studs as possible, but due to the spacing of the holes on the rail (which I think is still metric based) I was lucky if I managed to get two. You need to secure the rail every foot.

One lower rail, with shims because the wall is not flat

General process I used for installing rail:

  • Hold rail so that bottom of the rail is on your line, lining up the holes with as many studs as possible
  • Place 4′ level on top of rail and adjust until it is level
  • Have a friend use a pencil to mark the holes you want to use
  • Put down rail
  • Push drywall anchors into wall anywhere you need one (but don’t tighten them yet). Unscrew screws so they’re about 1/2″ out of the wall (but leave anchors flush)
  • Place screws in spots where studs are, but leave them 1/2″ or so out of the wall
  • Hang rail over screws, observe how ridiculously warped your walls are

The instructions tell you to shim any spots that are significantly recessed. This was a little more of a logistical challenge than I expected due to the drywall anchors. We ended up doing the following for shims over drywall anchors:

  • Remove the screw in the spot to be shimmed
  • Have one person hold the rail in place while the other places a shim behind where the screw will go
  • Mark the center of the hole on the shim
  • Mark where the top of the rail hits the shim
  • Remove the shim, drill a hole where the screw will go and cut off the excess from the top
  • Drill screw about 1/2″ into the shim so that it just pokes out the back
  • Remove rail from wall and place the screw/shim combo into the drywall anchors
  • Place rail back on wall over screws
  • Add weird rectangular washer things that came with the rail
  • Tighten everything to the wall, using the 4′ level to make sure everything ends up nice and straight and level

We figured out this strategy through trial and error. One thing that is very different than the old AKURUM line of cabinets is how they mount to the rail. The old ones had a nut like thing that slid into the rail, and then the cabinets lined up with it and were screwed in place. The new ones have a bracket on the back and basically just hang there, with some fasteners to keep them in place. I put one on just to see how it all worked. That cabinet is actually for the island, we haven’t assembled the bottom wall cabinets yet.

The real life bottom cabinets will have feet

The Ikea instructions tell you to measure / mark out the whole room first, but this doesn’t make sense to me. It’s MUCH MUCH easier to measure for the upper cabinets once you have your lower rails installed and level. I added 1/2″ to my measurements for the upper cabinets because I need a slightly taller backsplash. The backsplash tile we have is 3″ tall, and Ikea’s cabinet spacing is designed for 18.5″ vertically. To avoid having to cut the tile lengthwise I’m adding a little extra space to make room for the grout (which will be 1/8″ spacing between each tile and the counter/cabinets).

We called it a day after getting all the lower rails installed. The upper rails will be a little more annoying, because they’re up high and they’re much longer. We could do it with two people but I think it would be easier with three.

Cabinet construction zone

We’re ever so slowly inching towards being able to get the appliances out of the living room!

Want more Ikea cabinet hanging goodness? Check out day 2 of Ikea cabinet installation, or  check out the whole DIY Ikea Kitchen Installation process..

1970s Shore Home, New Construction Townhome

Visible Progress, Finally

After a lot of trips where nothing at the house changed much (and a few where they looked considerably worse), we finally had a weekend where it felt like things were moving again.

We went down Friday after work and I made a plywood cutting jig, following the instructions in this youtube video (hat tip to my dad for sending me the video).

Then we ate pizza and passed out. In the morning four of us got to work on the house while my in-laws watched the kids (my daughter and nephew). Bedroom trim was sanded, laundry room walls were primed, and I began fitting sheets of plywood to cover the old uneven subfloor. All of this went really well, and because things were visually changing it was really satisfying. After a trip to Lowes to pick out paint and trim (btw, not recommended on the Saturday before Memorial Day weekend) things were progressing at a good clip. Two more friends came to help after lunch and we were off to the races with paint and carpentry.

Laundry Room!
Laundry Room!

Laying the plywood (ok technically OSB) in the laundry room went really well. In the kitchen I hit some snags. I needed to trim the carpeting about 5″ since we removed a partial wall. My utility knife is missing in action. I ended up going to the hardware store to buy a carpet cutting knife, and learned first hand how much cutting carpet sucks (also you should wear gloves because I have a blister from it now). In order to get the plywood over the plumbing I had to trim and cap off the plumbing that goes to the sink, and then drill appropriately spaced holes in the plywood.

Kitchen mid-flooring.
Kitchen mid-flooring leveling.

I could not. for the life of me. get the plumbing caps to stop weeping. I re-taped the threads no less than 4 times. I have done this before without problems, but apparently no longer. Yes dad, I am wrapping the threads in the correct direction. I ended up just shutting off the water, I’ll deal with it later when I’m less irritated by it.

I’m really grateful we had so many friends helping out this weekend, the flooring took up all of my time/energy and it was amazing to see progress happening in other parts of the house.

My sister-in-law, sanding trim forever.

We called it a day on Saturday evening with the first coat of color on the walls in 3 upstairs rooms, laundry room color finished, and all the plywood flooring cut to size.

On Sunday morning I started working on leveling the flooring. Per some suggestions online that seemed legit I am using roofing felt to fill low spots in the floor. You can see the level in the picture of the kitchen above, and some felt in low areas. The floor doesn’t need to be perfectly level but it does need to be smooth and flat. Unfortunately I found a couple really nasty high spots that will have to be sanded down with a power sander before the floors can be nailed into place.

As part of Operation Remove Unused Crap we took out two old smoke detectors (all new ones are going in), a telephone junction plate covering absolutely nothing, and some wires that used to go to the old security system but are now completely unused. Someday the house will no longer be covered in tumors from things people stopped using and never felt like removing or fixing. However, as part of Operation Don’t Go Finding Any More Problems we decided to ignore the hole in the ceiling that has been “patched” with a chunk of painted OSB screwed over it. The hole is directly under a toilet and I’m afraid to find out what problems are located behind it.

Team Bedroom Painting finished up the second coat of paint upstairs (minus one bedroom which needs some drywall repairs first) and I am really excited that we will probably be able to sleep there next weekend.

It’s not so obvious in the photos, but bringing the color up the slanted wall made a huge difference in that room. Compared to the unpainted slant-wall room it looks much deeper and taller.

I was hoping we could get the vinyl flooring installed in the laundry room, but I realized I have to totally finish the kitchen first since there are some rows of flooring that will extend between the two. I’m a little sad we weren’t able to get the washer/dryer out of the living room and back where they belong, but overall incredibly happy with the progress we made this weekend. I can’t believe we’re so closed to having a room that is totally finished!

Oh god I am so not even remotely ready to think about decor items like window treatments. But it’s coming. Boy is it coming.

1970s Shore Home

Permits, Contractor Drama

It turns out I need a plumbing permit for the ice maker line and the new hot water heater. Sigh.

On Tuesday I went down with my parents to paint some ceilings and fill out the permit application in person. The office is open Monday through Friday, 8:30 to 4:30. So of course when I got there at 1:15 it was closed for the day. Apparently in the spring the office closes at 1pm on Tuesdays and Thursdays, presumably so they can process the permits because it seems like a really busy time of year for construction. Every time I’m down during the week I see contractors everywhere. The city offices are small; the police, fire, and administrative offices for the entire island are all one building.

So I got to go back on Wednesday to file the application for real.

Now we wait the 30ish days for the permit to clear. The lady who helped me fill it out said it might go faster since it’s such a small project, but that they’re pretty backed up.

We’ve had good luck with contractors so far, but now that it’s getting warm our luck is starting to turn.

The first one is weird: the contractor has finished the work but has disappeared and won’t invoice me. This isn’t a huge deal to me, obviously, but I’d also like him to do one more thing and I’m kind of concerned that he’s just up and disappeared. I even searched his name in the obituaries just in case he died in some sort of freak accident. Maybe he’s just on vacation?

The second is more frustrating, and partly my fault. We called a painter from Angie’s list to do the drywall and painting in the kitchen. A guy came out, gave us a quote, it seemed reasonable, we hired him.

He only communicates by text messages, which led to some miscommunication about which walls should be which colors. So the hallway that was supposed to be beige is now kitchen-blue:

2015-05-12 15.26.55

Oh well, not a big deal, I’ll totally live with it.

Then when I go down on Tuesday to paint, I notice a bunch of my painting tools are missing. Turns out the painter’s helper thought they were his and packed them up. Painter said he’d stop by Wednesday with them. Annoying, but an easy mistake to make and I should have put all my stuff away in the closet before the painters came.

I noticed some issues with the walls. The paper tape between the old and new drywall is pretty visible. There are spots on the ceiling that are completely unpainted. The color on the kitchen walls is thin and you can tell where it was cut in vs rolled. The painter has to come back to do one more pass, but he wants to wait until the cabinets are installed. This doesn’t make sense to me as it will be much more difficult to paint once the cabinets are in, and I’m a little concerned about paint getting on the cabinets.

Then he started pitching a fit about the check I left him. My bank is Schwab and they’re based out of Reno, NV. He insisted he “couldn’t do anything with it” because the bank was in Reno and was generally being a pain in the ass. It’s a check. You cash it like any other check. The fact that the bank is in Reno does not matter a damned bit.

I’m not terribly happy about the paint job but increasingly I just want this guy out of my life so my plan now is just to have him finish the work and then fix anything I don’t like myself. I can’t even leave a negative Angie’s list review – after signing the paperwork I noticed that the name of is company isn’t one of the ones I called. I must have gotten passed off by someone. My fault for not noticing, but super frustrating.

Lastly I can’t find a decent plumber to save my life. One guy flaked on me. One guy came out, looked at the house, and then seemed upset that permits would have to be pulled and never actually gave me an estimate or contacted me again. The Angie’s List options for plumbers in the area are pretty slim pickings.

2015-05-12 15.26.38

After two months the kitchen finally feels like a blank slate. We’re having a big work party weekend this weekend (you should come!) and hopefully the kitchen will start feeling like it’s coming together. The Ikea cabinets are awaiting assembly, the flooring is awaiting installation, and soon we should have the rest of our cabinet doors (more on that saga another day).

This weekend’s goals are to paint upstairs, lay new plywood over the subfloor (to make a smooth surface for the vinyl), and maybe assemble/install some cabinets. Fingers crossed by the end of the weekend we should have a nice painted bedroom with an honest to god bed in it!

And if not, at least we have a delicious steak dinner planned for Saturday night.

1970s Shore Home

Lights, Plumbers, and Appliances

Chris and I made a somewhat huge decision about the kitchen and living room: we’ve decided to spring for recessed lighting. It’s a little intimidating (so permanent! so not cheap!) but if we’re ever going to do it this is the time. We definitely won’t ever want to do it AFTER the drywall guy patches everything up. I think it will go a long way in making  our mid-range kitchen remodel feel more high end.

Today the electrician came by (for the 3rd time) to install recessed lighting in the kitchen/living room and also two pendant lamps over the kitchen island. The original plan was to get these lamps from Pottery Barn:

img63o


They’re a little pricey BUT we have a Pottery Barn gift card left over from when West Elm totally messed up our couch delivery. Plus originally I had my heart set on these cool globe lights, until I found out they are $800 each. That totally softened the blow of the Pottery Barn lamp prices.

I am slowly getting better at modeling things
For some reason the lights don’t look centered over the island but I swear they are.

Unfortunately, despite being “in stock” on the Pottery Barn website the pendant lights are actually backordered until July. Aww hell naw. So instead I went to Lowes and got the cheapest lights that I didn’t hate, figuring we can replace them with fancy ones down the road (but probably never will).

loweslight
$35 each from Lowes. Done.

My dad and husband went on an odyssey for the recessed light fixtures. The electrician brought some, but due to a miscommunication between me, the office, and the electrician they were the wrong size. So dad and Chris went out to the electrical supply store to get the right one while the electrician started the wiring and I marked out where everything was going. But the store didn’t have enough fixtures, so then they had to go to a 2nd store to get the rest. And we’re still missing one of the trim rings, but I can order that online and install it myself later.

The fridge, stove, and grill were all delivered today as well. Miraculously they managed to fit them in without removing the storm door. Then a plumber came to give quotes for rerouting the pipes for the sink / dishwasher / ice maker. Next stop is the permit office to get permits for the plumbing. Always fun!


1970s Shore Home

Things Crawl Along

Progress on the house continues, but slowly.

Appliances are getting delivered next week, cabinets two weeks after that, things are starting to shape up, so I called the gas company to find out when our gas service would be installed…

“Early June.”

I was warned that the gas company a) takes forever and b) just generally sucks. But ugh. Early June. I have to decide if we want to finish the floor and then put the old-but-still-functional water heater back, or just go without hot water until early june.

Not a lot changes visibly from week to week. One fix however was the contractors fixed up the gaping hole in the rotted laundry room subfloor.

2015-04-16 12.06.23
Now with less rot!

You can actually see some significant discoloration of the new wood where it is ever so slightly damp. I’m pretty sure this is because the crawlspace is so wet all the time. We’re having an additional vent added to the foundation right along the back wall here, which should help a lot. If not we’ll add a powered crawlspace fan to keep the air circulating.

Speaking of plywood, my dad and I went to the lumber yard to get some plywood to lay over the subfloor (for leveling). Unfortunately we forgot to tie it down (oops) and a sheet of it took off like a sail and went flying down the road. It was terrifying and I’m glad no one was hurt. Traffic was pretty light so we waited for a break and then ran out to pick it up. We threw it back in the trailer and then headed to the house.

Once at the house my dad volunteered to go get a replacement sheet (as the one that escaped had been run over dozens of times), and I decided we’d actually gotten the wrong type of plywood so I sent it all back with him to exchange for some 1/2″ OSB. It would have been better if I’d decided this BEFORE we unloaded the trailer, but c’est la vie… RIGHT DAD? Clearly my dad loves me very much to put up with these shenanigans.

A drywaller came out and gave us an estimate for fixing the kitchen drywall, painting it, and also painting the hallways as I have no interest in trying to paint on a ladder on a staircase. It came out to a little more than I want to pay, because I’m cheap, but I’m going to pay it anyway because look at this hot mess:

In case you can't tell, the backsplash left a mess of glue and the drywall stops 6" from the ceiling.
In case you can’t tell, the old back splash left a mess of glue and the drywall stops 6″ from the ceiling. On and there’s a hole in the ceiling the electrician had to cut for access.

I’d originally planned to prime the bedrooms today but I just wasn’t in the mood so instead I took up the incredibly tedious task of removing ALL of the remaining staples from the floor in the laundry room. The ones that wouldn’t come up were hammered down. That floor will be smooth, damn it.

I also painted sample spots on the walls upstairs to make sure I REALLY like the color before we buy gallons and gallons of it.

I’m pretty happy with it, or at least as happy as I’m likely to ever be. I think it might be a little too dark, but any lighter and I don’t think it would have such a nice contrast with the white trim. Of course now that I’m looking at the photos I kind of hate it, but it looked good in person I swear!

Plus the slightly-dark gray will look awesome against this all white bedding monstrosity I’m planning:

Guest Cubbies!
Guest Cubbies!

The plan is to take two full-size Ikea Brimnes beds and build a partition between them so that folks can have a little privacy. Then my coworker showed me the bunk beds her mom built, complete with powered wall cubbies:


https://instagram.com/p/1f2xKqoRs3/

I’m not sure if this is something I can make happen but oh my god do I want to.

1970s Shore Home, DIY and Decor

When not to DIY

Everything with the house is two steps forward one step back.

We took out the hot water heater and I went to replace the rotten subfloor below it. In theory this is a fairly straightforward process. Remove the old plywood, cut new plywood to fit, put new plywood in place. In practice nothing ever goes as planned and I don’t know why I was even a little surprised that the joist under the subfloor was rotted.

2015-04-11 14.27.31
Insulation can be seen below the rotten joist and torn up floor

This is the point where I called up the contractor who had just finished the crawlspace repairs half an hour earlier and asked if they could add this project to my tab. The flooring situation in the laundry room is quickly spiraling out of the realm of things I can sanely attempt to DIY. There’s also the time factor. If I were to try to do this myself it would be another week before I can get down there to even start, and it probably would take me multiple weekends, delaying the kitchen installation even further. In contrast, the contractor said he can have everything done Monday.

I also had another contractor flounce on me. The guy who was supposed to do the vents did not like that the crawlspace guys took out the existing vents, and refuses to do the work now. He was really dramatic and shitty about it, so if that’s how he’s gonna be I’m just as glad to be rid of him.

The other thing I decided not to DIY is the drywall repairs in the kitchen. When we took the soffit out we discovered there isn’t drywall all the way up to the ceiling (surprise!). Drywall is something I can technically do myself but I’m not very good at it and I don’t have the tools to deal with the large sheets we’d need to haul up near the ceiling.

This part of rennovation is just really frustrating because there’s not a lot of visible change and the to-do list is getting longer, not shorter.

The original plan for this weekend:

  • Remove soffit in kitchen – success! Chris and his dad got that thing down. We only had one unpleasant surprise lurking behind it, a hot water line that sneaks through the corner on its way upstairs. Since that’s over the fridge anyway I’m just going to build a frame around the fridge that lets the cabinet sit a foot out from the wall. Something like this.
  • Remove hot water heater – success!
  • Spackle and sand walls in master bedroom – A qualified success. This did in fact happen, but like all things it took longer than expected. There was a really bad drywall seam under the window which I was trying to smooth out. When I was sanding it I noticed that the trim on the window was a good inch away from the wall (and someone had tried to glob silicone caulk in there to compensate). I pulled off the trim and found that a wooden shim had slipped and was pushing the drywall out. I knocked the shim back in place and that let the drywall move back where it should be, but then I had to re-spackle it and wait for it to dry.
  • Prime and paint master bedroom – Nope. See above.
  • Remove rotten plywood in laundry room –  Nope. After I saw what a horror show the joist was I just stopped.
  • Bonus: Priming another bedroom and the upstairs landing. This wasn’t on the original agenda but Matt and Chris took care of this while I was frowning at the hole in the laundry room.
  • Extra bonus: our contractor fixed the broken shed door because he was tired of dropping it on  his foot.

Huge thanks are also owed to Chris’s mom, who wrangled the toddler while we did all this. Kiddo came through the house a few times like a tiny foreman. “Everyone is working on fixing up my beach house!” she announced.