1916 Row Home, Crafting

Rhinebeck and other Knitting Things

Guys I have a secret… I have another blog. One dedicated specifically to knitting. I started it last year meaning for it to be a site for aggregating knitting news and information, but didn’t have the time to put into it. The idea was that it would be sort of like a long-form Pinterest board to save knitting stuff I care about. Now it’s just sort of my awkward spot for writing about my own knitting. I haven’t figure out exactly how I plan to approach having two separate places for stuff. For a while at least I’ll probably cross post things here. Like this post about my trip up to Rhinebeck, NY for the annual Sheep and Wool festival. Spoiler alert: I bought some yarn.

http://balderstash.com/2016/11/29/notes-from-a-successful-rhinebeck-weekend/

I’ve been doing a ton of knitting, so at least for the next few months there will probably be a fair amount of activity there. I do have a bunch of stuff to post here about the house I’m working on, but I’m waiting until that whole project is wrapped up to share more. Mostly because I haven’t had a chance to get any decent photos lately. Between work, kids, the house, and my husband’s ice cream shop it’s easy to let stuff fall through the cracks. But in case you’re waiting with bated breath, here’s a crappy cell phone shot of the kitchen!


2016-11-17-15-59-12

DIY Ikea Kitchen
1970s Shore Home, DIY and Decor

My DIY Ikea Kitchen 1 Year Later

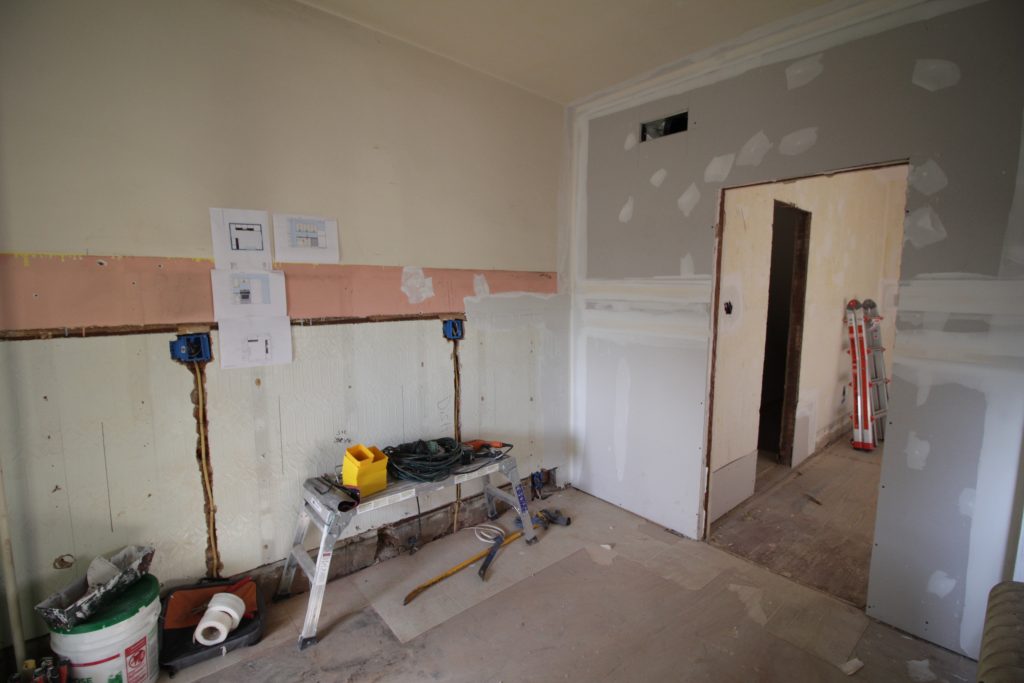
It’s been a year since our “kitchenwarming” down the shore, and it’s finally starting to feel like a functional place to cook and not just a showroom. It took a while to stock it; to collect all the spices we use regularly, to amass odds and ends like cupcake liners and cutting boards. We’ve gotten used to how it functions, and started agreeing on where we keep things. I’ve had some time to think about what I’d change if I were to do it all again (I’m not).

DIY Ikea Kitchen

The custom-made cabinet doors

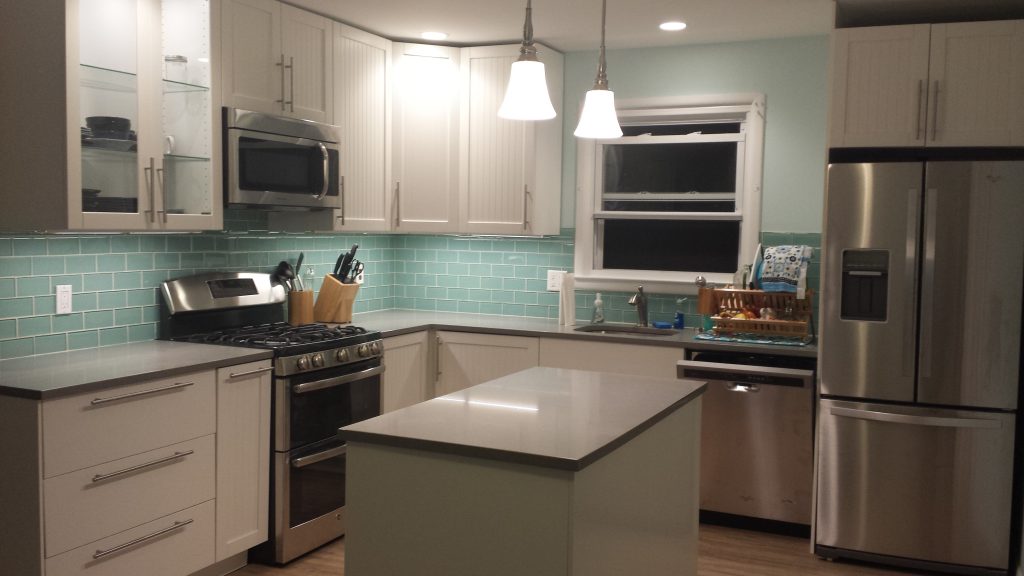
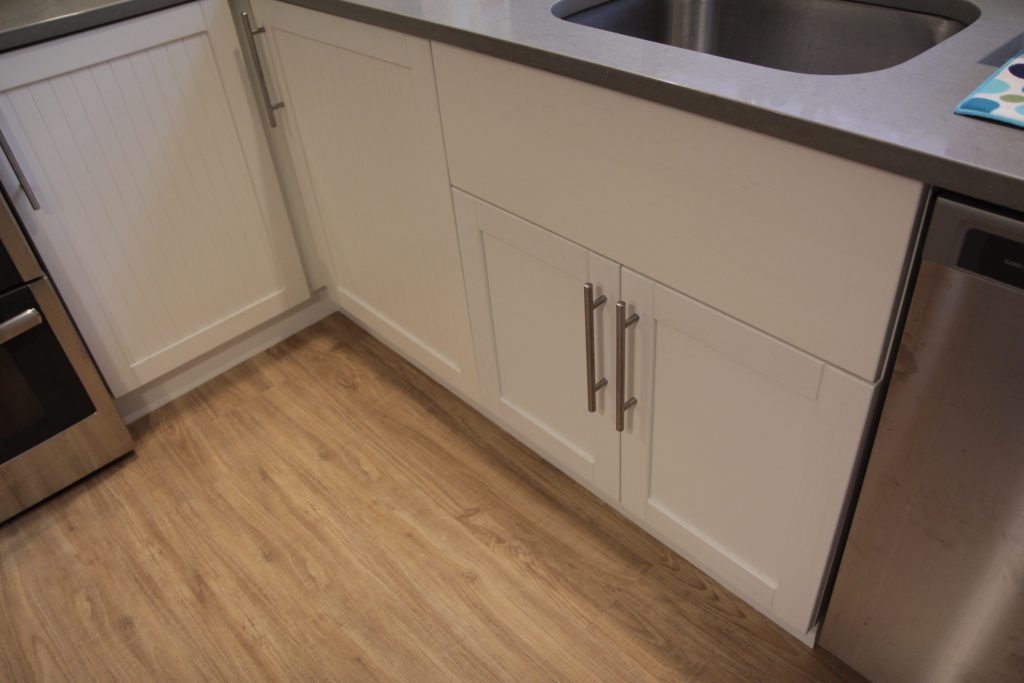
I didn’t like the available Ikea doors so we got custom made doors and I painted them myself. They look great, and didn’t cost much more than the Ikea doors, but it was a ton of work and honestly not worth it for a kitchen I only see on weekends and the occasional vacation week. Even with a sprayer, priming and painting the doors was a pain. I still think the custom doors are a good way to get a high end look in an otherwise budget kitchen, but I think I could have skipped it for this particular project.

The only really frustrating thing about the custom doors is that you’ve got no room to change your mind later. On our sink cabinet I had originally planned for a pull out trash drawer. Once everything was in it was very obvious that wouldn’t fit under the garbage disposal. I needed to switch from a drawer front to hinged doors, and ended up going with some that don’t quite match (and I still haven’t gotten around to painting). Granted I could have ordered more doors from the cabinetry company, but that would have taken another few weeks and I wanted to be done.
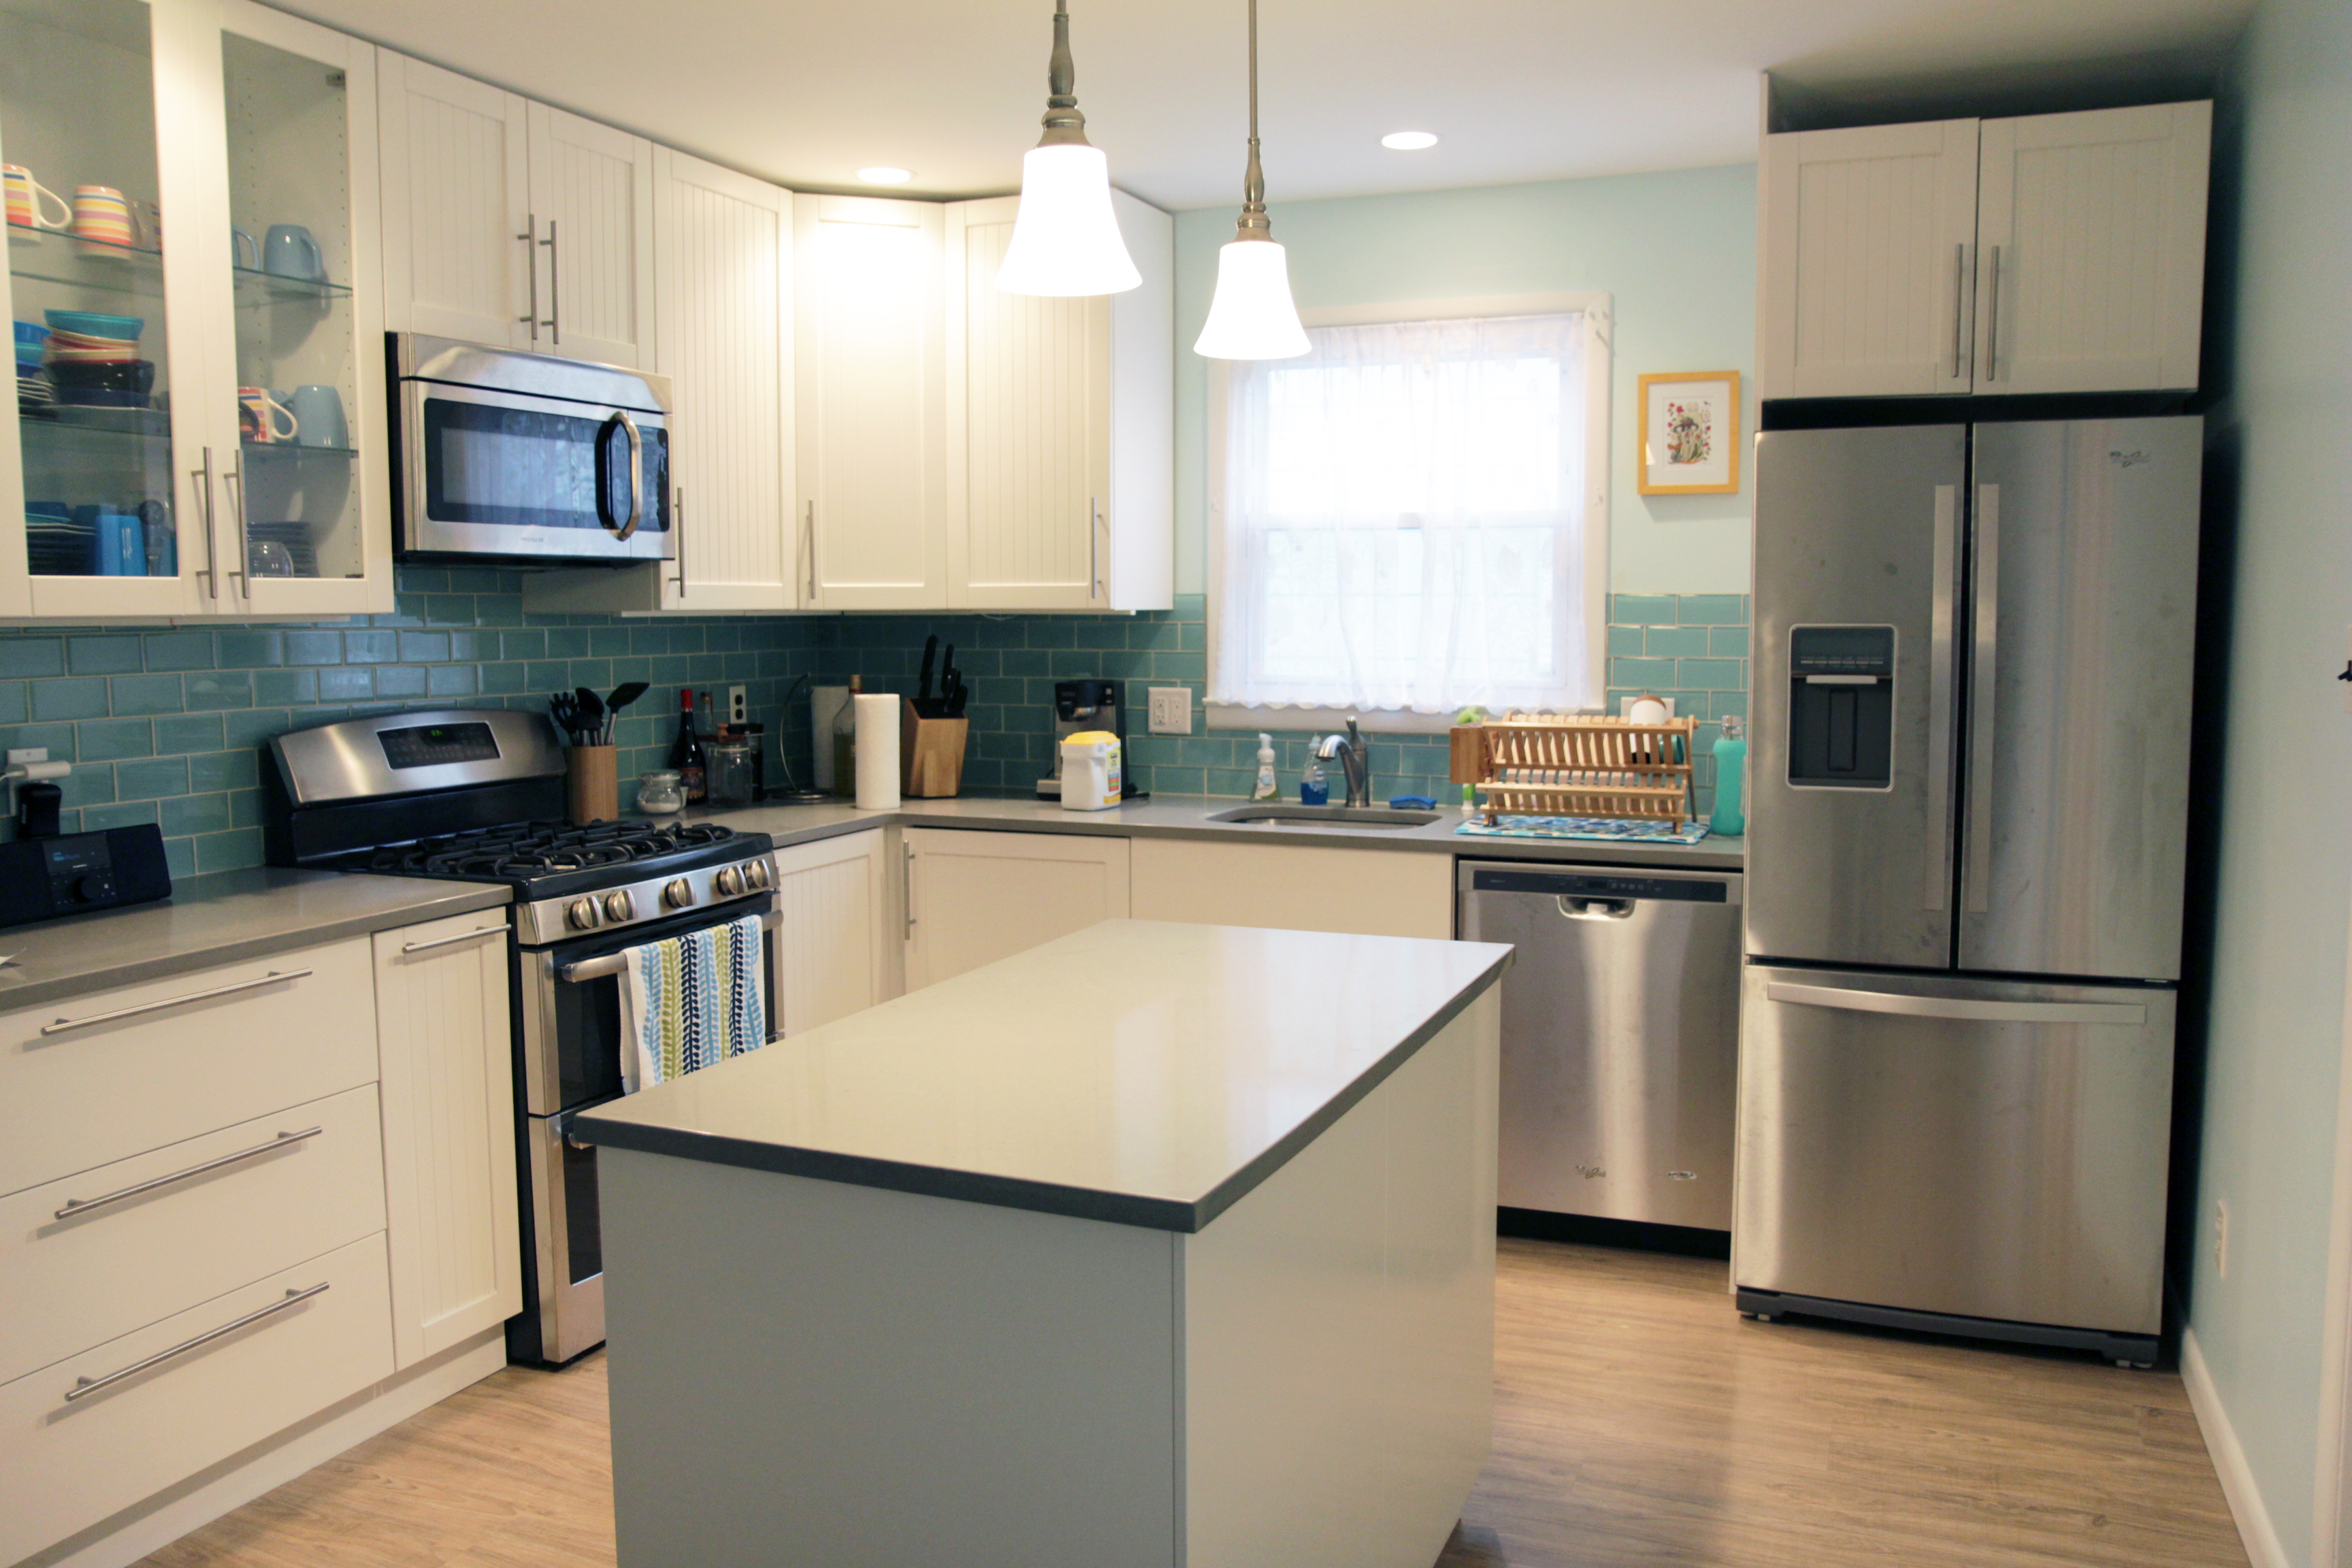
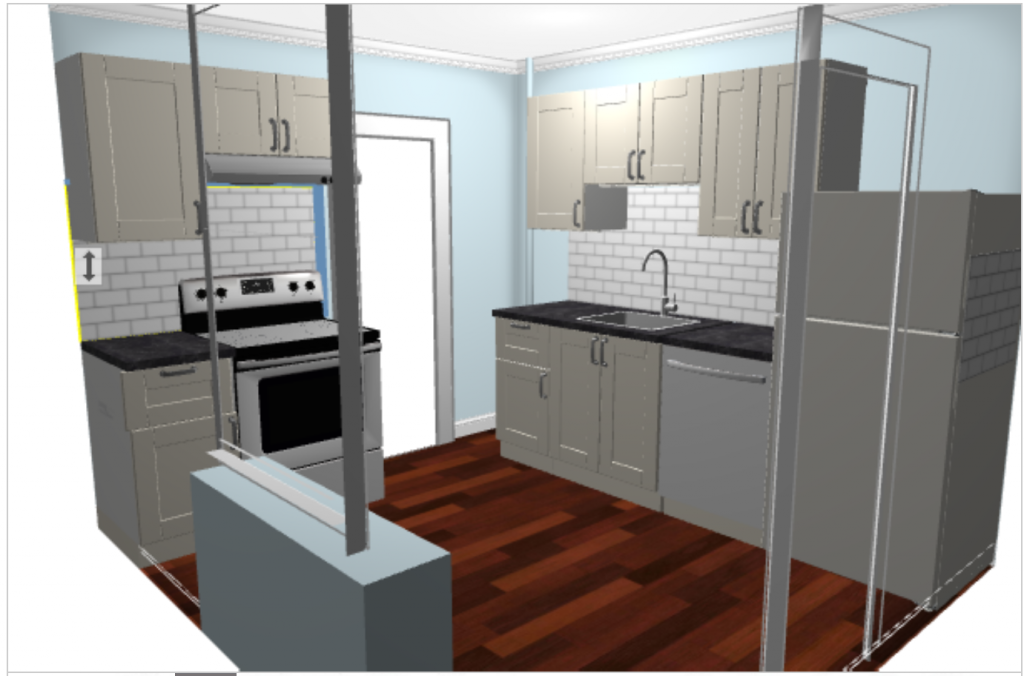
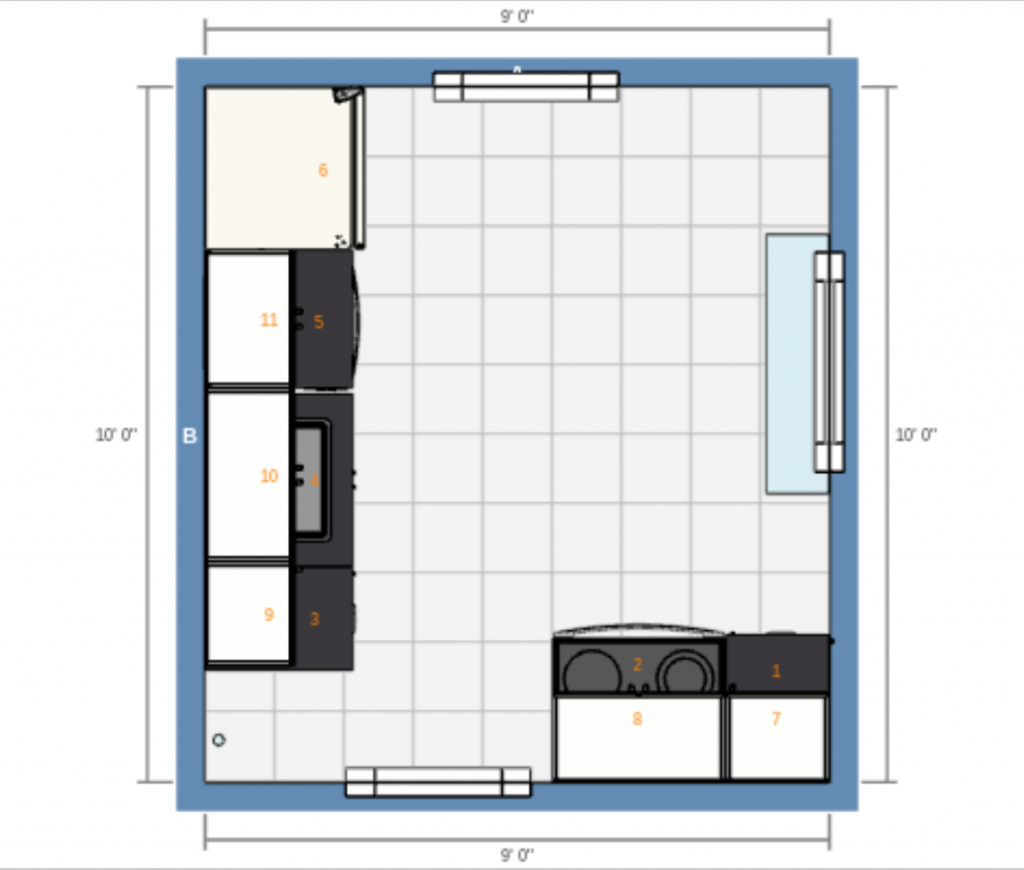
Custom doors on Ikea cabinet


The island

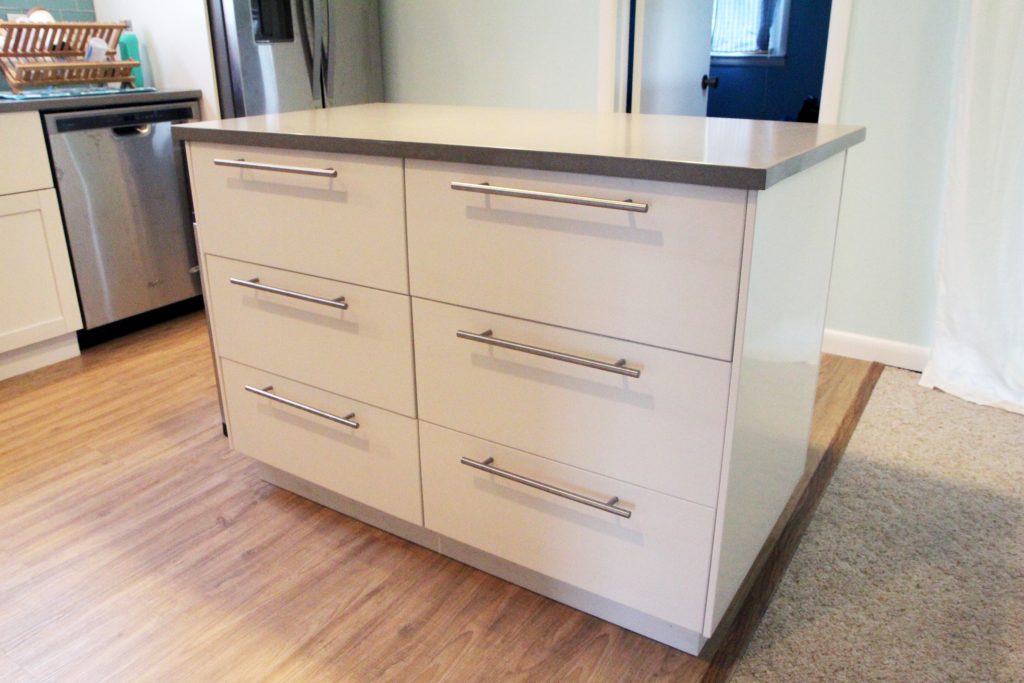
Our kitchen is about 10 foot square and I really didn’t think we had room for an island. I taped it out on the floor and took a while to pace around the room trying to get a feel for it. I’m really glad we put it in, the island makes it much easier for two people to work in the kitchen at once.

I think if I did it again though I’d get a freestanding island rather than a built in one. It would be nice to be able to move it out of the way for parties, and we really don’t need the massive amount of storage space it provides. Half the drawers in it are still empty.
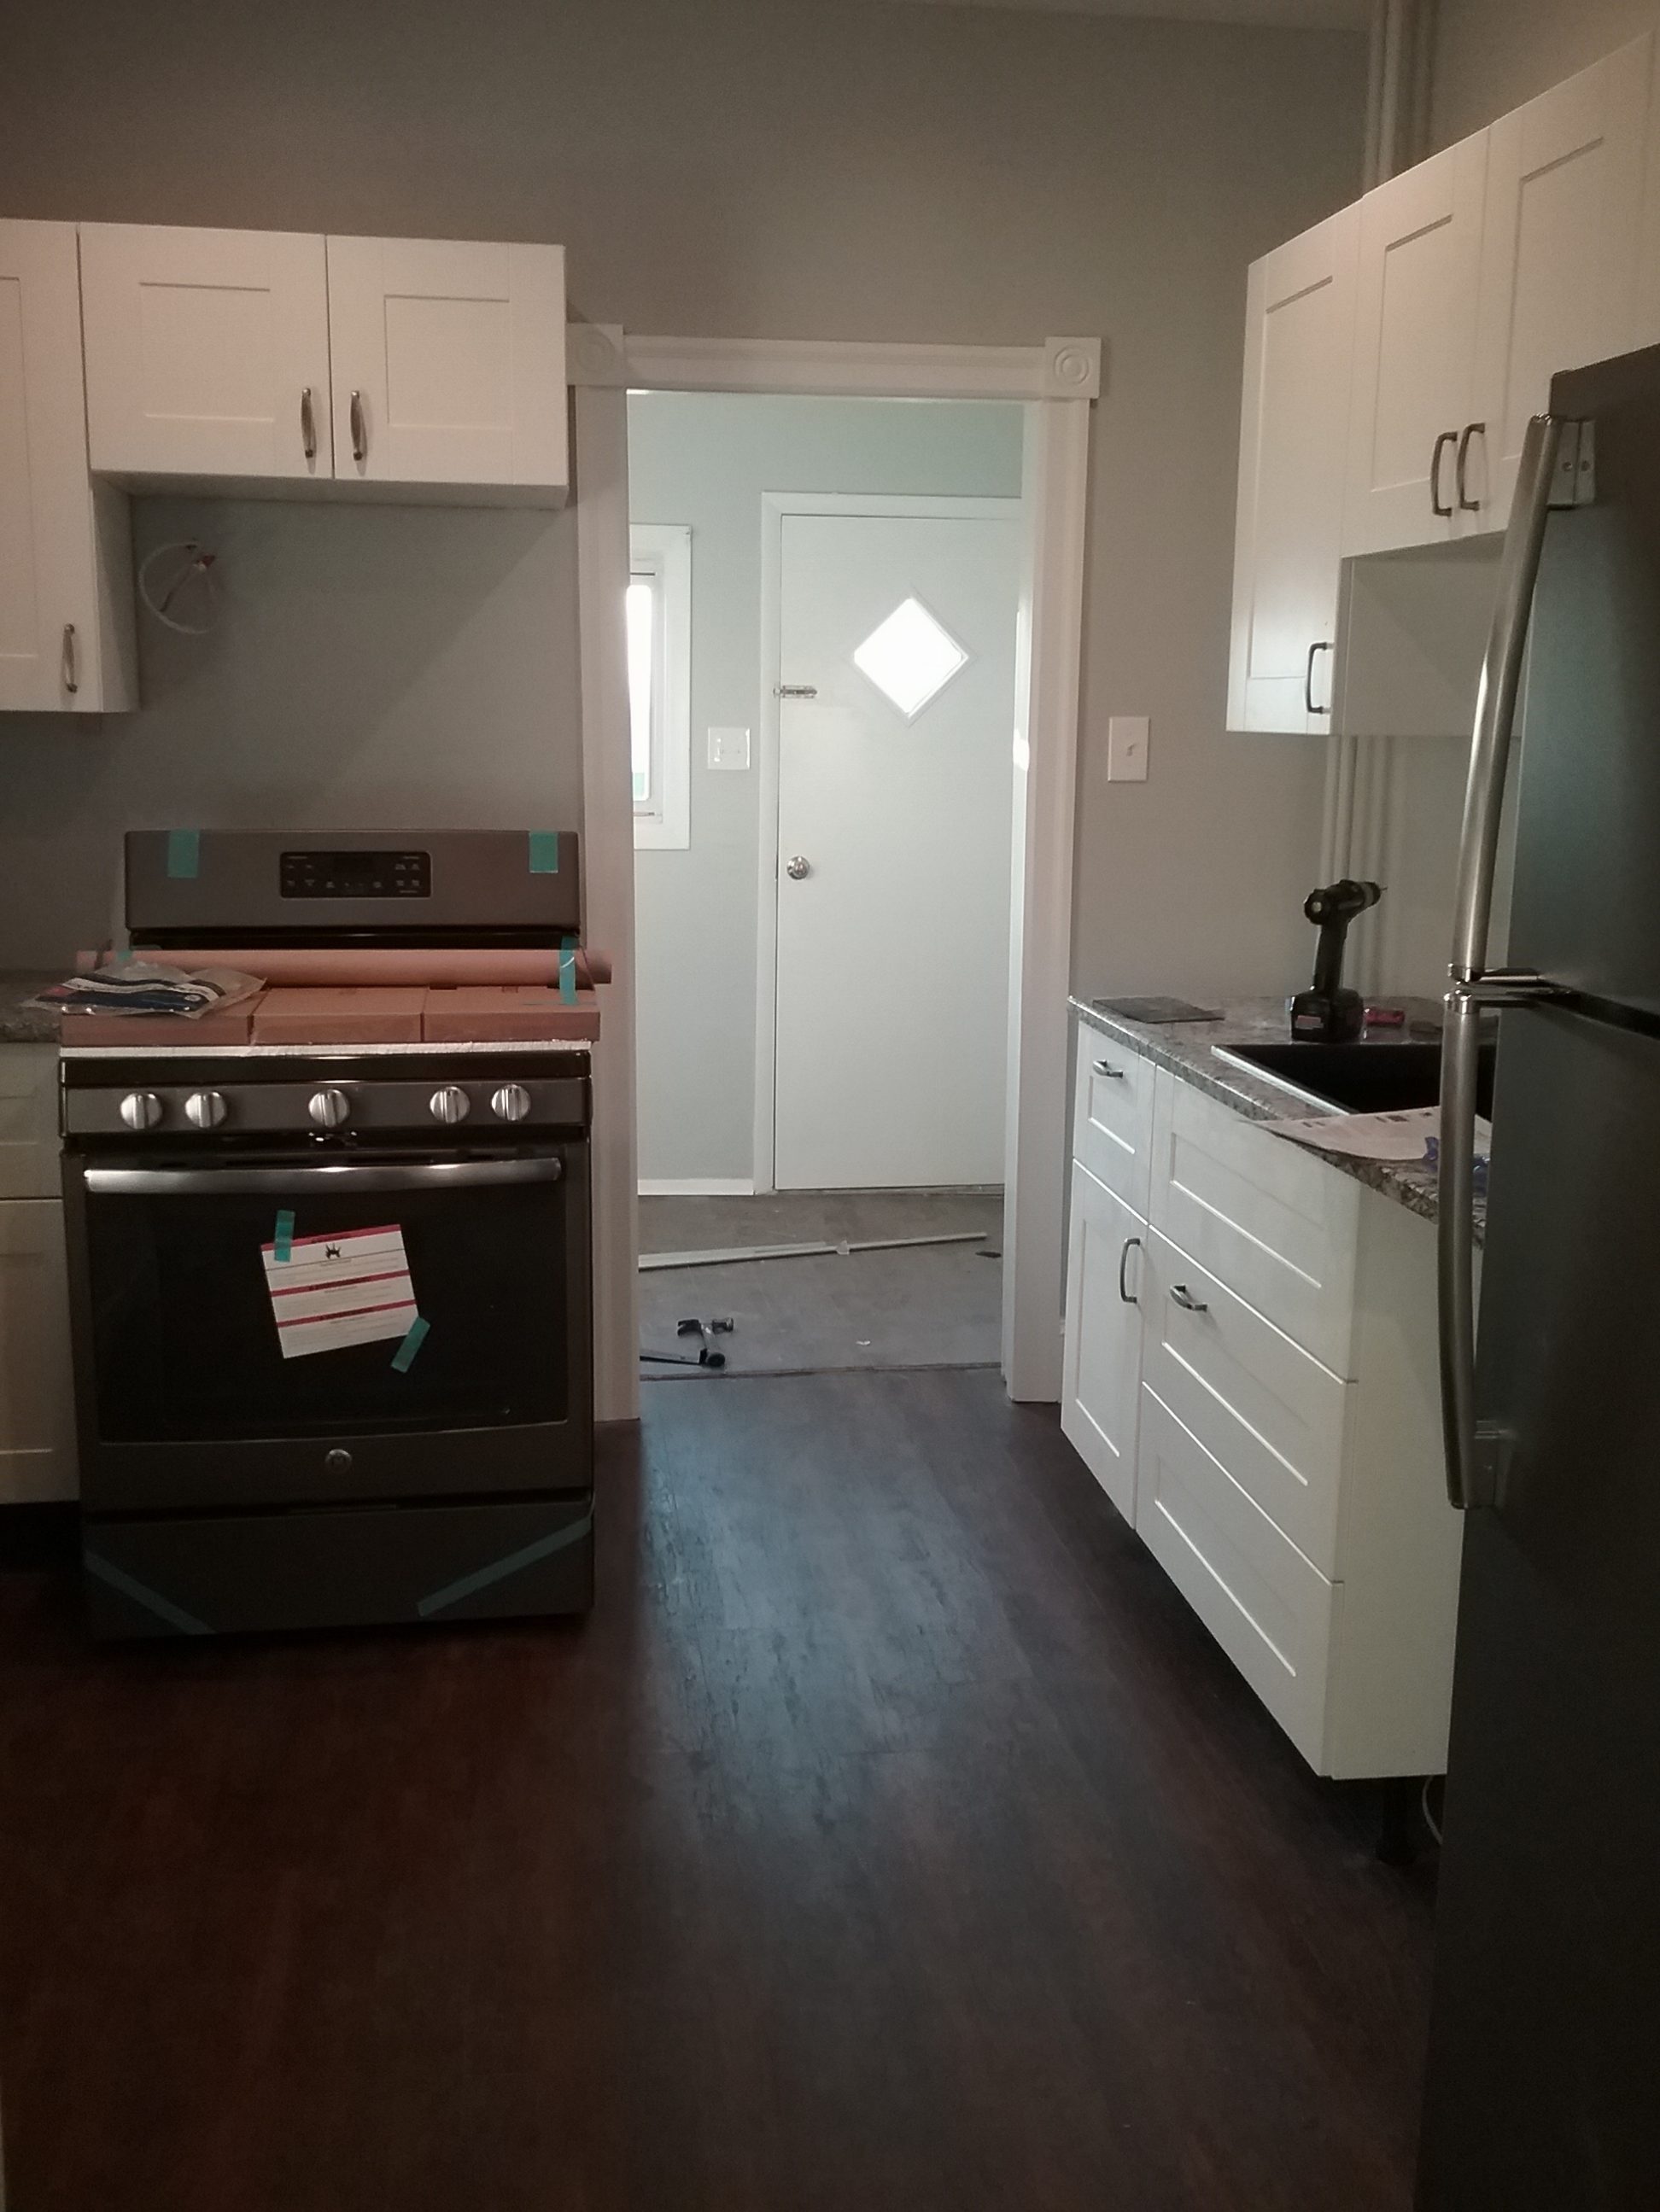
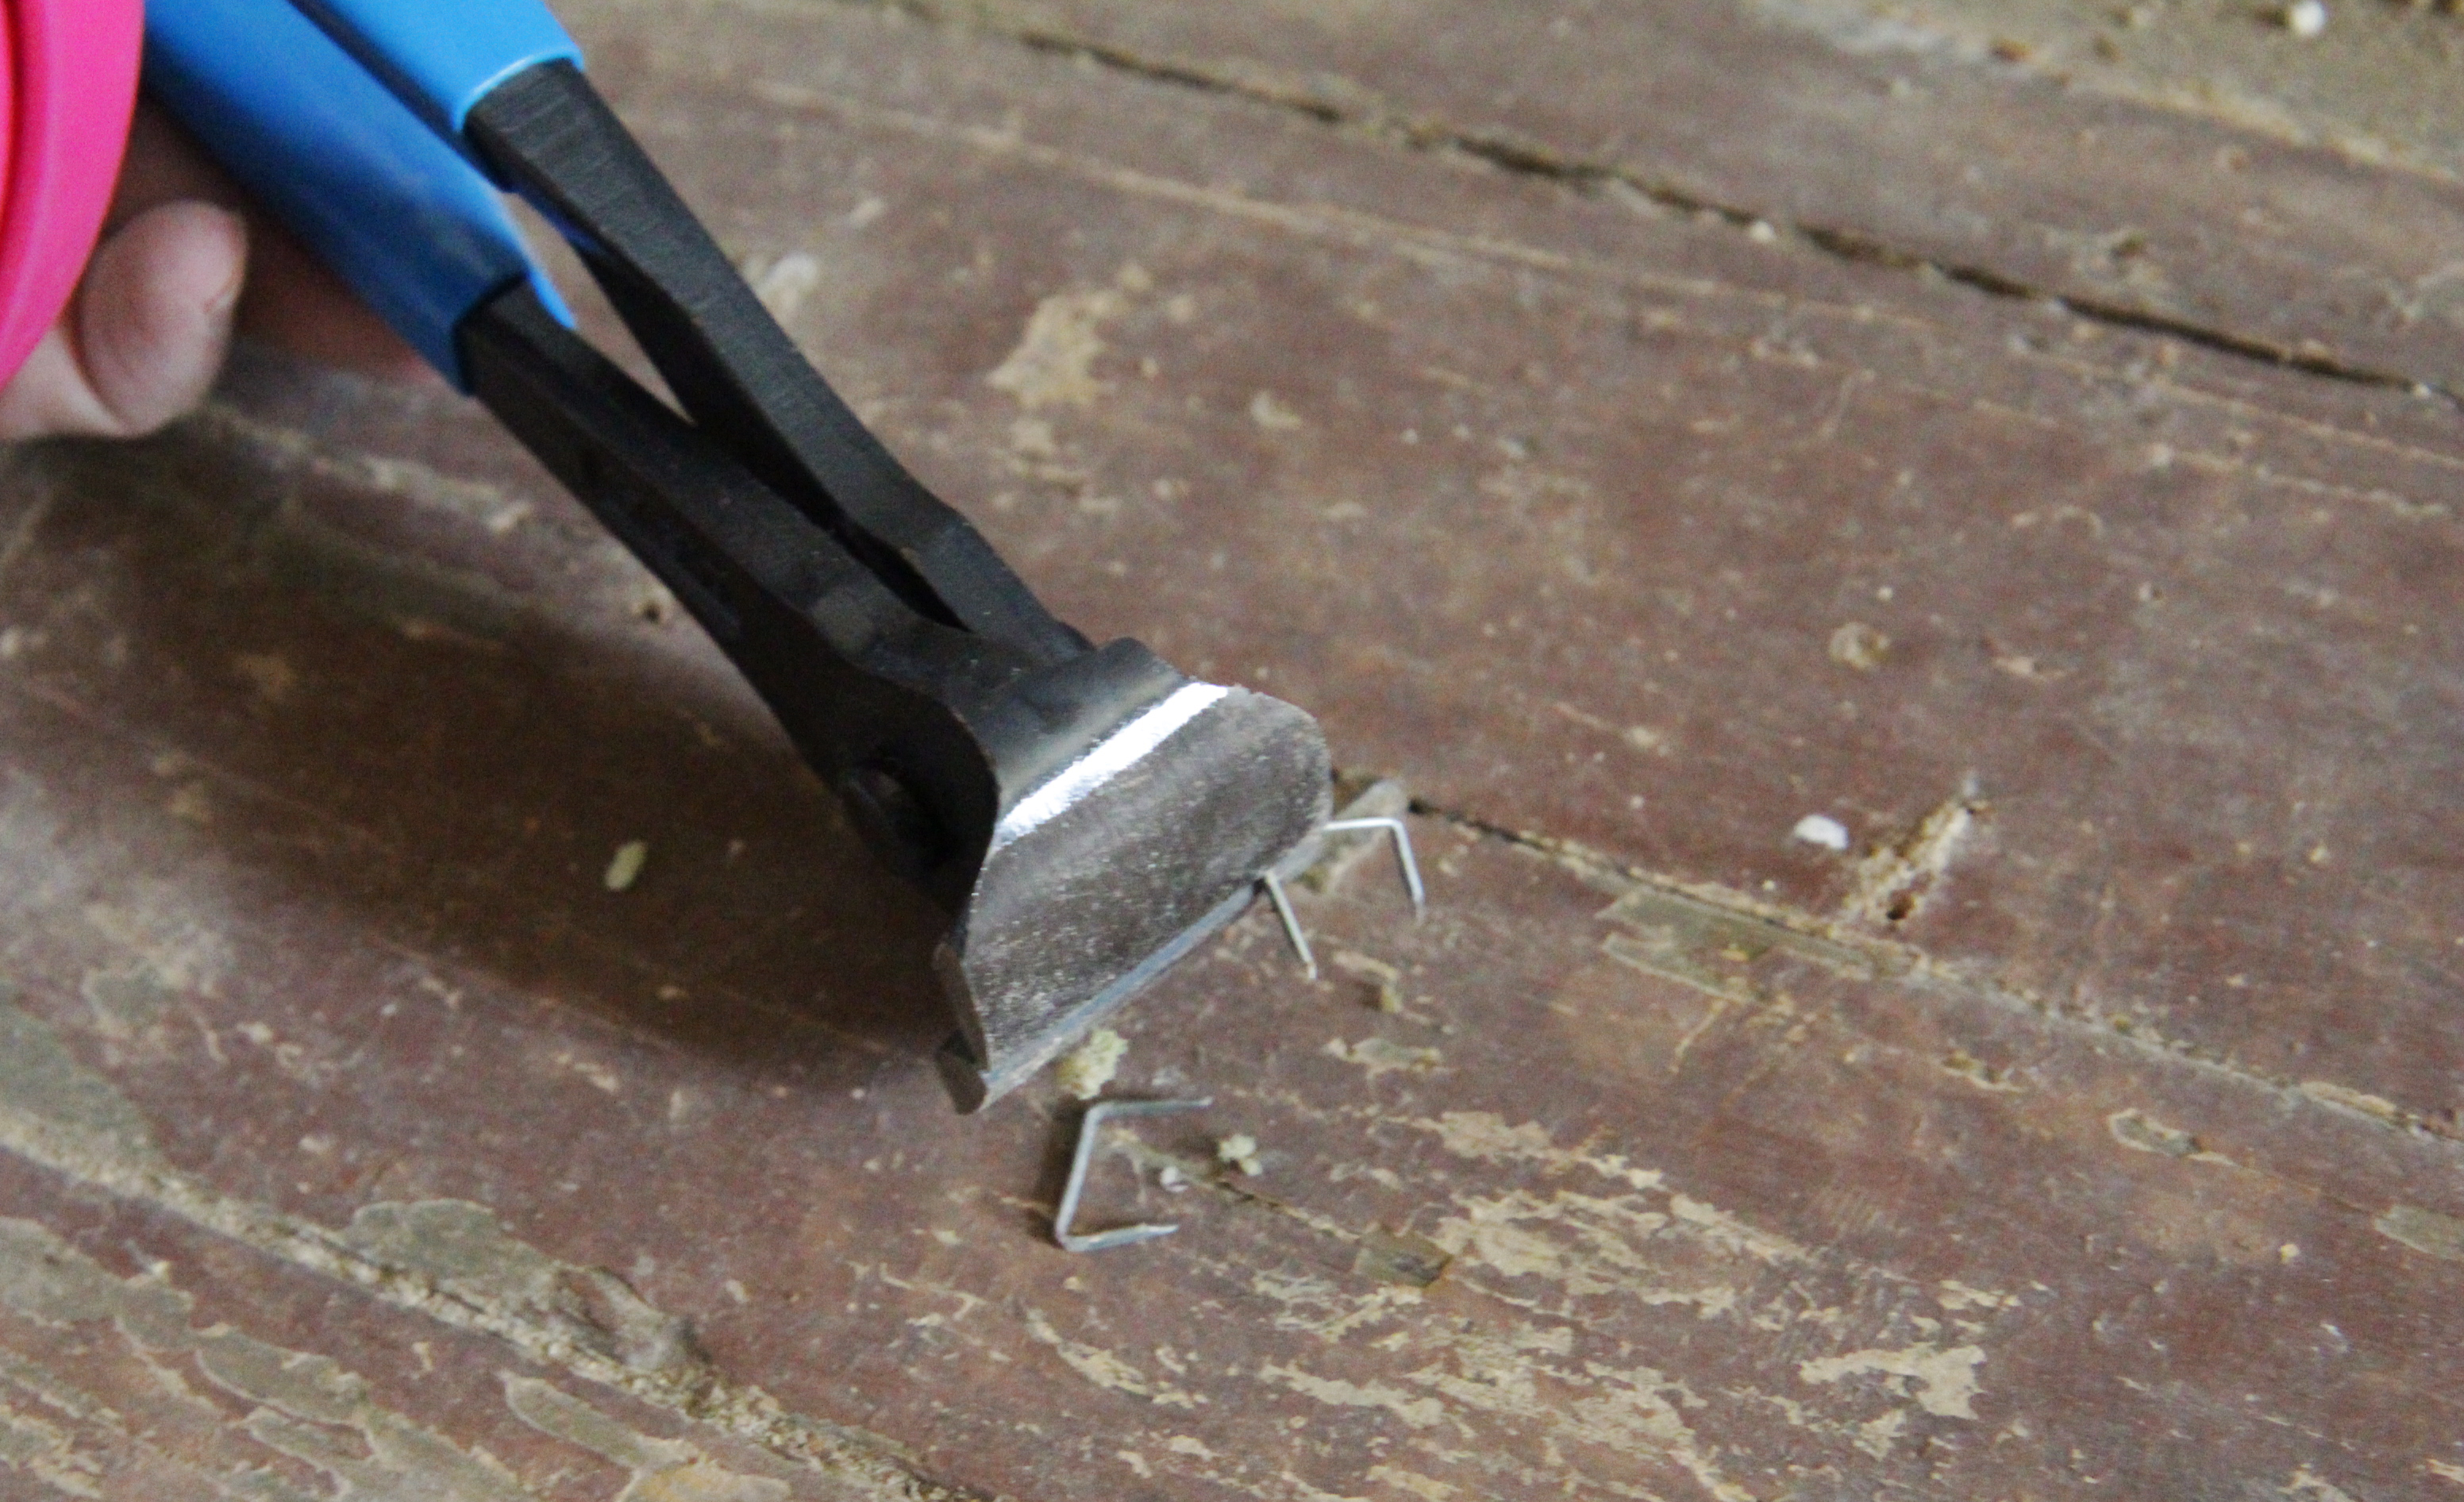
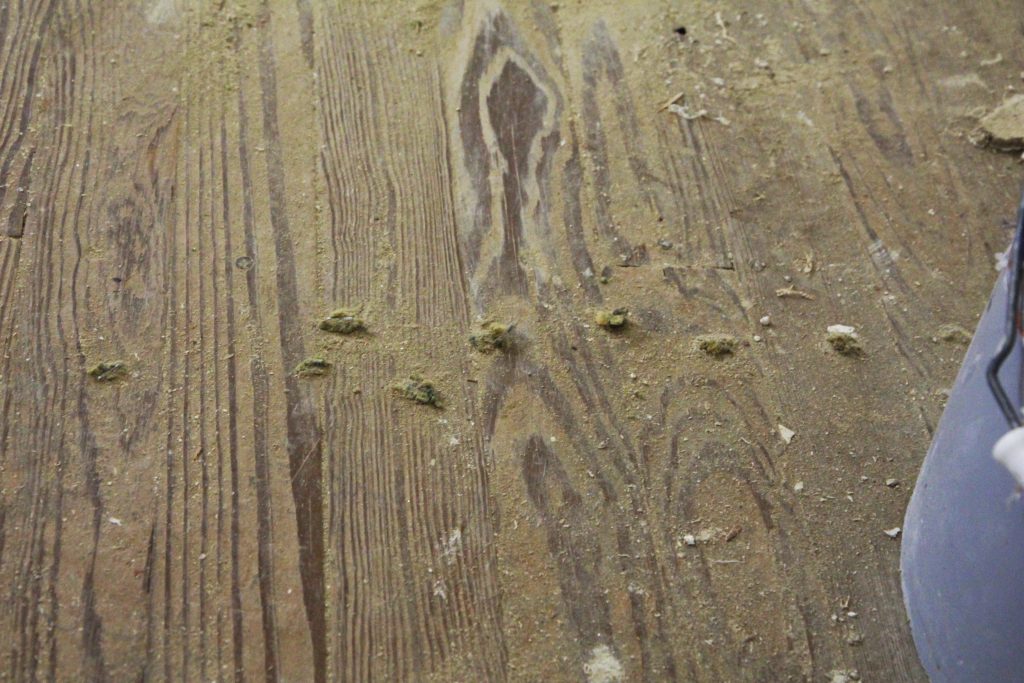
Ikea kitchen island

The flooring

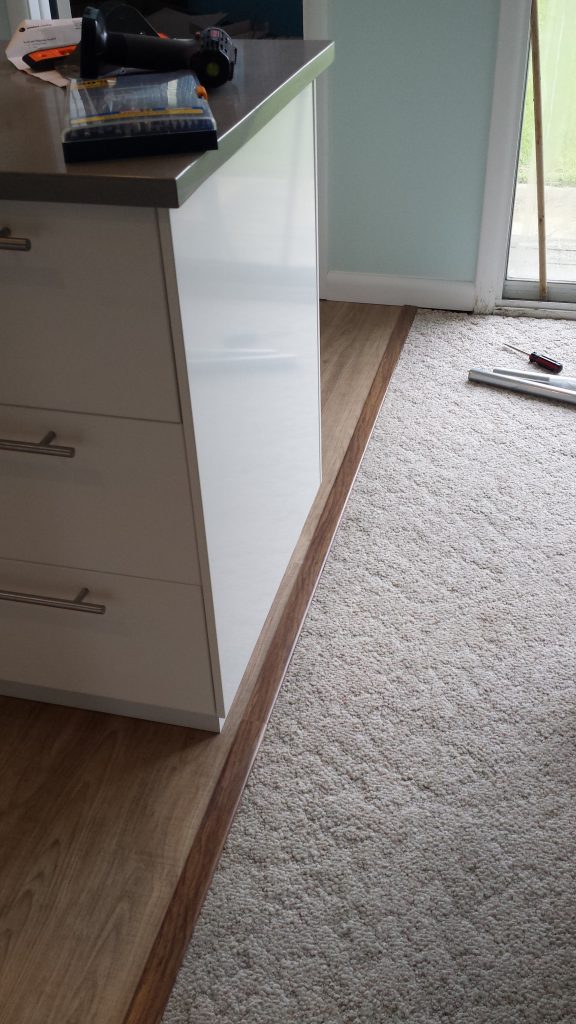
We went with luxury vinyl tile and it looks great. It’s waterproof, durable, and most people haven’t noticed it isn’t wood. To be fair, most people are also not looking because they are busy being on vacation. We’ve gotten many compliments on it. The transition molding I picked up from Lowes isn’t a perfect match, but it’s enough to make the room feel finished and put together.

Carpet to Vinyl transition

The drawers within drawers

Ikea has this feature where you can put drawers inside of doors or other drawers. We actually have this in our non-Ikea kitchen at home, and inside cabinets with doors it’s pretty great. It functions kind of like a pull out shelf for your pot lids or other doodads.

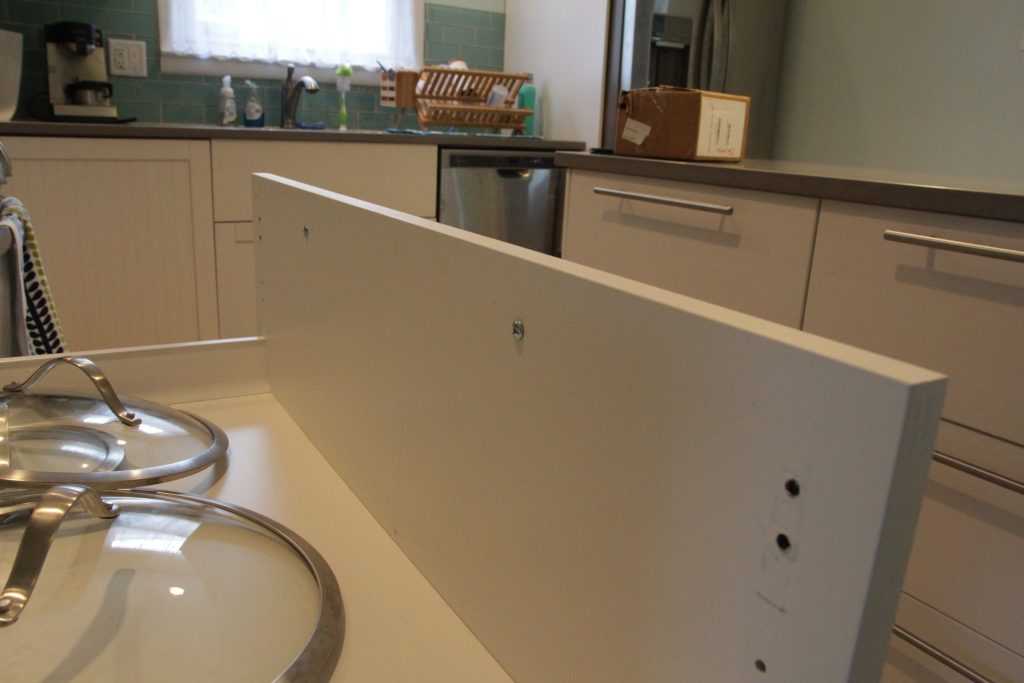
Ikea cabinets function on the idea of elements being a certain number of “units” high. Drawers can take up 1, 2, or 3 units. Our configuration has 2-high exterior drawers with a smaller 1-high drawer inside it.

Ikea drawer-within-a-drawer

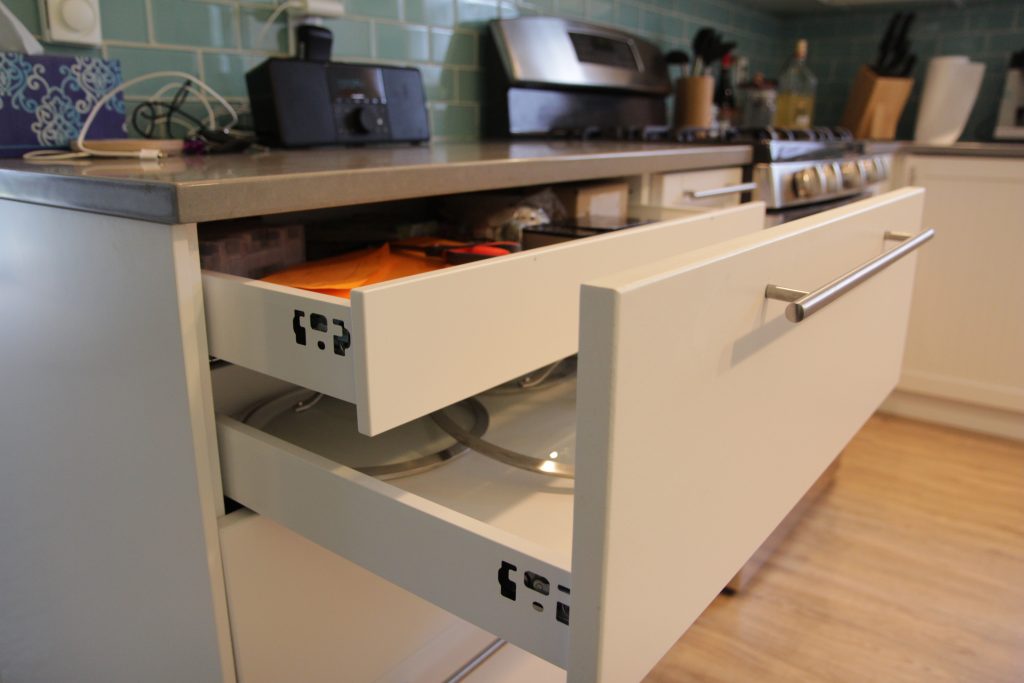
It sounds great in theory but in practice the smaller drawer is practically invisible if it’s closed. We’ve started calling them the ‘secret drawers’ because guests can’t find them.

Hidden Ikea drawer

Additionally there are two small spots where the paint has worn away due to the hardware we used to mount the handles. I’m not sure if we were supposed to countersink the screw holes on the back, but we didn’t so they stick out a bit and rub against the smaller drawer.
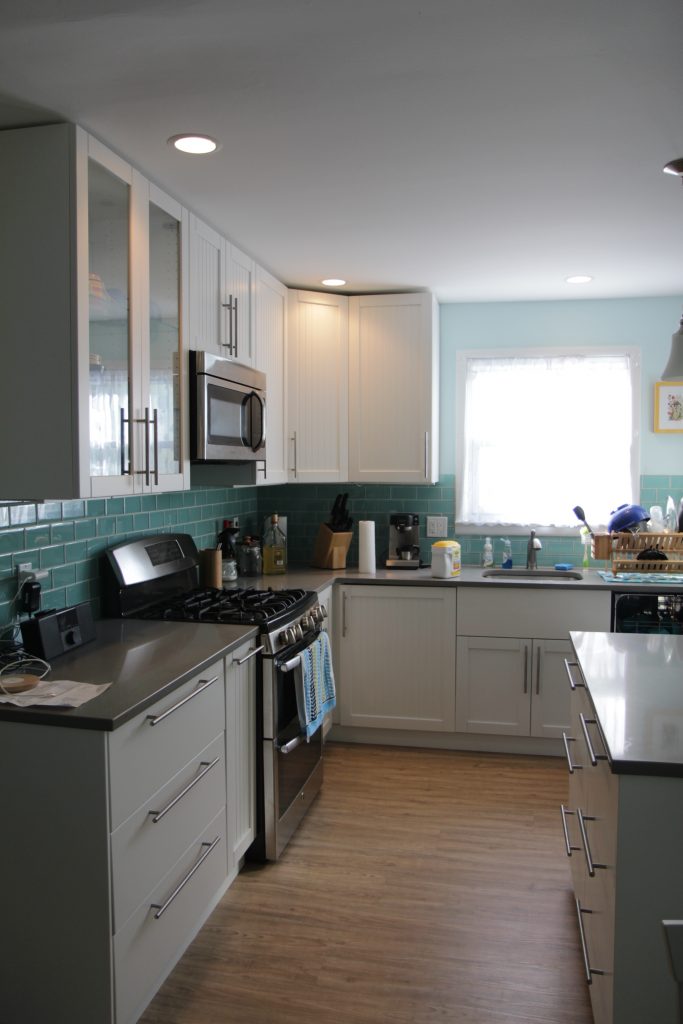
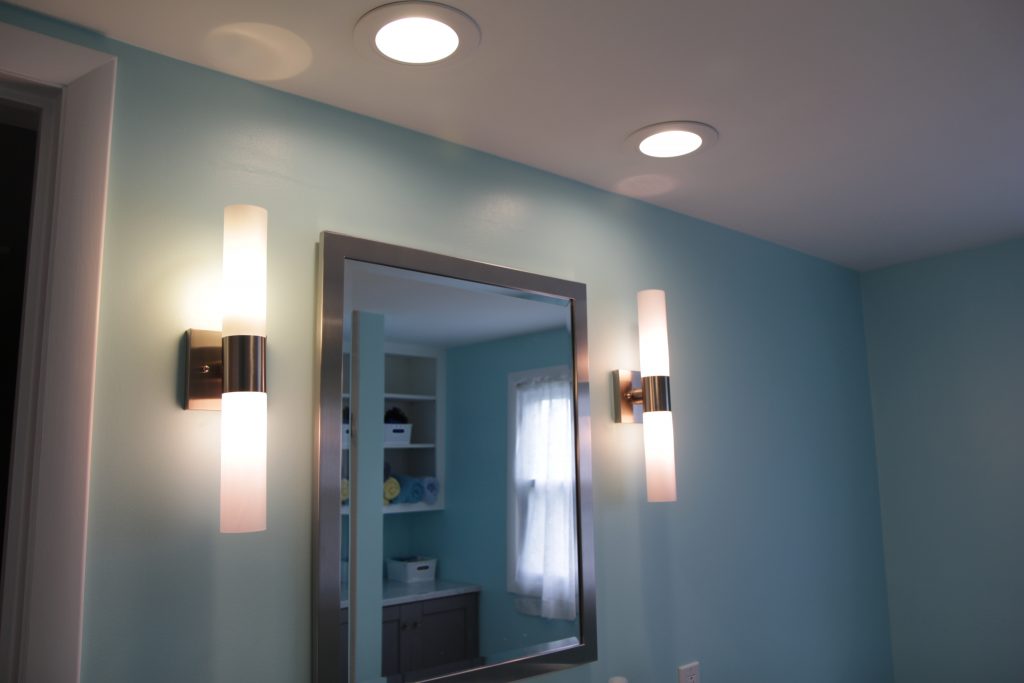
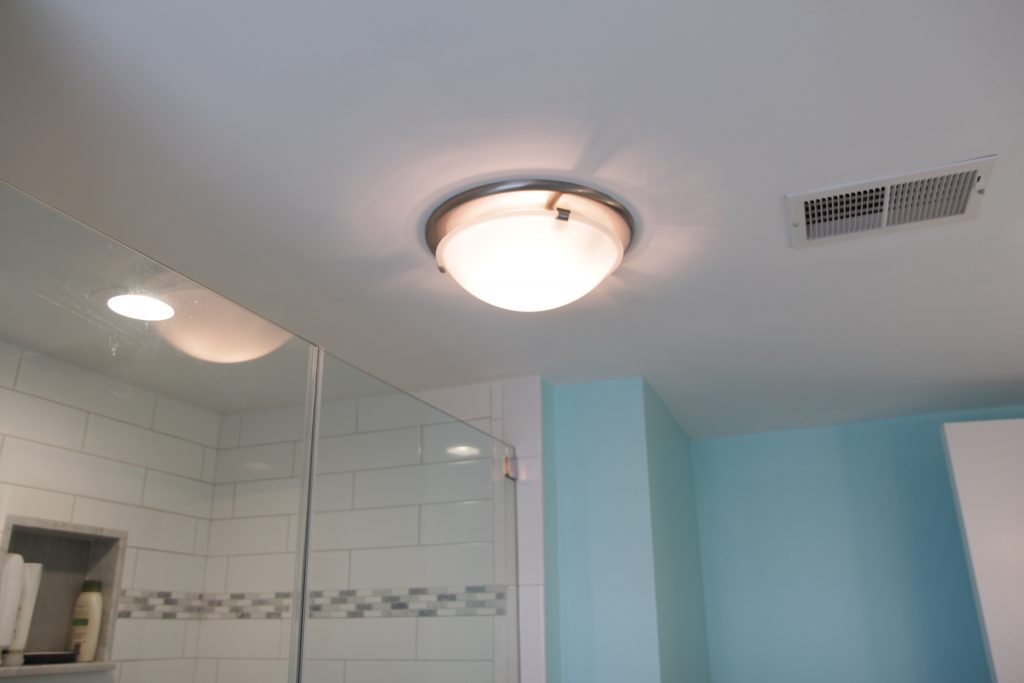
Screws sticking out back

The lighting

For the most part I am very happy with the lighting choices we made in the kitchen, especially having the recessed lighting put in over the counter area. Having a well lit work area is essential. The only thing I don’t love is the Ikea ANSULT undercabinet lighting, which is pretty poorly made. If I were to do it again I’d get my cabinet lighting from someone else.

Overall we’re still really happy with the kitchen, and I’d use Ikea again. In fact I am using Ikea again in our rental remodel.

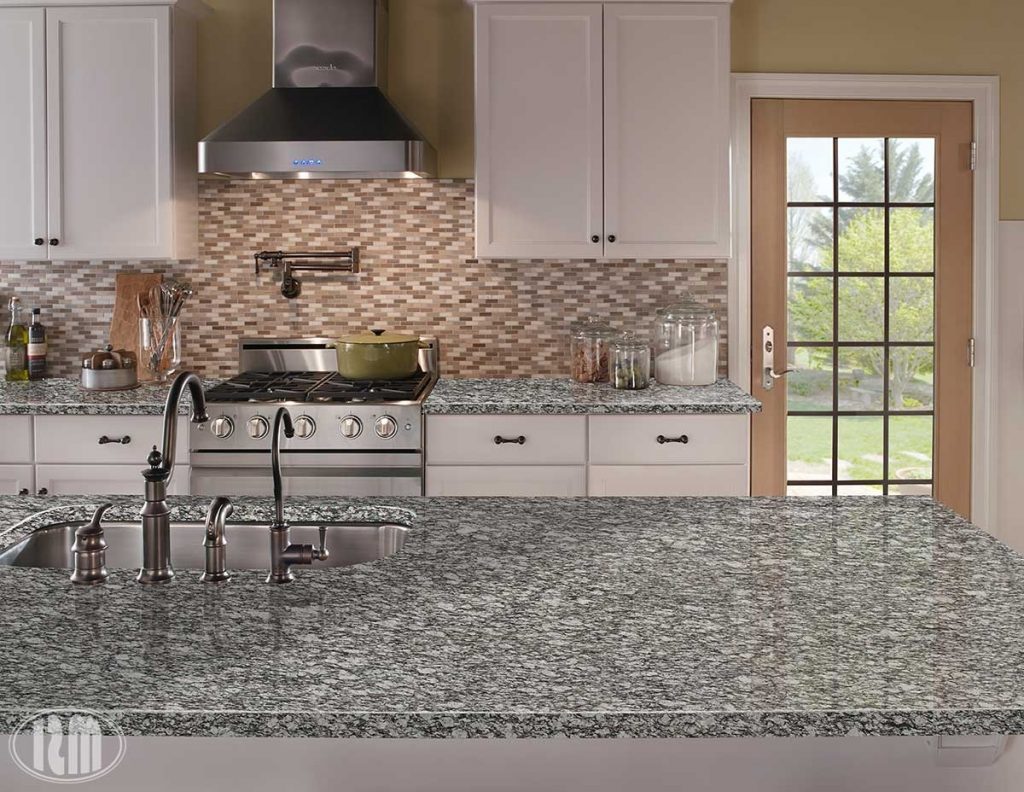
The glass subway tile backsplash looks amazing, but it was a huge pain to install and they were expensive. I’m not sure whether I’d do it again, I’d have to really love the project.

I still absolutely love the quartz countertops and while they were out of budget for the rental, I would use them again in a heartbeat.


Removing carpet staples
1916 Row Home

How to Remove Old Carpet and Flooring Staples


Our 100 year old house came with wall to wall carpeting everywhere except the kitchen and bathroom.

Old blue carpet

Actually there’s evidence there was once carpet in the kitchen too.

Kitchen carpet scrap

I ripped out all the carpet and found all sorts of things, like this very old outlet that had just been carpeted over at some point. I hope they had the common sense to disconnect the outlet first, but who knows. We put all new outlets in so now this thing can be safely removed.

Hidden Outlet

The flooring under the carpet is indeed solid wood, and it’s in OK shape, but it’s really just 100 year old subfloor. At some point it was painted brown. It has been carpeted over many times and the carpet padding was a disintegrating sticky mess. It left behind at least 60 years worth of rotting wood tack strips, rusted nails, and gunked up staples.

Old carpet padding

The tack strips can be removed with a pry bar and some patience, but the carpet staples are trickier. For a while I was using a pair of normal pliers and then the plumber took pity on me and lent me a pair of end cut pliers. It makes the task much easier.

It’s worth mentioning that I have heard this particular tool called a “cross cutter,” “end cutter,” and “side cutter” by various people. End cutter looks the most correct to me, so I’m going to go with that one.

I also have a teeny tiny pry bar that I use for the ones that are really flush to the floor. It came in a 3 pack of adorable pry bars and they’ve been super handy during this whole process.

dasco

The first step is to find a nice line of staples to work on. I find it easiest to work in one small area at a time. Keep a handheld brush or broom handy so you can keep the area clean and see what you’re doing.

Old Carpet Staples

Sometimes there’s a ton of padding around the staple, to the point where you can’t even see which way it faces. Use the tiny pry bar to scrape away gunk until you can see your target. Then place the pliers over it and gently grab it. You don’t want to actually cut it, just grab it.

Removing carpet staples

Then rock the pliers to the side in order to pull up the staple.

Removing carpet staples

Voila!

Removing carpet staples

Some staples need to be coaxed up a bit with the pry bar first, and a few staples were so stuck I actually had to get a pair of vice grips to get them out. But most of them come out pretty easily this way. It’s still not a quick process, but if you get into the swing of it there’s a nice sort of tedium. Keep sweeping up as you go, the little bits of carpet fuzz and staples get everywhere and if you don’t stay on top of it you won’t be able to see what you’re doing.

One thing about this process is that it’s pretty hard on your hands after a while. Take breaks and stretch out your wrists, no one wants to get carpal tunnel from staple removal!

Bare original floor
1916 Row Home

Preparing the Kitchen

The photo below shows the old kitchen in the house I’m remodeling. It was taken from the doorway and shows pretty much the whole room. Notice anything missing?

Small, cramped kitchen

That’s right, this kitchen lacks a stove. There actually is a stove, it’s in the room behind the kitchen on the same wall as the sink. This means that if you have a pot of hot something on the stove you have to carry it around the corner into another room. There’s no counter space next to the stove, so you’ve got nowhere to set things besides the stove itself. The paneling, flooring, and cabinets are all things I could live with; having the stove another room was not.

On one wall we’ve got a giant window and giant radiator taking up nearly all the space. On the other (next to where I’m standing taking the above photo) we’ve got a door to the basement, significantly cutting into where we can put things. The previous owners put the fridge in the middle of the room which I guess makes sort of a work triangle with the back room stove but… ugh.

Empty kitchen

The first major step was to move that doorway. I put it around the corner, in the dining room. This gives us more space in the kitchen as well as a small storage area behind the door at the top of the basement stairs.

Doorway moved

That hole above the new drywall is for the central air! We ended up hanging new sheetrock over this wall. Underneath the wood paneling it was in pretty rough shape. Before the wood paneling, which tore up the plaster with a million nails, someone had glued a faux tin textured… thing… and it wanted to take the plaster with it when it came down. Sheet rock over plaster isn’t my favorite thing in the world, but in this instance it was our best option.

Old and new doorways

With the doorway moved we installed a new prehung door and fit it with trim to match the rest of the house. On the left is the existing doorway to the kitchen with original trim, and on the right is the new door with new trim. The wide angle camera lens I used is doing some funny things with the perspective, the door looks much wider than it really is. In reality the space between the door and doorway is wider than the door itself.

The contractors removed the cabinets and moved the utilities. I was all excited to start putting it back together. And then I started looking at the flooring, which I was going to just floor over with click-lock vinyl. Specifically I looked at the spot where the cabinets had been to figure out what I was going to do about it.

Old kitchen carpet

Why yes, that IS carpet. The flooring here is more than half an inch thick, and that’s after I’d peeled up the first layer. There are at least 3 layers of flooring here and they’re all rotted / falling apart. The thought of putting even more thick flooring on top of that made me a bit ill. I made a somewhat hasty decision to take it all out.

Bare original floor

All things considered this part wasn’t too bad. It took my dad and I about 3 hours, the last of which was just removing all the *&@$# nails from the floor. The hardest part was that it’s just really dark in there. The recessed lighting isn’t working yet, and with all the rain we’ve had there wasn’t much natural light coming in. My dad brought a small work light (sitting on the window sill) which helped… unless one of us was standing in front of it. “Hey where’d the light go?” “I’m a human eclipse!”

Kitchen rear

With the flooring out I think we officially have a blank slate with this kitchen. The next step is to finish and sand the walls. Then we put in the flooring and replace all the trim. Once the trim is in we can paint. Of course by “we” I really mean my contractor. I’m also having my contractor hang the mounting rails for the cabinets because the wall they’re going on is masonry and I don’t have any of the equipment needed. Then I can build and hang the cabinets myself.

Ikea kitchen design

I’m using Ikea SEKTION again, because it’s affordable and since I’ve used it before it’s a known quantity. I also like that it’s modular, meaning if a tenant destroys one of the doors I can pick up a replacement locally and install it with minimal hassle.

kitchenoverhead

The layout isn’t perfect but I think it’s the best we’re going to do on the budget I have. Moving the radiator and resizing the window wasn’t an option for this project. The radiator pipes in the southwest corner keep me from taking the cabinets all the way into it. It’s a bit of an awkward space, but still not nearly as bad as having the range in a totally different room!

I still need to decide what I’m doing for the backsplash. The cabinets will be white and the counters I’m going with are a black and white textured granite called ‘white mist,’ which I’m hoping will be forgiving when it comes to hiding minor tenant damage. The floors will be a warm wood look vinyl plank.

White Mist Granite Slab

I’m trying to find an affordable tile backsplash with some color in it but I don’t want it to feel completely dated in a few years. If anyone has suggestions I’m all ears!

Ikea lamp
1970s Shore Home, DIY and Decor

A Tour de Light at the Shore House

Shopping for fixtures in the 100 year old house I’m renovating got me thinking about the lighting we chose for the shore house. When we started working on the house I hadn’t put any thought into lighting. It was only when I had an electrician over to disconnect the old lighting that I realized we were going to want more than just a flushmount fixture in the middle of the room.

I mean, it's not the worst.

The first thing we did was put in recessed lighting. Retrofitting can lights into the ceiling makes a mess of the drywall, and if I was going to do it again I would just rip out all the drywall and put up fresh sheetrock. It would have saved both the electrician and the painter a ton of time and been cheaper in the long run.

Ikea kitchen with recessed lighting

For the island I went with simple mini pendant lights from Lowes.

Pendant lights for island

I also installed Ikea ANSULTA undercabinet lighting, which honestly I can’t recommend. We’ve have problems with the transformers humming very loudly, and every time the power goes out they get de-sync’d from the wireless power switch and I have to climb up on a ladder to re-sync them  (the transformers are in the cabinet above the microwave). It’s a pain in the ass and we’ve really just stopped using them.

Finished kitchen with lights on

In the living room we have 4 more recessed lights and this table lamp. This lamp is special because it has an LIFX wifi multicolor bulb in it. The bulb is set up to change colors when my in-laws next door press a button to let us know they’re awake.

Table lamp from Target

Moving on to the bathroom, the vanity has both recessed lights and side lights. I may have gone a little nuts on lighting in there. The side lights, Livex Lighting Aero 2 vanity lights, each take two bulbs.

Vanity Lighting

There are actually TWO OTHER light fixtures in the bathroom: a recessed light in the shower and this combination light and exhaust fan in the middle of the room. You could do surgery in this bathroom it’s so well lit.

Bathroom fan and light

The last light I have to show off is a fun Ikea lamp we got for my daughter’s room. The white thing next to it is a noise machine, which I consider an absolutely essential item in a house that sleeps up to 14 people.

Ikea lamp

There are still a bunch of flushmount fixtures I’d like to replace some day, but right now I’m sort of OD’d on looking at lights so it will have to wait. I’m having trouble finding anything I really like; the ceilings upstairs are only 7 feet high and most of the low profile flush mount fixtures are no less ugly than what we’ve got in there now.

If you come across any nice looking low-profile flush mount lights be sure to let me know!

Home Improvement

10 Great Pendant Lamps Under $100

10

I’m remodeling a house and one of the things that desperately needs replacing is the light fixtures. They’re all 1970s attempts at 1920s styles, and not very good ones. Swapping out a dining room chandelier or other ceiling light is a great way to update a room with just a few hours of work. The options are nearly infinite, and unfortunately so are the prices. As cool as the Restoration Hardware catalog is not all of us are ready to spend next month’s entire paycheck on a lamp that looks like it was built by Howard Hughes. So I started looking into budget options. The lamp field really opens up around $150, and somehow everything that catches my eye is $300+ but there are some nice options to be found for less than a Benjamin if you know where to look.

These pendant lamps and chandeliers each come in under $100, meaning you can get rid of that 1970s reproduction nightmare without breaking the bank.

First, some fairly tame options for when you want something more streamlined, but don’t want to hear your mother-in-law’s opinions on the lighting every time you host a dinner party.

progresslightinglowes

progresssplendidlowes

kichler

If you’re feeling a little trendy (and why not when the lights are so affordable?) you could go for a drum light. Drum lights tend to look a little more casual than chandeliers, and if you hang them close to the ceiling they can be a little more subtle.

Or you can get a little weirder with these guys.

catalina-19866-000-3-light-metal-orb-chandelier-bronze-19866-000

I know what you’re thinking on that last one… it looks a little cheesy, right? Ok maybe it is a little cheesy, but bear with me. When it’s lit up it looks nice!

71dpb1qq8zl

And last but certainly not least there’s this chandelier, which I included because it’s called Khaleesi. I think it looks a bit like a metal octopus, which is admittedly not my thing, but they got me on the name. Well done, marketing team!

khaleesi

1970s Shore Home

We has a bathroom!

At long last, the bathroom remodel is complete! Ok, it was actually done a while ago, but we’ve been too busy enjoying it to do a full writeup.

Before

Gone is the pink tile, the awkward (and dangerous!) shower, the useless closet.

IMG_2961

Yes, our bathroom has come a long way from the pink leaky horror show we started with. New flooring, new shower, new toilet, new vanity… pretty much the only thing that stayed the same was the towels and the window.

IMG_2964

There is now a ton of LIGHT in the bathroom! From all angles! And the sun! It’s a downright cheery place now. And the sad awkward medicine cabinet has been replaced with a mirror (we didn’t really use it for storage anyway). The vanity has tons of storage space for any doodads left behind.

IMG_2965

See that light? That light is a bathroom fan. Before we had no bathroom fan and friends, let me tell you, it is LIFE CHANGING. Now this room is all GO FORTH AND POOP. DO NOT BE ASHAMED, THE FAN WILL TAKE THE ODORS AWAY.

Seriously I did not understand how critically necessary bathroom fans were until we had to survive without one. It also does a great job of whisking the damp shower air out of the house, preventing mold and other nastiness.

IMG_2954

The open shelf on the vanity makes a great place to store surplus toilet paper. And the open-ended toilet paper holder leaves NO EXCUSES for not changing out a fresh roll. It’s so easy! The trash can is right there!

IMG_2966

What was once an awkward closet is now a cabinet and open shelves. Guests no longer have to guess which closet has the towels, they’re right out in plain sight. Along with the first aid kit.

IMG_2967

We totally removed closet #2 in favor of a spacious walk-in shower with a seat. Perfect for hosing off the kids after a day at the beach.

IMG_2956

The seat is opposite a detachable shower head. It’s supported by a hidden iron bracket that gives it a neat floating effect. Two niches in the shower mean no collection of random bath items on the floor.

IMG_2953

We still need to get some artwork to go over the toilet, it’s looking a little bare. But mostly we are very excited to have a shower that does not dump water onto the room below.

Furniture and Finishes:

Vanity – Vinnova Florence 48″ vanity in grey
T
oilet – Kohler Cimarron Round Bowl
Shower head –  Delta In2ition 2-in-1 H2Okinetic Shower Head
Toilet paper holder – Moen Madison single post
Faucet – Kohler Kelston wide spread
Fan/Light – Broan 761
Floor tile – 3″ Hexagonal Carerra Marble
Wall sconces – Livex Aero

DIY and Decor, Exercise, Home Improvement

Cheap Ikea cycling desk

I picked up a bicycle trainer off Craigslist, a Century Fluid trainer someone else was offloading, and have been enjoying using it for workouts post-baby. It does get boring though, so I built a table that fits over it to hold my laptop.

2016-02-16 14.01.23

The table had a few non-negotiable requirements:

  • It needed to be sturdy enough to hold my laptop (easy)
  • It needed to be adjustable vertically so I could either lower it for a real workout or raise it and type on my laptop for some pedaling-while-working
  • It needed to be easily removable
  • It needed to be cheap

I ended up finding the parts I needed in the Ikea IVAR system. I used two 20″ wide by 48″ high sides, one 20″x35″ shelf, and an X bracket to give the whole thing stability.

Bike in "typing" mode
Bike in “typing” mode

The total including tax was under $45.

I pull the table up over the handle bars if I want to type on my laptop, and push it back so it’s more over the front wheel if I want to get an actual workout in. My only complaint is that the seat I have isn’t very comfortable when sitting upright and typing. I may pick up a gel cover to give my butt a break.

2016-02-16 14.00.11


1970s Shore Home

Quick Bathroom Update

I snuck down to check out the bathroom progress yesterday, newborn baby and 3 year old in tow. The walls are back up, there’s a floor again, the plumbing is all roughed in, and hopefully this week they’ll start tiling.

The downstairs bedroom, which had to be cut into to access the joists, is also all buttoned up and repainted. You’d never know it was disrupted.

12491764_10102943887527846_6521084593319504781_o
The landing before the bathroom, now about 8″ wider. Previously the wall was right up against the window. There’s a small scar on the floor where the wall-to-wall carpet doesn’t cover but we’ll just put some furniture over it.
12496465_10102943887522856_4141808617756079975_o
Looking into the bathroom from the doorway. The shower is now where the closet used to be, and that alcove behind the shower is where a new closet is going. The bathroom will actually feel a little smaller than it did before due to the fact that the shower is an entire foot wider than it was before. Best of all, my dad can now stand in it without hitting his head. There is also a light in the shower and an exhaust vent right in front of the shower.
12471429_10102943887517866_2962169384564819729_o
Another view of the shower.
1970s Shore Home

Clean Slate in the Bathroom

We’re about a week and a half into the bathroom project and demolition was, in a word, enlightening. Other words one might use include “complete horror show” and “dear god what were they thinking?” I’ll dive into the details in a second, but first let’s skip to the end and see where we’re at now:

IMG_2573
Once upon a time there was a bathroom here

You may notice something is missing. Something like… a wall. Or maybe you’ve forgotten, in which case let me jog your memory…

Hm something is different...
Hm something is different…

So yes, we removed a wall. Actually all the walls. And the floor. The whole room was gutted down to the studs and joists, and then we removed most of those as well.

You’ll notice in the ‘before’ photo that the wall between the landing and the bathroom is about a foot thick. Why? We weren’t sure. Maybe there was ducting running through it. Maybe it was full of treasure. Or bees. So we opened it up and found…

Oh.
Oh.

…Basically nothing. Well, we found a lot of questionable plumbing and electrical work. And the wall was framed with 2x3s. Badly. So it’s being torn out and replaced with a wall of more reasonable construction. We’ll gain about 8″ of space on the landing, which is nice. Downside is there will be a scar where the wall-to-wall carpet doesn’t cover, but that’s what area rugs are for.

Where the shower used to be

In a rare bit of good news it turns out the reason the shower was 8″ off the ground is that the person who installed it merely had no idea what they were doing. The new shower will have no problem being installed at floor level.

The electrical situation in the bathroom (and in fact the entire top floor) was rough. Random wires were taped together inside walls, everything was running on one giant overloaded circuit, improperly terminated junction boxes… it made me really glad we’re doing this now, and also amazed that the entire house hasn’t gone up in flames sometime in the last 30 years.

Oh yeah that looks super legit.

All the electrical in (and really anywhere near) the bathroom is being completely removed and redone. On the plus side we’re getting some new outlets in the rooms adjacent to the bathroom.

With the walls out of the way it was time to open up the floor and find out why it was so saggy / bouncy / otherwise shitty. It turns out the answer was very simple… giant chunks were missing from every. single. joist.

Rather than cut holes through the joists, which would have required some basic skills, the original owner just notched them to make room for the drain lines. Which was especially impresive in the case of the toilet drain (far right), which was left with barely 2″ of material. It is amazing no one ever fell through.

We also found out why the pipes were leaking (which is what started this whole process). They weren’t glued together at all. Just dry fit and then covered in silicone at some point when they started to leak. A cookie sheet was found underneath the shower drain, presumably to catch water. Because that is how you solve problems!

To fix the issues every single joist was sistered with new lumber. Unfortunately due to how the HVAC closet cuts into the room this meant having to cut into the freshly painted sheet rock in the room below. Unsurprisingly, it was super moldy and gross on the inside.

IMG_2569

You can see the new lumber (lighter) running along next to every joist
You can see the new lumber (lighter) running along next to every joist, and an HVAC vent popping out.

Moisture damage was a huge problem everywhere. The tile for the floor and for the shower were just installed over the plywood/drywall. The rotting subfloor has now been replaced but you can see the dark stains on the exterior wall studs from 30 years of water damage.

Where the shower will go
Where the shower and new closet will go.

We made a decision to deviate from the original plan. Rather than put the shower on the outside corner next to the window we’re swapping it with the old closet. The shower will now butt up against the HVAC closet (which opens into the adjacent bedroom) and a combination cabinet / open shelving unit will be built between the shower and the exterior wall. The front of the shower will have a half-height wall to allow more light in. The main reason for doing this is to make the pipes easier to run, but it also allows us to make the shower whatever width we want without having to worry about running into the window.

Here's a super rough sketch of the new layout
Here’s a super rough sketch of the new layout

Hopefully by the end of this week we’ll have walls and floors again. Not that I’m likely to see it, at this point I’m too pregnant to stray very far from Philly. I only went down today because my husband was able to come with me and I was sort of daring the baby to come. I am only mostly disappointed it didn’t.