1970s Shore Home

Kitchen, Bathroom, Doom

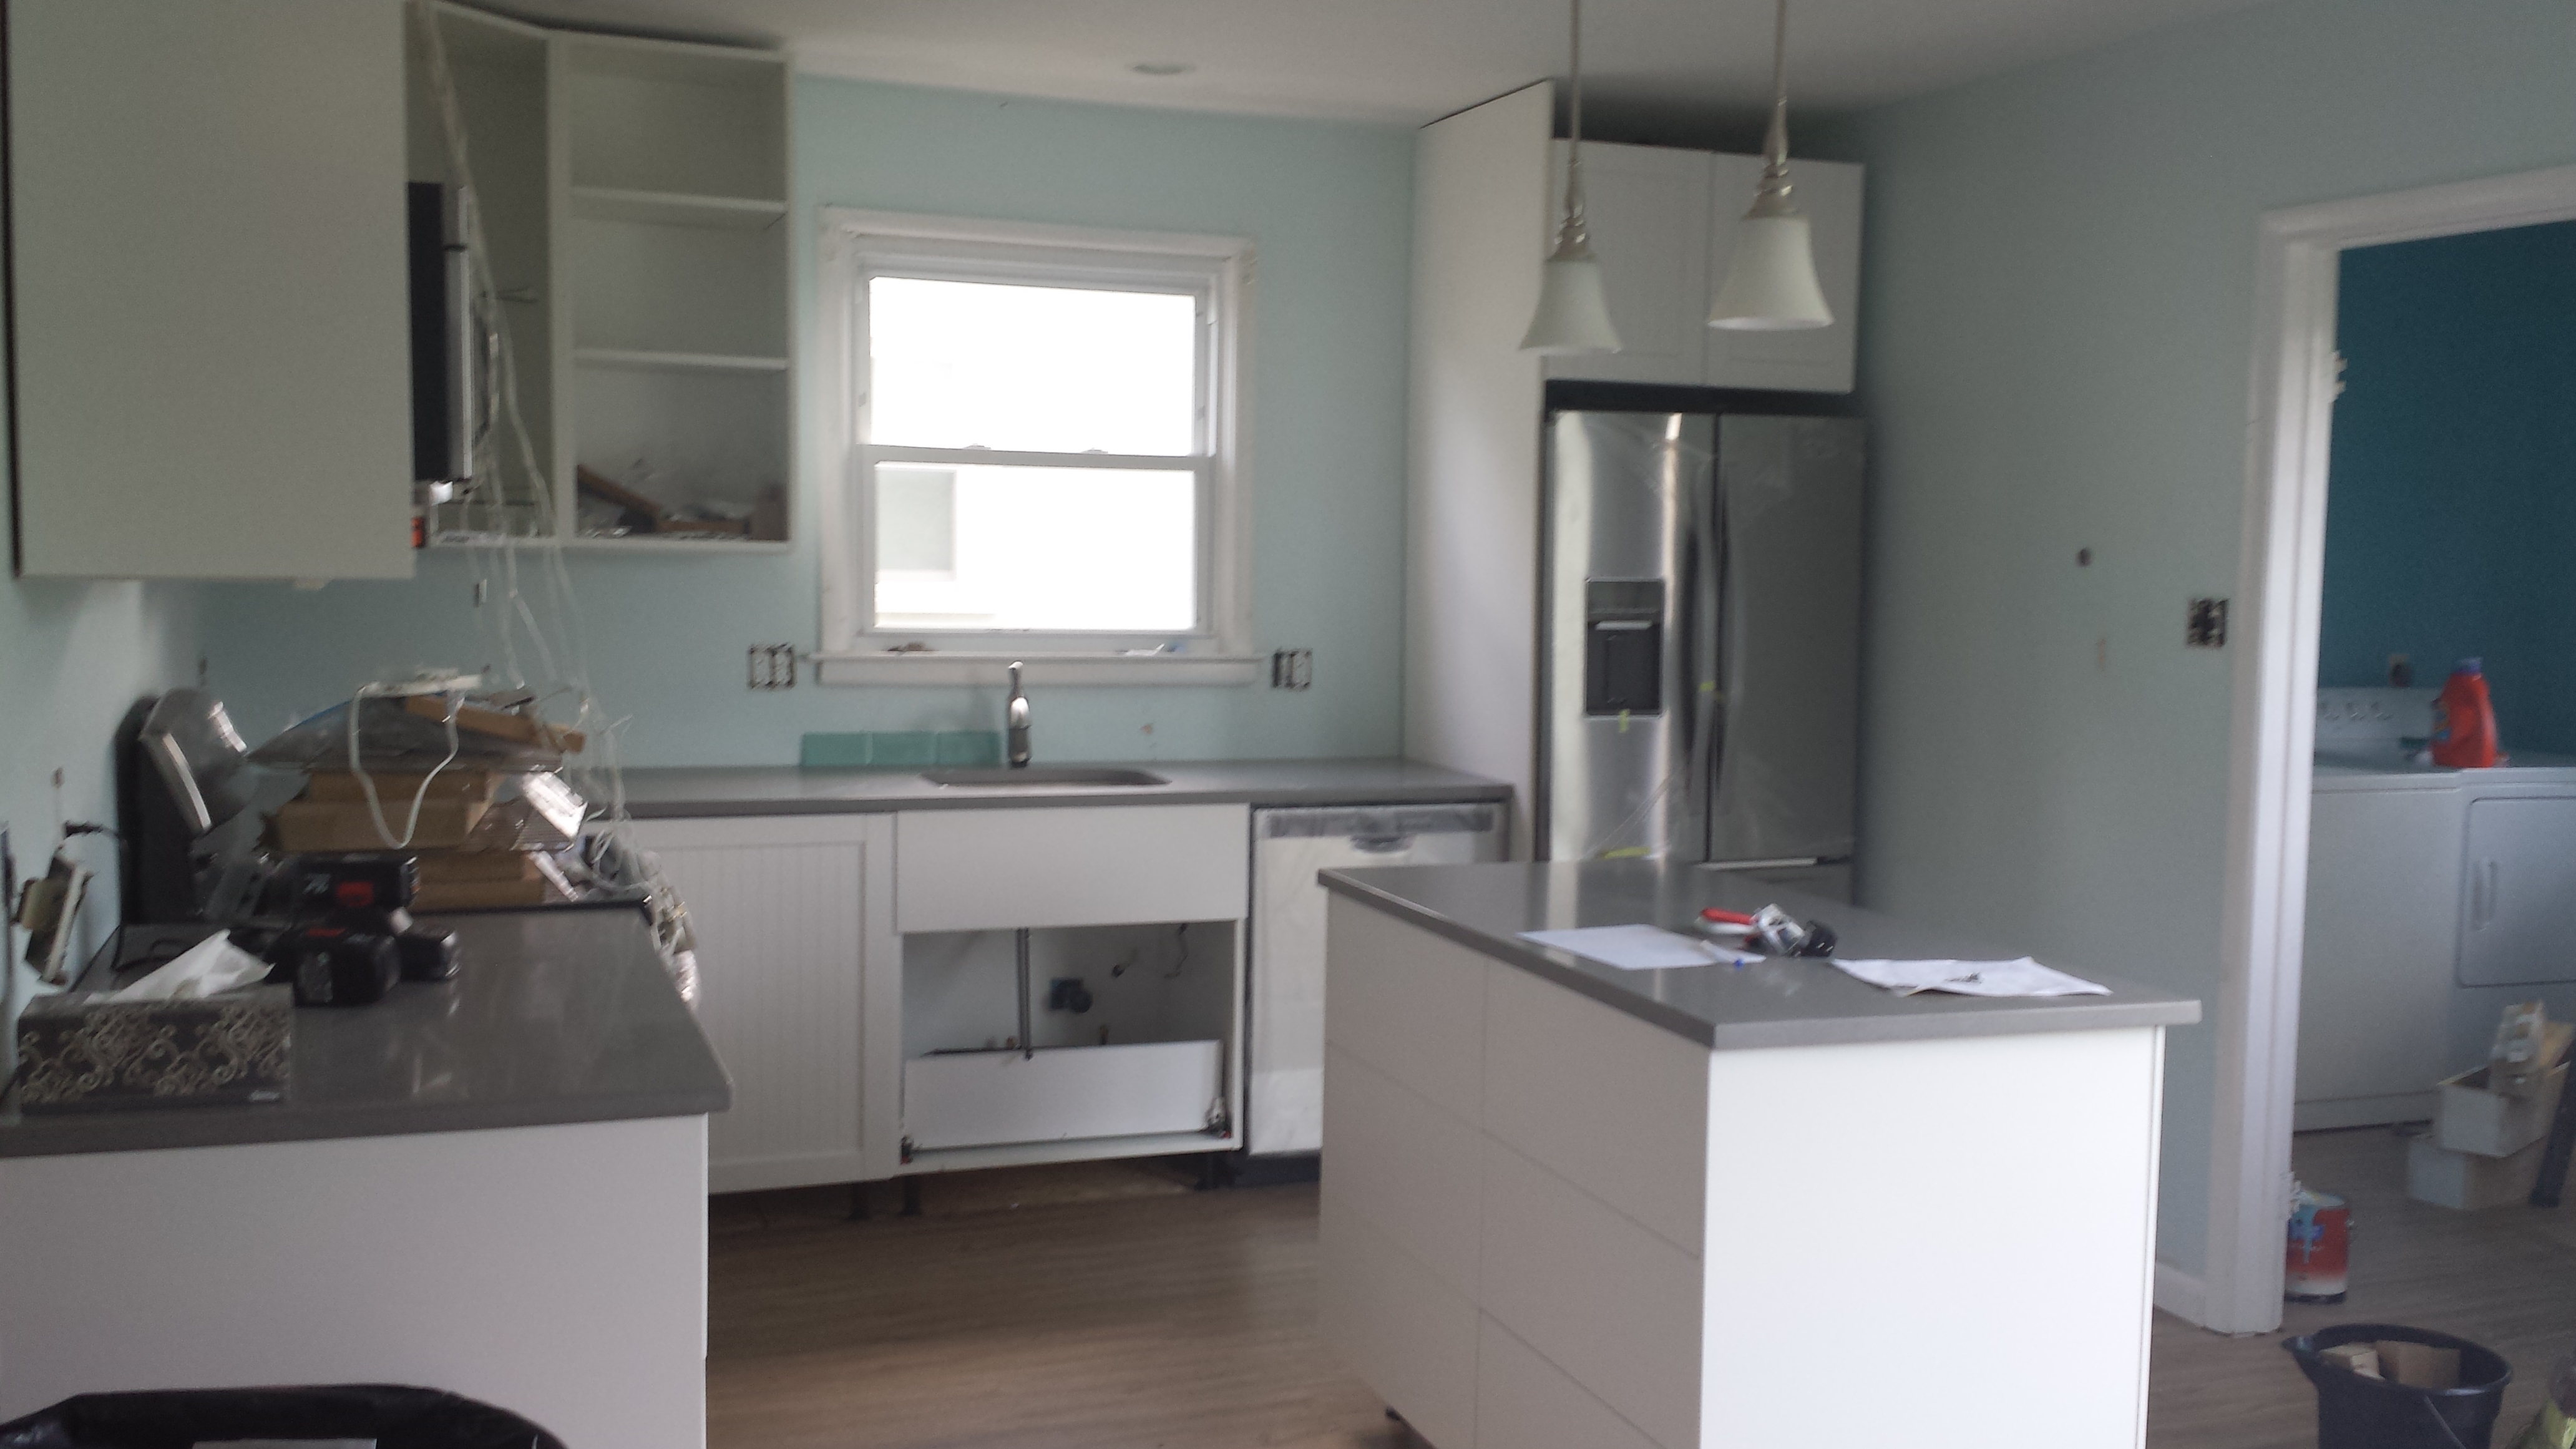
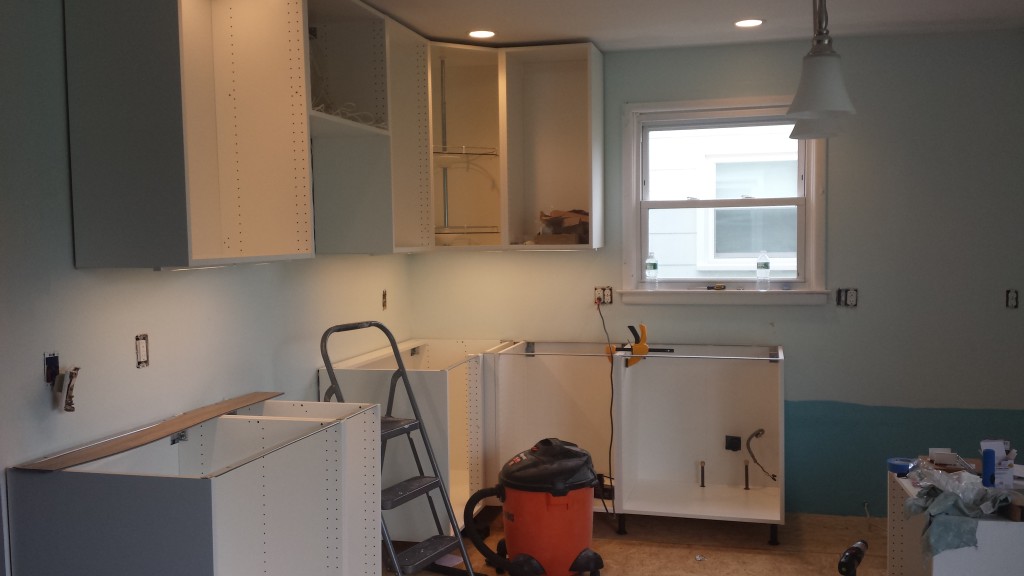
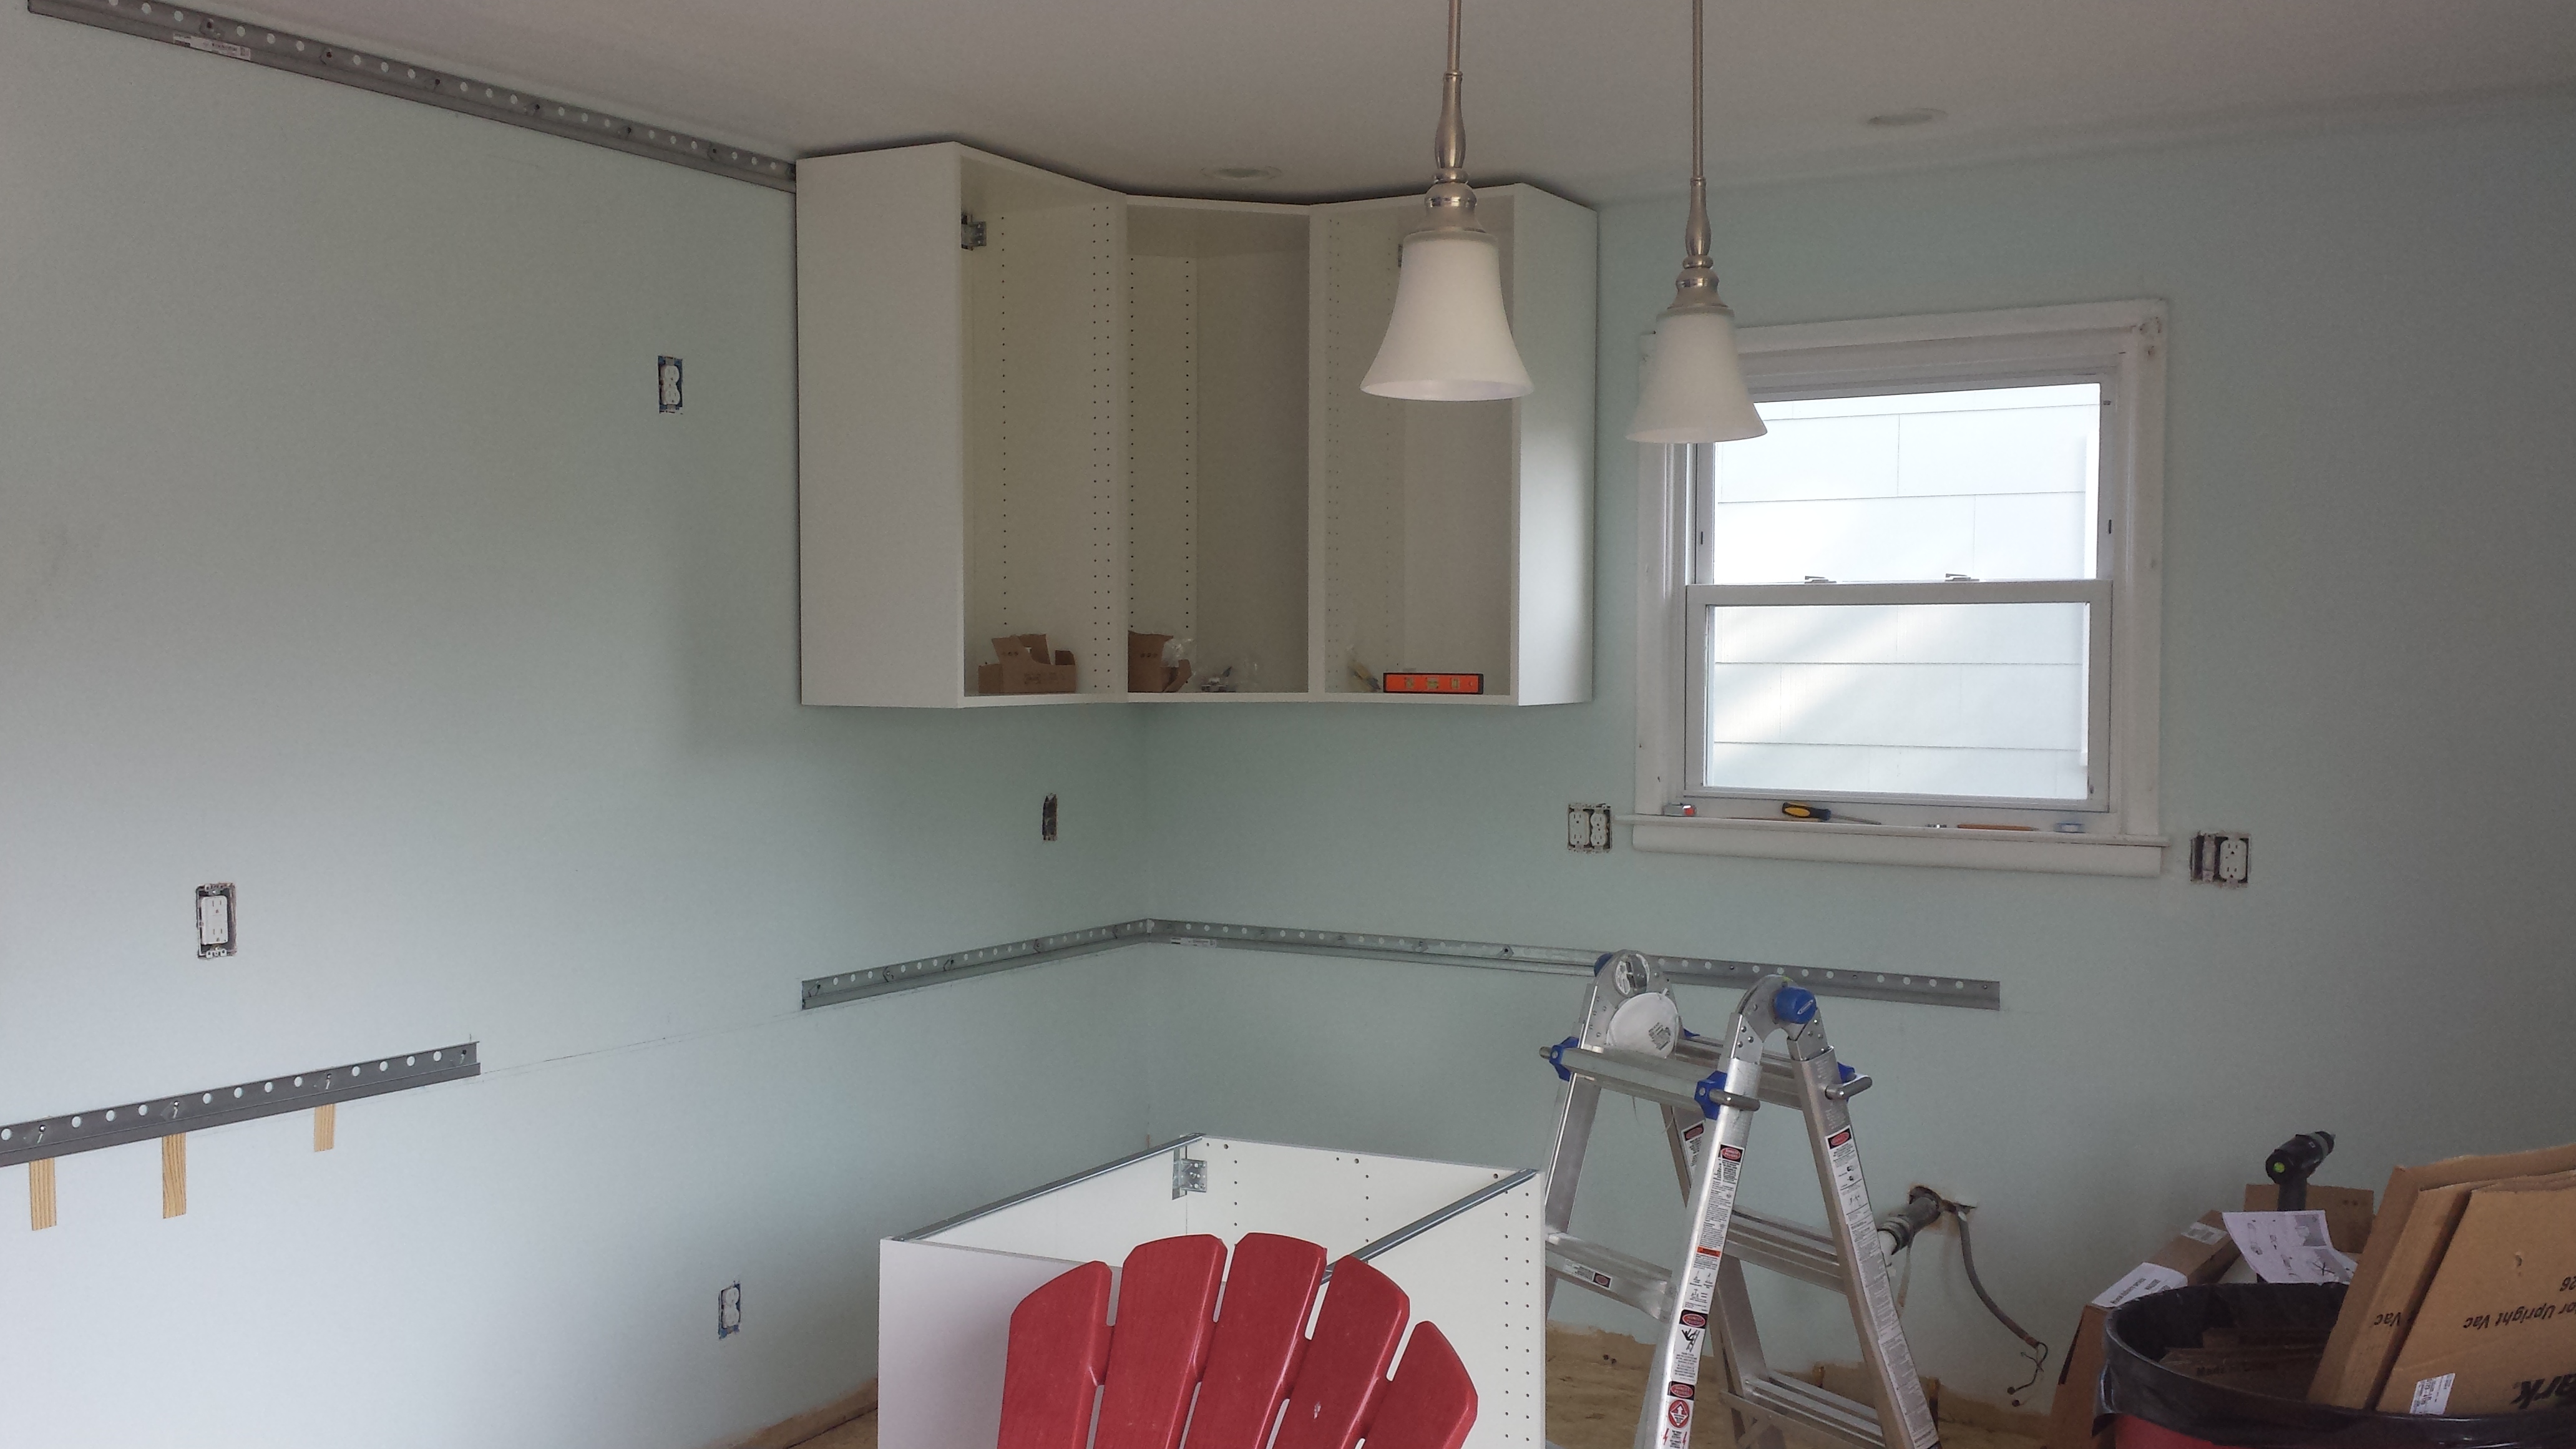
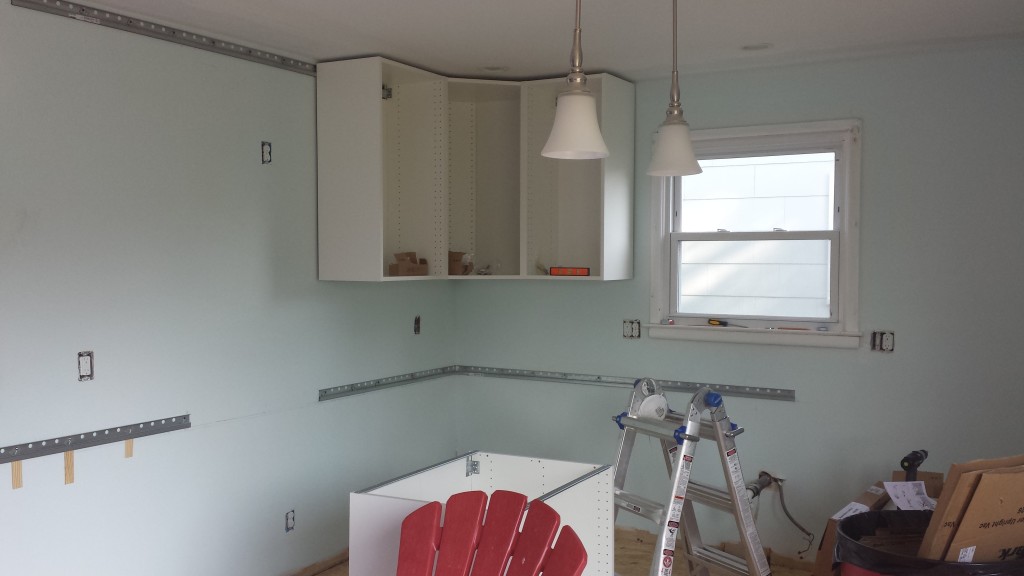
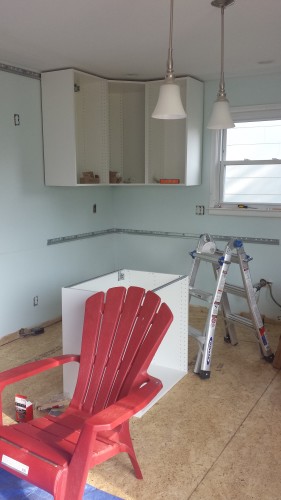
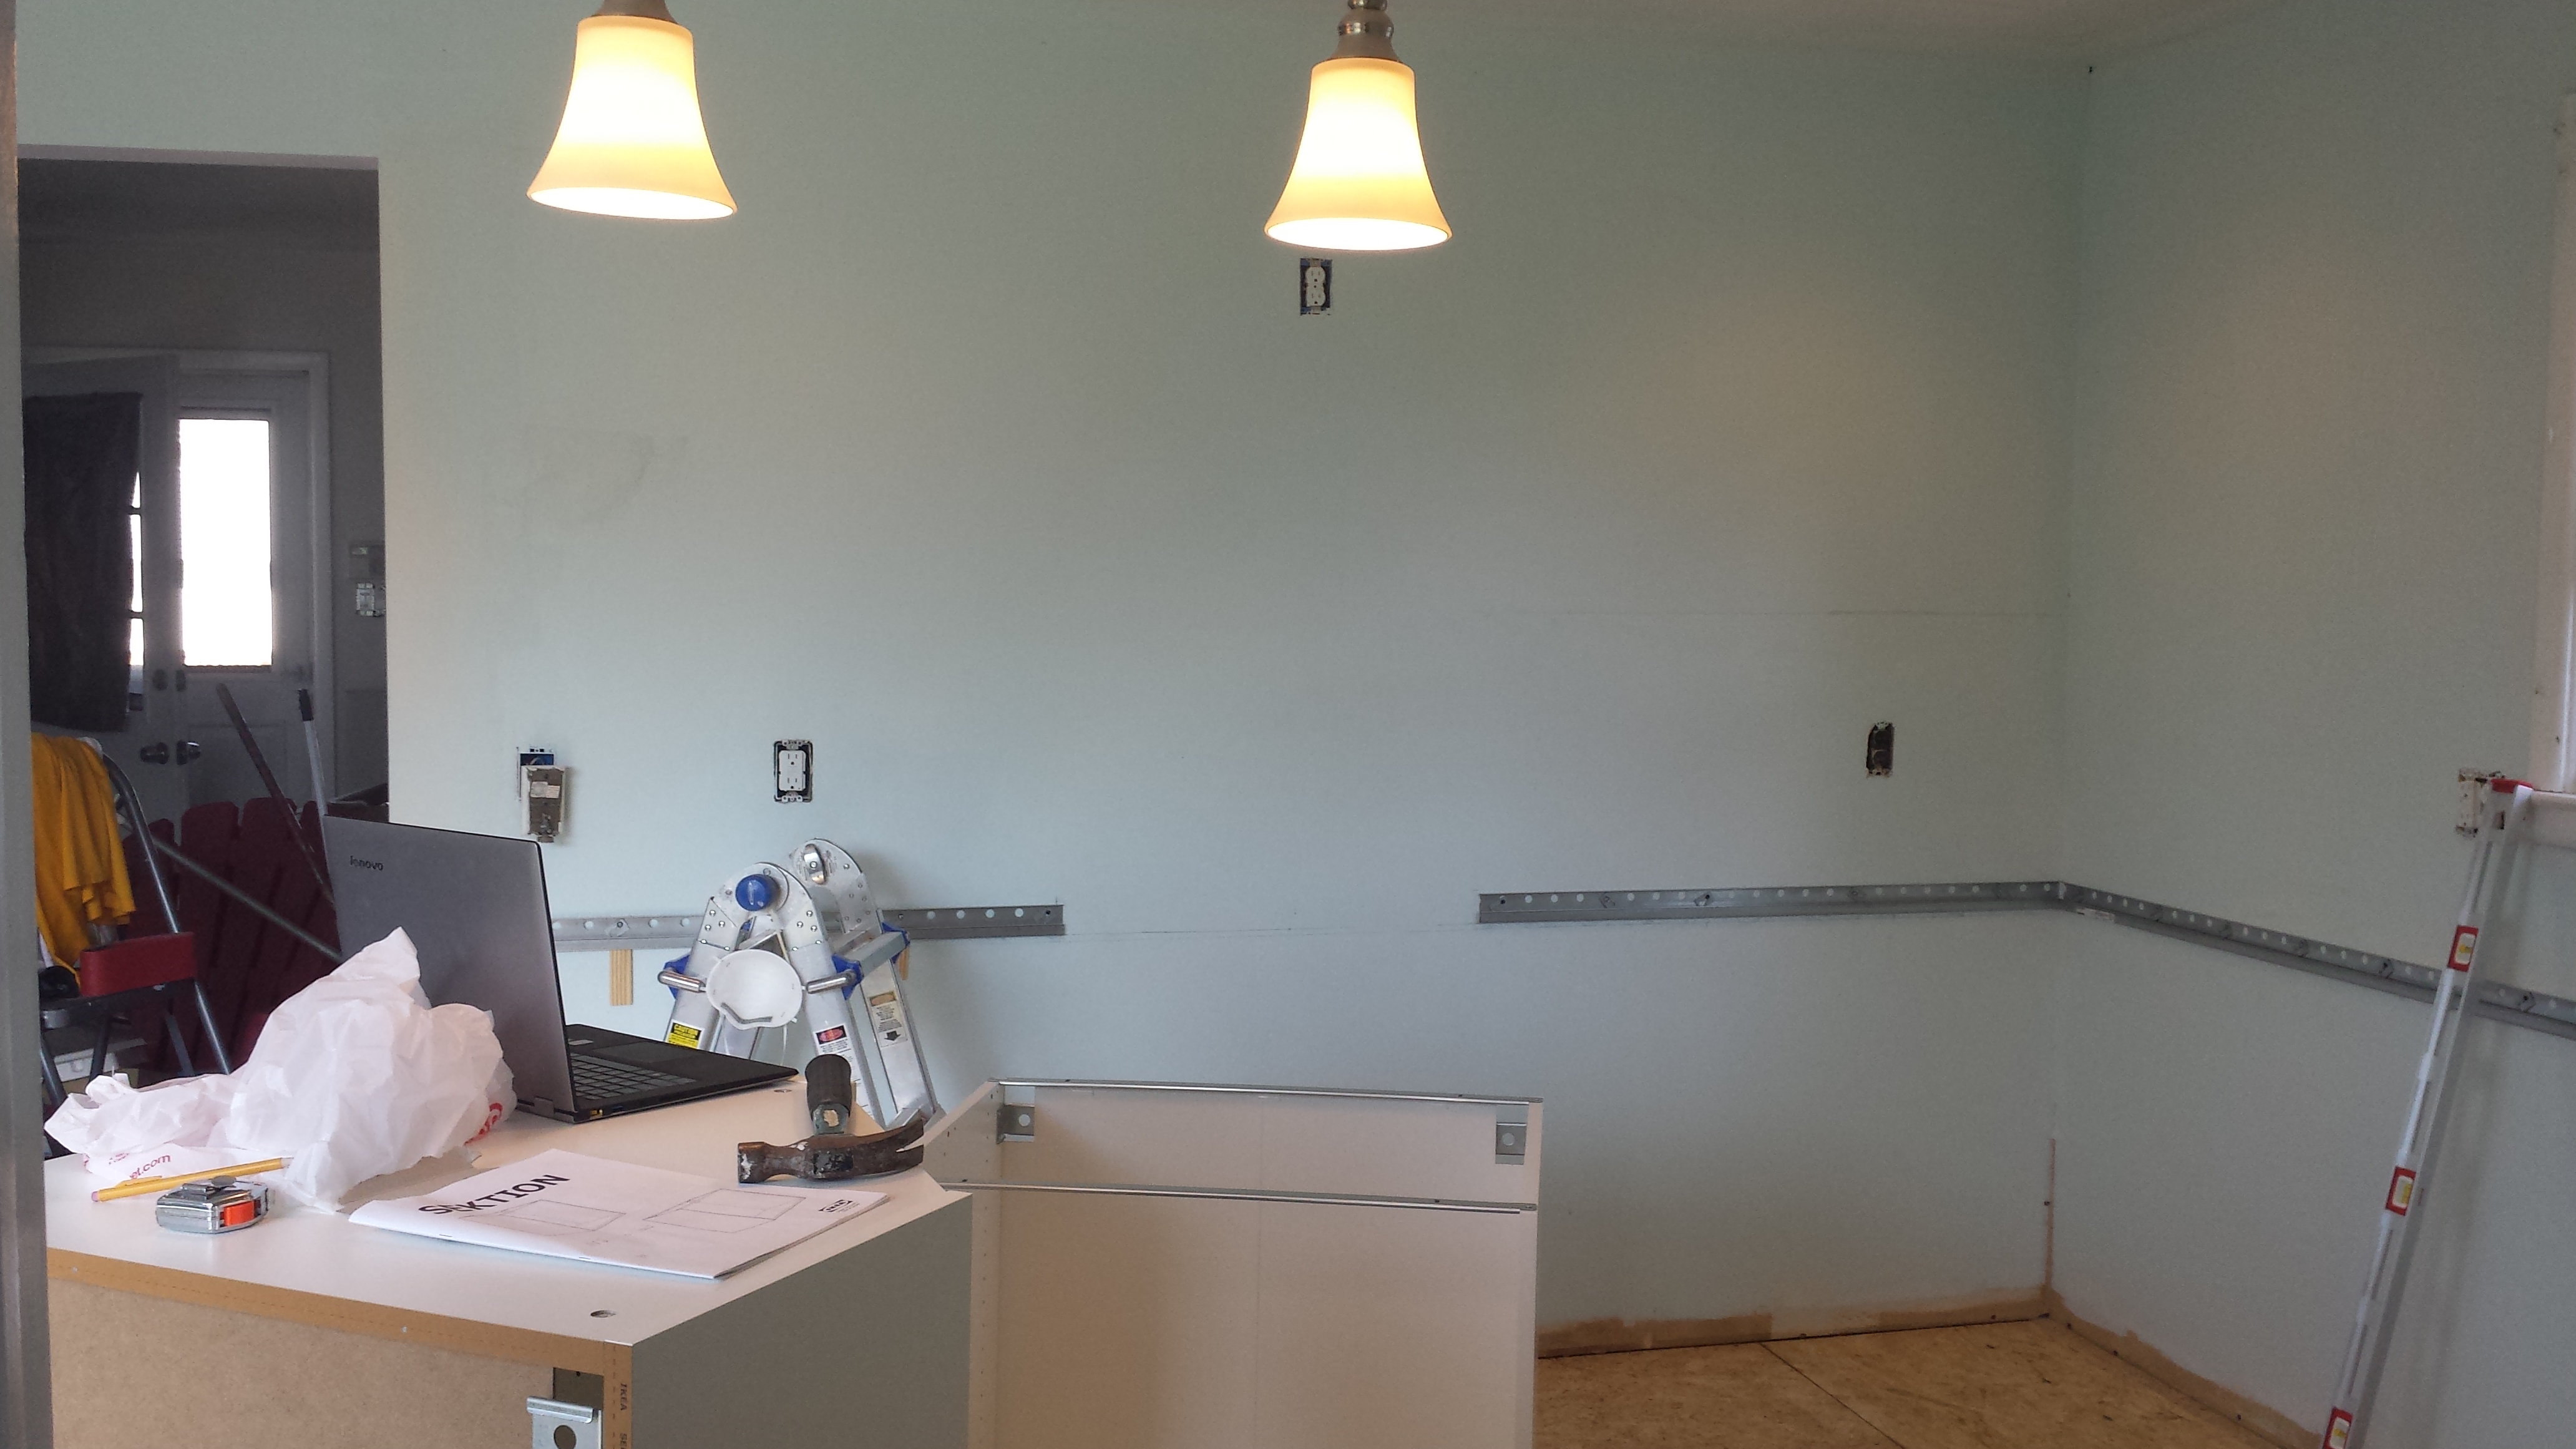
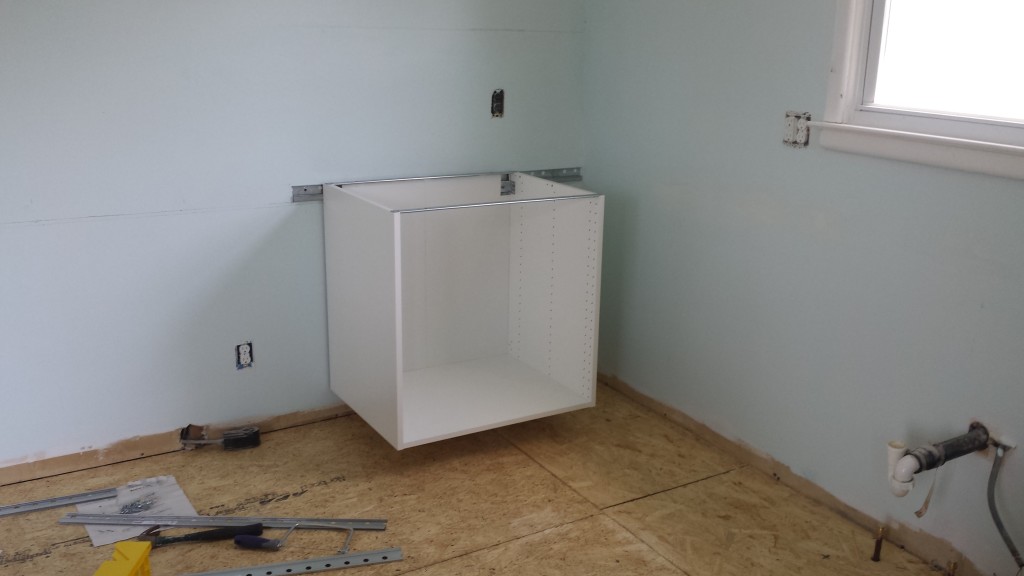
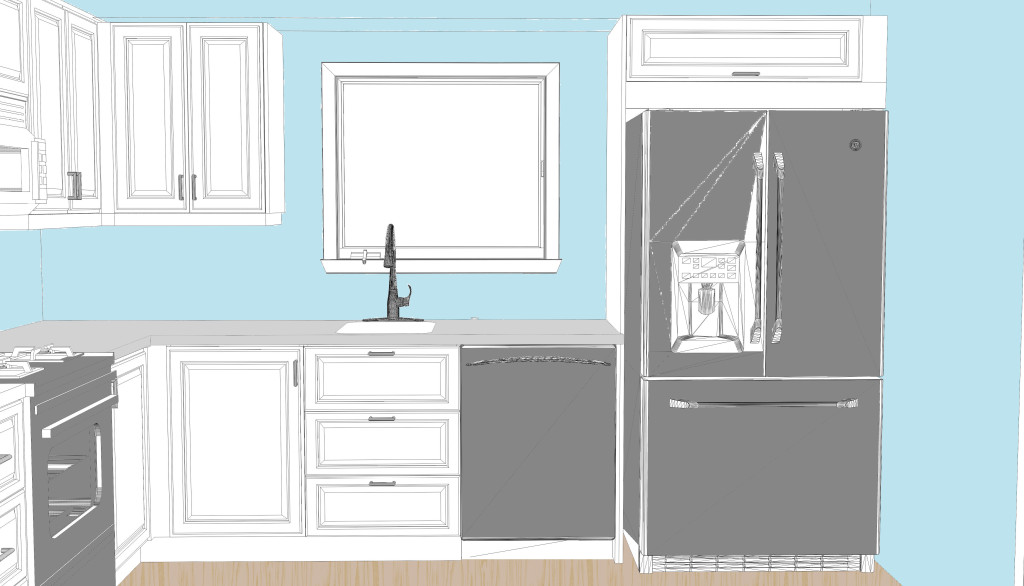
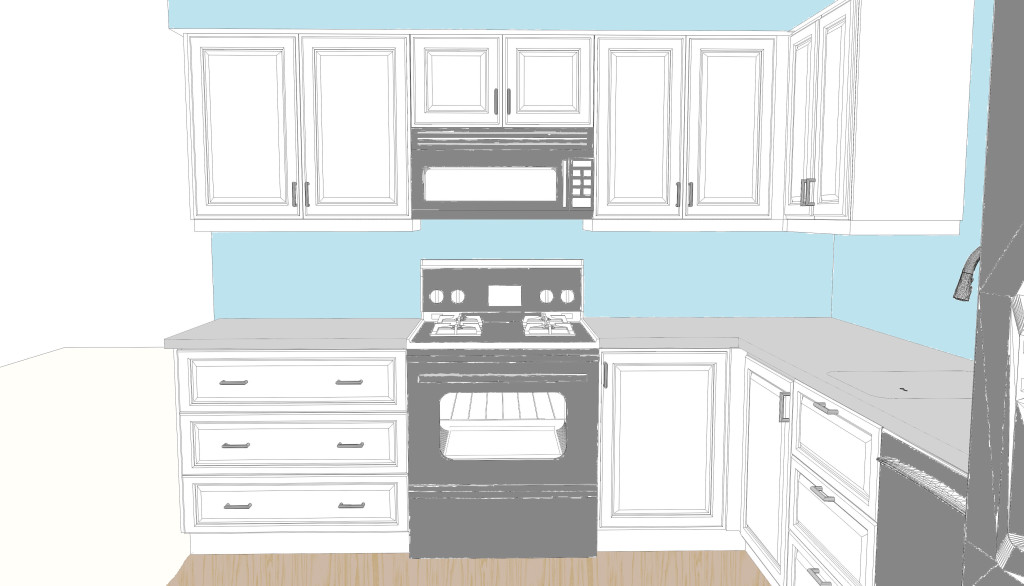
The kitchen is very near completion! I haven’t had a chance to take photos with a real camera, or write up a recap of the many things I learned in the process, but here’s a quick phone snapshot:

2015-09-24 20.39.27

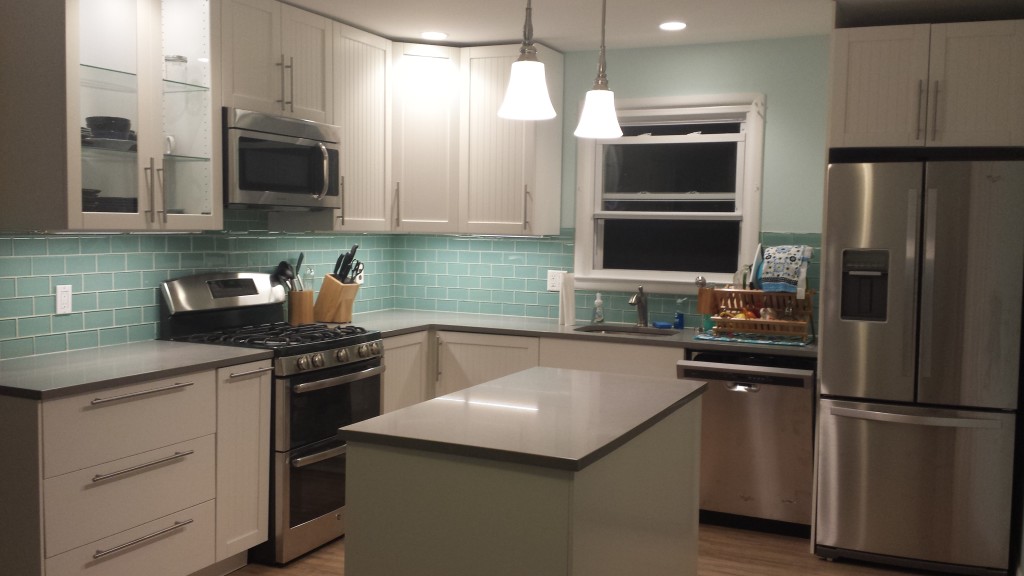
There are still a bunch of finishing touches to do, but the hard stuff is all done! We had our first weekend of using the kitchen and it worked very well, with two people able to cook without driving each other insane.

When I stepped into the house earlier this week I had a bit of a panic moment: I was immediately greeted by a very musty smell. After all this work on the house, damp musty grossness is absolutely NOT what I want. We had a really dry summer so we haven’t had a chance to see how the house holds up in a storm. After some poking around I found a window that had been left open, and thankfully after a few days the house has returned to its usual neutral scent.

In boring-but-important news, we had our structural contractor install a new beam under the house. Now the bathroom no longer jiggles around when you step! The end of the house is no longer sinking into the sand! It’s still not level, but it’s been raised a few inches. The drywall cracked in a few spots around the door frames but other than that it was a pretty painless process.

Over Pope Weekend we had 10 people total staying in the house, and no one came to blows! So I consider that a ringing endorsement for the house. Unfortunately, over the course of the weekend we also discovered that the upstairs bathroom has sprung a leak. Wamp womp. It’s a really weird leak. There’s a water stain on the ceiling below the shower, but even if the shower is off there is fresh water trickling down the waste stack (which is behind the toilet). The toilet has a tendency to run because it’s an old toilet with an old flapper I haven’t gotten around to replacing.

My totally unscientific theory is that the toilet is leaking, and since the bathroom has a distinct slant towards the shower the shower drain is no longer appropriately sloped, letting water run from the toilet to the shower where it then drips onto the ceiling below.

Please note the fact that the shower starts 6" off the ground.
Please note the fact that the shower starts 8″ off the ground.

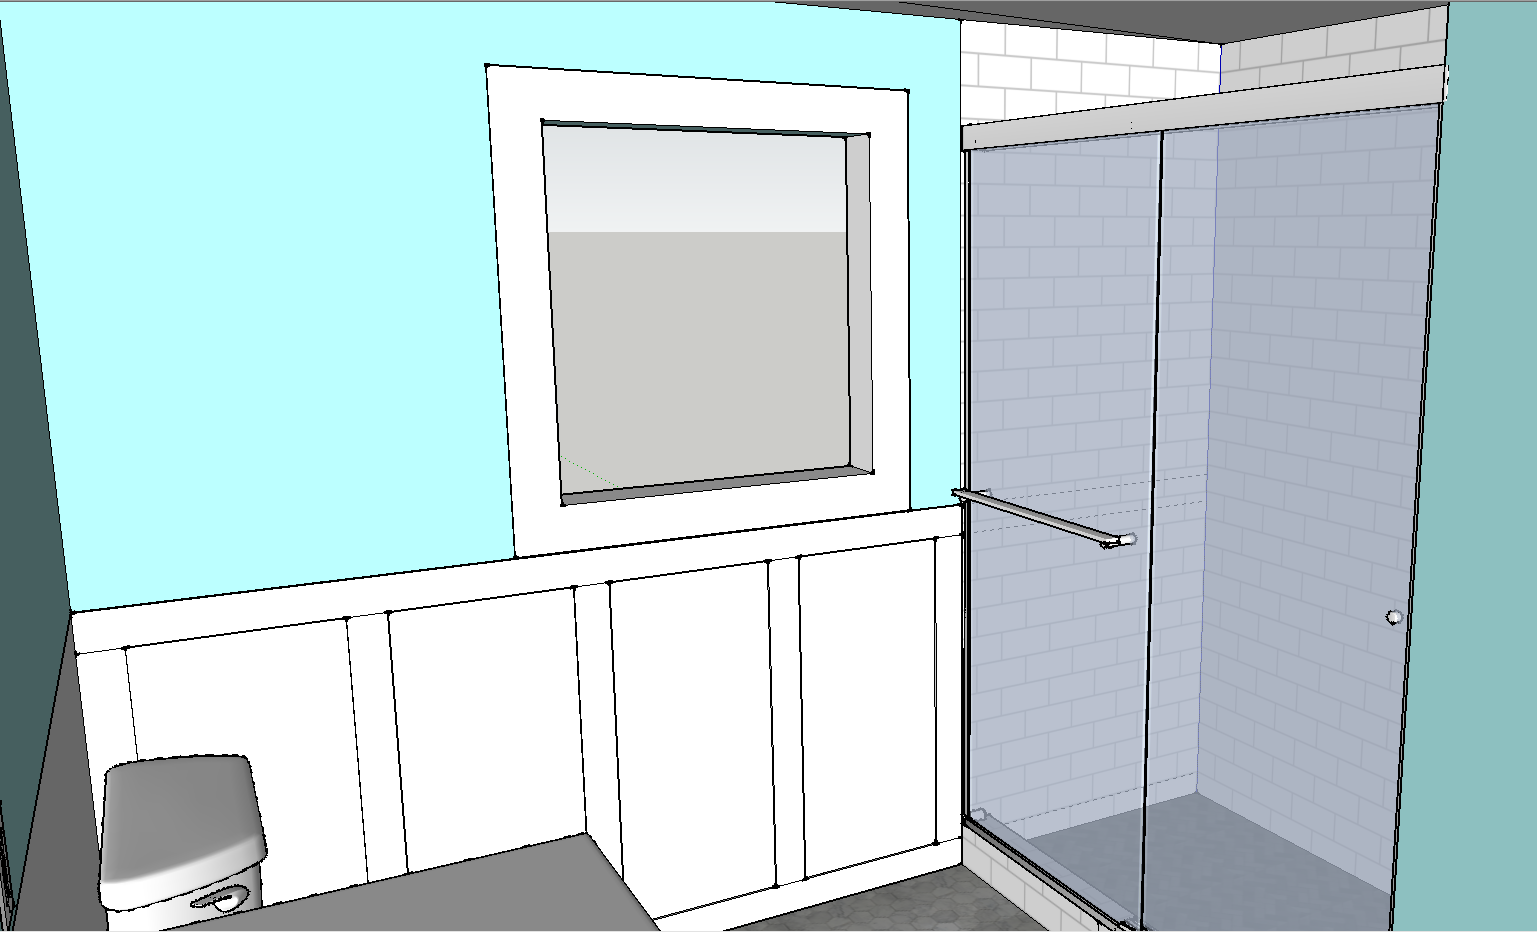
There is no easy way to access any of the waste line to see what’s going on. At the very least it will require cutting into the (freshly painted!) bedroom ceiling below it. Due to the bizarre way the shower is built, there’s also a chance we’d have to open up the shower tile. This bathroom is kind of a nightmare and we knew going into it that a full remodel was on the short list of things we wanted to do. But I wasn’t intending to tackle that until next spring at the earliest.

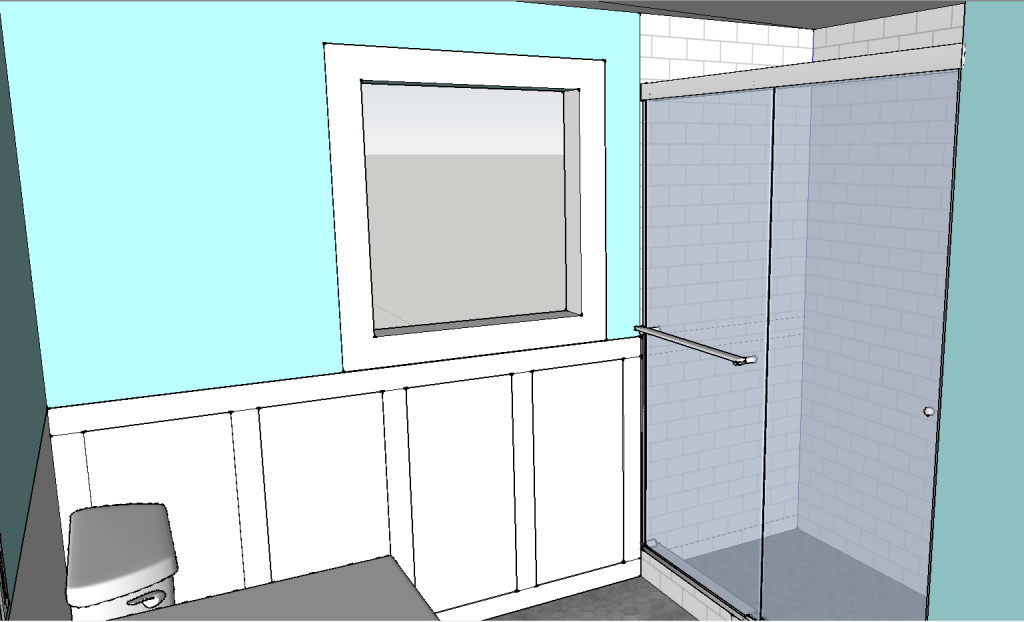
Now I’m trying to decide whether I rip up the bathroom just to fix the drain line, or just pull the trigger on the remodel now. I’ve met with two contractors so far and am waiting on estimates.

If we end up doing the bathroom now it will be a total gut remodel, and I’m contracting out 100% of it. At 6 months pregnant I have neither the energy nor time to do another major renovation.

Layout for new shower
Potential layout for new shower

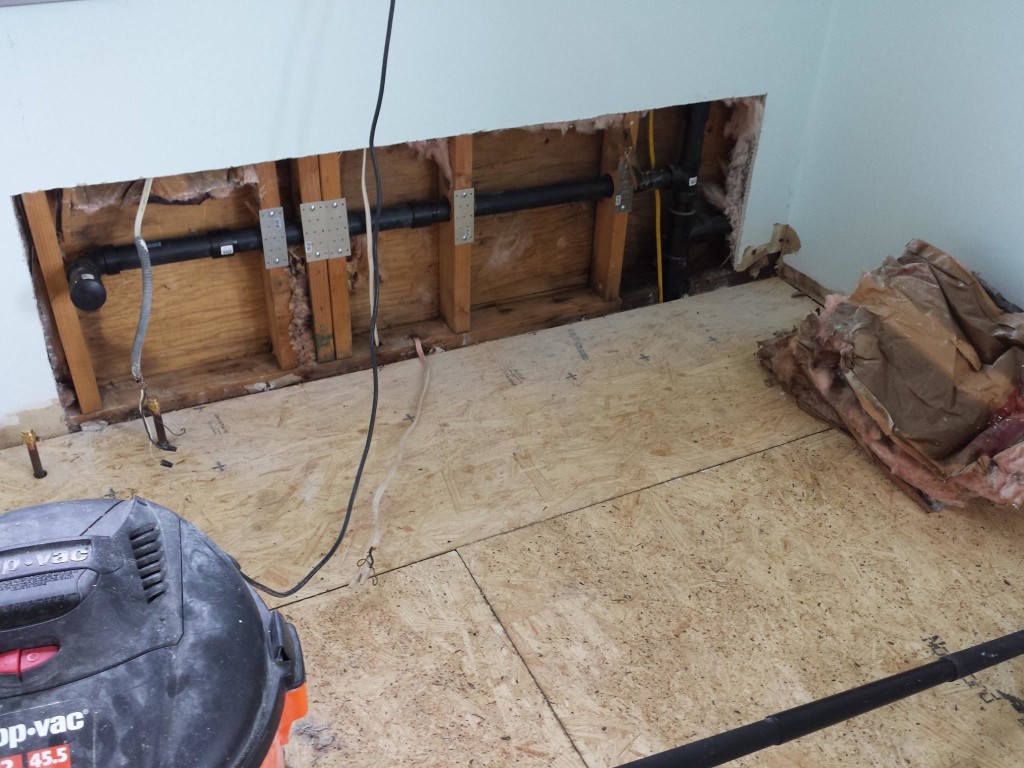
The last item on the agenda this week was preparing for the potential doom of Hurricane Joaquin. Thankfully the storm went out to sea, but we still had a really nasty nor’easter come through. My dad and I took care of some lingering to-dos, like removing the old HVAC condensation line (which was just sort of flapping around outside the house). Both of our storm doors don’t latch shut, so somewhat counter-intuitively we removed them before the storm so they didn’t fly open and rip off the door frame in the process. Getting replacement storm doors is on the short term to-do list once the storm passes.

So far almost every issue we’ve had with the house is something we’d budgeted to fix when we bought it. What we didn’t anticipate was cramming so much stuff into the first year. Many of the stuff on the “eventually” list became “now” either because they were more urgent than we thought, or because it didn’t make sense to do certain tasks separately. For example, the immediate project of “replace the broken heat pump” became “convert to gas heat” when we found out they cost about the same, and then that morphed into “convert and replace the hot water heater” since we were having gas lines run anyway. Silly me, I thought the electrical panel upgrade was gonna be next on the to-do list, but it’s actually the bathroom. Surprise!

1970s Shore Home

We have counter tops!!!

On Friday the stone company came and installed our counter tops. The kitchen looks 75% more like a real kitchen now!

New counter tops!!

The next steps for the kitchen are installing all the plumbing for the sink / dishwasher / fridge, and having the painter come paint the walls. There are a lot of detail items for us to finish (cabinet doors/handles, toekicks) and of course the big task is the tile backsplash. You can see a few of the tiles chilling behind the faucet. But we have counters and it’s starting to really feel like an honest to god kitchen.

The living room is finally cleared out and we’ve started on the flooring in the downstairs bedrooms. My friends and parents came down this week / weekend to help.

Left: the larger bedroom with the subfloor showing under the old flooring. Right: The smaller bedroom with the new flooring in place, awaiting finishing trim.

The last big exciting thing is that our gas lines were FINALLY approved by the inspector. The HVAC company is coming Tuesday to install… something. Honestly I’m not 100% sure what. Maybe the furnace, maybe the hot water heater, maybe the kitchen plumbing. They’re supposed to confirm on Monday. I’m really hoping it’s the hot water heater.

2015-07-30 12.48.04

The to-do list is still long… very long. But we’re inching closer and closer each week.

1970s Shore Home

Ikea Undercabinet Lighting

The past few weeks have been a lot of two steps forward / one step back in the kitchen. While tidying up the remaining boxes of kitchen stuff I came across the cabinet lighting, and thought “huh I wonder when I’m supposed to install these.” I’ll tell you…. before you secure the wall cabinets. Oops.

It took a while to figure out how to route all the wires. Then I had to unscrew and take down some of the cabinets, cut holes where appropriate, re-hang them, and then use a combination of fishing line and my tiny hands to fish the wires through. When the cabinets were off the wall I threaded fishing line through the holes. I secured it with painters tape to keep it from falling out, and then once the cabinets were mounted I taped the ends of the wires to the fishing line and dragged them through.

Wires coming out of a hole in the backboard
Wires coming out of a hole in the cabinet above the oven


Omlopp undercabinet light before securing the cord/cover

Installing the  Omlopp lights was kind of a pain. There are 6 light strips under my cabinets and getting them all lined up right was surprisingly tough, despite measuring everything. This is one place where oblong mounting holes that let you adjust would have been greatly appreciated, but weren’t provided. I also found that the directions are sort of backwards. They tell you to install the cord cover first, then the mounting strip,  then clip the light to the mounting strip. But it’s much easier to clip the cord cover loosely over the cord, mount the light, and then just stick the cord cover to cabinet wherever it lands.

I think most people put the transformers and cords above the cabinets. I don’t have the clearance up there so everything is going in the cabinet above the stove and I’ll put a shelf near the top to keep it mostly hidden away. There’s already an outlet in that cabinet for the microwave so the lights will be on the same circuit.

There are also two round recessed lights inside the end cabinet (which has glass doors and shelves). With the cabinet on the ground I used a 2.5″ hole saw to cut holes and then pushed the lights up into them with the cord coming out the top. I used some painter’s tape to keep the wires from flopping around and getting in the way when we put the cabinet back on the wall.

I opted for the plug-in lights because I didn’t want to deal with hardwiring them in. The transformers they plug into have a remote, but the transformers buzz whenever the remote is off. They don’t make noise when the light is on. I don’t know if I just got two duds, or if this is a widespread problem with the Ikea Ansulta transformers. Hopefully replacements will fix the problem.

I’m happy with how they turned out but a little discouraged by the buzzing issue, which I suspect is due to poorly engineered circuits in the transformers. I don’t mind losing the dimmer if it means getting ridding the noise.

Undercabinet lights installed
1970s Shore Home

Plumbing!

A brand new hole in my recently-patched walls

Last week we found out that the drain line for the sink would need to be moved down 3 inches in order to make room for the new, deeper undermount sink. This was a pretty big bummer because in order to to do it the wall would have to be opened up. The wall I just paid someone to patch and paint. Let this be a lesson to you all: do not touch any drywall until all your utilities are EXACTLY where they need to go.

In the end though it turned out to be a good thing. The old drain line was not run correctly (I am jack’s lack of surprise). It had an upward bow in the middle of it, and water does not like to flow uphill. The new line has the appropriate downward slope and some nice metal plates on the studs to keep you from accidentally cutting into them. We’ll put some new insulation in the wall before fixing the drywall, the old stuff is a little sad looking and my dad has half a roll leftover from something else.

We also got the upper cabinets leveled and secured. I didn’t take a photo because it looks exactly the same as it did last week, the only difference is that the cabinets are all attached to each other now. For geometry reasons I don’t entirely understand we had a hell of a time getting the cabinet over the stove to line up right. It’s still not completely perfect but we got it close enough that I’m just gonna tell you not to look that hard at that particular bit of cabinet.

Still looks like this, but with a big hole in the wall on the right

The new AC system is working great, both upstairs and downstairs were comfortable despite it being 80 and sunny out. The cooling system will get a lot of help once we’re done with all the painting and can put some real window coverings up.

Next time we’re down there a trip to the recycling center is NON-OPTIONAL. We tried to go today but only remembered after they were closed. We have a mountain of cardboard in the living room that is starting to take over.

I finally feel like most of the hard stuff is out of the way. We’re still waiting for the HVAC company to install the gas lines (the gas company says the meter is all set). There’s also some more stuff under the house I’d like to have looked at (ughhhhhhhhh) but none of it is super pressing. I don’t think we’ll have counters in time for the 4th of July weekend, but we’ll at least have a couple of bedrooms people can sleep in!

1970s Shore Home

Cabinet Installation Round 2: Hanging Ikea Cabinets

This is part 2 of my DIY Ikea Kitchen installation adventure. You can check out the whole series if you want to see the sausage get made!

We made a quick trip down this afternoon so we could help Chris unload the truck he rented to bring the furniture down from the condo (which is now officially SOLD!!!). It was a long day for both of us. I had to get the kid to school and get some work in before heading down, and Chris had to take 3 trains to northern New Jersey, pick up the truck, load it, drive it to the shore, and then drive it back to Philly.

I loaded up the car with the microwave (purchased during a memorial day super sale), vacuum cleaner, linens, and the kitchen sink.

My dad doesn't make a lot of "dad jokes" but he thought the kitchen sink was HILARIOUS
My dad doesn’t make a lot of “dad jokes” but he thought the kitchen sink was HILARIOUS

When last we left our kitchen was mid-installation of the rails which the cabinets hang on.

Cabinet construction zone
Lower rails up

Today my dad and I hung the upper rails. This was much easier due to the fact that there are a couple of 2x4s running along the top of the wall, and our cabinets come pretty much all the way to the ceiling. Or rather, the plan was to have them about an inch and a half from the ceiling, but the ceiling is SO BADLY WARPED that it’s gonna be close in a few spots.

After we got the top rails up I got some VERY EXCITING NEWS: The plumbing permit is in! The timing is perfect since we’ll be ready to install the sink soon. It took a little over two weeks to get, which is pretty fast as far as permit stuff goes (we were told to expect up to a month).

Next we assembled a couple upper cabinets and hung them. It’s starting to feel like something that could one day be a kitchen! Amazing!

Corner unit and flanking units hung

By the way I totally understand now why the painter wanted to wait until the cabinets were in to do the final coat of paint. I may have gouged the walls a couple times trying to lift the cabinets up. Thankfully it was in a spot that will be covered by the cabinets.

I was really proud when the corner unit was installed and hung level. Lining up the rails so everything was even was a little fiddly, especially because it’s hard for my dad and I to fit in the corner. Working on the larger sections of wall was much easier. I was really glad my dad is tall, it would have been a lot tougher if we bot had to be on ladders at the same time.

Now that the rails are up I expect hanging the rest of the cabinets to go pretty quickly. We can do one in under 20 minutes. Most people suggest assembling all the cabinets at once beforehand, but these people must have a lot of extra space in their houses. There is no way we could assemble all the cabinets and still have enough room to move around the kitchen. Our living room is full of appliances that are waiting to go into the kitchen.

I learned that Ikea hardware isn’t actually Phillips head screws, it’s a similar-but-different type called Pozidriv. Then my dad explained to me the history of phillips, pozidriv, and roberts screw heads. What my dad lacks in corny jokes he makes up for in WAY MORE THAN YOU NEEDED TO KNOW ABOUT SCREWDRIVER HEADS AND HENRY FORD. Although you can get by with a phillips it is MUCH easier if you have the correct driver for it. It turns out our drill bit set came with one, but if you’re installing an Ikea kitchen it is ABSOLUTELY worth it to spend the couple bucks on a Posidriv driver. You can get them on Amazon if you don’t feel like going to your local hardware store.

After 3 months of work and a few moments of “I’ve made a huge mistake” I finally feel like the end is in sight for the work we’re doing. There’s still a lot to do, like painting and hanging the cabinet doors. And the plumbing. And finishing painting upstairs. And starting painting the downstairs bedrooms. And installing the vinyl flooring. Not so much the home stretch yet, but at least I feel like it’s possible we might actually someday finish this project.

We got the sweet red chair at the grocery store, because the floor is filthy
1970s Shore Home

Ikea SEKTION Cabinet Install: Day 1

Over the long weekend we capped off the leaky pipes in the kitchen, nailed down the OSB flooring, and finished painting one of the upstairs bedrooms. Now all we need to be able to sleep there is a bed!

I'll iron/hem the curtains next time we're down.
I’ll iron/hem the curtains next time we’re down there

On Sunday Chris and Jen started assembling the cabinets for the kitchen while I tried to make sense of the installation instructions. It’s not easy. There are multiple sets of instructions you have to cross reference and some of them are very vague. While Ikea says “you can install it yourself” it’s clear they don’t think anyone is actually going to.

There are 3 basic components to hanging the cabinets: the rail that mounts on the wall, the cabinet box itself, and then the cabinet feet on the lower cabinets. Each of these is sold/packaged separately.

There’s the general install guide, which gives measurements but is pretty vague about how to hang the rails that go on the wall. Then the rail instructions which make sense until you go to install them, at which point you realize there are a number of steps glossed over (more on that in a sec). This plus the fact that I did not have a hacksaw to cut the rails led me to call it quits in frustration early Sunday afternoon.

Normally you can find an endless number of Ikea assembly / installation tips online. But because the kitchen system, SEKTION, is all new as of February there isn’t much available. The system is nearly identical to the European METOD system, so I was able to watch those videos in order to understand the general process. After a lazy Monday morning I went back to give it another shot.

The first step is to hang the lower rails used to align the cabinets. The general process starts like this:

  • Mark 32 3/16″ from the floor all along the wall where your cabinets are going
  • Realize your floor is not even a little bit level
  • Find the highest mark
  • Use a 4′ level to create a new, more level line based from the point where the floor is the highest

You have to go from the highest point because that’s the shortest the cabinet legs can be. If your floor is lower elsewhere that’s fine, the legs can be expanded to fit.

Next you have to hang the actual rail using a combination of drywall anchors and screws. I tried to line up as many studs as possible, but due to the spacing of the holes on the rail (which I think is still metric based) I was lucky if I managed to get two. You need to secure the rail every foot.

One lower rail, with shims because the wall is not flat

General process I used for installing rail:

  • Hold rail so that bottom of the rail is on your line, lining up the holes with as many studs as possible
  • Place 4′ level on top of rail and adjust until it is level
  • Have a friend use a pencil to mark the holes you want to use
  • Put down rail
  • Push drywall anchors into wall anywhere you need one (but don’t tighten them yet). Unscrew screws so they’re about 1/2″ out of the wall (but leave anchors flush)
  • Place screws in spots where studs are, but leave them 1/2″ or so out of the wall
  • Hang rail over screws, observe how ridiculously warped your walls are

The instructions tell you to shim any spots that are significantly recessed. This was a little more of a logistical challenge than I expected due to the drywall anchors. We ended up doing the following for shims over drywall anchors:

  • Remove the screw in the spot to be shimmed
  • Have one person hold the rail in place while the other places a shim behind where the screw will go
  • Mark the center of the hole on the shim
  • Mark where the top of the rail hits the shim
  • Remove the shim, drill a hole where the screw will go and cut off the excess from the top
  • Drill screw about 1/2″ into the shim so that it just pokes out the back
  • Remove rail from wall and place the screw/shim combo into the drywall anchors
  • Place rail back on wall over screws
  • Add weird rectangular washer things that came with the rail
  • Tighten everything to the wall, using the 4′ level to make sure everything ends up nice and straight and level

We figured out this strategy through trial and error. One thing that is very different than the old AKURUM line of cabinets is how they mount to the rail. The old ones had a nut like thing that slid into the rail, and then the cabinets lined up with it and were screwed in place. The new ones have a bracket on the back and basically just hang there, with some fasteners to keep them in place. I put one on just to see how it all worked. That cabinet is actually for the island, we haven’t assembled the bottom wall cabinets yet.

The real life bottom cabinets will have feet

The Ikea instructions tell you to measure / mark out the whole room first, but this doesn’t make sense to me. It’s MUCH MUCH easier to measure for the upper cabinets once you have your lower rails installed and level. I added 1/2″ to my measurements for the upper cabinets because I need a slightly taller backsplash. The backsplash tile we have is 3″ tall, and Ikea’s cabinet spacing is designed for 18.5″ vertically. To avoid having to cut the tile lengthwise I’m adding a little extra space to make room for the grout (which will be 1/8″ spacing between each tile and the counter/cabinets).

We called it a day after getting all the lower rails installed. The upper rails will be a little more annoying, because they’re up high and they’re much longer. We could do it with two people but I think it would be easier with three.

Cabinet construction zone

We’re ever so slowly inching towards being able to get the appliances out of the living room!

Want more Ikea cabinet hanging goodness? Check out day 2 of Ikea cabinet installation, or  check out the whole DIY Ikea Kitchen Installation process..

1970s Shore Home

Kitchen Design First Draft

The first draft of the kitchen layout came in tonight. It’s a start, but there’s definitely some stuff I want to change (and a few things I realize I forgot to tell the designer). The coloring is all mine, it came to me black and white.

Perspective View
Perspective View

I totally forgot to tell them we plan to remove the soffit (i.e. the drywall box above the cabinets), which would make the space above the refrigerator way less awkward. I’m not sure if we’d raise the cabinets up higher, maybe just the ones above the oven? I’m short so I don’t want to put stuff too high, but it would be nice to have more clearance between the microwave and the range.

Top View
Top View

I’m really not sure how I feel about the island. I plan to tape it out this weekend to see how it feels in the space. It adds some much needed counter area but I’m worried it will feel awkward. I do like that one person could be cooking at the range, one person could be cutting veggies by the sink, and one person could be prepping on the island without anyone getting in each others’ way.

Back Wall
Back Wall

I forgot to tell them to put in a double sink, and I just generally don’t like the layout for the area by the window. One solution would be to move the dishwasher into the island (easy since the kitchen is above an open crawlspace). It would mean running extra water and electrical lines, but it might be worth it to get that space a little less awkward. Alternately I could just pick out a smaller refrigerator which would free up some space and give us more room for a bigger sink (but it would still be off center, which I might just have to live with). The off-center-ness of the sink would be a lot less irritating with a lower profile fixture as well.

Left Wall
Left Wall

Seeing this drawing has me convinced we should remove the little partial wall that is currently next to the fridge (visible here). It makes no functional difference but it makes the room seem much more open without it. The wall does have some electrical in it so I’d have to have that moved. An electrician is coming down on Friday to quote everything.