lased

Test Tube Spice Rack

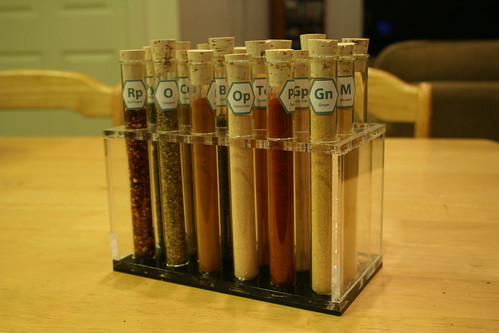
A friend of mine had all her spices stolen appropriated when her old roommate moved out. So I made her this spice rack for Christmas:

Spice Rack

It holds up to 18 test tubes of spices, pre-filled with 12 and each labeled with a suitably scientific sounding abbreviation.

Each glass tube holds about 1 ounce of spice. The rack is made from 1/4″ acrylic. I can put the plans up on thingaverse if anyone is interested, but it’s pretty self-explanatory.

The idea was unabashedly yanked from Dean and DeLuca, but I like my version better. Theirs is more steampunk, mine is more “cooking class 2120.”

Crafting, lased, LEGO

Meta Lego Storage

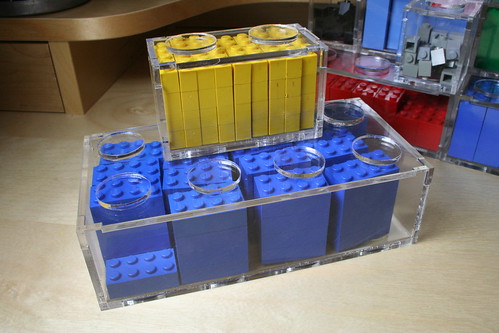
In need of a way to organize and store my Lego obsession, I made a bunch of acrylic boxes which not only hold Legos, but also stack and interlock similarly:

Each brick box holds 64+ of the same-shape piece. So the 1×1 box will hold 64 1×1 bricks, and the 2×2 holds 64 2×2 bricks. The larger ones hold a few more due to how the sizing works out. The 1×1 box is 40mm per side (external dimensions).

I posted the patterns on Thingiverse should anyone wish to make their own. No,  I’m not going to make and sell them. They’re time consuming to make, and plus I’m pretty sure Lego would sue me. If you don’t have access to a laser cutter, I’d suggest using a service like Ponoko.

The patterns were generated in OpenSCAD using the following code. Change “rows” and “cols” to get the lego size you desire. By the way, I’m teaching a class on OpenSCAD in Brooklyn next weekend!

fundamental_unit = 0.8;
thickness =3;
h_pitch = 10;
v_pitch = 12;
tform = 5;
knob = fundamental_unit*h_pitch*tform;
module side(rows){
	lwidth = rows*fundamental_unit*h_pitch*tform;
	lheight = v_pitch*fundamental_unit*tform;
	difference() {

		square(size=[lwidth, lheight]);
		translate(v=[10,0,0]) square(size=[lwidth-20,thickness]);
		translate(v=[10,lheight-thickness,0]) square(size=[lwidth-20,thickness]);
		square(size=[thickness, 10]);
		translate(v=[0,lheight-10]) square(size=[thickness, 10]);
	translate(v=[lwidth-thickness,10]) square(size=[thickness, lheight-20]);
	}
}
module top(rows,cols,holes){
	lwidth = rows*fundamental_unit*h_pitch*tform;
	llength = cols*fundamental_unit*h_pitch*tform;
	difference(){
		square(size=[lwidth,llength]);
		square(size=[thickness,10]);
		square(size=[10,thickness]);
		translate(v=[lwidth,0,0]) square(size=[-thickness,10]);
		translate(v=[lwidth,0,0]) square(size=[-10,thickness]);
		translate(v=[lwidth,llength]) square(size=[-10,-thickness]);
		translate(v=[lwidth,llength]) square(size=[-thickness,-10]);
		translate(v=[0,llength]) square(size=[10,-thickness]);
		translate(v=[0,llength]) square(size=[thickness,-10]);
		if(holes==true){
			for (i = [1:cols]){
				for (j=[1:rows]){
				translate(v=[j*knob-knob/2,i*knob-(fundamental_unit*h_pitch*tform)/2,0]) circle(r=fundamental_unit*6*tform/2);
				}
			}
		}
	}
}

rows = 2;
cols = 4;

h_spacing =  rows*fundamental_unit*h_pitch*tform+10;
l_spacing =  cols*fundamental_unit*h_pitch*tform+10;
v_spacing = fundamental_unit*v_pitch*tform+10;

side(rows);
translate(v=[ rows*fundamental_unit*h_pitch*tform+10,0,0]) side(rows);
translate(v=[0,v_spacing]) side(cols);
translate(v=[ cols*fundamental_unit*h_pitch*tform+10,v_spacing]) side(cols);
translate(v=[0,2*v_spacing]) top(rows,cols,true);
translate(v=[ rows*fundamental_unit*h_pitch*tform+10,2*v_spacing]) top(rows,cols,false);

In the next batch I’m going to make the nubs a little smaller than the holes. They work now, but it’s a bit fiddly getting everything to line up just so. A little more forgiveness would be nice. Also, OpenSCAD does strange things with circles. Rather than simply write a circle in the DXF, it represents it as a bunch of line segments. I’m not sure if there’s a way around this, but it’s marginally irritating.

You can download a .dxf for a few different box sizes on Thingiverse.
I’ve also created a Flickr Collection for my various Lego stuff.
Meta Lego

Business, Crafting, lased

Packaging Evolution

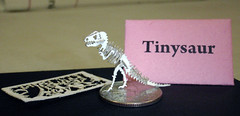
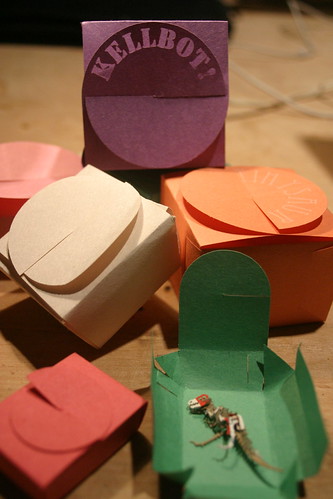
My packaging has been through a number of iterations since the first Tinysaur was shipped.
Tinysaur
The first was an “Oh no I need packaging” sort of thing, where I haphazardly went to Duane Reade to pick up the least boring paper I could find – which turned out to be construction paper.

I ran the construction paper through a laser printer (as in toner, not coherent light) to throw the word “Tinysaur” on the outside, and then cut the envelope shape out on the laser cutter.2009-01-12 Tinysaur package closeup I didn’t really have a decent method for registration (lining up the print with the cutting) so it took a while. And folding the little envelopes turned out to be a pain.

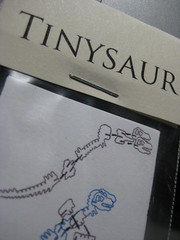
After having to recruit friends to help me fold tiny envelopes during the holiday rush, and running out of construction paper, I got a little smarter. I started using bags with staple-tags, much easier to cut. Now they look almost respectable.

But they were still not quite ready for a retail-side display… which I realized when I was talking to a purchaser for a chain of museum shops. Oops.

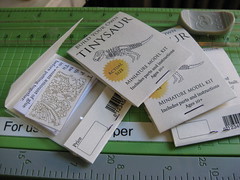
New PackagingWhich brings me to my current matchbook-style packaging. It takes a little more energy than the staple-tag, but feels nice and solid, and gives me plenty of room for marketing copy (uh… about that…).

Next on my packaging to-dos is to redesign the instruction sheets, which I’ve been putting off for a while. Ugh.

Crafting, lased

Today’s Wooden Displays

Most of the last week has been spent prepping for a craft show, my first one in about two years. In order to get ready for the craft show, and also to attract some more wholesale clients, I’ve been working on some nice wooden display stands for Tinysaur.

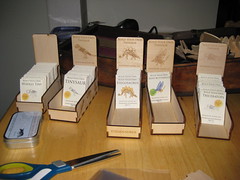
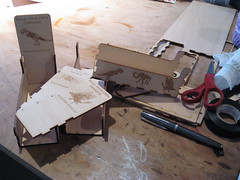
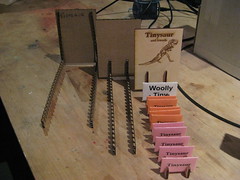
Getting ready for Prime Time These are the displays I’m using for the upcoming show. They’re laser cut/etched wood. Each stand holds a different model Tinysaur. The stand on the far left is a prototype, hence its lack of a dinosaur etching.

Each display holds about 30 Tinysaurs. Each Tinysaur is contained in its own matchbook-style packaging. I plan on using these displays to transport the Tinysaurs, but more on that later.

Designing a display takes a while, and is an iterative process. The first time I cut one, I realized the front piece was too short, and had to make a new one. I also decided the runners on the sides were too short, it looked a little stumpy.  So I added two more inches to it. Which turned out to look a little ridiculously long.
Work in progress
When I took the first raster-etched stand out of the laser, I realized I’d made another mistake. I forgot to mirror the right-hand runner, so the dinosaur silhouettes ended up on the wrong side. Oops.

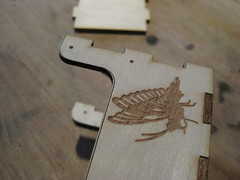
I also had to do some experimenting with the raster image of the dino that appears on the “flag.” The line drawings have a lot of thin lines, which tends to look sort of anemic when etched. I went into Photoshop and used a combination of filters to beef up the lines. You can see the difference in this picture.

Lastly there was the issue of transport. The flags that stick out of the top make it sort of unweildy to pack, and they’re also sort of fragile. Rather than risk them breaking off in transit, I made a second set of backs which are only as tall as the sides.
Raster close up
Then I drilled a few holes in each side of the stand. Since I want the backs to be removable, I don’t want to glue them on. Instead I’m going to run some elastic through the holes and around the back. That way I can switch the backs out easily, and they’re held in place by elastic.

I think the elastic will work OK, but it’s sort of fiddly. I think a beter option would be to use some small bolts to keep things in place. Something to think about for the next version.

Crafting, lased

Laser Sponge

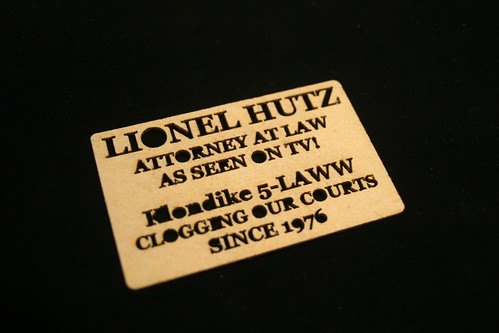
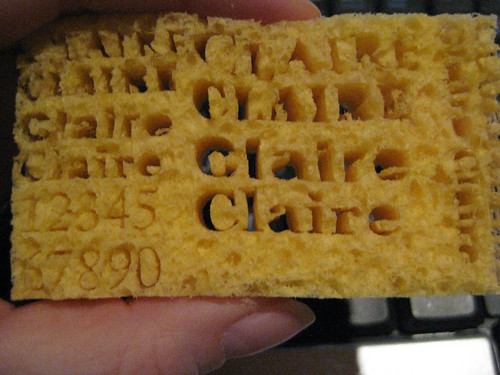
A friend of mine asked me to test out laser cutting on some compressed sponges, which she wants to use for a business card. It came out really well!

Compressed Sponge

Test #2

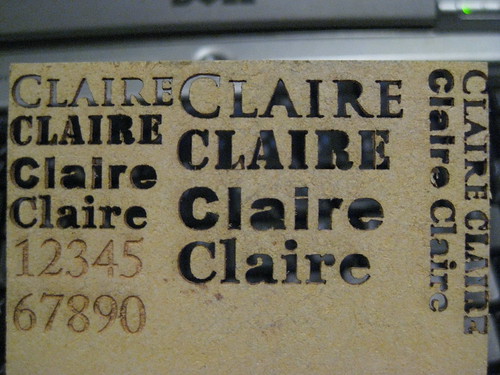
Both the raster and vector cutting was done at 100% power and 100% speed. Cellulose is surprisingly resiliant stuff. The serif font looked OK down to 14 pt (sideways, on the right). The rest of them looked better at 18 pt and up. Click on the photo above for specific fonts used.

Test #2 expanded

The raster is nice betcause you get to keep the counterforms (spaces inside the letters) rather than having them fall out. You can also get much finer looking lines with the raster, and because it doesn’t go all the way through it doesn’t make the sponge unstable. But, it takes longer, and doesn’t look as nice pre-expansion.

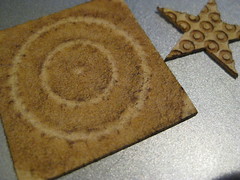
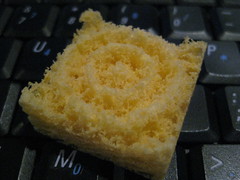
Interestingly, you can also get some pseudo-3d effects with the raster settings and gradients, which I played around with some.
flat sponges rings - AFTER h2o

By the way, the sponges look awesome when they’re expanding:

The sponges themselves are available through craft stores including Blick, or if you want someone else to do the cutting, they’re for sale on Etsy.com.

lased, SDXF Documentation

Tinysaur Display

Tinysaur Kit Display

I’m helping my friend Sara at the Squidfire Holiday Market in Baltimore, Maryland on Sunday. She suggested I bring some Tinysaurs, and so I made a display to neatly hold the Tinysaur kits.

I generated the pattern with a python script I wrote, using the sdxf library.

If you’d like to make your own, the DXF files are up on Thingiverse, or you can grab the python scripts and make one to your own dimensions. I cut it on the laser, but there’s no reason it couldn’t be cut on a scroll saw.

first, second, success

Here you can see my first attempt, second attempt, and final. The first two were in cardboard, fantastic for prototyping.

Once all this craft show stuff is over I will probably make a few available in my Etsy shop in case folks who do craft shows are interested in one.

lased

Woolly Tiny


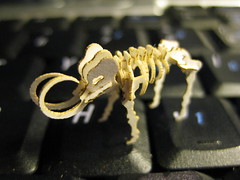
Not wanting to get Tinysaur to get all the spotlight, I bring you… WOOLLY TINY. Like a Woolly Mammoth. But Tiny.

The pattern comes from the epilog website and the assembly was done with a pair of tweezers and a baby syringe full of Elmer’s glue.

If you’ve always wanted your own mini mammoth, or just want to show off you have the steadiest hands of anyone ever, you can pick up the pre-lased parts on Etsy.

lased

Folded paper boxes

I’ve been working on learning Processing, a language which is a bastardization of Java used for drawing pretty pictures (among other things). Most of its functions are based around drawing/graphics.

Processing project #1 was to generate templates to be cut on the laser cutter. Specifically paper boxes, because I needed something to package my Tinysaurs in. They end up looking like this:

Laser-cut boxes

You enter the depth, width, and height of the box, and Processing draws the pattern

Processing has a PDF library which I use to generate the template in PDF format, which Corel Draw is able to read. I’m looking into using Python instead of Processing, because it apparently has a nice DXF library. Although the fact that Adam scoffs at Processing makes me want to keep using it just to annoy him.

The Processing program is available in the NYC Resistor SVN repository. Which is public, hooray! The code is only vaguely commented, but it should be pretty clear what it’s doing. Maybe.

Of course you dont’ need a laser to cut these out, and xacto knife would work just fine. But… I have a laser so I use it.

If you don’t want to mess with Processing and just want to print box patterns, you can do that too. I’ve generated a bunch of sizes:

You may need to right-click and save the pdf to your hard drive to get it to load.

lased, Networked USB Lamp

New Project: Lamps

Hooray, a new project!

At work it often gets very loud in my office, so everyone wears headphones. Unfortunately this makes it difficult to get someone’s attention, because they’re all rocking out to David Bowie or whatever. Also, it gets very dark in my office because we don’t have desk lamps.

The solution, clearly, is networked USB lamps that you can make blink if you want to get someone’s attention. Someone else suggested a cheaper solution would be Nerf balls to throw at each other, but that’s way less fun to build.

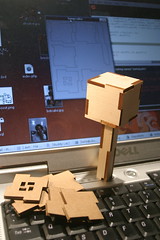
Lamp prototype

Here’s my prototype for part of the first lamp. I’m making 5 lamps total, and they’ll all be different. Each lamp will have white LEDs for general lighting, and then different colored LEDs for various alert functions. The first couple will probably just use normal, colored LEDs. I’ll try some RGB LEDs later, they’re just so stupidly expensive compared to normal LEDs.

I wrote a program in Processing to generate the parts, so I can easily make models of different sizes or with different thickness materials. I’ll post it in a bit when things are a little farther along.

I’m using an Arduino to prototype the electronics, but will probably switch to something cheaper like an ATTiny when I go to build the lamps.

Just because it’s handy, I’ve written the prototype drivers for the lamp in Processing, but that’s only because I already had it open. Eventually I’ll want something that can hang out in the systray / menu bar, and I don’t think Processing allows for that. Tho one advantage of Processing its an easy way to make executables for both Mac and Windows. Or it pretends to be, I’ve had inconsistent luck getting Processing applications to run on my windows machine. Thanks, Java!