Crafting

Baby Sweater!

Fall has settled in nicely around us, and it’s time to make Bitmap some sweaters!

An exciting new Philadelphia yarn store opened up in my neighborhood. I’ve started haunting it with Bitmap during the day, the shopkeeper Lisa is very nice and lets us hang out and knit. I’m really stoked to have a local yarn store within walking distance and I hope they do well!

I picked up a skein of Lorna’s Laces and sat down at my knitting machine to make a sweater. This is the first time in a very, very long while that I’ve actually knit a garment on the machine instead of tinkering with it.

The sweater is knit in 5 pieces (back, left front, right front, and two sleeves) and then a folded hem is added to the front and collar. It took a week to make, although I didn’t work on it at all over the weekend. I think I could make another in a day or two.

A day by day log of my progress can be found on the sweater’s Ravelry page. I do still need to add buttons, and maybe embellish the front a bit, but in the mean time it will keep Bitmap nice and warm.

Crafting

Winning the Knitting Machine Lottery

I peek at the Craigslist listings for knitting machines from time to time, but don’t usually see much that strikes my fancy. Most of what’s available consists of overpriced Ultimate Sweater Machines (which are junk at any price). For buying and selling machines, the Ravelry sales group is much better.

Last week I came across a White Easy Knitter for $25. The White Easy Knitter is made by the same company that made my beloved 1602, and is the same pitch (5mm). The Easy Knitter is a low-end hobby machine, and considerably simpler than the 1602, but the parts and accessories are interchangable. For $25 I wasn’t expecting it to be in great shape, but since replacement needles are about $1 each on ebay I figured it would be a good source for spare needles.

You may remember that my 1602 did not come with a full bed cast-on-comb, and I’ve attempted to make my own. My homemade comb works OK, but not great, and I’ve been keeping my eye out for an affordable replacement without much luck. I have yet to see one for less than $100 once shipping is factored in.

White Easy Knitter tools

I’m happy to say that the $25 Easy Knitter came with both a full bed of 160 needles (all of which look to be in good shape) AND a full bed cast-on-comb. So that’s $260 in parts right there. The carriage for the Easy Knitter is sold as the intarsia carriage for the 1602, another $50+ part.  It also came with some weights and transfer tools which will work with the 1602. Most curiously and surprisingly, it came with an original copy of the 1602 manual. Most mysterious, since the 1602 manual really doesn’t apply to the Easy Knitter at all.

The condition of the Easy Knitter bed itself is OK. A few of the flow combs are broken, but that doesn’t really prevent it from being used. It’s a very simple machine compared to the 1602. I plan on stealing a few needles from it to replace some bent ones on the 1602, but will otherwise leave the Easy Knitter in tact. It’s considerably lighter and smaller than the 1602, and will come in handy if I ever get around to teaching another knitting machine class.

Overall I feel like I’ve won the knitting machine lottery, with a solid $300+ worth of parts and tools compatible with my 1602 for only $25.


Crafting

Homemade Cast-on Comb

The White/Superba 1602 I purchased sadly did not include a full-bed cast on comb, which makes casting on things wider than swatches somewhat tricky. There are a few floating around eBay, but they all seem to be $50 and/or in France, and shipping a three foot long steel comb from France to the US isn’t particularly cheap. Also, I am impatient. I’m told that a knitting machine store in Toronto also has some, but again, impatient.

So I set out to make my own. The comb consists of small metal teeth which go in between each stitch, and a rod which is threaded through holes in the top of the teeth to trap generic propecia the yarn in place. I made a 12″ long test comb to see if it would work before committing to a whole yardstick worth of bobby pins and hot glue.

I purchased 4 packages of bobby pins and some wooden rulers at the local dollar store. I then arranged the bobby pins at 5mm intervals along the ruler, since the Superba machines are 5mm machines.

IMG_0304

I used a second ruler (they were 3 for $1!) to make sure the pins were all at an even height and that they retained their 5mm spacing. Then I ran a line of hot glue along both sides to hold things in place.

IMG_0306

To use the comb to cast on ribbing, you run the carriage/yarn across the needles to establish a zig-zag of yarn across the bed. Then you push the cast on comb up between each stitch, and run a rod through the top of the comb. This traps the yarn between the rod and the ruler below, letting you appropriately tension the yarn for the first row of stitches.

IMG_0309

As you knit, the comb pulls the fabric down between the two beds. A weight is attached to each end to provide tension. In this photo, I’ve lowered the front bed to make it easier to see what the comb is doing. You can just barely see the small copper rod at the bottom of the fabric.

IMG_0307

I used it to knit a gauge swatch for a sweater I plan on knitting soon. It’s a mini-cable rib pattern. The cables are worked by hand, which is pretty tedious though I’m slowly getting faster at it.

Mini cable rib swatch

My dollar store comb is by no means as good as the real thing, but it works pretty well for $2 worth of materials. It has a few key issues which make it a little tricker to use than a normal cast on comb. First, the end of the bobby pins are just a little bit too wide, I have to set the bed spacing all the way up to 6 in order to get them to fit through. Second, the bobby pins get in the way of the holes used to hang the weights. And my DIY comb is nowhere near as durable as the steel one. But it works well enough for now.

Crafting

I can stop whenever I want

I don’t have a knitting machine problem, I could quit right now, I swear.

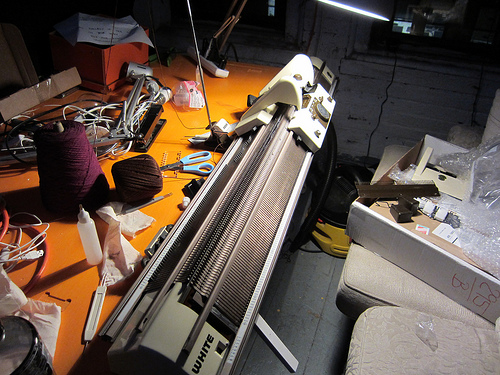
While working with my Toyota 747 I decided to try and find a ribber for it, which led me to the Ravelry Knitting Machine Sales group. I did not find a Toyota ribber, but I did find someone in Brooklyn who was selling a White/Superba 1602. He was selling it at a reduced price because the electronic selector box was not functioning.

White/Superba 1602

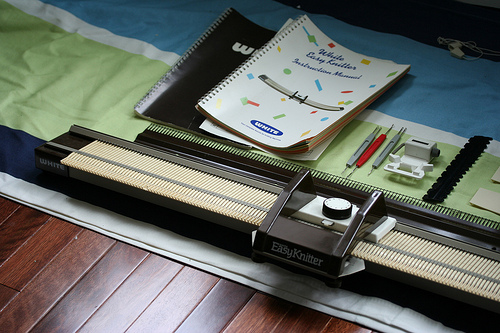
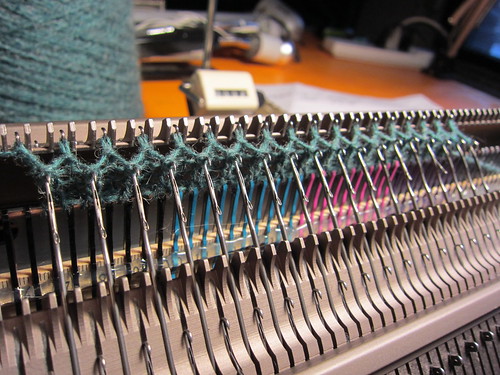
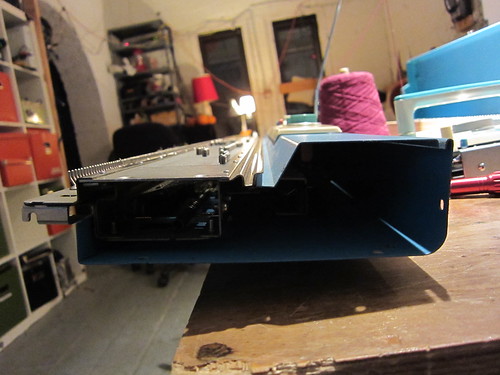
The Superba knitting machines, which were also sold under the brand names White, Singer, and Phildar, are really interesting machines. Instead of a main bed and an optional removable ribbing bed like most Japanese machines, the Superbas have two permanently fixed identical beds. This makes it much easier to get consistent, even ribbing.

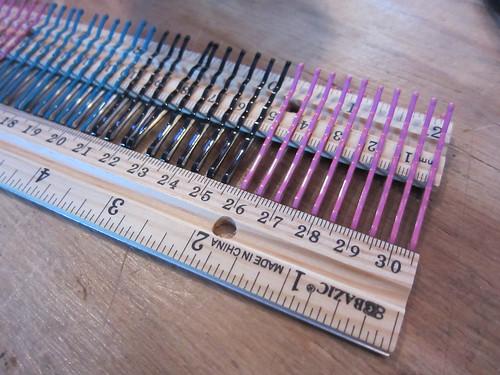
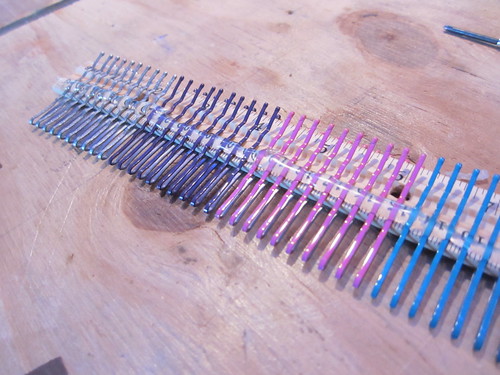
Mechanically, the machine is in good shape. Stockinette stitch, ribbing, and jacquard patterning (done by manually moving the needles into place) all work well.

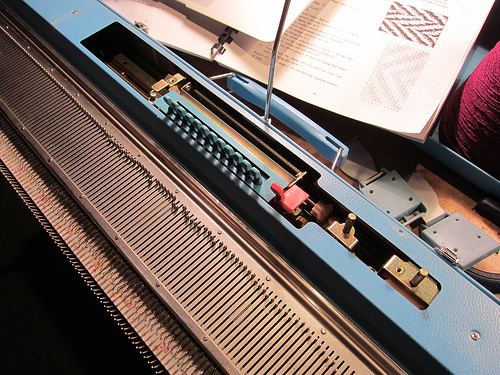
The selector box, which can be seen in Patrick’s photo stream, works by reading stitch patterns off mylar sheets. A photoresistor detects either a light or dark square and sends a signal to the machine which moves the needles accordingly.
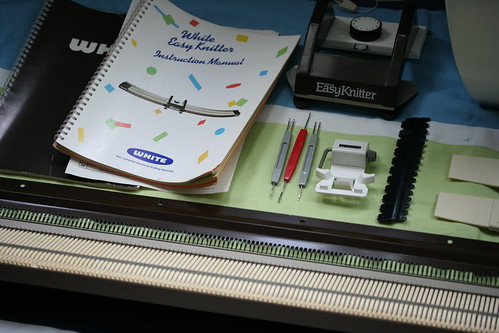
In addition to maintaining a comprehensive site on Superba machines, Patrick also was kind enough to supply me with the users manual, service manual, exploded part diagrams, and logic flow charts for the electronics.

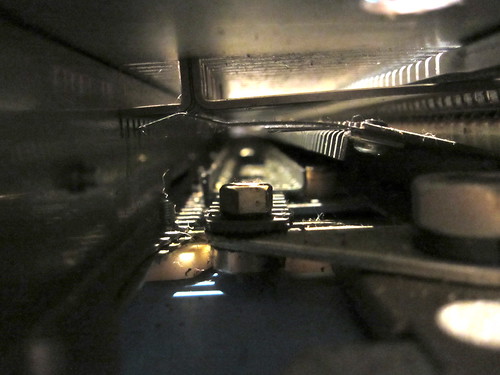
As soon as I opened up the machine and took out the circuit boards, it was clear things weren’t working properly:

Broken :(

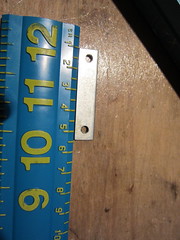
I superglued the board itself back together, and then used lumps of solder to repair the broken traces. Jumper wires would have been better, but admittedly I was too lazy to get up and find a spool of wire.

Once the traces were repaired, Phooky helped me test the output voltages. Since it takes in 110V mains power, I was nervous to start poking at it by myself. But we only made the electricity arc between the multimeter probes once. Have I mentioned that mains power is kind of terrifying?

Anyway, of the four pins that connect to the card edge, two are tied together to ground, and the other two provide 24v for the motor drive (which feeds the mylar sheets) as 12v for the COP420 microchip.

Speaking of the COP420, my first instinct was to try to get a firmware dump off the chip and try to reverse engineer the firmware. Not that I have any experience doing that, but luckily Trammell does. Unfortunately, he found out that the COP420 is a mask-programmed device, meaning that the program is put into ROM when the chip is created, in contrast to something like the Atmega chips used in Arduinos. If you’re lucky, the “test mode” on the chip was initially enabled, making it possible (if somewhat of a pain) to read out the firmware.

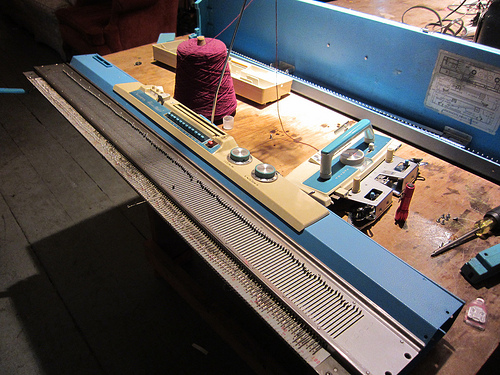
The more I think about it, the more it makes sense just to redesign the selector box from the ground up. Most of the bulk and power of the box is related to the scanning and advancing of the mylar cards, which are adorably archaic but not exactly convenient. A USB interface would be vastly preferable, and would cut down on about 2/3 of the circuit. I need to do some investigating to see if the whole thing could be USB powered, eliminating the need for a separate power cord and bulky transformer.

Yeah, ok, I have a knitting machine problem.

Crafting

Knitting Machine Teardown Part 2

After purchasing a fresh sponge bar for the Toyota K747 I started to put it through its paces. It knits stockinette beautifully, so I started working through the tuck stitches.

At first I couldn’t get the I and II buttons to stay in place at all. After some disassembly and a lot of oil, we got things moving again and it works great. But I quickly noticed that the 3rd needle selector wasn’t working. So I started to disassemble the machine to figure out why.

IMG_0289

With the top cover off you can see some of the neat mechanisms in there. The zigzag gear (right) physically moves the needle selector up or down the needle bed. This means if you have a simple shifting pattern like a zigzag or checkerboard, you don’t need a punch card at all. You can just move the zigzag back and forth with each row.

Each of the blue needle selector levers rotates down to catch a small lever on the bottom of the machine. When these levers are caught, they cause the corresponding shafts (anyone know what these are really called?) to raise, which then push the needle butts forward. The small red lever releases the needle selectors.

Getting into the machine was a little tricky, you have to remove the card and zigzag knobs to access all the screws. Thankfully there’s a useful diagram in the K747 service manual. With the knobs removed, you can see the discoloration of the plastic over the years.

IMG_0287

I had to fully remove the needle bed from the machine casing to get at the needle selector levers. Unfortunately by that time my hands were absolutely covered in grease so I couldn’t take many pictures. But once I got it out, I could flip it over and see the problem part:
Busted

The two little tangs on the bottom of the 3rd needle selector have somehow broken off, though I’m really not sure how. Unfortunately disassembly/repair of that part of the machine isn’t covered in the service manual. I see two options going forward: 1) I can carefully disassemble the needle selector mechanism, 3D print a replacement lever, and pray to God that I can get it all back together again, or 2) Fashion some replacement tangs with Sugru and hope they stay in place.

Since option 2 doesn’t require completely disassembling the machine, I’m going to try that first. There are a lot of little springs and I’m not sure I have the dexterity to get them all back in place again. I’d also like to better document the machine teardown, so sometime in the new year I’ll recruit an assistant and take apart / photograph the whole thing.

In the meantime the machine works great, and I can come up with plenty of patterns that avoid the 3rd needle selector.

Crafting

Knitting Machine Teardown

A few years ago I was given a Toyota K747 knitting machine, a gorgeous blue knitting machine that features a punchcard patterning system. It is by all counts a fascinating machine, and I was excited to receive a lace carriage for it today.

It’s been a while since I’ve devoted time to the knitting machine – they’re a bear to set up and take down so without somewhere to leave it set up all the time it can be daunting to use.

I noticed that one of the screws on the side wasn’t biting into anything, and decided to take the machine apart to figure out what was missing. I took out 6 screws on each end, and pulled off the end caps.

Side view

With the caps off I could stare into the dark abyss of needles and gears. I discovered it’s really challenging to take photos down a long, dark tube when using a point and shoot camera, so forgive the image quality of the following photos.

There are two “compartments” inside the machine, the front area which is all metal and has slots at the top for the needle tabs (called the needle butt) to stick out of, and the back which is mostly plastic where the needle butts rest. This is also where the patterning shafts (for lack of a better term) are located.

Here’s the front compartment, the front of the machine is to the left. If you have trouble seeing the needle tabs, click the image for an annotated version.

Front interior

Here’s the back. You can see there’s some greasy dusty areas. I’m not sure how to get in there to clean it. The needle shanks are pointing down to the “shafts”, which if you look closely you can see there are 12. The Toyota K747’s repeat is 12 stitches wide.

Rear interior

The missing part in question is a small rectangular nut which slides into the end cap. I’m really hoping this is something I can source rather than having to mill/tap one myself. Any suggestions for shortcuts are appreciated.

Mysterious nut

Aside from the missing nut, the machine is in great shape, and the nut isn’t super crucial to the machine’s operation. My next step is to find a scale version of one of the punch cards so I can cut some out on the laser cutter. I found a few places that claim to sell punch cards for it but none of them had them in stock.