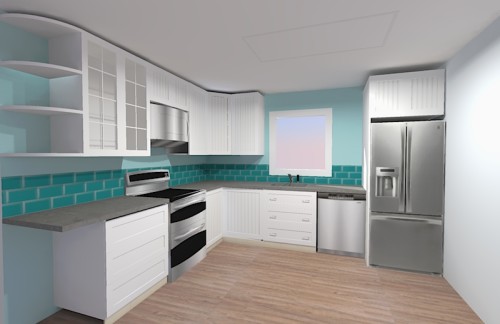
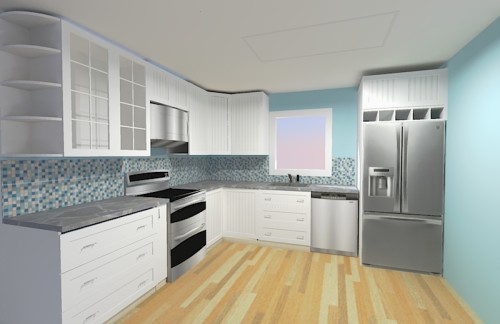
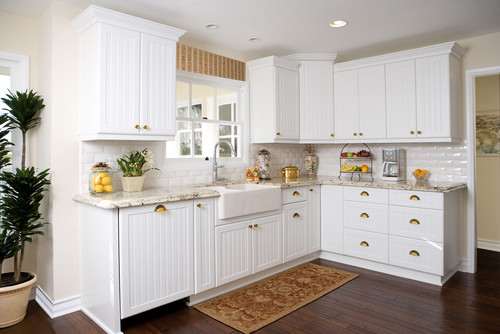
Following up on yesterday’s backsplash indecision: I found some more ideas I liked and mocked them up in SketchUp. SketchUp continues to be a rather poor way to visualize these things, but it’s all I’ve got so I make do.
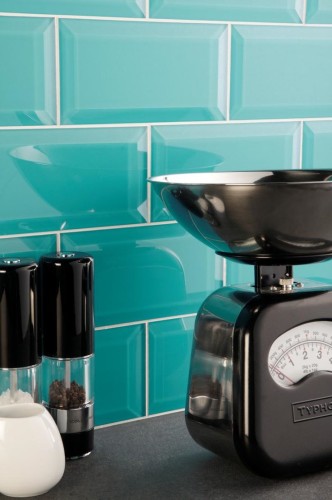
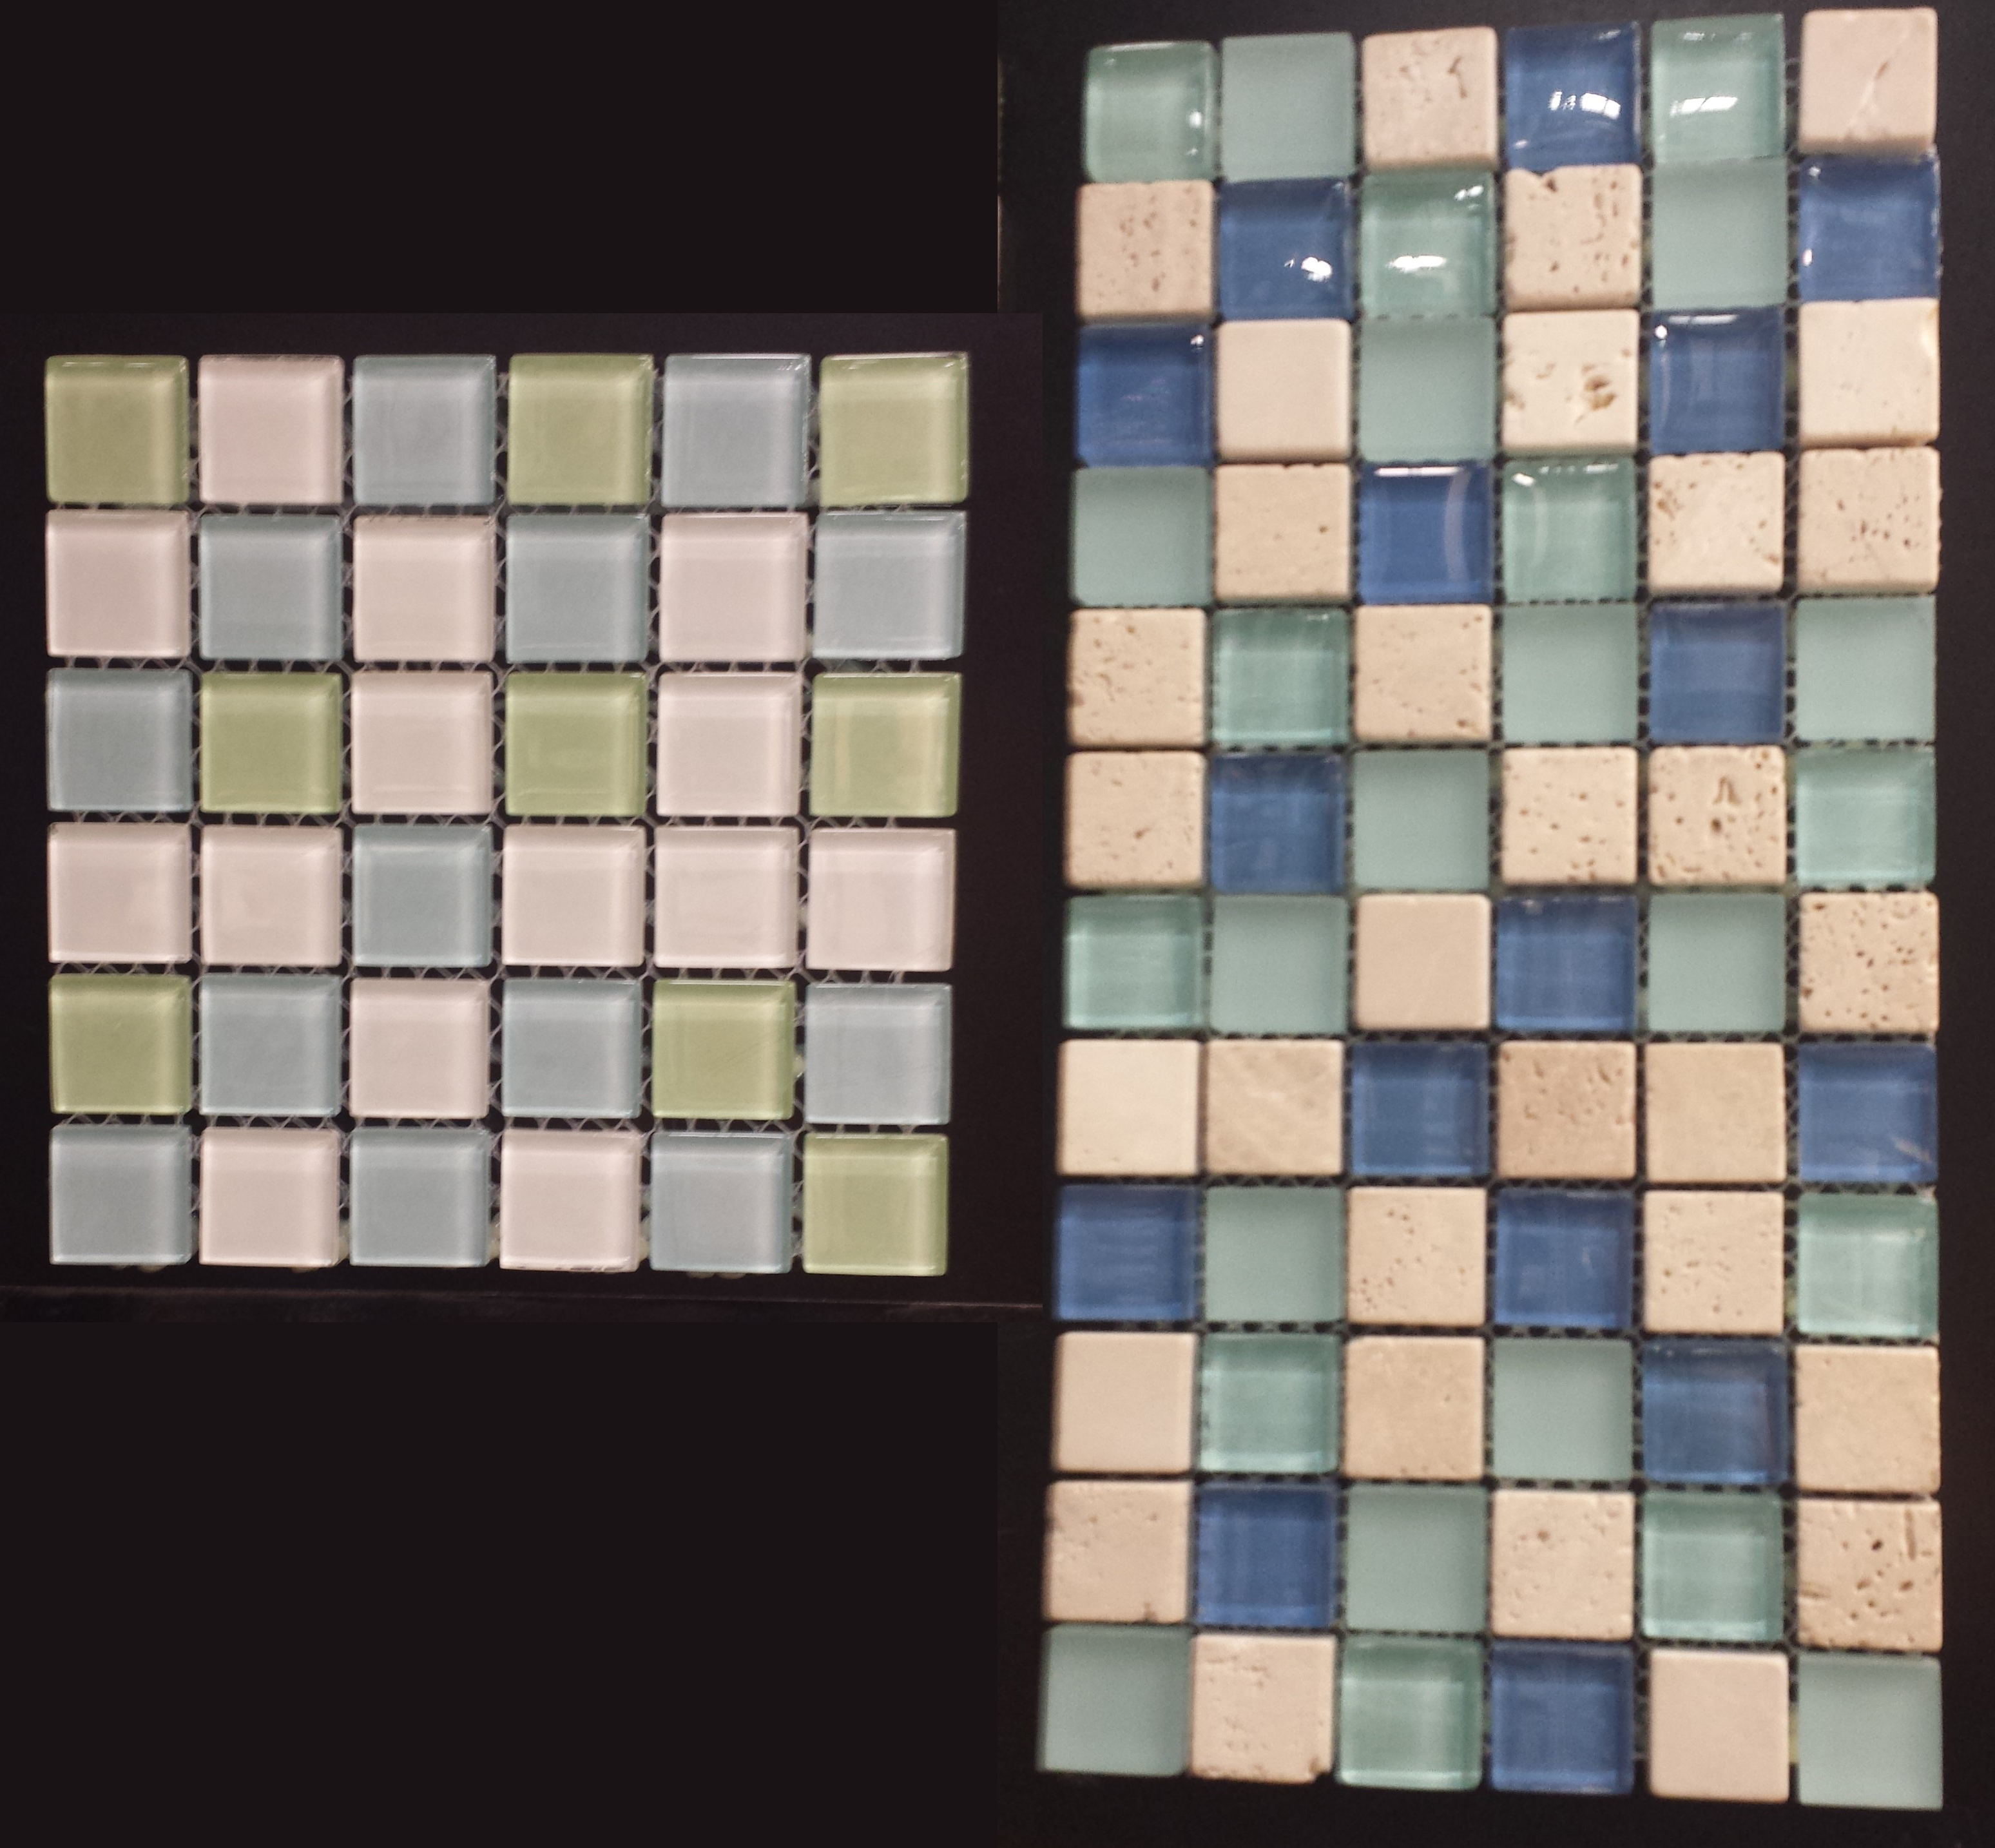
I found this tile on Pinterest and fell in love with it:
oh hello, beveled glass tile
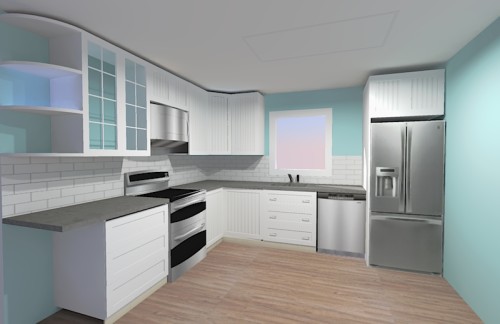
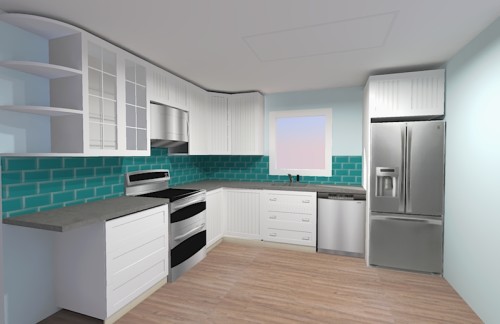
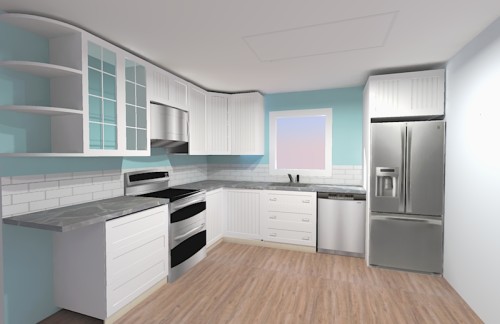
Once again the sketchup mockups were a bit underwhelming, but I played around with a few different tile / wall options. Never mind the missing lower cabinet, I accidentally deleted it and don’t feel like re-creating it right now.
I think ultimately I need to go lighter on the backsplash, even though I kind of want to cover the entire house in that teal tile.
On Tuesday I went to Ikea before work to order cabinets. I wanted to go in the morning during the week because I know that with the current sale the place is a total zoo on the weekends. I also was warned that ordering Ikea cabinets is not a fast process, and to allow about an hour. Unfortunately it took more like three.
The downside of getting there early was that I got there before the manager of the kitchen area. There was a sales associate there to help me, but he was new and couldn’t handle some of the more complicated aspects of my order. I didn’t want any doors (we’re getting them made in solid wood by Scherr’s instead), I wanted to order custom quartz countertops, and I needed them to calculate the undercabinet lighting stuff for me. New Guy helped me as best he could but ultimately Mr Manager had to come and redo most of it when he got in.
Aside from the new guy drama, ordering cabinets is just really fiddly and seemingly lacking optimization. First you bring up your design from the 3D planning software. Then they import the design into their sales order software. Then they go through every single cabinet in the order to make sure everything is correct. Along the way they fix any inconsistencies (I had accidentally selected one off-white panel to go with my white panels, for example) and account for any design oversights you may have made. For whatever reason some things like lighting can’t be added in the 3D design software and must be hand-added by staff. The quartz counter tops are handled by a 3rd party vendor, so that’s an entirely separate process. The sales associate has to calculate all the rough dimensions and edgings of your counter top in order to give you a quote. It just all takes a while.
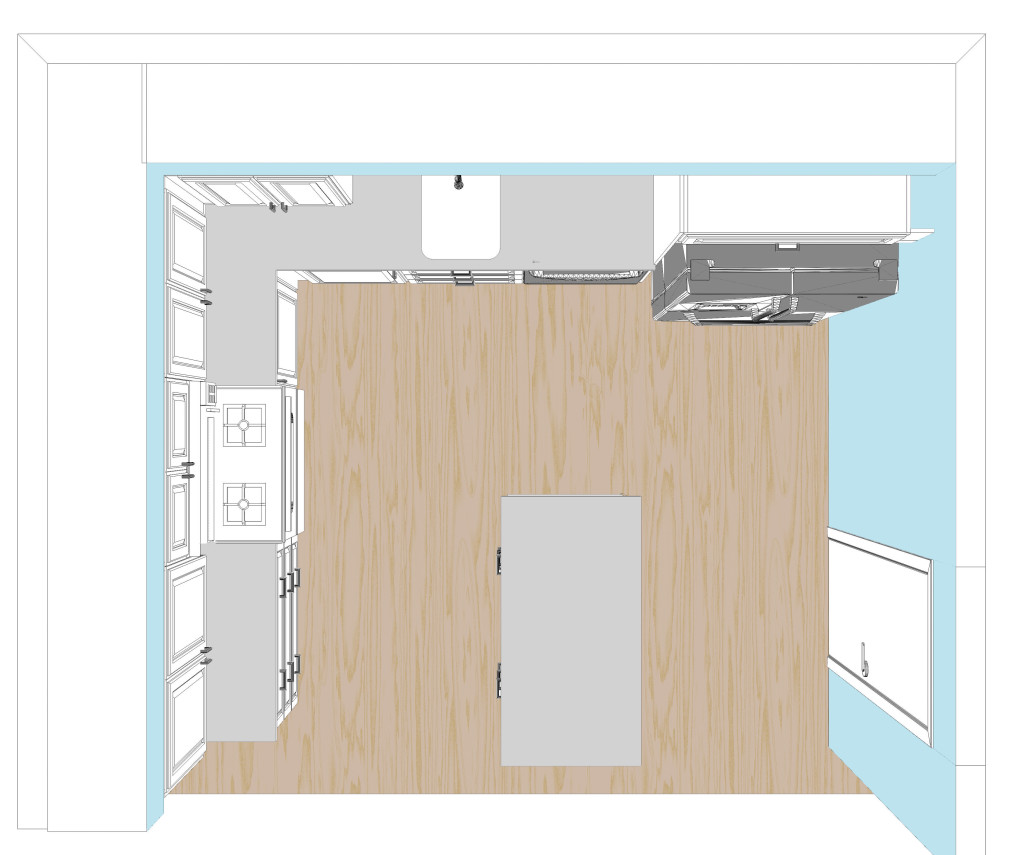
The design as seen in Ikea’s tool
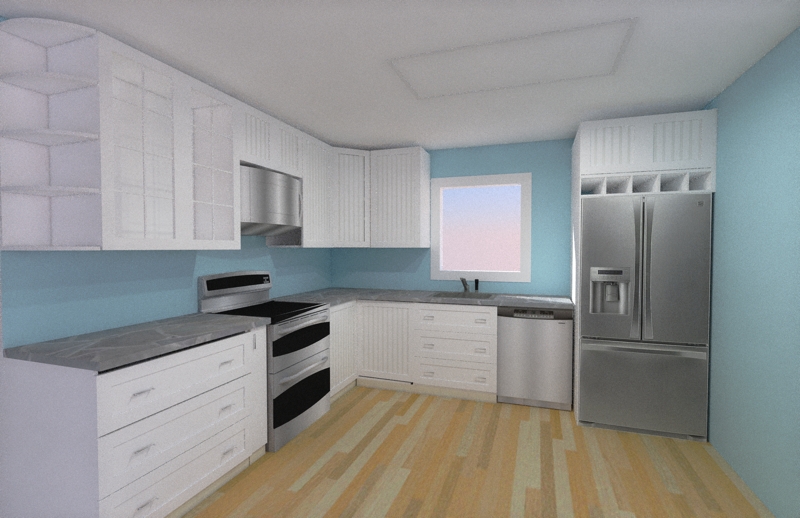
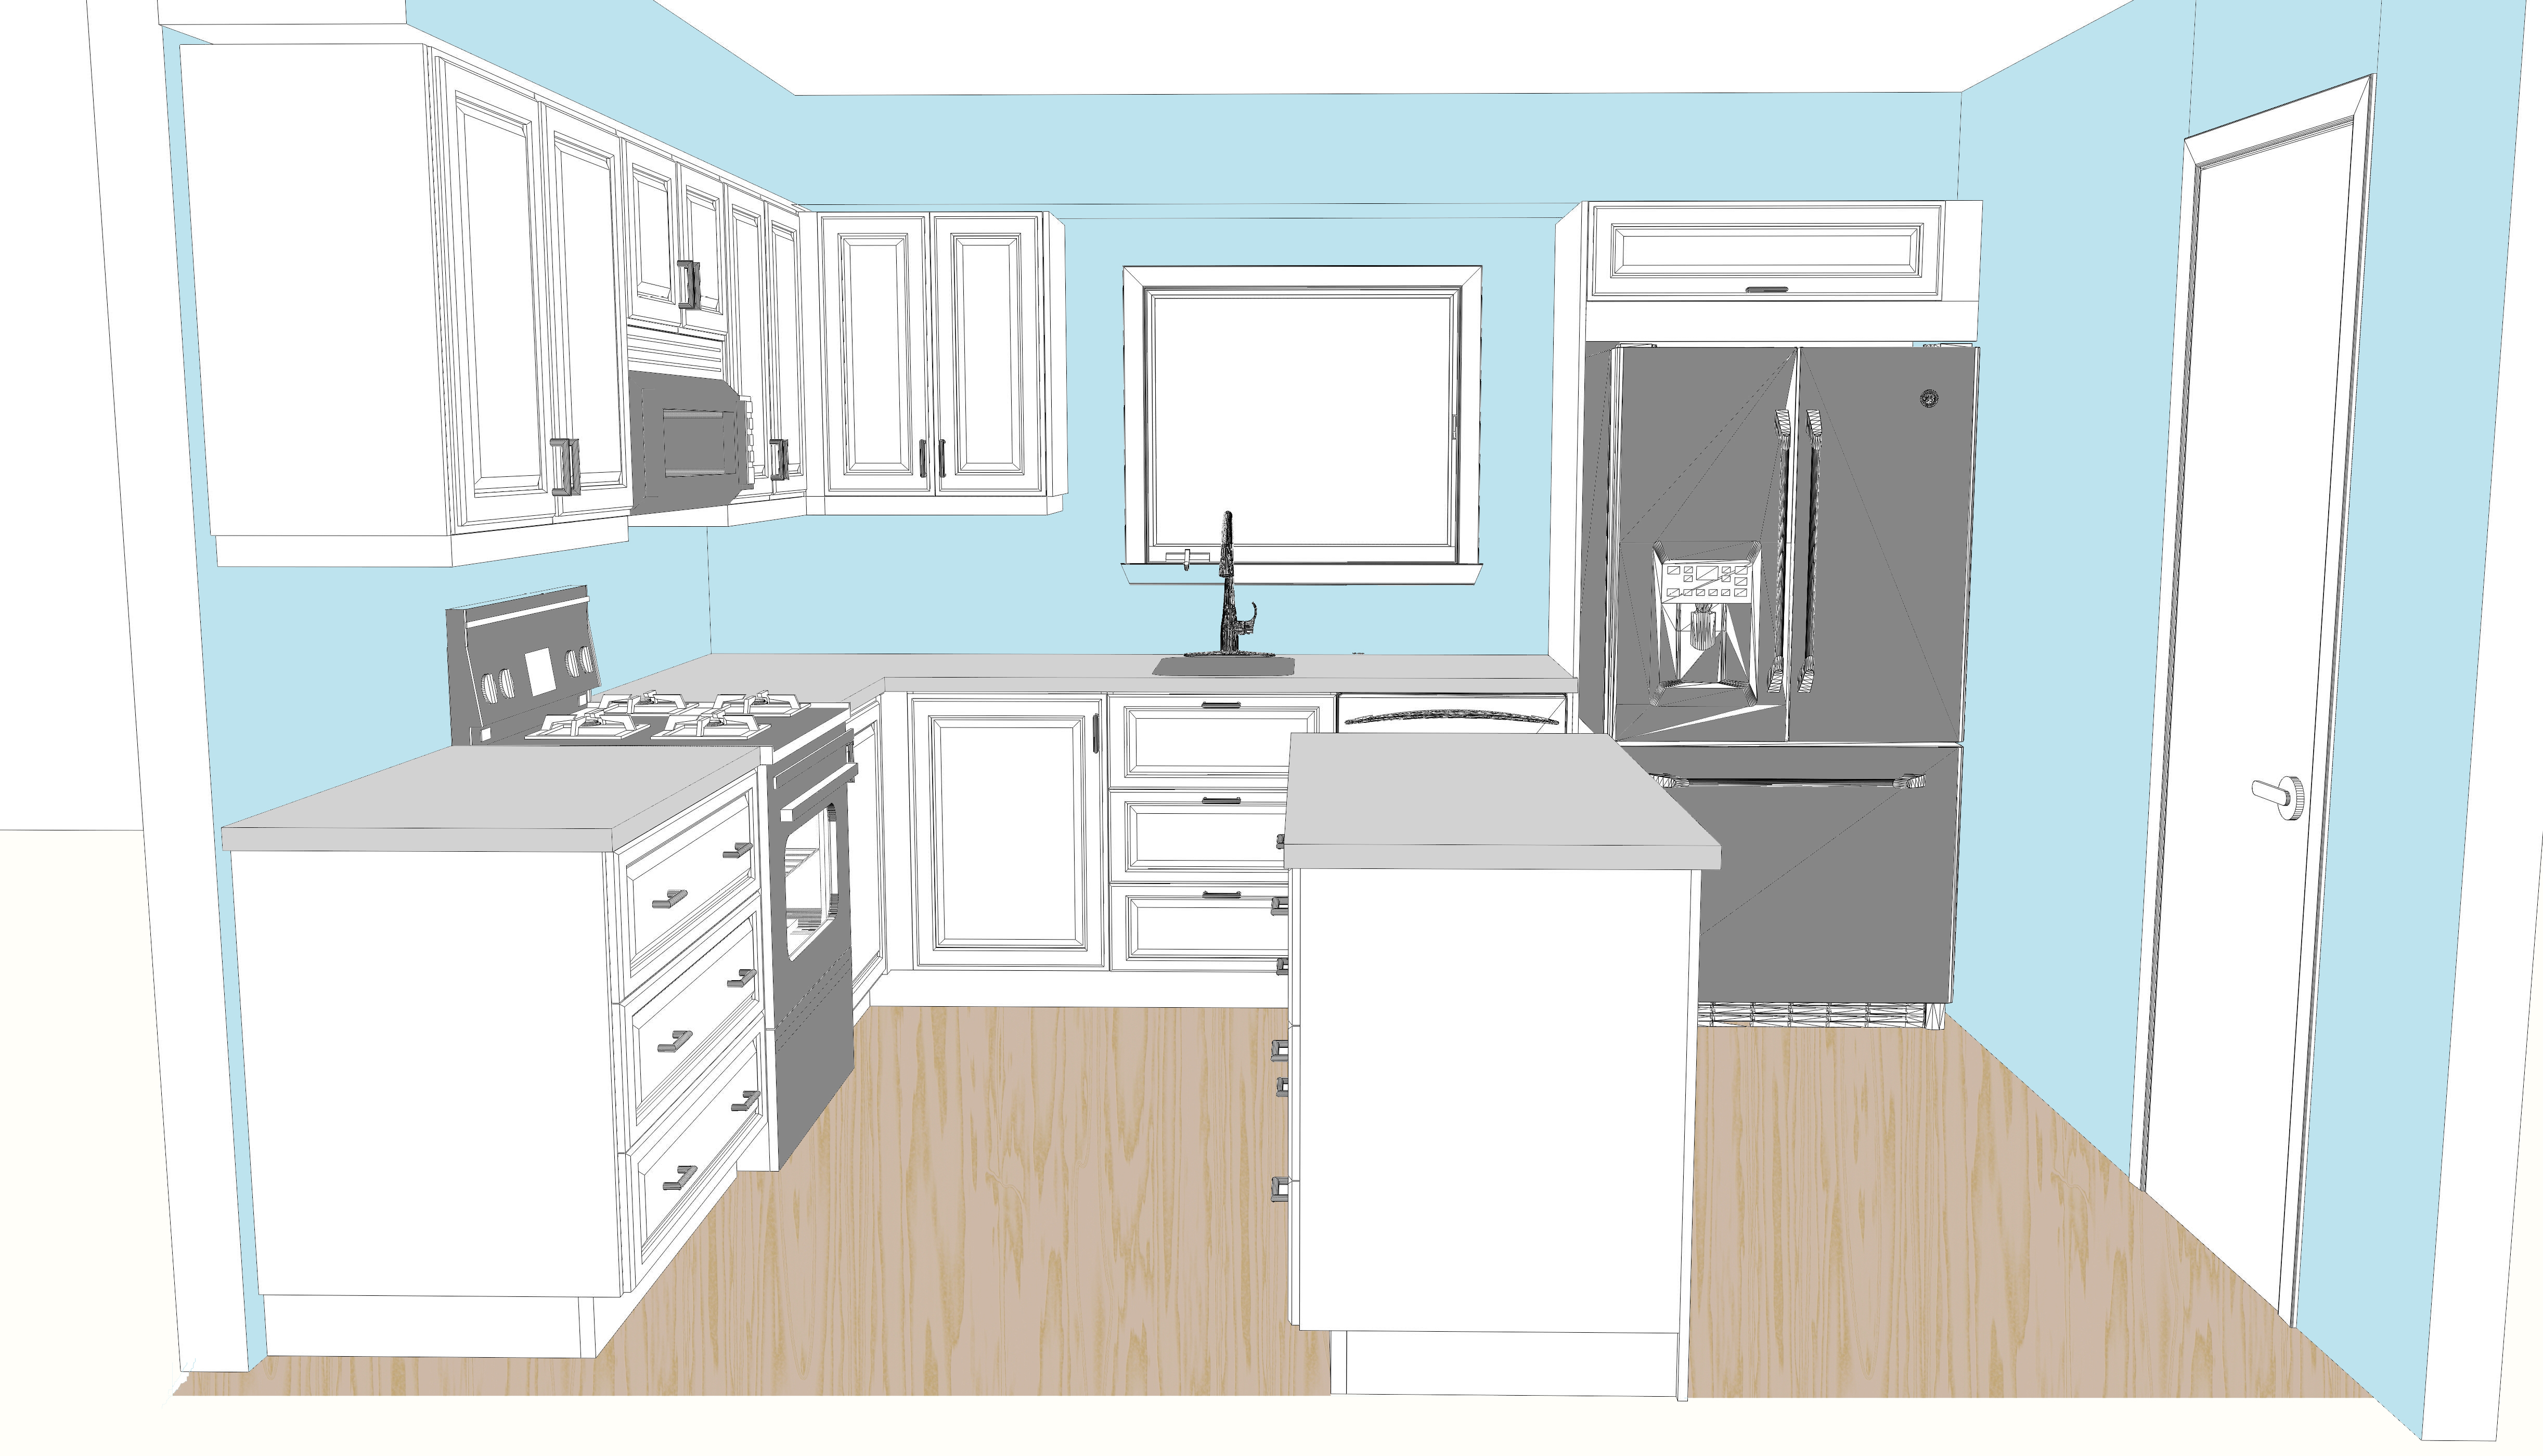
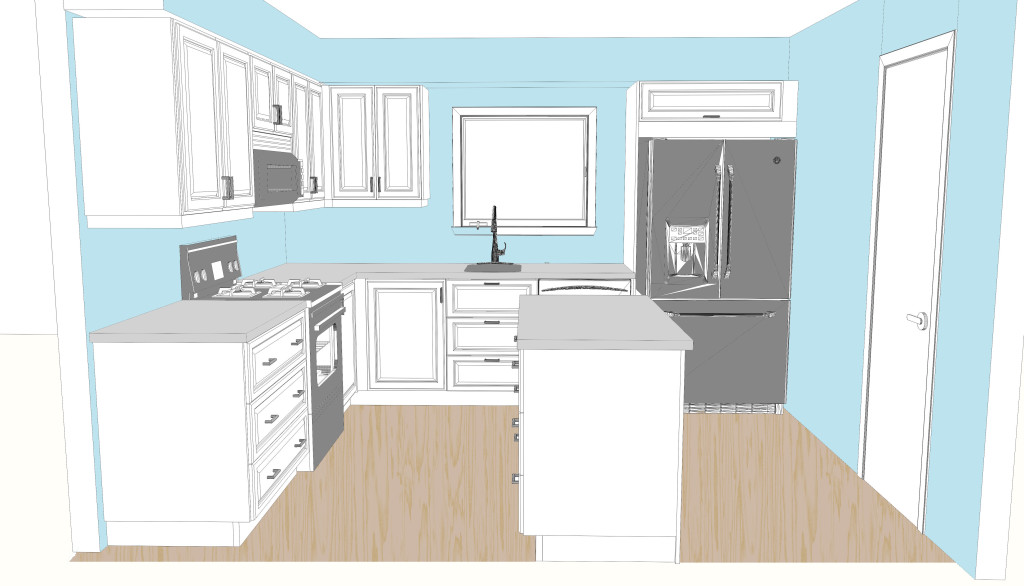
There are a few design tweaks since the last revision: we ended up going with a narrower fridge, and I reconfigured some things to the left of the range, so now I don’t have to do any major surgery on the cabinets. I’m still making a custom shelf for the end of the upper cabinets, but no other hacking is needed.
I ordered the fridge and range from a local appliance place. They were the same price or better than Home Depot / Lowes for the same models. The Sears outlet had a really good price on a scratch + dent dishwasher so I’m going to try to get out there this weekend to see it.
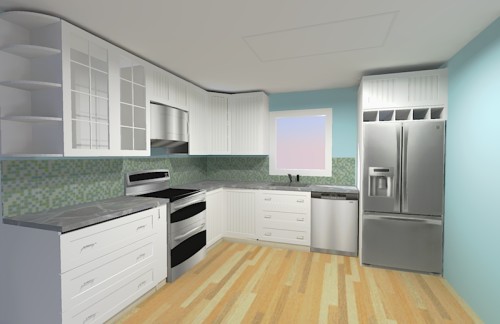
Everything is slowly coming together. I started looking at backsplash tile today while I was in Lowes. Two choices that looked really cute in the store look really overwhelming when I mocked them up in SketchUp.
In person I thought “these look great!”
In SketchUp they look kind of like a train wreck and I don’t know if it’s just because the colors aren’t real-to-life accurate, or if it really would look this busy. The green one looks SUPER GREEN in the mockup, which is not what I was going for at all.
So much texture!So much green!
Mercifully the backsplash is one of the last steps so I have a while to think about it. But omg, so many steps to this process. We’re going down this weekend to hopefully finish ripping out the soffit, and maaaaaaybe take out the hot water heater and start working on the subfloor repairs. Oh and paint prep. There is always more paint prep to do.
First thing’s first: I took my first trip to the dump last weekend! We dumped over 600 pounds of kitchen! It was an adventure, but not a very interesting one so you might have missed the blog post as I didn’t email it out.
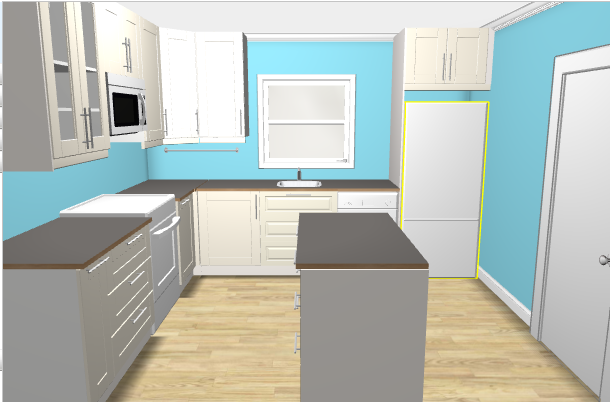
It’s nearly time to order the cabinets for the kitchen and I’m having trouble getting everything finalized. We got the latest revision from the designer and I’m nitpicking about a lot of little stuff (and a few medium sized things).
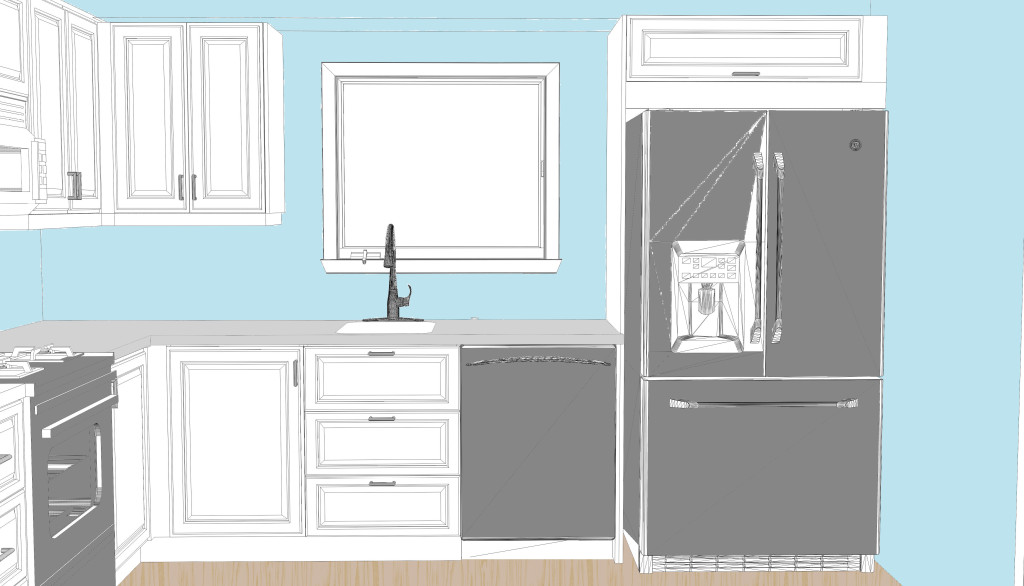
The space between the window and the fridge is kind of awkward and I don’t love the designer’s solution of putting a cabinet there. I think that whole area of their design looks weird:
Not feeling the cabinet to the right of the window
I think I’m going to leave that area empty and experiment with little open shelves once it’s all in. Or just leave it open. Or remove the cabinet to the left of the window and put open shelves there to balance things out. Or slowly go insane due to the available options.
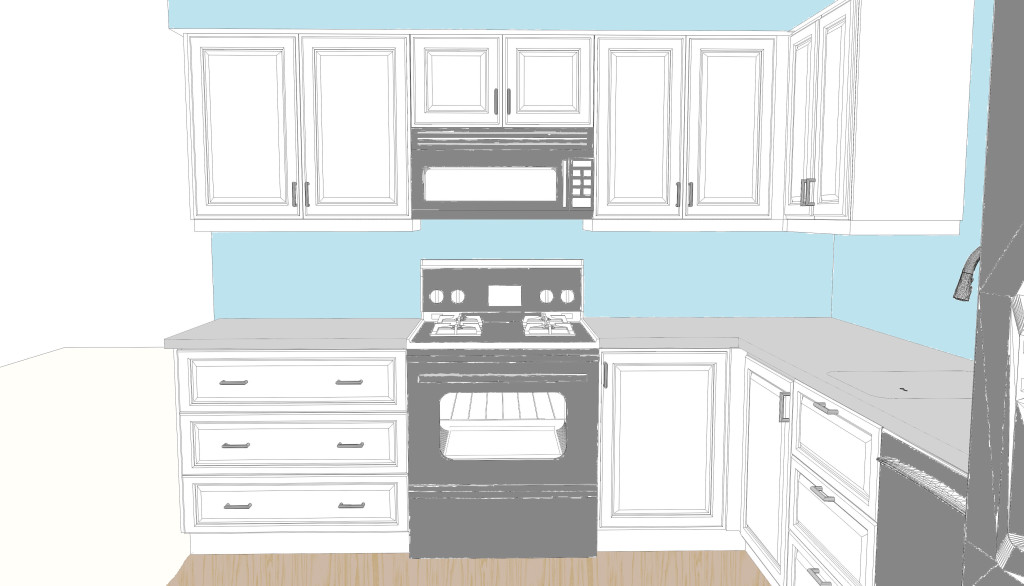
The other thing I don’t like about the designer’s design is that there’s 6″ of space between the end of the cabinets and the wall. This is just due to the limits of Ikea cabinet sizes, but I found a YouTube video detailing how to cut cabinets down so I think I might make a little custom cabinet next to the oven for storing baking sheets. Then I’ll make a little open end shelf for the top so everything lines up. I’m also going to build a custom wine rack for over the fridge.
A sketchup diagram of my mods.
The island is missing from this diagram, partly because I didn’t feel like modeling it in SketchUp, but also because I’m afraid of committing to it. I suggested to Chris that we get a counter height table instead of building cabinets in. He pointed out that we probably would never actually need or want to move it and that I should just stop waffling about everything. I taped it out in the current kitchen and made sure there’s still room to get the washer/dryer back into the laundry room. There’s an exterior door in the laundry room but it would be super annoying to have to take everything out and then back in because the island is in the way.
I think it will be an awesome island?
I have a long while to think about things before we actually install the cabinets, because there are about 800 steps that come first, but they need to be ordered in the next couple of weeks in order to take advantage of the Ikea kitchen sale. 20% off of $4000 of cabinets (oh my god) is huge.
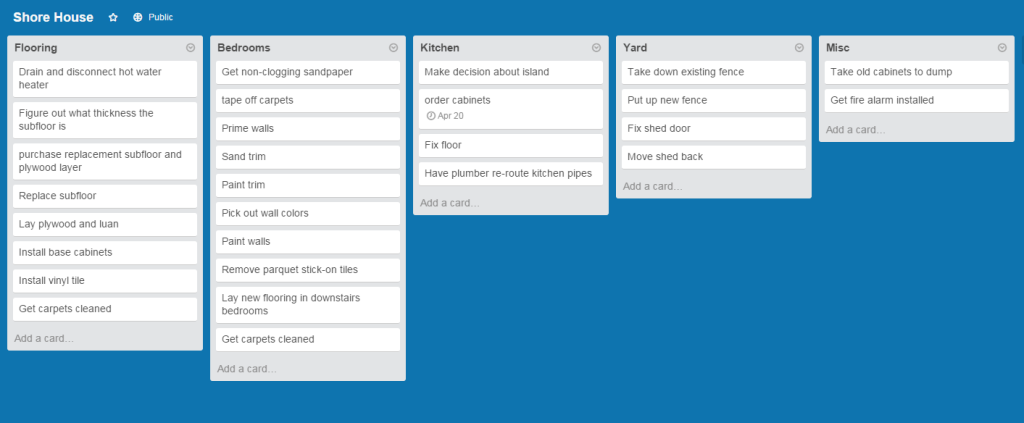
The list of to-dos for the house is kind of overwhelming. I put it all in Trello to try and make sense of it all but it honestly just seems more insane now. Everything in the kitchen is blocked by needing to remove the hot water heater and fix the rotted flooring under it. Family members have volunteered to help make this happen, but with a few family events the next few weekends I’m not sure when we’ll all be down there next. In the meantime I’ll work on painting the bedrooms, and removing the awful parquet flooring that I have discovered is just stick-on vinyl.
The contractors are hard at work, at least. The electrician came down on Tuesday to do the wiring for the kitchen, and the structural guys are working in the crawlspace to get everything shored up and dried out. The gas company came and planted little flags in the yard marking where the gas line is going to go. In 6-8 weeks we should have gas service.
But yeah feeling kind of overwhelmed at the moment.
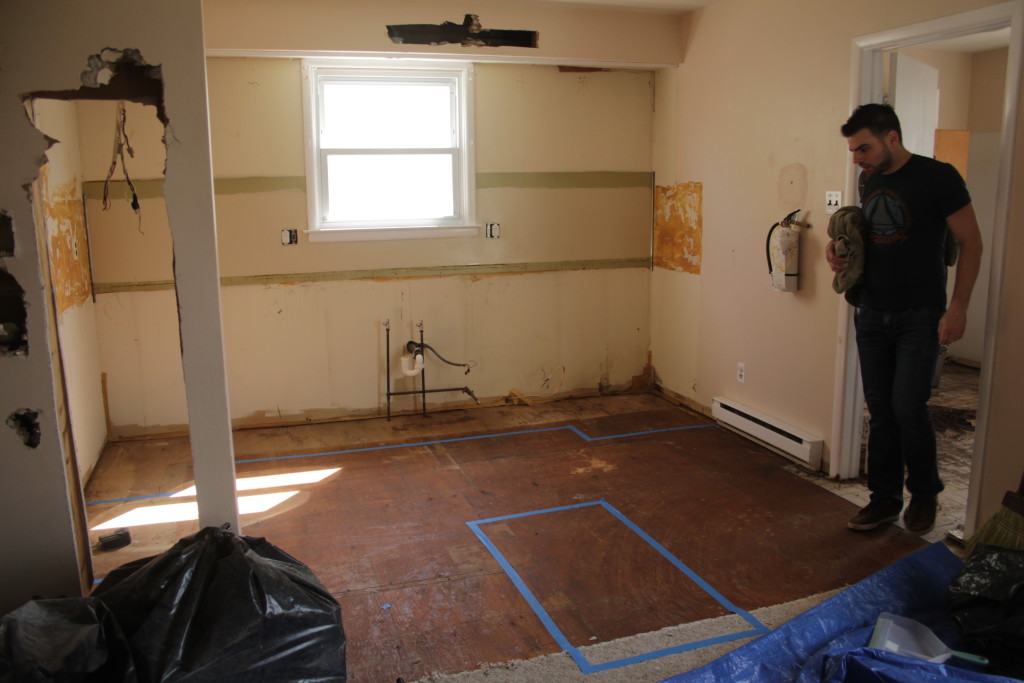
We spent the weekend working on the house again, but it didn’t feel nearly as satisfying as last week’s kitchen demo.
The big adventure for the weekend was taking a load of debris to the dump. The local transfer center and garbage collectors won’t take bulky trash like ours, so we drove it to the big dump in town. My dad brought down his trailer (hitched to a Volkswagen Passat) and we completely filled it. When you get to the dump they weigh your car and give you a slip of paper. When you leave they weigh you again and charge you based on how much you dropped off. We had over 600 pounds of debris from the kitchen, and it cost about $30. It was a surprisingly clean dump and didn’t smell too horrible. For a dump.
Not shown: giant bulldozers
After that we went to 84 Lumber to get luan for the floor. We’re nowhere near ready for it yet, but we had the trailer so I figured we’d make use of it.
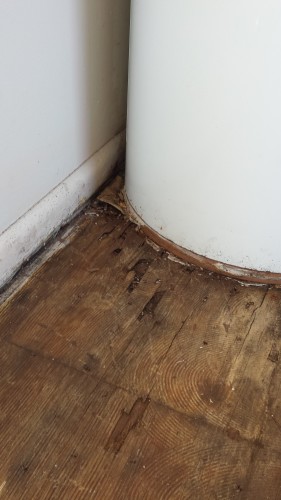
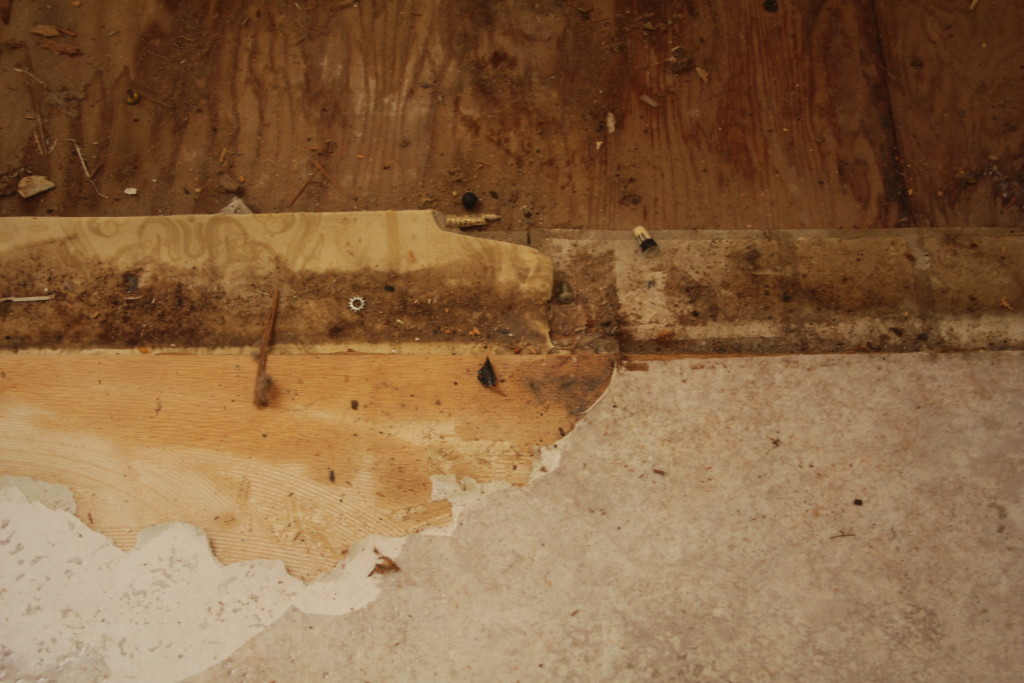
The final round of flooring removal in the laundry room was grueling. Thanks to water damage the staples are all rusted and were a huge pain to get up. It took easily 3x longer than the stuff in the kitchen. But it’s all gone except for a few small squares trapped under the hot water heater. Unfortunately the plywood subfloor under the hot water heater is in really rough shape. You can see how the weight of the heater is causing it to compress because it’s rotted. It actually looks better in this picture than it does in real life.
The wood sags a good 5mm under the heater.
The short wall next to where the fridge used to be came down this weekend too.
Now with 25% fewer walls!
The other task for the weekend was priming the walls upstairs. We got about 1/3rd of the way done with the walls. The trim is kind of a mess and I’m deciding if I care enough to scrape/sand it or replace it (it’s cheap stuff, less than a dollar per foot). No one will notice either way, but I will. Gross gloppy trim drives me nuts. Because that’s the kind of neurotic I am.
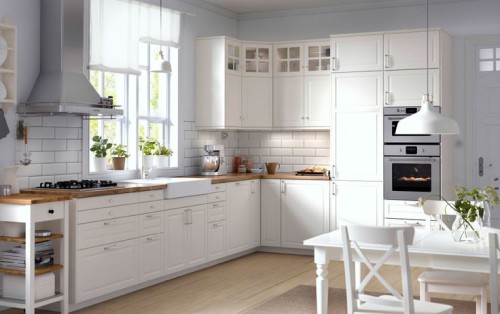
One of the things you can do to class up an Ikea kitchen is to spring for non-Ikea doors. There are a couple companies that do this, most notably SemiHandmade and Scherrs. I’ve had my eye on some beadboard panel doors:
As far as default IKEA options go the only one I’m even vaguely into are the white BOBDYN doors.
I mean it’s OK
I don’t really have anything against the IKEA doors, except maybe the shade of “off-white” is a little too far “off” for my tastes. But really I’m splitting hairs. I just love the look of the beadboard doors.
Unfortunately the quote for my beloved custom doors came in at literally twice the price of the IKEA doors. Ouch. I understand why: it’s an apples to oranges comparison. BOBDYN is made of MDF (aka particleboard) with a white veneer. Scherrs doors are solid wood. Oh, yeah, that “twice as much” quote doesn’t include painting, I’d have to do that myself (or pay extra). It’s a much smaller jump from Ikea’s solid wood doors to Scherrs. But the price gap between MDF and solid wood is significant. If we go with IKEA we’re looking at $1000 worth of doors. Even with the money we’re saving by DIYing a lot of stuff I’m just not sure I can justify shelling out an extra grand on doors.
It’s not all lost yet; the Sherrs folks are looking to see if we can rework the quote to be a little more budget friendly by swapping out a few things, but at this point I’m not optimistic. At the end of the day I have to think about other things that money could go towards (like a nice stove).
Overall I’ve been dealing with a lot of sticker shock over just how much all this stuff costs. I’ve never redone a kitchen before – both the condo and our current place had nice kitchens when we moved in. This stuff is nuts. Right now we’re looking at spending almost $14k on a 10′ x 10′ kitchen, using mid-grade stuff (except those countertops; I will die for my quartz countertops) and DIYing all we can.
So yeah kitchens are insane.
Update 3/27: it turns out I can’t read. The new quote came in much lower, and then I realized I’d misread the original quote. I did not notice the 25% discount applied, which cut the price of the doors by $500. So the solid-wood doors are still 50% more than the ikea MDF but… maybe it’s worth it?
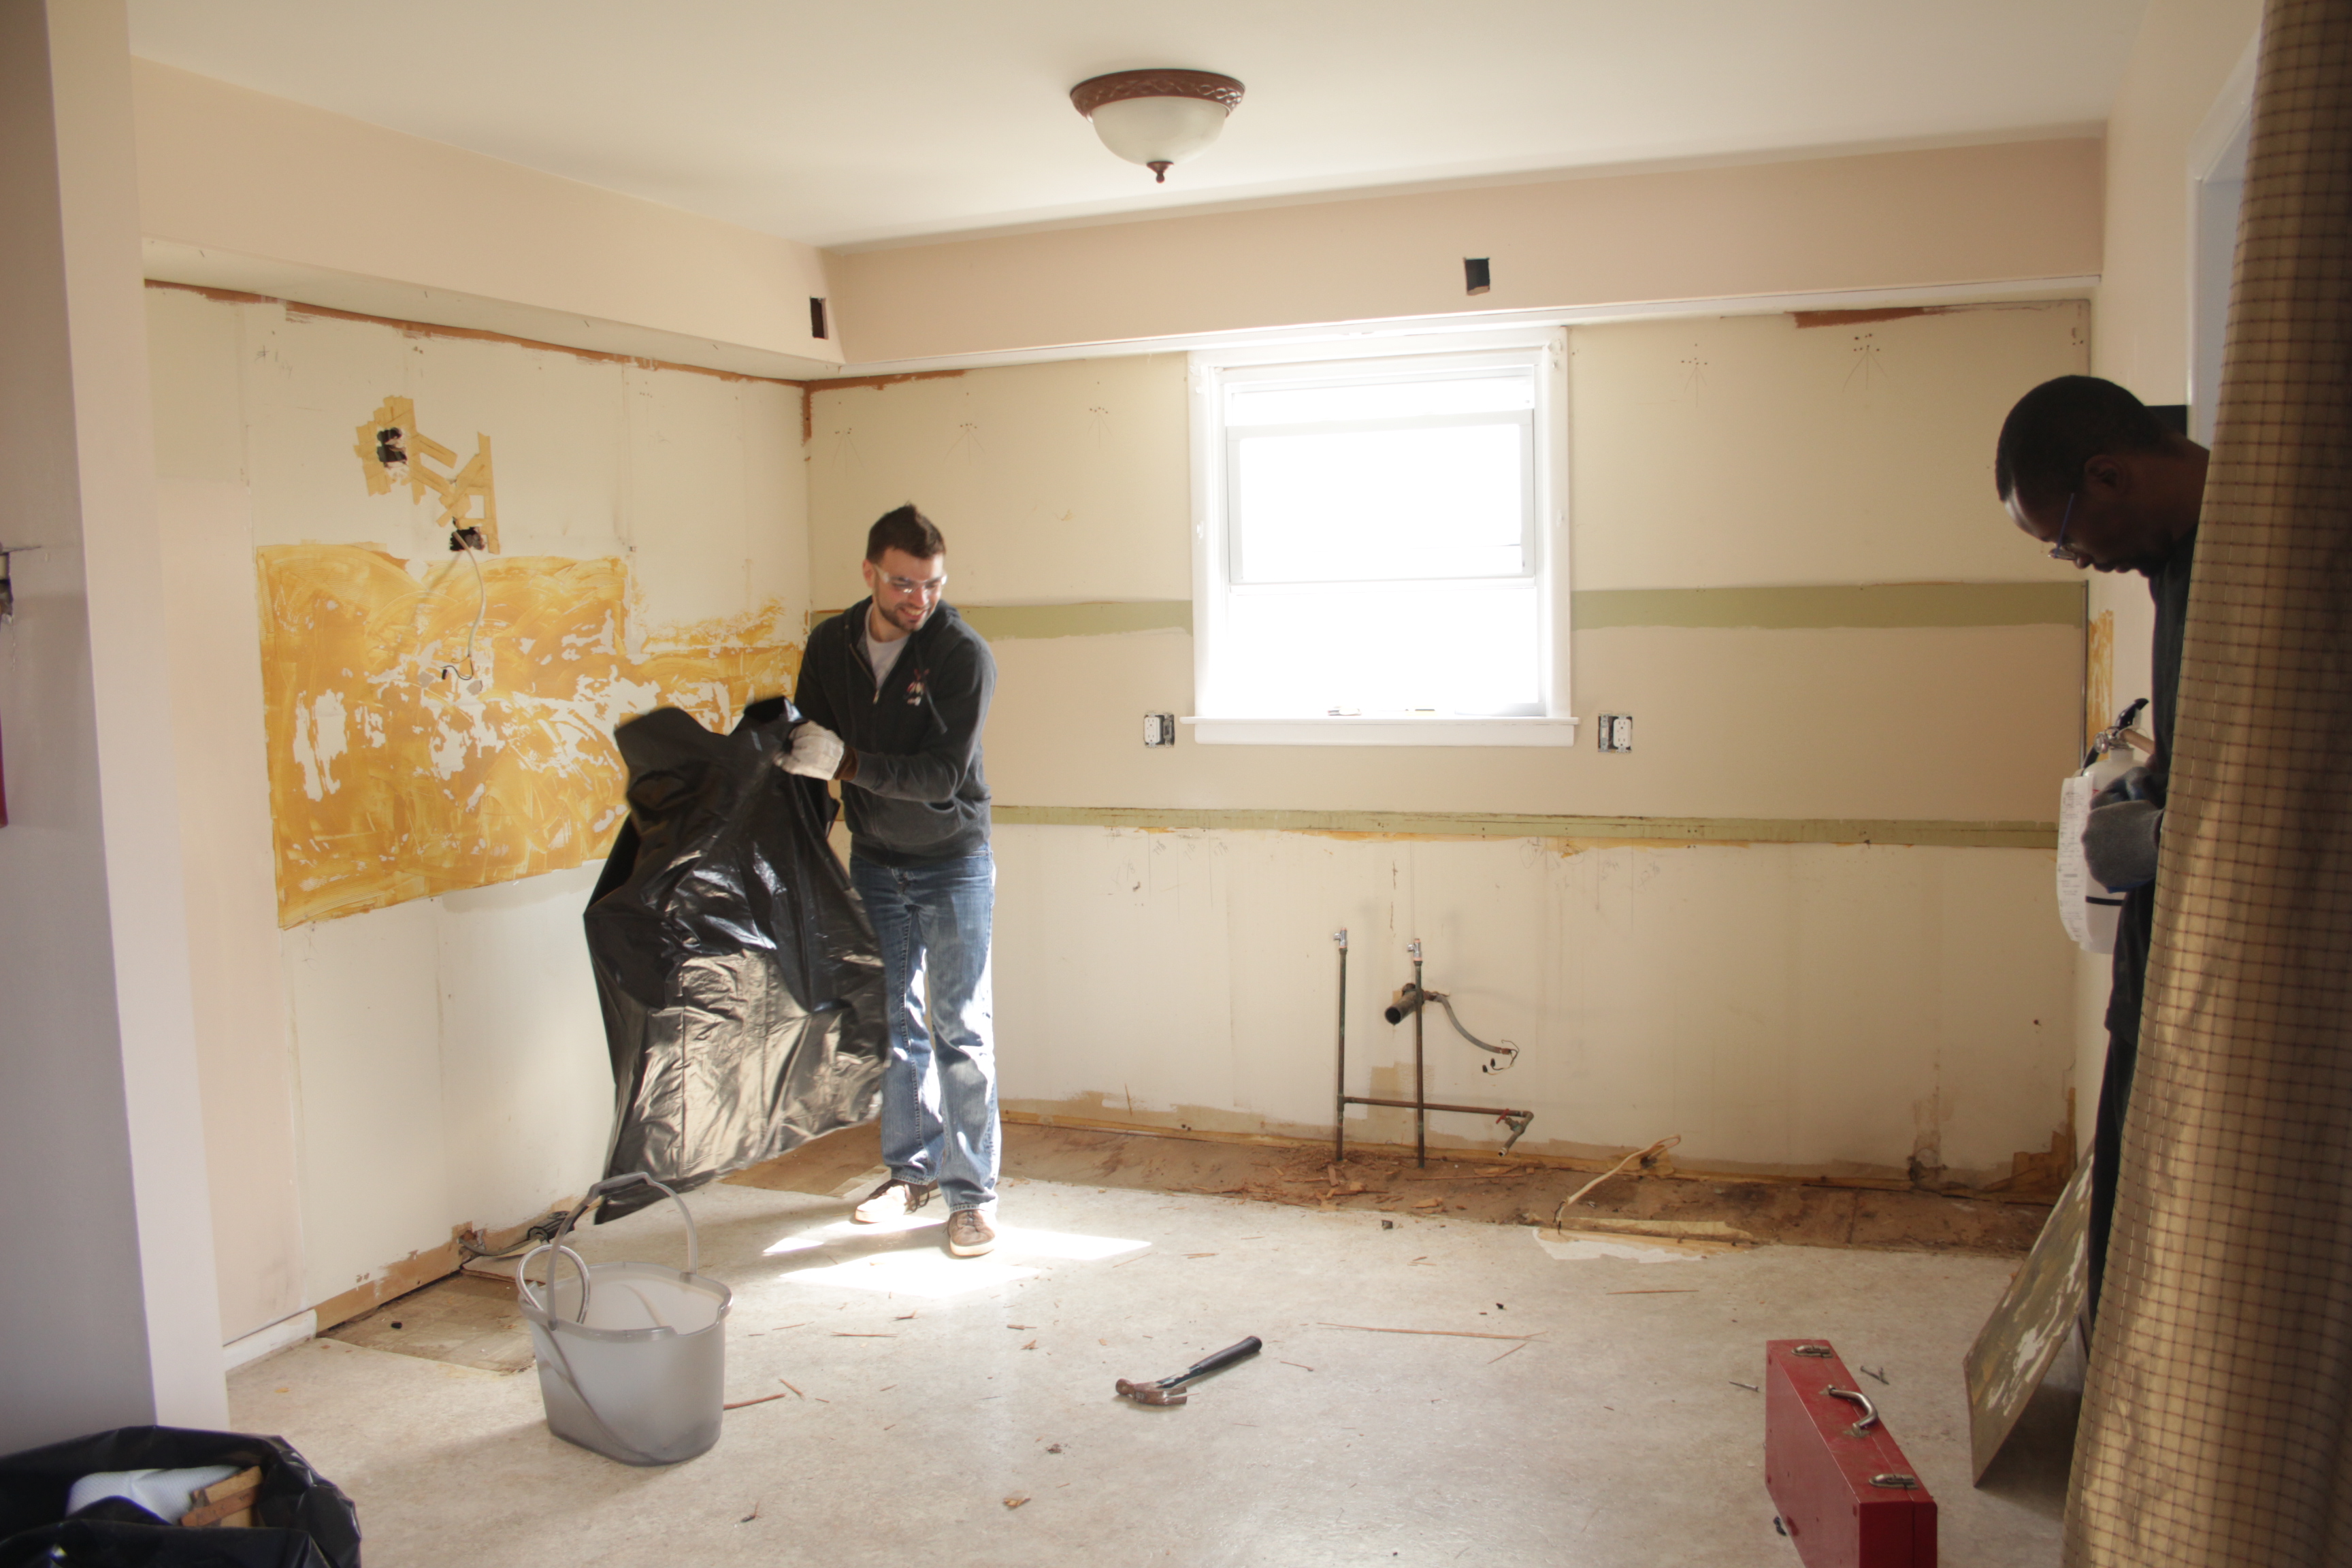
This weekend seven of us descended upon the shore house to rip out the kitchen and begin prepping the walls for paint.
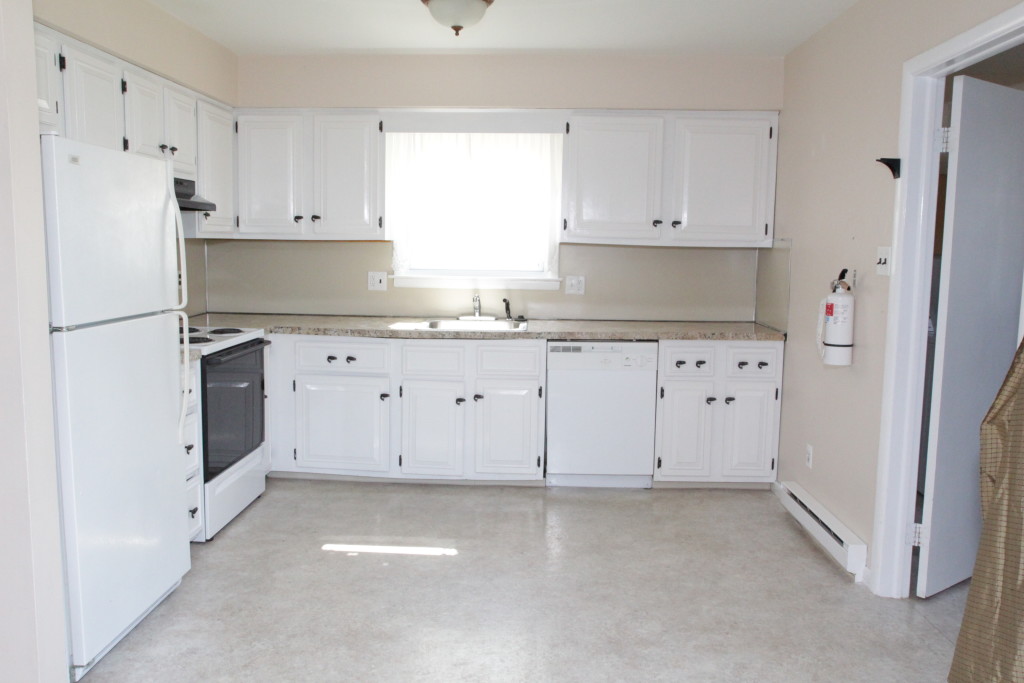
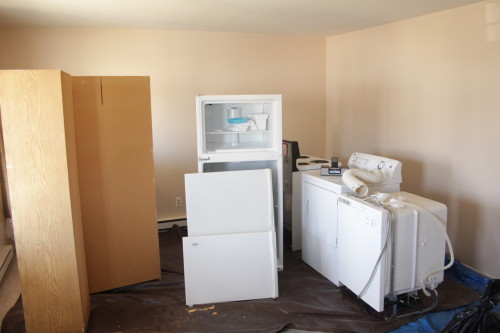
Take a good look at this picture of the kitchen, because it’s the last you’ll see of it!
First we removed all the appliances and put them in the living room. I was really glad I had my dad and another handy friend with us, because I had no idea how to remove a dishwasher. Additionally, the shutoff valve for the dishwasher water supply failed, spraying water everywhere. Thankfully there is very easy access to the main water shutoff, and we could use my in-laws’ bathrooms next door.
Appliance Party!
Next we took off the doors and started taking the cabinets apart. The sink came out and then we ripped off the countertops.
Some of the cabinets came out in one piece, and those will be donated to Habitat for Humanity’s ReStore along with the dishwasher, stove, sink, and garbage disposal. Other cabinets were not so lucky.
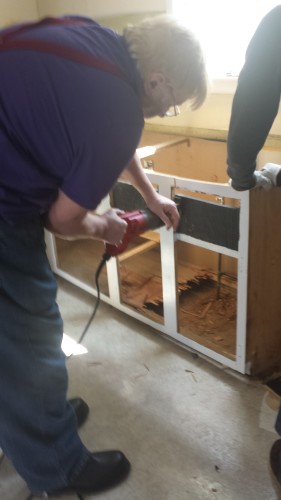
My dad using a sawzall on one of the cabinets
Removing the cabinets revealed that there were not two layers of vinyl flooring, as we’d thought, but actually three.
Top layer on the bottom, middle layer on left, original flooring on the right
I took samples of the layers of flooring and had them sent to a lab for asbestos testing. Thankfully they came back negative, but it’s still gross dirty work so we wore respirators. The plan was to take up the top two layers and leave the one beneath that. There are only so many surprises I can take in one day.
Between each layer of vinyl was a layer of plywood underlayment. The plywood was held down with approximately 1000 staples. It took four of us at least four hours to get all the goddamned staples out. Each staple was at least an inch long and had to be pried out with vice grips. Regular pliers were completely useless for the task.
We had one of these on Saturday. We went to the hardware store on Sunday and bought 4 more.
After pulling out staples forever we pulled up the middle layer. Because it was glued down (surprise!) the bottom layer started coming up with it. Thankfully the bottom layer came up mostly intact so it wasn’t too terrible. I don’t know what the moral of this story is, because I don’t think it’s “leave your floor covered in 40 years and 2 inches worth of vinyl.” My takeaway is that we should build a time machine and stop everyone from putting a million layers of flooring down.
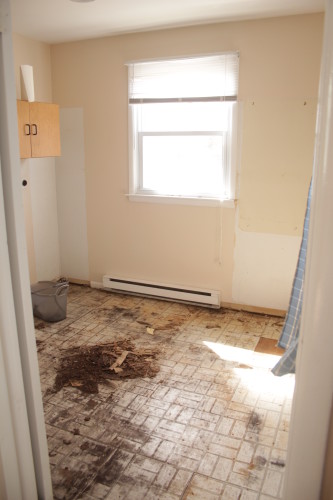
Thanks to water damage on the floor, the plywood in the laundry room came up without taking much of the asbestos tile with it. The pile of debris in this photo is actually plywood that had decomposed into dirt. On the right side you can see a spot that jettisoned an old tile.
Laundry Room
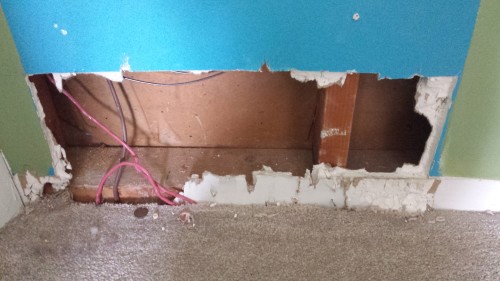
The last major items to demolish are the soffit above the cabinets and the wall next to the fridge. And electrician came in and removed the wires that were running through the wall so that we could safely remove it. He’ll be back in a few weeks to button it all up.
Goodbye Wall
With the kitchen emptied out I taped off where the new cabinets are going to go. I wasn’t sure about the island before, but now I think it’ll fit comfortably.
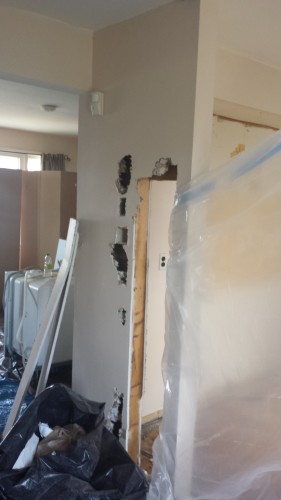
There is still some work to do but it’s coming along. In addition to the kitchen demo there was also a ton of spackling and sanding happening upstairs. I salvaged some of the drywall from the kitchen wall in order to make a patch which will go in this charming space where someone ran wires and didn’t close it back up. Or paint around it.
I don’t even know what’s happening here.
In the meantime I’ve got a million contractors scheduled. The crawlspace needs work (which we knew about before purchasing) and originally I was going to put it off because it’s not urgent. After spending 5 minutes under there I think we should do it sooner rather than later. It’s very damp all the time due to the fact that the soil has eroded below the bottom of the foundation and water has no way to escape.
Other big-ticket items are the heating system. I want to convert to gas, and then if we convert to gas the question is do we replace the aging hot water heater now. And if we do, do we get a tankless system. The tankless system is wayyyyyyy more expensive but in a house where we’ll regularly have 8+ people sleeping/showering a tankless system is very appealing. Even if we can only run one shower at a time (a complaint I’ve heard with tankless), 8 warm showers is better than 2 warm showers and 6 cold showers.
Right now I’m feeling a liiiiiittle bit overwhelmed by the scope of this project. We can talk about my sticker shock over the price of countertops another day.
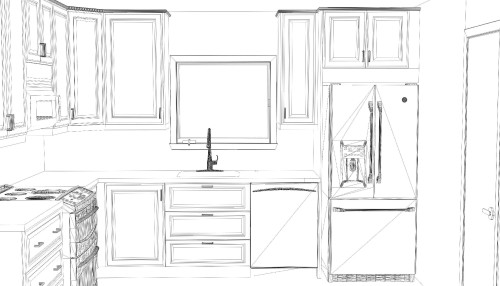
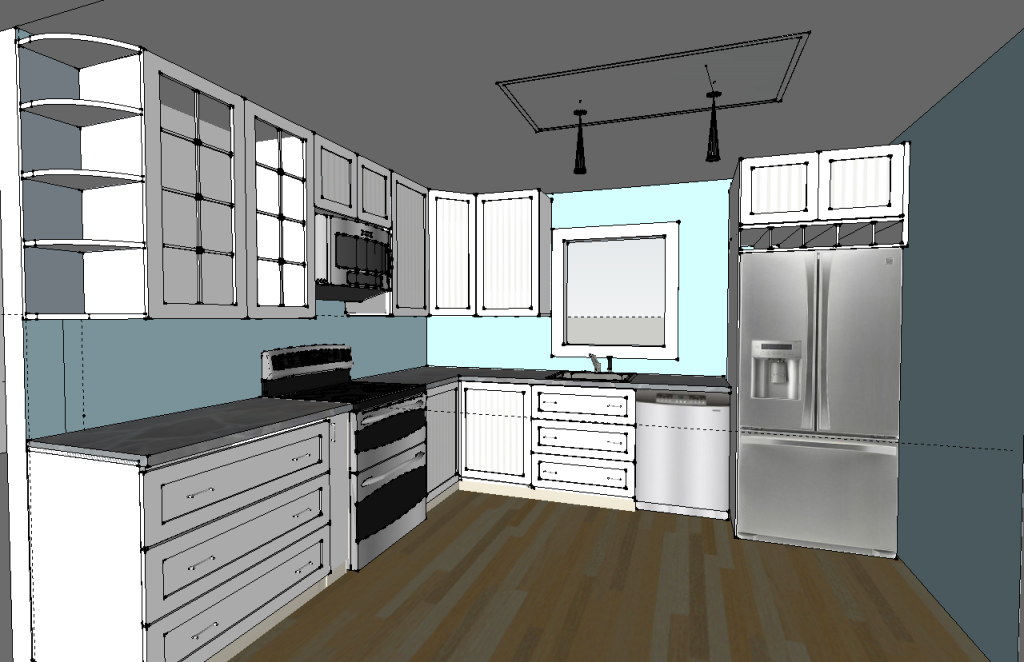
The first draft of the kitchen layout came in tonight. It’s a start, but there’s definitely some stuff I want to change (and a few things I realize I forgot to tell the designer). The coloring is all mine, it came to me black and white.
Perspective View
I totally forgot to tell them we plan to remove the soffit (i.e. the drywall box above the cabinets), which would make the space above the refrigerator way less awkward. I’m not sure if we’d raise the cabinets up higher, maybe just the ones above the oven? I’m short so I don’t want to put stuff too high, but it would be nice to have more clearance between the microwave and the range.
Top View
I’m really not sure how I feel about the island. I plan to tape it out this weekend to see how it feels in the space. It adds some much needed counter area but I’m worried it will feel awkward. I do like that one person could be cooking at the range, one person could be cutting veggies by the sink, and one person could be prepping on the island without anyone getting in each others’ way.
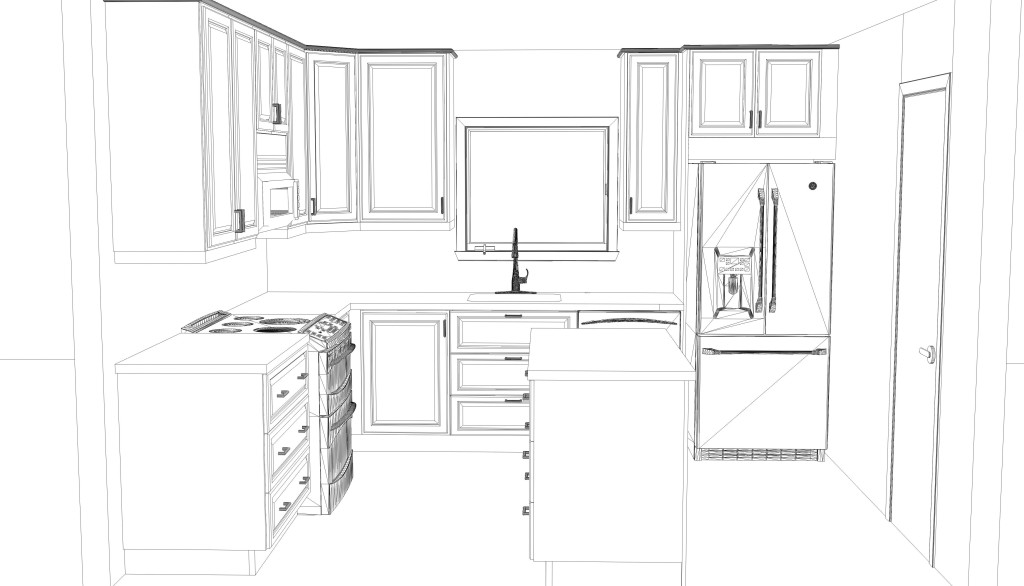
Back Wall
I forgot to tell them to put in a double sink, and I just generally don’t like the layout for the area by the window. One solution would be to move the dishwasher into the island (easy since the kitchen is above an open crawlspace). It would mean running extra water and electrical lines, but it might be worth it to get that space a little less awkward. Alternately I could just pick out a smaller refrigerator which would free up some space and give us more room for a bigger sink (but it would still be off center, which I might just have to live with). The off-center-ness of the sink would be a lot less irritating with a lower profile fixture as well.
Left Wall
Seeing this drawing has me convinced we should remove the little partial wall that is currently next to the fridge (visible here). It makes no functional difference but it makes the room seem much more open without it. The wall does have some electrical in it so I’d have to have that moved. An electrician is coming down on Friday to quote everything.
I spent a while tonight trying to pick paint colors using the Sherwin Williams tool, which served us well before. It’s harder with this place though. I love bright bold colors but the rooms down the shore are so small that it could easily feel overwhelming. The furniture is also much more mis-matched hand-me-downs so I need colors that play well with random sofas.
For the upstairs bedrooms I’m thinking of going with a shade of grey, and then using duvet covers to add colors. The beige carpet is killing me. It is a slightly warm shade of beige so I have to be careful to pick walls that compliment it well or else it will just look dirty (jk it is dirty). The color currently stops below the slanted part of the ceiling, which makes it feel like it’s caving in of you. Whatever color we pick will be extended all the way up to the flat part of the ceiling.
I love love love the blue color we used in our guest room in Philly (“Drizzle”) but I wouldn’t want to do it in all four bedrooms, and I’m not sure how I like it with the carpet.
Gray Clouds
Drizzle
Classic French Gray
Mineral Deposit
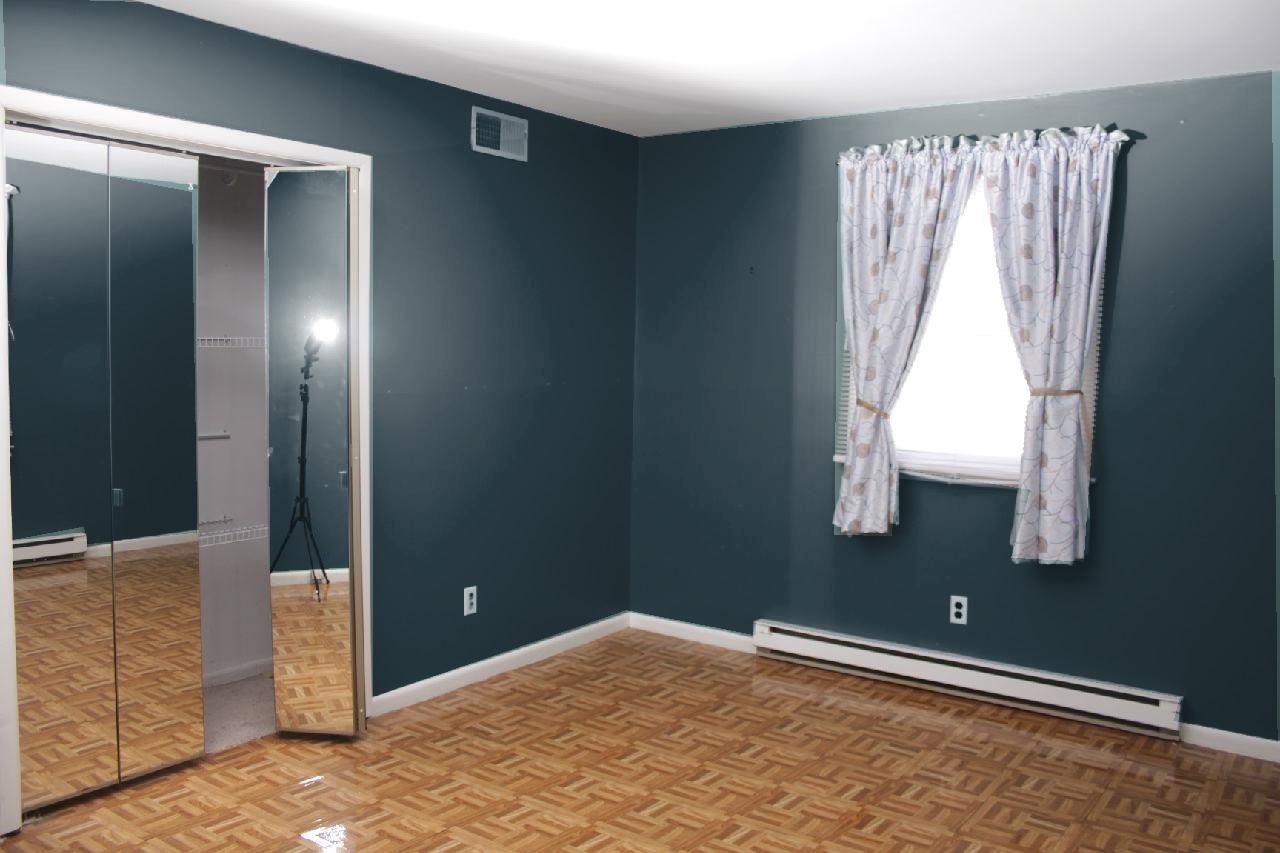
The downstairs “master bedroom” is the largest bedroom in the house. It has parquet floors which I haaaaaaaaaaate but given the amount of other work the house needs I’ve gotta live with them. My favorite of the choices is the dark color, but I feel like a dark bedroom isn’t very ‘beachy.’ My beloved Drizzle doesn’t look so great against the orange wood of the parquet floors. I’ll probably go with the lighter of the two grays below.
Jubilee
Serious Grey
Dark Night
Drizzle
Meanwhile I’m trying to get everything ready for the weekend, which is Demolition and Contractor Extravaganza. Friends are coming down on Saturday to help rip out the kitchen and prepare the walls for painting. I have two different HVAC estimators coming out, an electrician, and a crawlspace guy. It’s gonna be a busy weekend.
It’s cheap, lasts forever, fireproof, what more could you want from a miracle material? – My dad, on asbestos
I knew this going in, but oh god nothing is ever easy with home repairs.
Let’s start with what we knew going into this: the house is covered in asbestos. Literally. It has asbestos siding, but it’s in good shape so who cares just leave it alone and we’re fine.
We also knew the house had inadequate flood venting. Aside from driving up the cost of flood insurance the inadequate venting traps moisture under the house which makes the wooden structure rot faster. So we knew we’d be spending about a thousand dollars on replacement/additional vents.
What we did not know is that the vents are placed in such a way that they can’t be replaced without cutting into the siding. Which is made of asbestos. Therefore the cost of replacing vents is more like $2500. Ouch. “But,” the venting contractor said “if you were planning on replacing the siding anyway I could do the venting while the siding is off and that would save you a lot of the labor charges.” I assure you, with the laundry list of things to fix on the house I was not intending to replace the siding.
From what I’ve read asbestos siding lasts damn near forever, so I’m leaning towards not replacing it. I’m going to have someone come out and give a quote tomorrow but I can’t imagine the cost being worth it. Opinions from anyone who has done this before are appreciated.
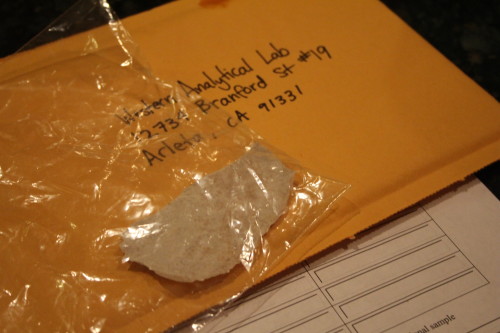
Speaking of asbestos, did you know that some vinyl floor tiles contain asbestos? Me neither! I cut a chunk of vinyl out of the kitchen floor and am sending it off to a lab to have it tested. We should get the results in a week or so. I don’t even want to have someone look at the roof (which will need replacing within the next few years) because I’m afraid to find out how much asbestos it is full of.
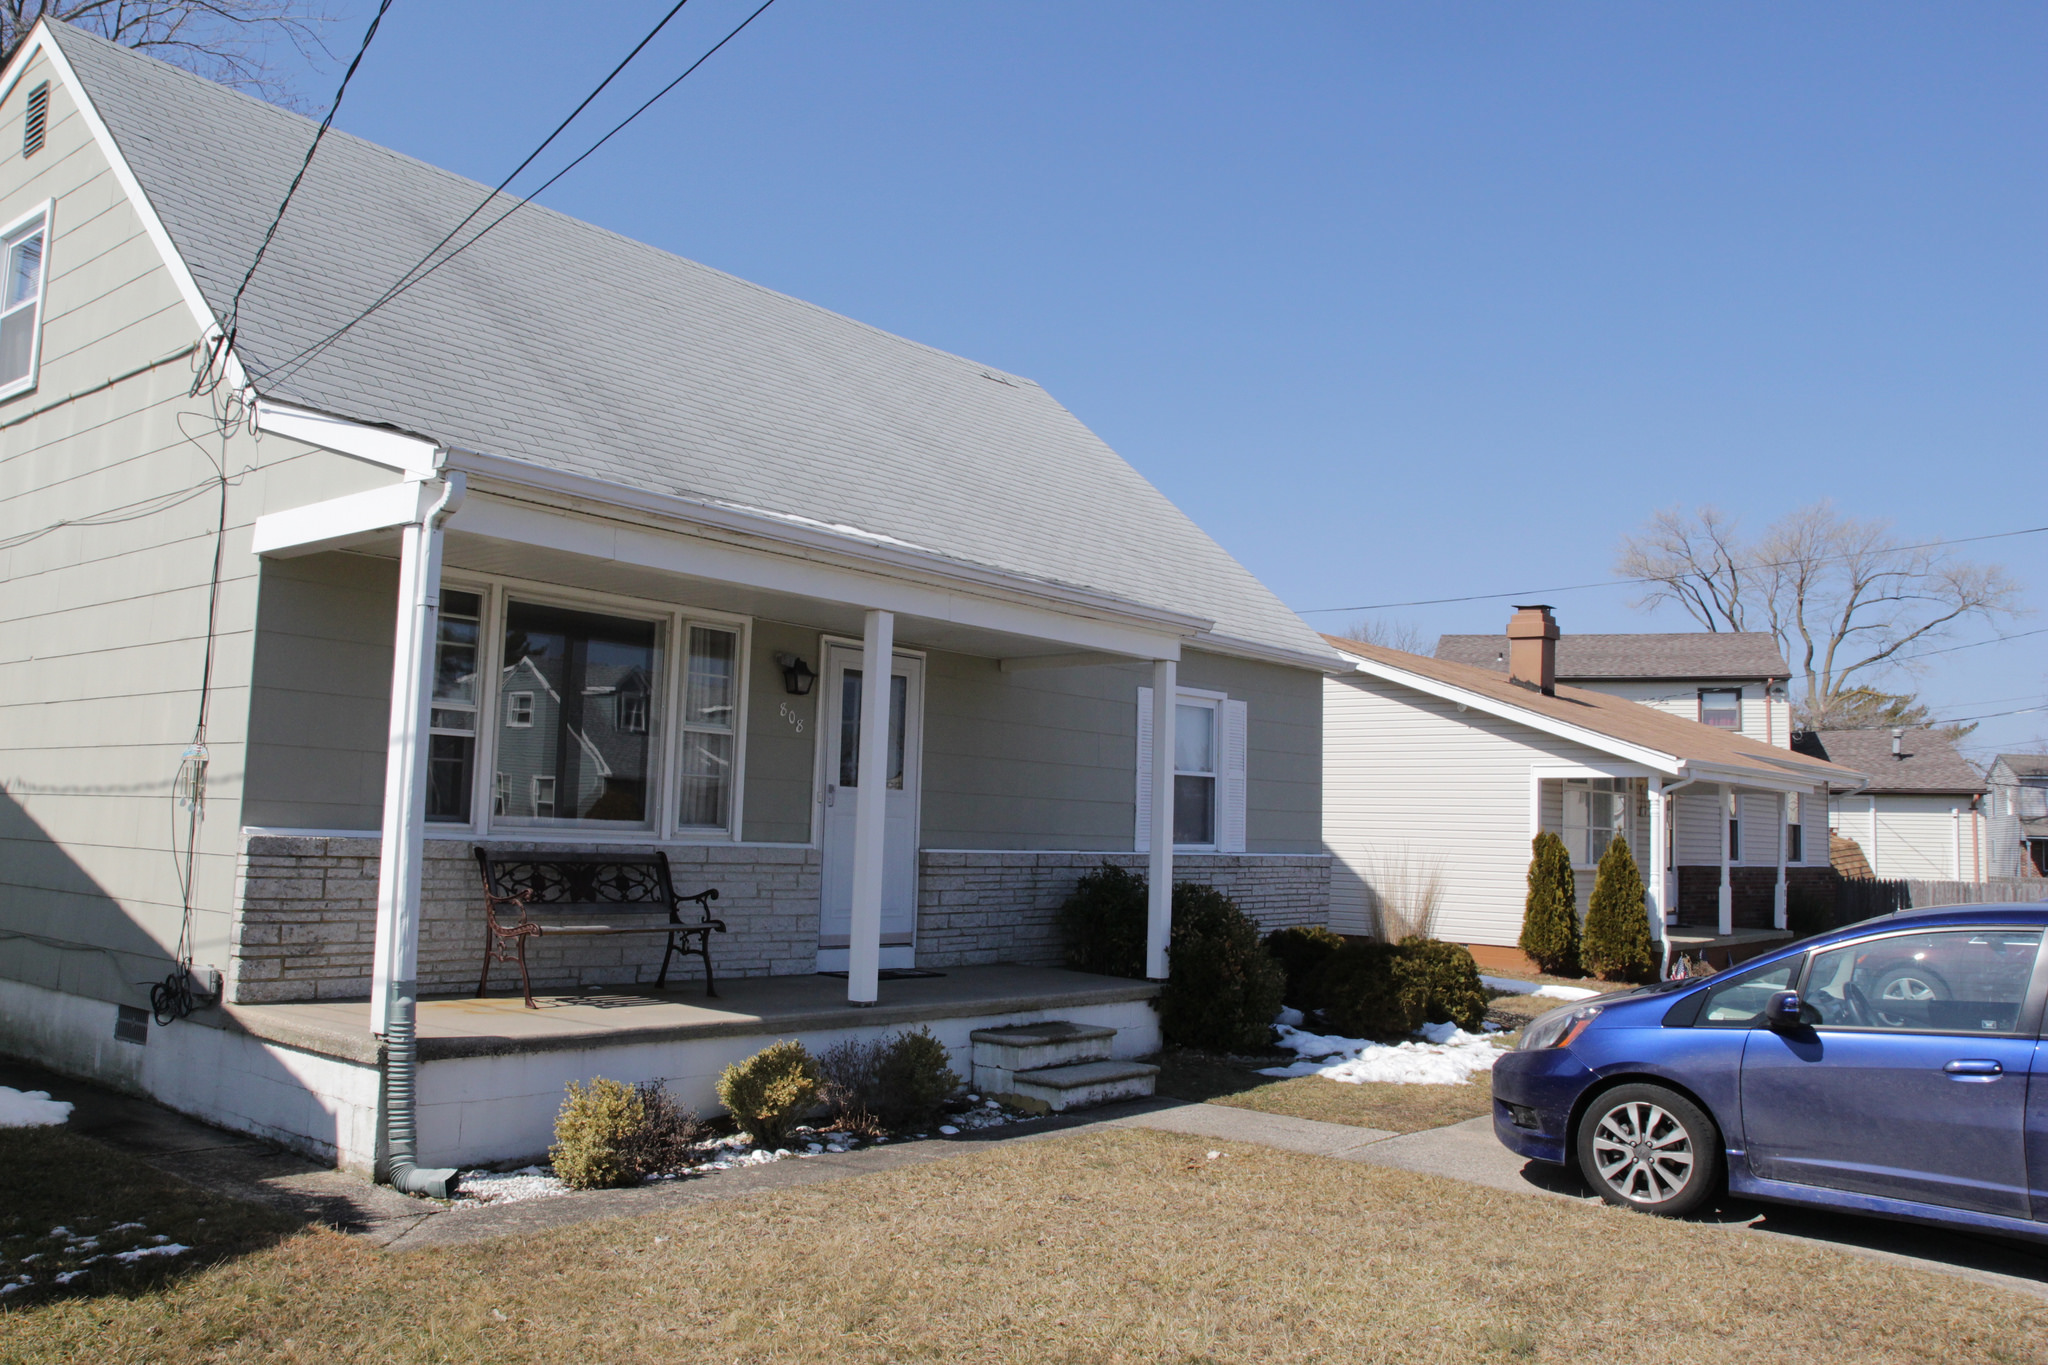
It’s official, we are now the proud owners of a shore house next door to my in-laws!
Closing took a while. Aside from the usual shenanigans we had to sign 30 pages worth of affidavits saying that we were not various other people who share our names and owe many other people lots of money. I’m not sure if this is unique to this area or not, it was definitely new to us. The title agent was also so disorganized I won’t be surprised if we get called back to fix some of the paperwork later. But we’ll deal with that later … it’s ours!
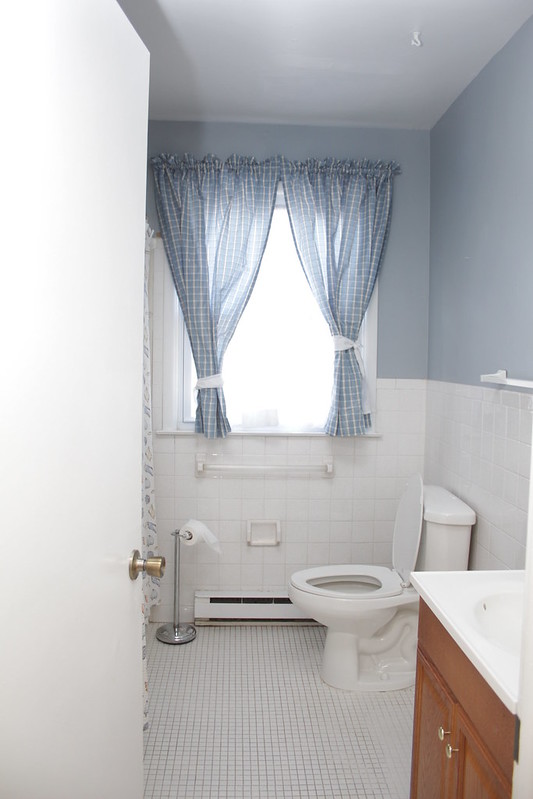
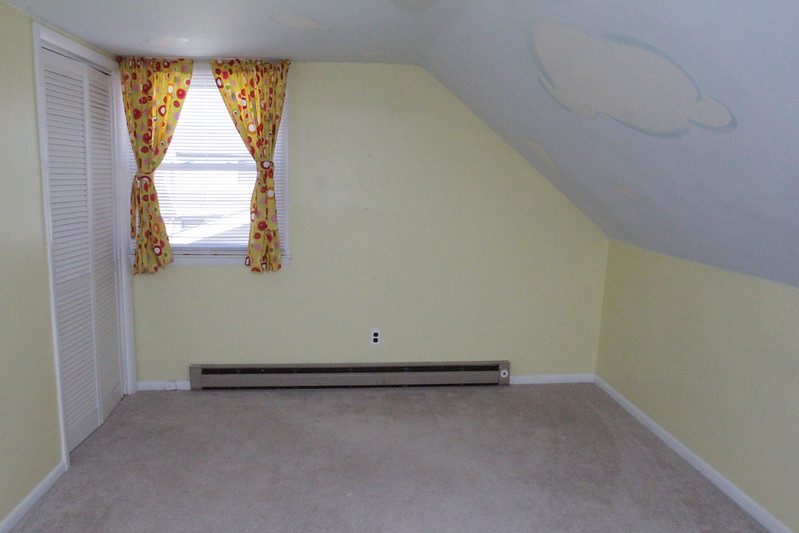
After closing my dad helped me take photos and measurements. I got some OK photos but honestly by the end of it all I was so exhausted I could barely function. Here’s the nickel tour…