Crafting

Knitting Nesting Instincts

I actually started knitting baby items well before I got pregnant myself. Baby items are some of the most satisfying things to knit: they’re quick, they’re great for using up the odds and ends in your yarn stash, and the fit can be pretty haphazard.

When my friend Bre’s baby was born I knit a tiny pair of baby booties, which immediately triggered a flood of suspicion from the family. The pattern can be purchased here.

Baby Booties

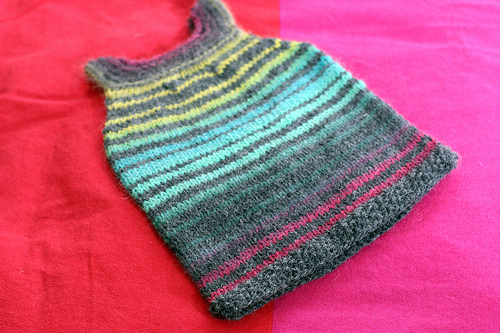
Next up was a tunic/dress thing for our own spawn. I had half a ball of Chroma yarn left, which tends to look a little like clown vomit when used by itself, so I striped it with some grey.

Tiny Tunic

The most recent is a Milo shirt, which I knit in pink even though we’re not planning on finding out the gender before the baby is born. Fun fact: pink used to be considered a color for boys as it was “light red.”

It didn’t come out nearly as well as I’d hoped, mostly because the varigated yarn competes too much with the cable details, so I didn’t bother to photograph it.

I keep track of my knitting on Ravelry, you can follow me there if you’re a knitter too.

Crafting

Homemade Cast-on Comb

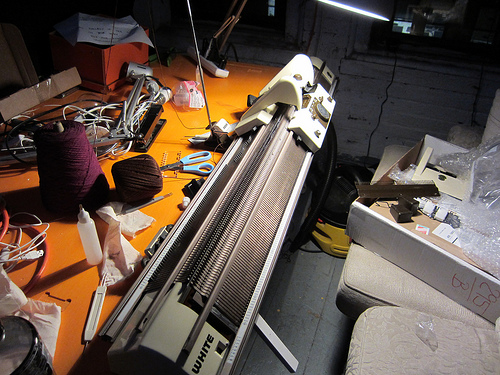
The White/Superba 1602 I purchased sadly did not include a full-bed cast on comb, which makes casting on things wider than swatches somewhat tricky. There are a few floating around eBay, but they all seem to be $50 and/or in France, and shipping a three foot long steel comb from France to the US isn’t particularly cheap. Also, I am impatient. I’m told that a knitting machine store in Toronto also has some, but again, impatient.

So I set out to make my own. The comb consists of small metal teeth which go in between each stitch, and a rod which is threaded through holes in the top of the teeth to trap generic propecia the yarn in place. I made a 12″ long test comb to see if it would work before committing to a whole yardstick worth of bobby pins and hot glue.

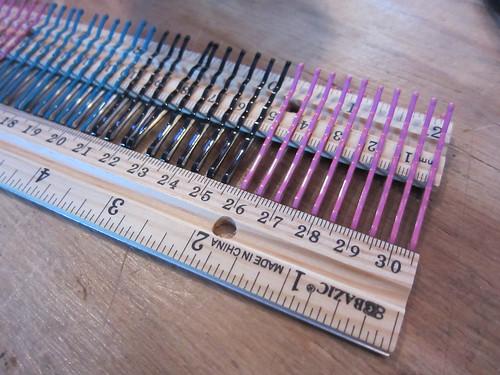
I purchased 4 packages of bobby pins and some wooden rulers at the local dollar store. I then arranged the bobby pins at 5mm intervals along the ruler, since the Superba machines are 5mm machines.

IMG_0304

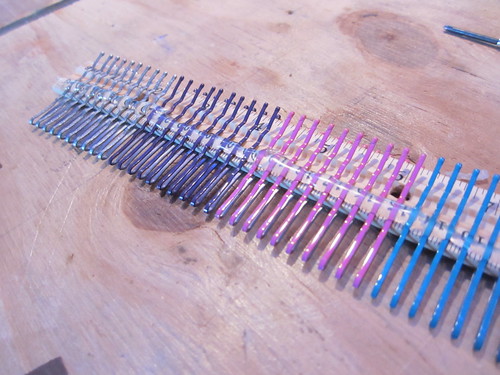
I used a second ruler (they were 3 for $1!) to make sure the pins were all at an even height and that they retained their 5mm spacing. Then I ran a line of hot glue along both sides to hold things in place.

IMG_0306

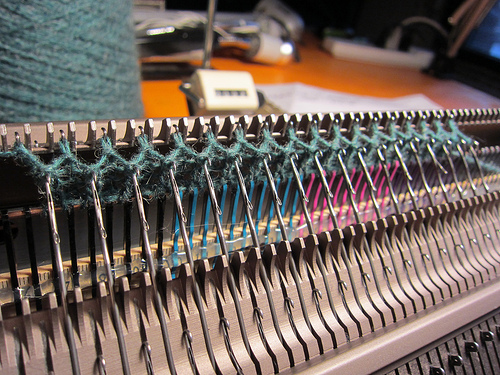
To use the comb to cast on ribbing, you run the carriage/yarn across the needles to establish a zig-zag of yarn across the bed. Then you push the cast on comb up between each stitch, and run a rod through the top of the comb. This traps the yarn between the rod and the ruler below, letting you appropriately tension the yarn for the first row of stitches.

IMG_0309

As you knit, the comb pulls the fabric down between the two beds. A weight is attached to each end to provide tension. In this photo, I’ve lowered the front bed to make it easier to see what the comb is doing. You can just barely see the small copper rod at the bottom of the fabric.

IMG_0307

I used it to knit a gauge swatch for a sweater I plan on knitting soon. It’s a mini-cable rib pattern. The cables are worked by hand, which is pretty tedious though I’m slowly getting faster at it.

Mini cable rib swatch

My dollar store comb is by no means as good as the real thing, but it works pretty well for $2 worth of materials. It has a few key issues which make it a little tricker to use than a normal cast on comb. First, the end of the bobby pins are just a little bit too wide, I have to set the bed spacing all the way up to 6 in order to get them to fit through. Second, the bobby pins get in the way of the holes used to hang the weights. And my DIY comb is nowhere near as durable as the steel one. But it works well enough for now.

Crafting

I can stop whenever I want

I don’t have a knitting machine problem, I could quit right now, I swear.

While working with my Toyota 747 I decided to try and find a ribber for it, which led me to the Ravelry Knitting Machine Sales group. I did not find a Toyota ribber, but I did find someone in Brooklyn who was selling a White/Superba 1602. He was selling it at a reduced price because the electronic selector box was not functioning.

White/Superba 1602

The Superba knitting machines, which were also sold under the brand names White, Singer, and Phildar, are really interesting machines. Instead of a main bed and an optional removable ribbing bed like most Japanese machines, the Superbas have two permanently fixed identical beds. This makes it much easier to get consistent, even ribbing.

Mechanically, the machine is in good shape. Stockinette stitch, ribbing, and jacquard patterning (done by manually moving the needles into place) all work well.

The selector box, which can be seen in Patrick’s photo stream, works by reading stitch patterns off mylar sheets. A photoresistor detects either a light or dark square and sends a signal to the machine which moves the needles accordingly.
In addition to maintaining a comprehensive site on Superba machines, Patrick also was kind enough to supply me with the users manual, service manual, exploded part diagrams, and logic flow charts for the electronics.

As soon as I opened up the machine and took out the circuit boards, it was clear things weren’t working properly:

Broken :(

I superglued the board itself back together, and then used lumps of solder to repair the broken traces. Jumper wires would have been better, but admittedly I was too lazy to get up and find a spool of wire.

Once the traces were repaired, Phooky helped me test the output voltages. Since it takes in 110V mains power, I was nervous to start poking at it by myself. But we only made the electricity arc between the multimeter probes once. Have I mentioned that mains power is kind of terrifying?

Anyway, of the four pins that connect to the card edge, two are tied together to ground, and the other two provide 24v for the motor drive (which feeds the mylar sheets) as 12v for the COP420 microchip.

Speaking of the COP420, my first instinct was to try to get a firmware dump off the chip and try to reverse engineer the firmware. Not that I have any experience doing that, but luckily Trammell does. Unfortunately, he found out that the COP420 is a mask-programmed device, meaning that the program is put into ROM when the chip is created, in contrast to something like the Atmega chips used in Arduinos. If you’re lucky, the “test mode” on the chip was initially enabled, making it possible (if somewhat of a pain) to read out the firmware.

The more I think about it, the more it makes sense just to redesign the selector box from the ground up. Most of the bulk and power of the box is related to the scanning and advancing of the mylar cards, which are adorably archaic but not exactly convenient. A USB interface would be vastly preferable, and would cut down on about 2/3 of the circuit. I need to do some investigating to see if the whole thing could be USB powered, eliminating the need for a separate power cord and bulky transformer.

Yeah, ok, I have a knitting machine problem.

Crafting

Knitting Machine Teardown Part 2

After purchasing a fresh sponge bar for the Toyota K747 I started to put it through its paces. It knits stockinette beautifully, so I started working through the tuck stitches.

At first I couldn’t get the I and II buttons to stay in place at all. After some disassembly and a lot of oil, we got things moving again and it works great. But I quickly noticed that the 3rd needle selector wasn’t working. So I started to disassemble the machine to figure out why.

IMG_0289

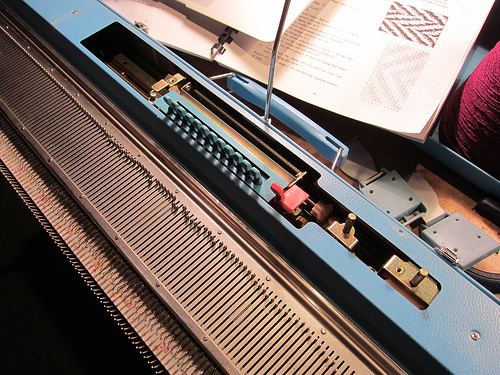
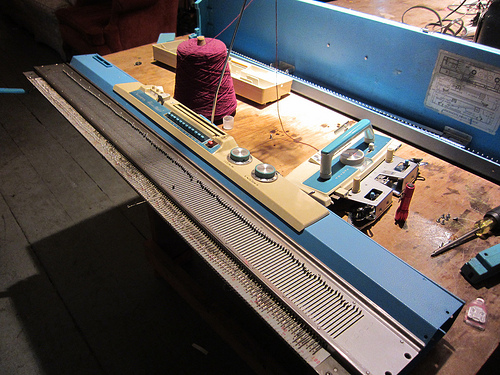
With the top cover off you can see some of the neat mechanisms in there. The zigzag gear (right) physically moves the needle selector up or down the needle bed. This means if you have a simple shifting pattern like a zigzag or checkerboard, you don’t need a punch card at all. You can just move the zigzag back and forth with each row.

Each of the blue needle selector levers rotates down to catch a small lever on the bottom of the machine. When these levers are caught, they cause the corresponding shafts (anyone know what these are really called?) to raise, which then push the needle butts forward. The small red lever releases the needle selectors.

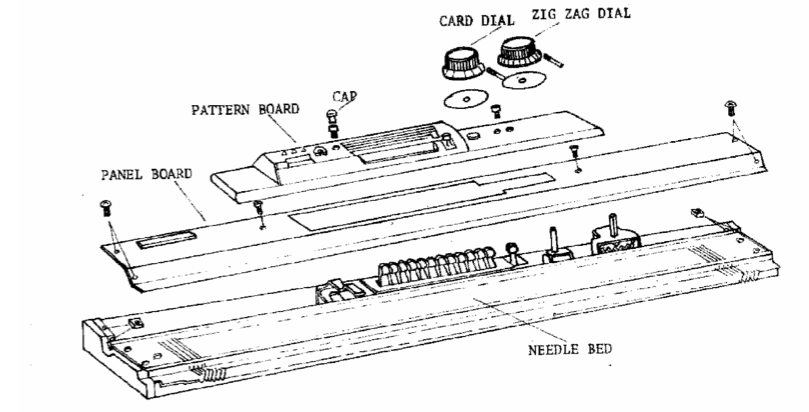
Getting into the machine was a little tricky, you have to remove the card and zigzag knobs to access all the screws. Thankfully there’s a useful diagram in the K747 service manual. With the knobs removed, you can see the discoloration of the plastic over the years.

IMG_0287

I had to fully remove the needle bed from the machine casing to get at the needle selector levers. Unfortunately by that time my hands were absolutely covered in grease so I couldn’t take many pictures. But once I got it out, I could flip it over and see the problem part:
Busted

The two little tangs on the bottom of the 3rd needle selector have somehow broken off, though I’m really not sure how. Unfortunately disassembly/repair of that part of the machine isn’t covered in the service manual. I see two options going forward: 1) I can carefully disassemble the needle selector mechanism, 3D print a replacement lever, and pray to God that I can get it all back together again, or 2) Fashion some replacement tangs with Sugru and hope they stay in place.

Since option 2 doesn’t require completely disassembling the machine, I’m going to try that first. There are a lot of little springs and I’m not sure I have the dexterity to get them all back in place again. I’d also like to better document the machine teardown, so sometime in the new year I’ll recruit an assistant and take apart / photograph the whole thing.

In the meantime the machine works great, and I can come up with plenty of patterns that avoid the 3rd needle selector.

Crafting

Toyota K747 Knitting Machine Instruction and Service Manuals

When I partially dismantled my K747 knitting machine I wasn’t able to clean it out much because I couldn’t get it completely opened up. I was thrilled to find a copy of the Service Manual as a free PDF, and can’t wait until I have a spare weekend to get in there are de-gunk it.

When I first got the machine, I had no idea what model it was. Thankfully the folks at Newton Knits did, and were able to guide me to the right replacement sponge bar and needles, as well as a copy of the instruction manual.

I’ve noticed that there are a ton of people selling PDFs of the scanned manuals, for a king’s ransom. One on eBay was $15 plus $4 shipping for a CD with the PDF on it. Mind you this is a PDF that the seller didn’t even author, they just scanned the book. Someone else holds the copyright.

I was able to find the instruction manual for the lace carriage as a free PDF, which led me to copies of the service manual and instruction manual for the machine itself. I’m making them available here for anyone who so desires them, free of charge.

Toyota K747 Instruction Manual
Toyota K747 Service Manual
Toyota K747 Lace Carriage Manual

If you have a different machine you need a manual for, check out this link. They list a huge number of free knitting machine manuals, many direct from the manufacturers.

Crafting

Knitting Machine Teardown

A few years ago I was given a Toyota K747 knitting machine, a gorgeous blue knitting machine that features a punchcard patterning system. It is by all counts a fascinating machine, and I was excited to receive a lace carriage for it today.

It’s been a while since I’ve devoted time to the knitting machine – they’re a bear to set up and take down so without somewhere to leave it set up all the time it can be daunting to use.

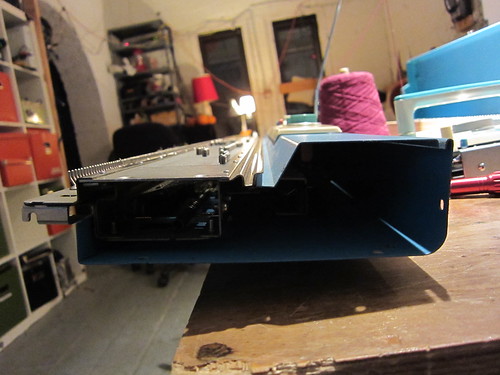
I noticed that one of the screws on the side wasn’t biting into anything, and decided to take the machine apart to figure out what was missing. I took out 6 screws on each end, and pulled off the end caps.

Side view

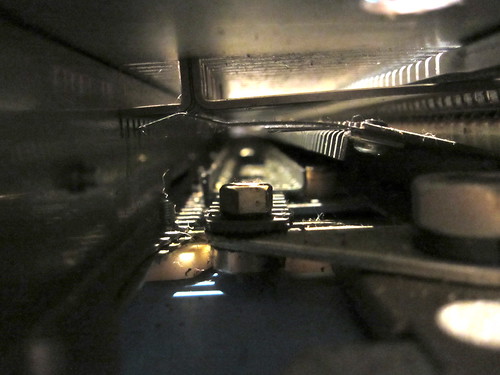
With the caps off I could stare into the dark abyss of needles and gears. I discovered it’s really challenging to take photos down a long, dark tube when using a point and shoot camera, so forgive the image quality of the following photos.

There are two “compartments” inside the machine, the front area which is all metal and has slots at the top for the needle tabs (called the needle butt) to stick out of, and the back which is mostly plastic where the needle butts rest. This is also where the patterning shafts (for lack of a better term) are located.

Here’s the front compartment, the front of the machine is to the left. If you have trouble seeing the needle tabs, click the image for an annotated version.

Front interior

Here’s the back. You can see there’s some greasy dusty areas. I’m not sure how to get in there to clean it. The needle shanks are pointing down to the “shafts”, which if you look closely you can see there are 12. The Toyota K747’s repeat is 12 stitches wide.

Rear interior

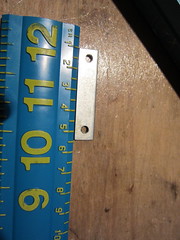
The missing part in question is a small rectangular nut which slides into the end cap. I’m really hoping this is something I can source rather than having to mill/tap one myself. Any suggestions for shortcuts are appreciated.

Mysterious nut

Aside from the missing nut, the machine is in great shape, and the nut isn’t super crucial to the machine’s operation. My next step is to find a scale version of one of the punch cards so I can cut some out on the laser cutter. I found a few places that claim to sell punch cards for it but none of them had them in stock.

Crafting

Showing off some knitting

I’ve been doing too much work-coding to really get into hacking lately, but I have gotten back into knitting. It’s nice for long bus rides and commutes.

Here’s some of what I’ve been working on lately:

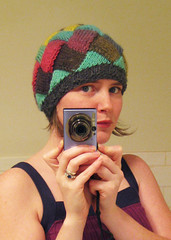
Entrelac Hat
A festive entrelac hat. It’s neat because it looks like many different yarns, but in fact there’s just one continuous strand throughout the whole hat.

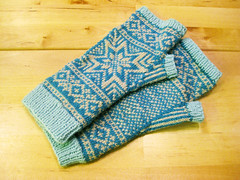
Snowflake Fingerless Gloves
Fingerless gloves. This was my first real attempt at fair isle color work, and it was a lot easier than I thought it would be.

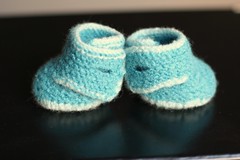
Baby Booties
Baby booties for a friend’s baby

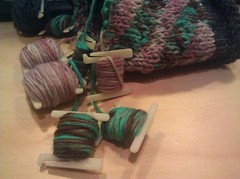
I also printed some yarn bobbins on our makerbot, to make it easier to manage yarn for intarsia:
Yarn bobbin


You can find details about each project, including the free patterns they’re made from, on my Ravelry page (warning: account required, but it’s free).

Crafting, Hacking

Hooked on 'botting

This week I makerbotted for the first time! I know, I know… I should have done this much much sooner. Everything Tiny and Makerbot were actually founded in the same room, the old NYC Resistor location, and it's been really exciting to see things take off for them. But until recently, partly due to the success of Everything Tiny, I never really had time to sit down and get personally aquanited with the wide world of 3D printing.

Part of my probelm was that I always had ideas which were large and complicated, and I never finished the designs. So in an effort to actually produce something, I set myself to a very simple first project: a plastic organizer insert for a mint tin.

Subdivided mint tin

I'm using it to organize my miniature pompom collection. Because I have one of those.

Overall the printing process was pretty easy. Adam, Matt, and Pax were nice enough to help me get over the few problems I ran into. Matt, who is the developer in charge of ReplicatorG (Makerbot's printing software), gave helpful instructions like "now click the picture of the potato with an arrow coming out of it." He then asked if I knew any UI designers looking for work.

Here are the issues I ran into on my maiden print:

The model didn't adhere to the bed.  Because my design is pretty thin, it didn't stick very well to the bed of the makerbot, even with the heated build platform. This was easy enough to fix, we turned on the raft (a layer of plastic which goes down evenly before you start the real print, and is removable later).

The plastic was coming out goopy. The main issue with my first two attempts was that the plastic was coming out much too thick, and kind of lumpy/grainy. This caused two problems: first, it looked terrible, with little lumpy bits everywhere. But more importantly, the lumpy goopy bits would build up and then harden. Then when the extruder head came by again, it would hit these plastic lumps and move the model, throwing off the registration.

There were two suggested fixes here: first was to increase the speed, so that the build platform would move faster (allowing for less material to build up). This was met with a certain degree of success, but Adam suggested cheap cialis online that the plastic we were using, which had been sitting out at Resistor for quite some time, had absorbed too much water from the air to really be useful. The moral of the story here is to store your plastics in airtight containers with some desiccant. In the end, we switched plastics.

My machine wouldn't talk to the Makerbot. This ended up being an issue with my machine, a somewhat unhappy eeePC. When I switched to my mac, all was happy again. Also, the eee is way too underpowered to really be generating gcode for prints. I was able to cold-boot my mac, install RepG, install the drivers, and generate the print's gcode from scratch in the time it took my eee to get halfway done generating the same gcode.

The build platform wouldn't heat. This one took us the longest to debug. One of the connectors was visibly damaged (names were named but I won't reprint them here), but it worked just often enough to make us think something else was the problem. After some thorough testing with the  multimeter, and some careful coaxing of the connections, power was restored to the build platform.

Here's the source model, which I've uploaded to Thingiverse. Note that this is meant to fit mint tins that I purchase wholesale, and as such may not fit the Altoids tins. I created the object in Google SketchUp and then exported it to STL for use with RepG. GoogleSketchUp is OK for doing things quickly, but there are a lot of things I wanted to do with the design that I couldn't convince SketchUp to let me do. Particularly, I wanted nice rounded edges on the top of my model.

I'm happy with the final print, and really stoked about Makerbotting more models in the future!

lased

Test Tube Spice Rack

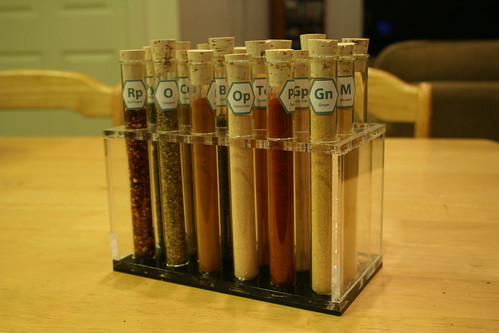
A friend of mine had all her spices stolen appropriated when her old roommate moved out. So I made her this spice rack for Christmas:

Spice Rack

It holds up to 18 test tubes of spices, pre-filled with 12 and each labeled with a suitably scientific sounding abbreviation.

Each glass tube holds about 1 ounce of spice. The rack is made from 1/4″ acrylic. I can put the plans up on thingaverse if anyone is interested, but it’s pretty self-explanatory.

The idea was unabashedly yanked from Dean and DeLuca, but I like my version better. Theirs is more steampunk, mine is more “cooking class 2120.”

Crafting, lased, LEGO

Meta Lego Storage

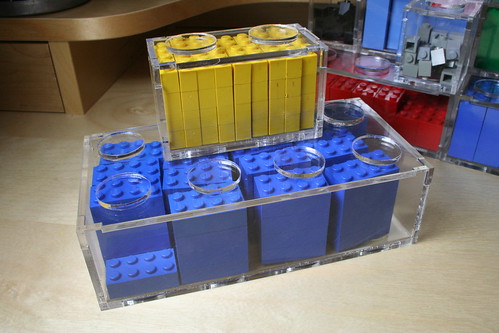
In need of a way to organize and store my Lego obsession, I made a bunch of acrylic boxes which not only hold Legos, but also stack and interlock similarly:

Each brick box holds 64+ of the same-shape piece. So the 1×1 box will hold 64 1×1 bricks, and the 2×2 holds 64 2×2 bricks. The larger ones hold a few more due to how the sizing works out. The 1×1 box is 40mm per side (external dimensions).

I posted the patterns on Thingiverse should anyone wish to make their own. No,  I’m not going to make and sell them. They’re time consuming to make, and plus I’m pretty sure Lego would sue me. If you don’t have access to a laser cutter, I’d suggest using a service like Ponoko.

The patterns were generated in OpenSCAD using the following code. Change “rows” and “cols” to get the lego size you desire. By the way, I’m teaching a class on OpenSCAD in Brooklyn next weekend!

fundamental_unit = 0.8;
thickness =3;
h_pitch = 10;
v_pitch = 12;
tform = 5;
knob = fundamental_unit*h_pitch*tform;
module side(rows){
	lwidth = rows*fundamental_unit*h_pitch*tform;
	lheight = v_pitch*fundamental_unit*tform;
	difference() {

		square(size=[lwidth, lheight]);
		translate(v=[10,0,0]) square(size=[lwidth-20,thickness]);
		translate(v=[10,lheight-thickness,0]) square(size=[lwidth-20,thickness]);
		square(size=[thickness, 10]);
		translate(v=[0,lheight-10]) square(size=[thickness, 10]);
	translate(v=[lwidth-thickness,10]) square(size=[thickness, lheight-20]);
	}
}
module top(rows,cols,holes){
	lwidth = rows*fundamental_unit*h_pitch*tform;
	llength = cols*fundamental_unit*h_pitch*tform;
	difference(){
		square(size=[lwidth,llength]);
		square(size=[thickness,10]);
		square(size=[10,thickness]);
		translate(v=[lwidth,0,0]) square(size=[-thickness,10]);
		translate(v=[lwidth,0,0]) square(size=[-10,thickness]);
		translate(v=[lwidth,llength]) square(size=[-10,-thickness]);
		translate(v=[lwidth,llength]) square(size=[-thickness,-10]);
		translate(v=[0,llength]) square(size=[10,-thickness]);
		translate(v=[0,llength]) square(size=[thickness,-10]);
		if(holes==true){
			for (i = [1:cols]){
				for (j=[1:rows]){
				translate(v=[j*knob-knob/2,i*knob-(fundamental_unit*h_pitch*tform)/2,0]) circle(r=fundamental_unit*6*tform/2);
				}
			}
		}
	}
}

rows = 2;
cols = 4;

h_spacing =  rows*fundamental_unit*h_pitch*tform+10;
l_spacing =  cols*fundamental_unit*h_pitch*tform+10;
v_spacing = fundamental_unit*v_pitch*tform+10;

side(rows);
translate(v=[ rows*fundamental_unit*h_pitch*tform+10,0,0]) side(rows);
translate(v=[0,v_spacing]) side(cols);
translate(v=[ cols*fundamental_unit*h_pitch*tform+10,v_spacing]) side(cols);
translate(v=[0,2*v_spacing]) top(rows,cols,true);
translate(v=[ rows*fundamental_unit*h_pitch*tform+10,2*v_spacing]) top(rows,cols,false);

In the next batch I’m going to make the nubs a little smaller than the holes. They work now, but it’s a bit fiddly getting everything to line up just so. A little more forgiveness would be nice. Also, OpenSCAD does strange things with circles. Rather than simply write a circle in the DXF, it represents it as a bunch of line segments. I’m not sure if there’s a way around this, but it’s marginally irritating.

You can download a .dxf for a few different box sizes on Thingiverse.
I’ve also created a Flickr Collection for my various Lego stuff.
Meta Lego