New Construction Townhome

Painting is done!

At last, the painting is done and the house is ready for us to move in! When people ask what color we painted, I say “all of them.” There were no less than 13 different colors used (though because I’m a creature of habit most of them were shades of blue, grey, or beige).

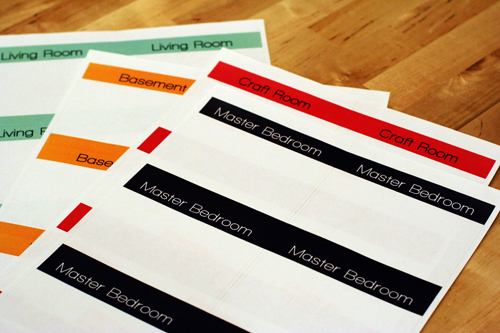
Unfortunately I don’t have great photos of all the different colors, because despite bringing all the rest of my camera stuff I somehow managed to leave the one lens I need at the old place. So the rest of the photos will have to wait until after we move this weekend. But I did manage to take a couple snapshots.

BabyRoom

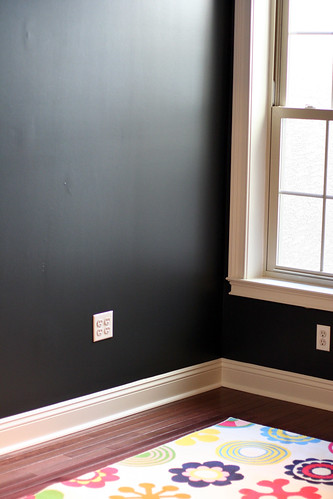
I really enjoy the looks on people’s faces when I say that we painted the nursery black. To be fair, it’s really a very dark slate grey (Sherwin Williams Iron Ore), but it looks pretty black. We’re pairing it with a lot of really bright furniture and decor.

MediaRoom

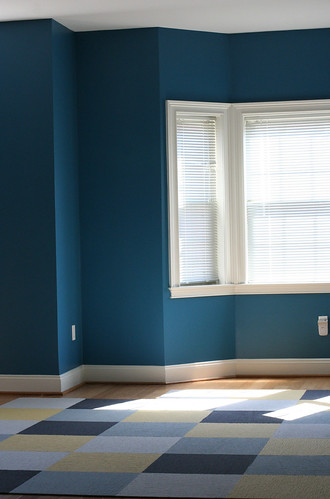
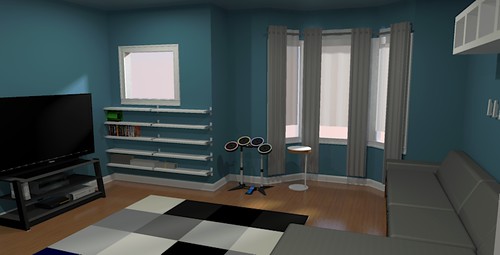
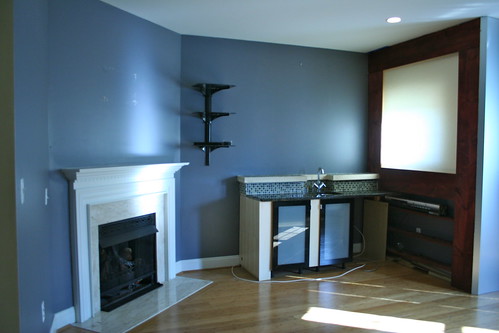
The media room, where our TV and games will go, is blue (Sherwin Williams Turkish Tile) except for one wall. A friend of ours who used to do TV installation said that blue walls make the colors of your TV look awful, so the TV wall is the same dark grey we used in the nursery. The carpet is made up of individual modular tiles, by Flor.

BedroomFront

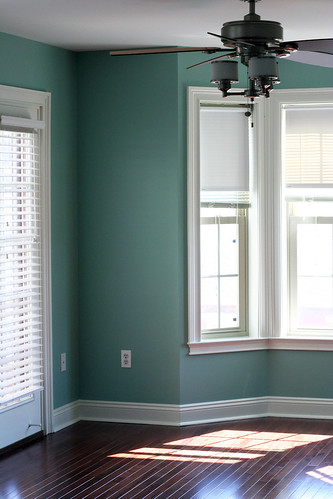
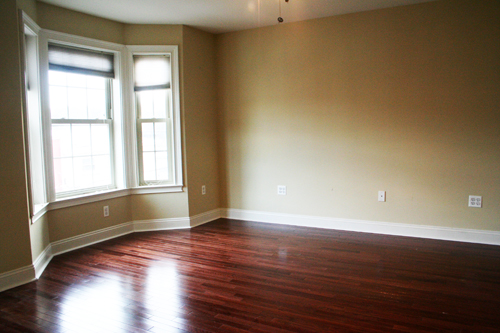
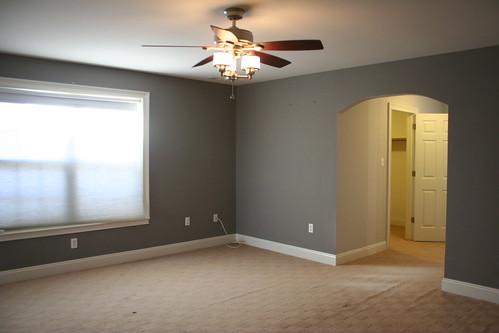
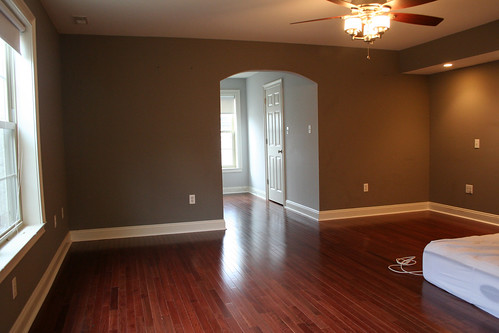
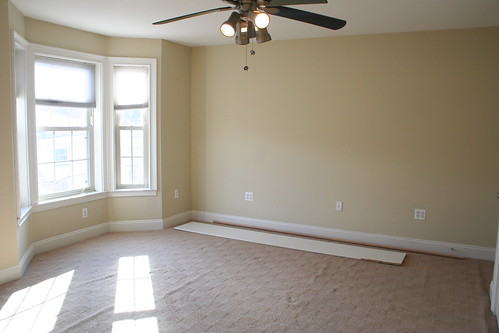
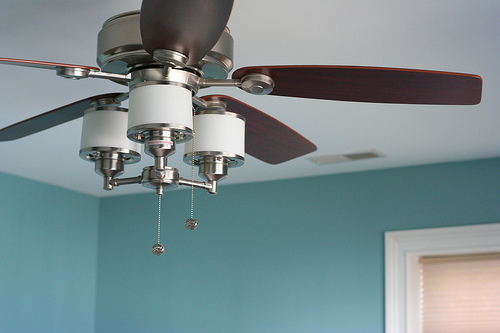
The front part of the master bedroom is a tealy sort of color. Sherwin Williams calls it “Hazel” but depending on the light it looks alternately blue or green.

The painter who did the work painted pretty much every paintable surface in the house, including all the trim and doors. It took about two weeks, but the house looks absolutely amazing. Should anyone be looking for a painter in Philadelphia I would definitely recommend him. After one more cleaning we’ll be all set to move in this weekend.

New Construction Townhome, Organization

Color coordinated packing labels

We’re less than a week from moving day, and while packing I came across some shipping labels I’ve had for years. I decided to use them to make color coordinated packing labels.

Sheets of packing labels

The nice thing about the labels is I can write detailed information about what’s in each box. This gets important towards the end of packing when completely unrelated items start ending up together.

IMG_5860

Since we got the boxes from friends who had recently moved, they’ve already got various rooms and contents written on the side. The labels make it easy to tell at a glance where each box goes without having to cross out all the previous markings.

IMG_5862

The labels I used were Staples White Shipping Labels, which come 6 to a sheet. They’re compatible with Avery 5164 labels and Avery 8164 labels. I’ve uploaded the Photoshop template file should anyone wish to make their own. There are 5 different colors for the labels, just hide / show the appropriate layer group. Click here to download the PSD template.
The font used is Walkway Bold, which you can download for free.

New Construction Townhome, Organization

Our New-House Checklist

Offbeat Home featured an article asking “We bought a house, now what?” Since we’re in the process of getting our place ready for move-in, I figured I’d share what we did to keep organized.

Photo by Images_of_Money on Flickr

When we closed on our new place we started a Google Doc titled “New House Things.” Everything we need to do to or buy for the house gets shoved into this document. Since our time is split between two different states, Google Docs has been a lifesaver; it’s impossible to leave the list at the other house.

The day we closed we started listing everything we might want to do to the house. And I do mean everything, from putting in hardwood floors to changing the burnt out light bulbs. The list was sorted into categories of things we needed to hire someone to do, things we could do ourselves but didn’t really want to (at 6 months pregnant I’m not super handy around the house), and then everything else.

Not everything on this list will get done before we move in, or even within our first year of living there. Some of the things on the list would be considerably harder to do after move-in (e.g. painting) so those were on our must-do list. Others fell to the bottom; some were deprioritized for financial reasons, some because we decided they weren’t that important, and some because we’re just too tired to think about them.

We use the same Google doc to store our shopping list, with everything we need from toilet paper to furniture. We also use it to store the paint colors we picked out and the phone numbers of the contractors we’re using. In short, everything we need to get the house in order is in this one document which I can access from my laptop, desktop, and phone.


Things we need someone else to do

  • Hardwood floors for upstairs
  • New carpet for basement
  • Inspect / fix gutters
  • Get roof checked out
  • Investigate water damage above window in living room
  • Fix mysterious switches in living room
  • Ceiling fans: how do they work?
  • Scary buzzing junction box in kitchen
  • Nonworking outlet in laundry room
  • Fritzy lightbulb in guest bathroom
  • Investigate garage leak

Things we could do ourselves but probably won’t

  • Cat6 wiring throughout
  • Caulk outside windows
  • Paint (interior, exterior door / stairs)
  • Fix molding in living room and elsewhere

Everything else

  • Get pan for under washer
  • Add some sort of tread to outside stairs?
  • Change or re-key locks
  • Set up alarm
  • Set up land line
  • Set up internet
  • Set up gas
  • Set up electric
  • Remove ugly bar from living room
  • Disassemble the wardrobe in the basement
  • Change light bulbs
  • Finish/paint media alcove in living room
  • Install storage in pantry
  • Built in bookcases for living room
  • Make back yard cute
  • Put house number above garage
  • Get programmable thermostats
  • Treat for termites
  • Install additional towel bars/hooks in master bathroom
  • Clean whole house from top to bottom


New Construction Townhome, Organization

Page-A-Day Chore Calendar

One of the scariest things about moving to a bigger place is how much more space we’ll have to accumulate stuff. To a real estate agent, big bedrooms and walk-in closets are a selling point, but to me they’re caves threatening to fill with dust dragons and piles of things forgotten. Honestly, I’m not very good at keeping our apartment clean as it is. If we’re going to move into the house without Chris killing me, I need to level up my tidiness skills.

It turns out I’m not alone. Offbeat Home helpfully published an keeping your place organized little by little, using daily chore checklists from A Slob Comes Clean. But I decided the checklists were kind of boring looking, and in my usual spirit of over-engineering I came up with this:

I put "fight off headcold" on my to-do list for today.

I took the base of last year’s page-a-day calendar (my mom gets me one every year for Christmas), and designed a chore calendar to fit it. Each page features 7 “every day” tasks at the bottom, e.g. checking the trash cans to see if they’re full (and emptying them if they are). At the top left is a more major chore (like vacuuming) that needs to be done on a weekly basis. In the middle there are four blank lines for the day’s to-do list which I can write in. And lastly, if there’s a special event that day, such as a birthday, it’s shown below the to-do list.

Sample Page

I designed the pages in Photoshop and then wrote a program using ruby/ImageMagick to dynamically create a page for each day. The daily chores are always the same, but the weekly ones rotate through the week. Within the generator program I plugged in a list of important dates to populate the special events area. Finally, the program lays out the pages two-up on Letter sized paper so I can print them out, cut them, and assemble them into a pad.

To start with I’m just printing a week at a time, so I can tweak things in the design as I go. I used hot glue to bind the pages, but I plan on picking up some padding compound next time I’m in SoHo. I’ve heard rubber cement can work as well.

I’m only on day two of using it, so it’s too early to tell if this is something I can stick with, or yet another failed attempt to be less of a slob. One thing I’m noticing already is that chores take a lot less time when you do them regularly. Also, I still really hate folding clothes.

New Construction Townhome

Hardwood Floors: Done!

The biggest project for our new home was installing hardwood floors. If you remember, the house came with some stained, poorly-installed carpeting on the top two floors:

Master Bedroom
The wrinkles are just waiting to trip you in the night

We picked out flooring and hired a contractor to install it. They started on Thursday and spent the day ripping out the old carpet, revealing the plywood subfloor underneath.

Top Floor
I think it looks better than the carpet already

Less than thrilling was the water damage we found under almost all the windows. The tacking strips for the carpet were rotted out in some places. Not exactly what a new homeowner wants to find, especially on a house this young.

Bad news bears
Unfortunately it was freshly damp, indicating an ongoing issue

The side of the house is stucco, which has deteriorated and created a gap around each window and door frame. We saw this during the home inspection before we bought the house, I just didn’t expect it to be such a dramatic problem already. Our contractor sealed the cracks with silicone caulk, which we’re hoping will stop the majority of the damage, and once the weather warms up we’ll look into having the house repainted with a waterproof paint.

The crew worked through the weekend, and when we returned to the house Tuesday night the floors were done. Everything in the house was covered by a fine layer of sawdust, even the light switches.

Dusty
Not that it stopped me from walking around in my bare feet

To clean the floors we first vacuumed, then dry mopped (using dry swiffer-type pads), and then gave things a once over with Bona Floor Cleaner. There’s a trick to getting it to clean well – you have to rinse out your cleaning pad (I used a Quickie microfiber mop) frequently to prevent streaking/product build up. This meant at least once per room, usually every 4-5 sprays of the cleaner, being sure to wring out the pad well since wood and water are not friends. For tough spots you still have to get down on your hands and knees with a microfiber cloth.

Master bedroom
We'll get a bed eventually

It was about 5pm by the time I finished cleaning so the lighting isn’t great in the photos. But what’s really interesting is that the wood looks drastically different colors depending on the light. This is most visible in the middle bedroom, which has a halogen light ceiling fan, where you can see out into the hallway (which is lit by compact flourescents).

Lighting differences
Same wood across the whole photo

Yeah, that isn’t going to make picking out paint colors a headache at all… but we’re really super happy with the floors. They look great. At first I wasn’t sure about the narrower planks, because the trend right now is wider, but I think they give the house character and offset that blah new-construction feel a lot of recently built homes have.

Once the walls are patched up and painted we can drag all our belongings down and start actually living there! In the meantime, Chris and I are testing out hardware setups for our incredibly over-engineered home network / media center.

New Construction Townhome

Picking Wall Colors

Now that the floors are in (photos forthcoming after the dust is gone) we can start picking out paint. Picking paint colors is hard. For the time being we’re just focusing on the main floor, which is an open floor plan with a kitchen in the middle and room for seating at either end.

On one end, nearest to the kitchen, we want to create a nice sitting area to chat / read, with built in bookcases. This area opens up to the back patio as well as the kitchen (which has decidedly contemporary cabinets), so we kept it pretty light and airy.

There’s also a fireplace surrounded by blue-green stone on one wall, which dramatically influenced what colors we could use. I got a few different swatch strips from the paint store and taped them all up next to the fireplace to see which hue matched the stone the best.

The chairs we chose in approximately the colors we chose.

Armed with our paint swatch and a sample of our flooring we headed to the furniture store, and spent maybe an hour comparing woods, stains, and upholstery until we got something that looked good together.

At the other end of the house is what we’ve been calling the “media room,” which is basically a shrine to our video game consoles. After keeping things pretty tame in the living room, we went a little nuts with color and opted for decidedly more modern furniture.

We opted for a sectional in the same style/line

To choose the blue, I went a little overboard and mocked up a ton of different color options in Google Sketchup. I even created a 3D model of the sectional we picked out.

TurkishTile - With Lorimer
Computer rendering of the room

Sherwin Williams conveniently provides the approximate RGB values for their paints, and you can see some of the earlier color options on Flickr. After a ton of deliberation we had our color, and a vague idea of what it might look like. I got a sample quart of paint and painted swatches on each wall in the room, to make sure it was going to look right.

After picking out color for just two rooms I’m pretty sick of looking at paint swatches, so I doubt I’ll go quite as nuts with mockups and options for the bedrooms.  We’re headed to Disney World next week, and I’m definitely looking forward to a week away from looking at home decor!

New Construction Townhome

Hardwood Floors Are Underway

The biggest project on our to-do list for the new home is the floors. The two upper floors came with wrinkly, stained carpeting that we knew we’d want to replace before moving in. We decided to bite the bullet and have hardwood installed.

Israel Furniture Co.

Our first stop was Bell Floor Covering in downtown Philly. This place has been around forever, and it didn’t take long to figure out why. The sales staff was friendly and explained the difference between solid and engineered hardwood. Engineered woods can be installed most anywhere and can be refinished twice. Solids have to be nailed down and can be refinished three or more times. Since we’re installing it over a plywood subfloor, we could go with either.

Lyptus hardwood

We ended up picking out a solid hardwood called Lyptus – it’s a hybrid of a few different Eucalyptus species and claims to be sustainably grown and harvested. It was on closeout so we got it for $3 / square foot, less than half of what it retails for.

To figure out how much we needed I went around and measured every room in the house that we wanted to put hardwood in, closets and all. Since converting feet/inches to decimal is tedious, I used Wolfram Alpha to calculate the square footage of each room. I added 10% to the total to get the total number of square feet.

We had three contractors come out to give estimates – two dedicated flooring specialists and one general contractor who handles complete home remodeling. All of them came in around $3 / square foot for installation. We went with the general contractor and I was immediately glad we did – when we were loading the wood flooring into the garage I noticed a leak coming from the first floor bathroom. The contractor, Osman, added to his list of things to check out.

Osman and his assistant are hard at work ripping out the existing carpet. I think it’s already starting to look better.

New Construction Townhome

Digital Interior Design

Over on the main hacking blog I detailed some of the decor/design planning for the house, done using SketchUp and a few other tools. I’m still getting the hang of Google SketchUp, but it’s been fun to play with all the furniture digitally. I’m not sure how useful it will be for picking colors, since getting the lighting right is a little outside of my skill set, but it’s handy for laying out furniture.

[Kellbot Hacks: Interior Design Planning]

New Construction Townhome, Software

Interior Design Planning

One of the nice things about buying a home that had been built recently is that the original builder’s plans were still available, leftover from when they were trying to sell the development. We got them from the seller and I immediately started modeling the house in Google SketchUp.

I followed the technique in this video to build the house from the plans. Things won’t match inch for inch, but it gives me a pretty good idea of the layout and I can always correct the measurements later after checking them with a tape measure.

For the time being my house has no ceilings, and each floor is laid out side by side. Google SketchUp has a wide variety of furniture in their 3D Warehouse, and with a little practice I’ve started to be able to model my own furniture.

Sketchup

Ever since seeing this Billy bookcase hack on Pinterest, I’ve been kind of obsessed with creating a built-in shelving wall. Ikea has some pretty good planning tools, so I was able to design something I thought would work in the space.

BillyPlan

Then I grabbed the Billy set from the SketchUp 3D Warehouse and started modeling it in the room. SketchUp’s rendering tools leave a lot to be desired so I started playing around with a demo of Twilight, a rendering plugin. Aside from some odd lighting issues, I think it gives you a better feel for a space than SketchUp’s line drawings.

billyRender

One other SketchUp plugin that has been invaluable is Fredo6’s Round Corners. I used it when modeling the couches to make them look more couch like.

CornerChairComparison

Clearly my 3D modeling skills still leave a little to be desired, but you get the general idea of the piece. It’s a Makenzie corner chair from Target, part of a sectional we’re considering getting for our TV room.

Thankfully we have some time before we have to start seriously thinking about furniture, since the carpets need to be replaced and we’ll want to put up a fresh coat of paint. The next few weeks will be spent coordinating various contractors (long distance), trying to get the house in shape for move-in well before the baby decides to show up.

New Construction Townhome

Our New Home To-Do List

Our new house may not have a bed, but it has internet! It took us all of 10 minutes in the new place to realize that we weren’t going to survive long without it. The first thing we did in our new home was to make a list of all the things we needed (or just wanted) to do to make it move-in ready. Some of them were quick tasks, like reprogramming the garage door (omg we have a garage!), but there are some big projects as well.

After a week long ordeal with Comcast that gained me more than a few new grey hairs, we finally got broadband internet set up. After two days of scrubbing and vacuuming, we finally got the house to a point where it felt clean enough to be ours. We purchased a few inexpensive counter stools from Target so we’d have somewhere to sit. Once the holidays are over we’ll tackle some of the bigger items on the to-do list.

Painting is one of the biggest and most daunting tasks. In addition to the pretty pretty princess closet, the whole house could use a fresh coat of paint. I’ve been using the Sherwin Williams paint visualizer to try out different color schemes on a photo of the living room fireplace (omg we have a fireplace!).

Existing Paint (White) and 3 color options

Of course, the color paint we pick out will be heavily influenced by the floors, which also need work. The house currently has some unappealing carpeting in the bedrooms. We’d like to replace it with hardwood (or something similar looking), which is a giant project in and of itself. So many choices… bamboo? solid wood? engineered wood? No matter what though, the carpet has got to go.

Guest Room
Wrinkly carpet, you are going away

And then there’s the bar. The previous owner installed a wet bar in the den, which is a little odd to me because the den is attached to the kitchen. The kitchen has a perfectly lovely island with a bar seating area, so why one would want a separate bar 20 feet away is a mystery to me. Also, only the hot water appears to be plumbed into the faucet. Overall it’s a strange little corner. But most of all we’ve got that wall earmarked for the TV, so the bar will be removed. We’ll have to have a plumber in to close off the water lines.

Media Room
Anyone want a bar?

Oh, and of course we need to have the house wired for ethernet so we can set up our NOC in the basement. Because no home is complete without a central media server and a computer attached to every TV.

There are a dozen smaller projects, like an electrical junction box that emits a terrifying buzzing sound and a window that looks like it may have some water damage. Thankfully the floors and walls are the only things that really have to be addressed before we can move in.

It’s exciting and overwhelming at the same time, and the more we work on it the more it starts to feel like home.