Cooking, Family

Making Baby Food Pouches

Remember how I gave up on making baby food because it was crushing me emotionally? Well, these days I have a toddler brimming with teeth, and even a few molars in there. You’d think I’m well past the woolly world of pureed vegetables. You’d think that at 15 months, my daughter would be shoveling finger food into her mouth. And you’d be wrong.

Vegetables, she has decided, are not finger food. Vegetables are for throwing on the floor. I tried burying shredded broccoli in mac and cheese. She took a bite, chewed it, reached into her mouth, and pulled out the offending plant. She then handed it to me with a look that said “I think you lost this, here it is.”

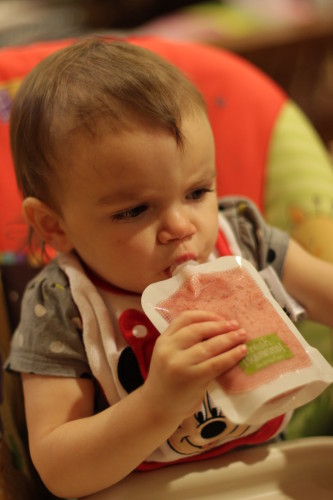
Pouches of pureed vegetables (preferably with fruit mixed in) are the only way I can get most veggies into this kid. As a bonus, they’re fairly clean and she can self feed them. As an anti-bonus, they cost a goddamned fortune. Amazon’s Subscribe & Save brings the price down, but not nearly enough.

HEY LOOK A KITCHEN GADGET

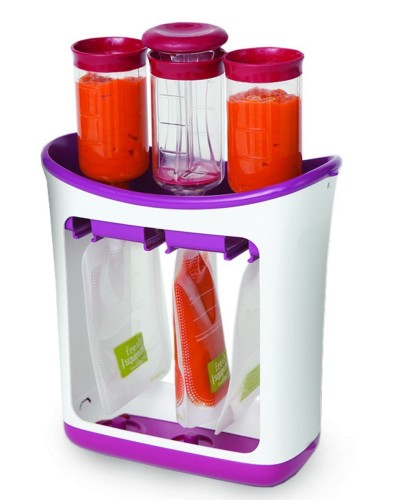
We saw the Infantino Fresh Squeezed system at Target, and I was intrigued by the idea of not having to mortgage our house to get Bitmap to eat some veggies. I also happened to be at Target for some post-miscarriage retail therapy, so I was totally into the idea of buying some stupid baby food thing I don’t really need. RevolvingDork was less convinced, but for $20 was willing to try it if it meant I would stop pouting at him. Oh and the reviews online were all very positive.

You guys, I am totally in love with this thing.

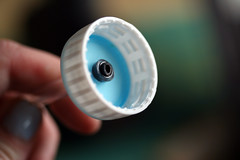
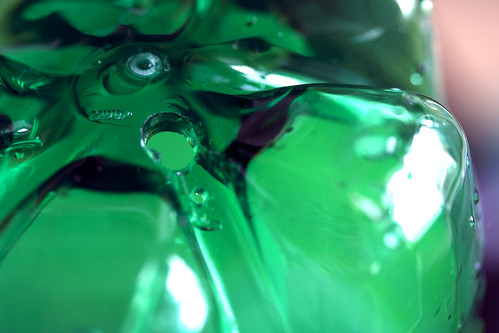
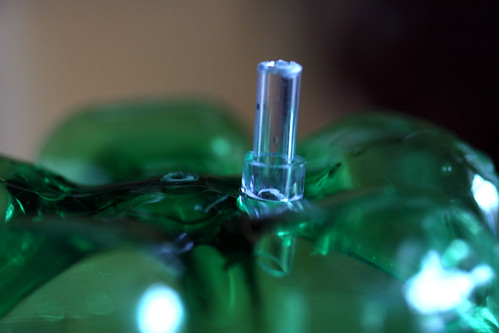
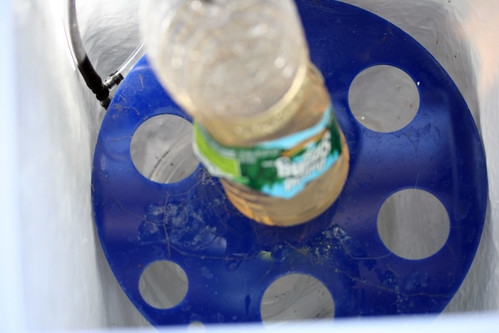
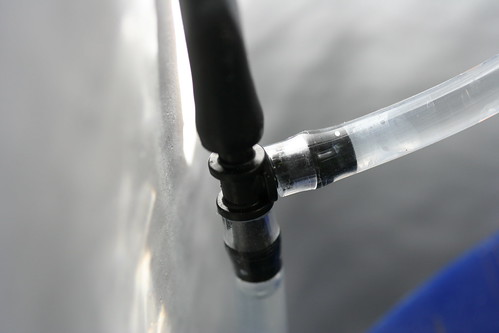
It is really weirdly satisfying to shove puree into little pouches with a plunger, and even more exciting to see Bitmap consume things like carrots and spinach. I’ve been making purees of pretty much everything. I’ll give her a store-bought pouch to sample, and if it’s a hit I will recreate it in my food processor. So far it’s great. She can eat them without my help, they’re relatively tidy, and oh thank god she is eating vegetables.

The pouches are disposable (though they do make a reuseable one), and they do cost a little more than I’d like. It’s still not a cheap way to feed your kid. But if I think of it as a bribe for eating vegetables it almost seems reasonable. And it’s still a hell of a lot cheaper than the store-bought pouches (most of which range from $1.25 to $1.90 per pouch).

Various purees ready to eat

I throw equal parts cooked veggies and applesauce/pearsauce into the food processor and blend until smooth. If you are a super amazing mom who loves her children more than her sanity, you will probably pick some organic produce from your hobby farm and steam it lovingly before smashing it for your child. If you are like me, frozen or canned veggies are totally fine. Also, it turns out pre-made applesauce is WAY CHEAPER than buying fresh apples and saucing them. Just make sure to read the labels on everything to make sure there’s no added salt / sugar.

A can of pears + a can of peas is enough to make 4 pouches of food. They’re around $1 per can. Four disposable pouches works out to roughly $1.30. So add that all up ($3.30) and the cost per pouch is $0.82. More than I’d like, but far cheaper than the store bought ones.

I also make some yogurt + fruit pouches, which I keep in the freezer and serve as smoothies. Either run them under warm water for a bit or let them warm up in the fridge before serving. We gave one to Bitmap this evening after she bit her lip. It cured her hysteria instantly.

She's gonna make it after all
She’s gonna make it after all

Here are some “recipes” that Bitmap likes. I use either fresh, frozen, or canned food as it’s available. Fresh veggies are great, but I won’t judge you if you’re too tired to do anything but crank the can opener. Smoothies are a good use for fruit that is looking slightly over-ripe. You may need to add a little water to get the consistency you’re after.

Strawberry Spinach Smoothie (makes 4-5 pouches)

1 cup greek yogurt
2 cups whole strawberries
1 cup steamed spinach (or kale)

Spinach Applesauce (makes 2-3 pouches)

1 cup steamed spinach
1 cup applesauce

Applesauce / Pearsauce and Veggies (makes 4-5 pouches)

1 cup steamed peas
1 cup steamed green beans
1.5 cups applesauce or pearsauce

Gardening

Building a Better Reservoir

I noticed one of my windowfarm columns was going through a lot more water than the others, and realized that it had a slow leak. I’ve been using Deer Park 1.5 liter water bottles, upside down with a hose mounted in the cap, but the plastic is so thin that every time I touch them they get more deformed and “crunched” looking. So today I set out to build a better reservoir.

I used 1 liter soda bottles, which are considerably thicker plastic than the Deer Park bottles and will hopefully stand up a little longer. They’re also shorter, so they fit into the orchid pot (essential for keeping leaks off my floor) much better. I’ve had a few questions about how everything is set up, so here’s a more detailed build.

IMG_6057

Drill a hole in the bottle cap slightly smaller than the outer diameter of your water-line tubing”

IMG_6059
IMG_6060

Push the end of the tubing through and secure with a barb (I cut mine from a t-joint connector I wasn’t using).

IMG_6061

Drill two holes in the bottom of the bottle: one the same size as the cap hole, to serve as the water return, and a smaller one to allow air in/out of the bottle. Without the smaller hole, water won’t be able to flow into the bottle due to the air pressure build-up.

To make it easier to connect / disconnect the water return lines, I made a coupling using a short piece of flexible tubing (pushed through the hole in the bottle) and some smaller diameter rigid tubing (from the aquarium store). To connect the water return line, I just slide it over the piece of rigid tubing.

IMG_6063

I’ve tried to get a good photograph of the set-up in action that explains the placement of the reservoirs and t-joints, but I think a diagram would be better. I’ve got 3 1L soda bottle reservoirs, one aquarium pump (Tetra Whisper 40), a 4-way gang valve, and each reservoir is connected to a T-joint via 5′ of 1/4″ diameter flexible tubing. The lift tube for each column is 5 feet of black landscaping tubing, which claims to be 1/4″ but is considerably thicker than the water supply tubing. The water return line is the same clear 1/4″ tubing I used for the water supply. The whole setup is contained in a tall orchid pot I got from Target. A Rubbermaid bin would work just as well, but the orchid pot looks better.

Black vs clear tubing is a personal preference thing. The clear is considerably easier to debug, but you need to be fairly vigilant about cleaning it or you’ll get algae build-up.

For the sake of my crude illustration skills, I’ve only drawn one reservoir and left out the gang valve.

So far nothing is leaking, but we’ll see how things look in the morning. If nothing else, the water tubes have gotten a thorough cleaning over the last two days.


Gardening

Windowfarm Update

I haven’t had a lot of time to dedicate to the windowfarm, between finishing up work projects and getting ready for the baby’s imminent arrival. But I did manage to do some basic upkeep today, and take a few photos.

Three Columns
As you can see, I need to clean the windows

I added a third column, using the same design as column #2. I vastly prefer it to the water bottle columns, as it’s easy to lift up the net cups (yogurt containers) and clean the cups if need be. It also makes it easy to move plants between columns.

Thyme
Tiny Thyme Plants

So far in column number 3 I have thyme, lettuce, basil, and some cherry tomatoes. The cherry tomatoes were started earlier this week, so they’re just tiny seedlings right now.

One of my reservoir bottles needed to be replaced, it was crunchy and sad looking, so I took the opportunity to disassemble the reservoirs and give them and the water lines a good cleaning. I refilled the system with plain water (no nutrients) to give everything a good flushing out, just for good measure.

Lettuce
Droopy, sad lettuce

The pump system is still working well. Occasionally air backflows into the reservoirs, but the problem is self-correcting. After a few noisy minutes the water in the lift tube drains and then everything starts working smoothly again.

The lettuce isn’t doing very well, but I’m actually surprised it germinated at all. The seeds were really old, and I didn’t have very high expectations. It’s growing, but the leaves are kind of rubbery rather than crisp and lettuce-like.

Parsley and basil are both doing well, though the basil isn’t growing as quickly as it did when I tried the aeroponic / deep water culture system a few years ago. I’m not sure if that means it wants more water, more nutrients, more light, or it’s just because I’m using a different strain of basil this time. Next time I do this, I’ll be sure to be a little more scientific about things.

Parsley, with the black lift tube visible

By far the most prolific grower is the dwarf sugar peas. They’ve climbed up the window and are now taller than the top of the windowfarm column. Unfortunately one of the plants is still experiencing yellowing leaves, and I think another one (on a different column) is starting to go the same route. I got some really good suggestions and information for debugging things (thanks!) but unfortunately haven’t had the time to really sit down with it and figure out what’s going on.

Peas
Dwarf Sugar Peas are taking over my window

I’m not really sure at which point I should switch from “vegetation” nutrients to “flowering” nutrients. So far the peas seem quite content to climb up the window. How do you know when your plants are ready to start flowering?

Obviously there’s a lot of variables to consider, and when I set up column #4 I’ll be better about tracking them all. In the mean time I think it’s going pretty well for a somewhat haphazard project, and I’m happy with it.

Basil
Little basil plants


Gardening

Mysterious Sick Plant

IMG_6042
Thriving bean plants

Things are generally going well for my windowfarm. The herbs are starting to look like real plants, and the dwarf sugar peas are going nuts taking over the window. Unfortuantely, one plant isn’t doing so well and I haven’t yet figured out why.

Sick wiltling leaves

The lower leaves have turned yellow and withered. At first I thought it was simply because they were stuck under the felt and not getting enough light, but now the outer edges of some of the other leaves are joining them.

Cursory research suggests that the plant may not be getting enough water, but if that were the case I would expect other plants in the system to have problems too since they’re all on the same watering schedule. The roots of the sick plant look healthy and have access to plenty of oxygen.

I did notice some suspicious build-up on the clay pellets near the sick plant. It’s possible that some sort of bacterial or fungal infection has managed to get a hold of the plant. If I can find a local source for food-grade hydrogen peroxide I may try flushing the system with a dilute solution of it. In retrospect, I should have sterilized my seeds before placing them in the root plugs for germination. Sterilizing the root plugs in the pressure cooker would have been smart as well.

IMG_6045
Is the white crusty stuff simply dried nutrient build-up, or something more sinister?

I’m also trying to decide if it makes more sense to simply remove the troubled pot from the system to prevent the others from becoming contaminated. To do so would mean losing those two plants but I’d rather lose two than the whole column.

Gardening

Adding a second column to my windowfarm

Yesterday my windowfarm got a second column of plants. Once I understood the basic mechanics of how a windowfarm works, I set out to make column #2 more attractive. Honestly, I’m not sure I succeeded. The second column looks different though, that much is true.

2column
Perhaps one of these days I'll learn to photograph this better.

Instead of plastic water bottles I used white plastic cups, and instead of string I used ribbon to hang it. Unfortunately the plastic cups are too wide to work well with the 3″ net cups I have. Conveniently, Chobani greek yogurt cups fit almost perfectly. More conveniently, I eat a fair amount of Chobani yogurt (unlike bottled water, which I try to avoid).

ChobaniCup
Cutting the holes is tedious, but not too bad with a fresh, sharp blade.

Like the other column, each cup was given a cotton wick to help discourage splashing. The cups are attached to the ribbon with small metal brads. I confess I’m a little dubious as to how well they’ll hold up once the plants start getting heavier, so each cup got two on each side. The black lift tube was sewn into place along the ribbon.

You can see the two silver brads on the right, connecting the cup to the ribbon.

I realized much too late that the thinner cup plastic won’t allow me to easily attach a hose to the bottom, so I grabbed the bottom of a soda bottle that was lying around and improvised a water collector to sit at the bottom of the stack. The soda bottle bottom is considerably thicker than the rest of the bottle, and I actually had to use a 1/4″ drill bit to get a hole into it.

watercup
The cup is covered in paper to discourage algae growth.

Each column has its own reservoir, which makes water pressure debugging easier. It also may help cut down on contamination if one of the plants gets a fungal or bacterial infection.

reservoir
The reservoir bin is still incredibly ugly.

I’m feeling sort of “meh” about the new column. It’s got some pros and cons, and I think it’s sort of a wash versus the first one.

Advantages:

  • Doesn’t look like water bottles hanging in your window
  • Much easier to remove net cups for cleaning
  • Fairly easy to remove cups from ribbon, should one become damaged or need changing
  • Shorter height means shorter lift tube, making it easier to get water up
  • Inexpensive compared to purchasing water bottles. 50 plastic cups came to under $10.
  • Vaguely better looking

Disadvantages:

  • Looks like disposable cups hanging in your window
  • Not nearly as rigid as the water bottle set up, making it feel more flimsy
  • Cups are made of thinner plastic and more prone to splitting than water bottles
  • Shape of cups makes them more percussive, so dripping water sounds considerably louder
  • Because the bottom is flat, some water collects around the edges which may lead to contamination / algae problems down the line
  • The cup’s brittle plastic means a separate water collector must be used on the bottom to funnel water back into the reservoir
  • Lack of a “top” on each cup means water evaporates more quickly, so the pump may need to run more frequently

In terms of looks, I actually rather like the water collector cup (covered in paper). If it doesn’t look totally soggy and sad in a few weeks, I may make column #3 out of 1 liter soda bottles and scrapbooking paper.

I’ve also noticed that column #2 has a considerably higher water flow rate than column #1. I think this is due to a combination of a shorter lift tube, larger reservoir bottle, and minor differences in the airflow from the pump.

Gardening

Reducing WindowFarm Splash Damage

My hydroponic window farm has been humming along nicely, but I noticed the windows were starting to look a bit gross from all the water splashing from each bottle. It cleans off easily, but is not ideal.

IMG_5998
Water droplets drip down and splash out

I’ve seen other windowfarms which use a short piece of tubing to direct the water, but it seems like overkill to me. I added a cotton wick to each bottle cap, hoping the water would follow the wick down instead of free-falling and splashing.

IMG_6008
String, cap, and a bead
IMG_6009
The bead keeps the string from pulling through the hole

Then I screwed the cap back onto the bottom of the bottle. I found that it works better if the hole is a little larger, so I snuck in with an xacto knife and cut a few small slits in the cap to make the hole wider.

Water now follows the cap string nicely. Hopefully this will save me from having to wash the windows daily.

Gardening

Windowfarm Hydroponics Version 1

It’s been a few years since I tried any hydroponics, but now that we have a place with nice big windows I’m trying my hand at a windowfarm. Windowfarms are drip planting systems that are set up vertically, making them great for places without a lot of outdoor gardening space.

Two dwarf sweet pea plants

Windowfarms are made from plastic bottles stacked vertically. A small airpump lifts water from the reservoir at the bottom to the topmost bottle, where it then trickles down over each plant. The plants, which were started in root plugs, are sitting in 3″ net cups filled with expanded clay pellets. The pellets offer root support for the plant, and retain water while still allowing plenty of oxygen flow.

IMG_5988

My set up is, in a word, ugly. Eventually I plan on having four columns hanging in the window, and with any luck they’ll get more attractive as I go along.

IMG_6006

I used a large plastic orchid pot to hide the water reservoir, which is simply an upside-down water bottle with a coil of 1/4″ tubing coming out the cap. The blue tray is leftover from a previous hydroponics experiment, and is there to hold the bottle vertically.

IMG_5987

To make the joint between the cap and the tubing water tight, I sacrificed the barbed end of a plastic hose connector and pushed it into the cut end of the tubing. This pushes out the sides of the tubing and keeps water from escaping.

IMG_6004

The water line is about 3 feet long and runs up to a t-joint, which you can just barely see in the photo of the reservoir. Airline tubing from the air pump comes in from the side, and the black tubing carries water up to the top of the plant column.

The basic theory of the system is that water comes up from the bottom and is then pushed up the black drip tubing by air from the air pump. Undergravel filters in aquariums work on a similar principal. Getting it to actually work is a trial and error process, and your reservoir needs to be high enough above the t-joint to keep the water pressure up.

The air pump also needed some tweaking to work well. Too much air and you get a noisy system that doesn’t lift water well, too little air and you get a quiet system that doesn’t lift water well. I found a nice four-way adjustable valve on Amazon which allows me to carefully adjust the airflow.

The system is on for 15 minutes every two hours, which I’ll increase as the plants grow. I’ve planted dwarf sugar peas, tomatoes, and basil so far. With any luck I’ll have something edible in a few months.

RevolvingDork loads the bookshelves
New Construction Townhome

Built-in Bookcases by Ikea

RevolvingDork loads the bookshelves

RevolvingDork and I have completed our first DIY home improvement project together: built in bookcases for our living room. It was only a little nerve wracking to coordinate on a project where neither of us really knew what we were doing.

We used Billy Bookcases, closely following the example from Centsational Girl’s blog. After trying a few different combinations we went with four full-width and one half-width bookcase. In between each bookcase is a strip of 1 11/16th inch moulding. We were able to pull up and reuse the floor moulding from the back wall (though as you can see in the photo above we need to get new quarter-round shoe moulding).

IMG_5923

Our base moulding is pretty tall, and because we planned to install doors we needed to make sure the bottom edge of the lowest shelf was above the moulding. All together we needed to raise the bookshelves by 2 and a half inches. We built a frame out of two by fours, and nailed little wooden “feet” to the bottom to get things to the right height.

IMG_5927

Like most houses, our walls and floor are not perfectly square so we had to fudge things a little bit to get them to line up. We used some scraps of the flat moulding as shims to convince the bookshelves to line up correctly. Conveniently, the crown moulding at the top hides any uneven edges between the bookcases. Once everything was in place we painted all the moulding to match the trim.

IMG_5933

I’ve seen a lot of Billy build-ins, but none with doors. The doors weren’t quite as much of a problem as we’d expected; you can get away with up to 1/4″ thick moulding before you have to re-drill and reposition the mounting holes for the door hinges.

IMG_5935

The bookcases themselves came in at $500 (more than half of which was the doors), and we spent about another $150 on wood, moulding, nails, etc. Despite being very crafty / hackery, neither of us is very handy so don’t have much in the way of spare lumber or hardware lying around. Thankfully we were able to borrow a compound miter saw from RD’s dad. We started the project on Wednesday and finished it Saturday morning, though it took longer than it needed to because we don’t have a car to easily get large things from the hardware store.

It may not be the most technically perfect bookshelf in the world (don’t look too closely at the mitered base moulding…) but we’re pretty proud of our first home improvement project. As a bonus, the living room is finally a livable space instead of a box maze.

Living Room Unpacked