Crafting

Last Minute Displays

7 (1)

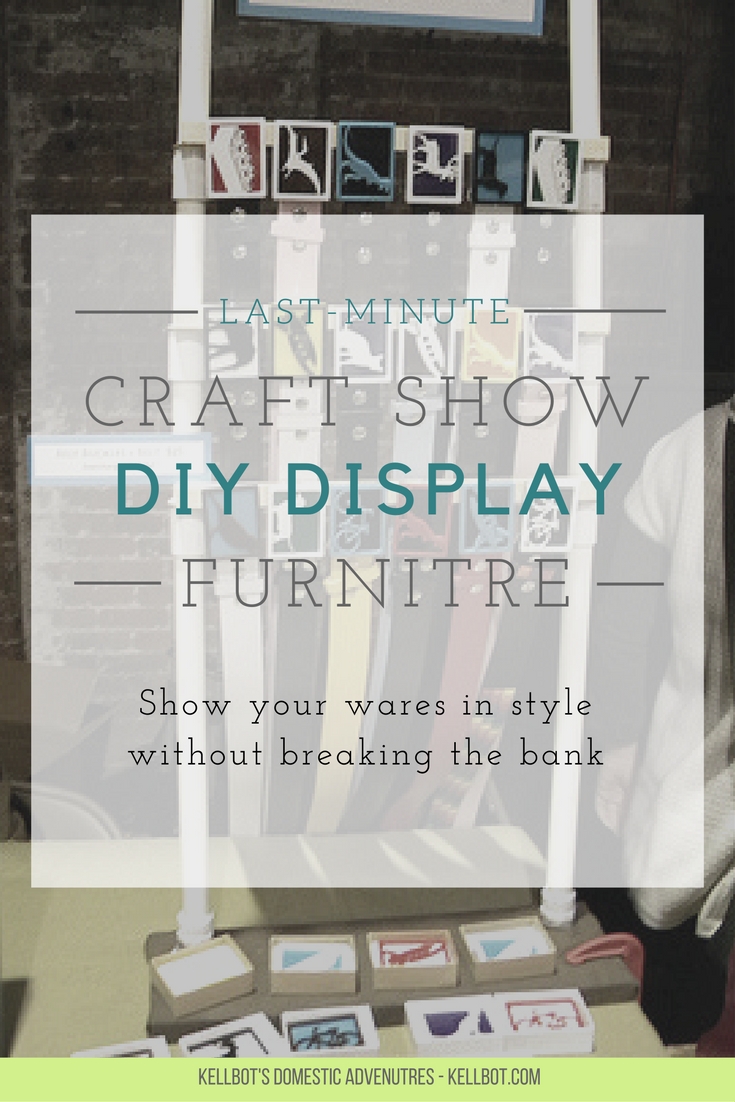
My craft show displays, like so many others’, are in a constant state of flux. I’m constantly adding new products to my line, and for some reason I don’t usually think about how to display them until right before a show. This month I had discount viagra sales back to back weekend shows, Squidfire and the Brooklyn Lyceum, so I scrambled to put together some new displays for my new line of pendants and my older line of belt buckles whose display I wasn’t totally happy with. I had about a week to get it all together.

Belt Buckle Display

Belt Buckle Display

The belt buckle display is made of PVC and wood, and the cost of all the materials was about $20. The goal for the display was to put many of the buckles at eye level and keep the belts themselves from getting tangled up. Bonus points for being able to easily see the backs of the belts to view sizing info.

Parts list:

  • 18″ long piece of 1×6
  • 2 metal flanges for 3/4″ pipe
  • 4 6″ lengths of 3/4″ PVC pipe
  • 2 16″ lengths of 3/4″ PVC pipe
  • 6 3/4″ PVC straight couplings
  • 2 couplings to fit the 3/4″ pipe into the flange threads
  • 3 16″ strips of rectangular molding
  • Scraps of 1/8″ plywood
  • 18 magnets
  • C clamp to keep it from falling over

To make the rails to hold the buckles/belts, I took the rectangular molding and glued magnets evenly along them, 6 per rail. The buckle backs are steel, so they stick to the magnets pretty well. I used some ceramic magnets and some neodymium magnets because that’s what I had lying around, but if I were to do it again I’d probably use all neodymium.

To attach the rails to the PVC I laser cut some rings (shown on the left) out of some scrap 1/8 plywood and glue them to each end of the rails. While I’m lucky enough to have a laser, it’s something you could pretty easily cut by hand with a little patience and an appropriately sized drill bit.

The rings slip over the PVC, and rest on top of the coupling. The whole thing is surprisingly sturdy, and breaks down easily to fit in my Big Box of Craft Show Gear. The C clamp helps keep things stable. The last show I did had super wobbly floors that shook the table any time someone walked by.

Eventually I’d like to make some cloth covers for the PVC pipe, so it’s not so ugly, but for the time being the display worked pretty well. I sold a good deal more belt buckles than usual, and I think having them all easy to see was a big part of that.

Pendant Display

Pendant Display

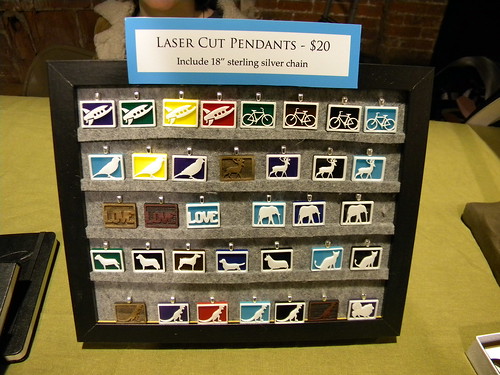
The pendant display was made literally the night before the show. I grabbed an Ikea frame and a 12″ square piece of grey industrial felt I had lying around. I cut the felt to fit the frame, and had some leftover. From that I cut narrow 1/4″ strips of felt the same width as the frame. I glued them at pendant-sized intervals, and the pendants are just thin enough that they can sit on the felt rails. And unlike my last slapdash jewelry display, this one doesn’t have nails sticking out the back to stab me.

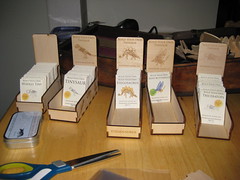
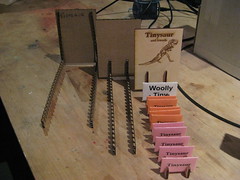
Overall I’m pretty happy with the two displays, although I sometimes wonder what craft shows would look like if it wasn’t for Ikea. The Tinysaurs themselves are in need of some new display furniture, so I’ll probably put something together for them in the spring. I’m free from craft shows for a whole four months!

Uncategorized

Tinysaur Factory

Big things have been afoot in Tinysaurland. I’m putting together a huuuge wholesale order for a well-known retailer. I’m not sure if I can say who yet. I’m also preparing for Crafty Bastards, a huge awesome craft show in Washington DC. The past few weeks have been spent scaling up my production. It’s something I knew I might have to do, and am more or less prepared for, but still intimidating. 

Trex Trex Trex

I spent the majority of today laser cutting T-rex "bones," tomorrow will be more T-Rex, Triceratops, and the labels to go on the top of the tins. Which reminds me, if anyone has a favorite place for custom die cut stickers, please let me know! I definitely plan on having someone else make the labels next time. 

I cut the bones in batches of ~100, and in each batch there are always a few that fail quality control. This happens when the paper is curled on the edge, or I forget to take the inventory sticker off first, or I otherwise screw up the cut. These rejects (shown scattered above) get turned into pre-made models, as I combine parts from various sheets.

Mammoth in Progress

My paper supplier switched to an ever-so-slightly thicker paper, which is good and bad. The good is that it’s got a nicer finish, and lases better with less charring. No more brown edges! The bad is that the tiny bit extra thickness means I had to re-tool all of my designs. But overall I think it’s a positive change. The photo above is a test model, to make sure the adjusted pattern was correct.

Foam on a RollLased Foam Foam Inserts

I also switched the foam used in inserts that go in the tins. I’m looking into having these custom die cut, but for the time being it’s actually not to painful to laser cut them (yes, the foam is laser-safe). 

I have another 8 hours or so of laser cutting to do, and then on Friday my lovely assistant (oh yes, I have an assistant!) is coming in to help assemble everything. With luck I’ll have my big wholesale order AND my Tinysaur inventory for Crafty Bastards done by Monday.

That gives me what, four whole days to come up with a booth design?

Busy week!

Crafting, lased

Today’s Wooden Displays

Most of the last week has been spent prepping for a craft show, my first one in about two years. In order to get ready for the craft show, and also to attract some more wholesale clients, I’ve been working on some nice wooden display stands for Tinysaur.

Getting ready for Prime Time These are the displays I’m using for the upcoming show. They’re laser cut/etched wood. Each stand holds a different model Tinysaur. The stand on the far left is a prototype, hence its lack of a dinosaur etching.

Each display holds about 30 Tinysaurs. Each Tinysaur is contained in its own matchbook-style packaging. I plan on using these displays to transport the Tinysaurs, but more on that later.

Designing a display takes a while, and is an iterative process. The first time I cut one, I realized the front piece was too short, and had to make a new one. I also decided the runners on the sides were too short, it looked a little stumpy.  So I added two more inches to it. Which turned out to look a little ridiculously long.
Work in progress
When I took the first raster-etched stand out of the laser, I realized I’d made another mistake. I forgot to mirror the right-hand runner, so the dinosaur silhouettes ended up on the wrong side. Oops.

I also had to do some experimenting with the raster image of the dino that appears on the “flag.” The line drawings have a lot of thin lines, which tends to look sort of anemic when etched. I went into Photoshop and used a combination of filters to beef up the lines. You can see the difference in this picture.

Lastly there was the issue of transport. The flags that stick out of the top make it sort of unweildy to pack, and they’re also sort of fragile. Rather than risk them breaking off in transit, I made a second set of backs which are only as tall as the sides.
Raster close up
Then I drilled a few holes in each side of the stand. Since I want the backs to be removable, I don’t want to glue them on. Instead I’m going to run some elastic through the holes and around the back. That way I can switch the backs out easily, and they’re held in place by elastic.

I think the elastic will work OK, but it’s sort of fiddly. I think a beter option would be to use some small bolts to keep things in place. Something to think about for the next version.

lased, SDXF Documentation

Tinysaur Display

Tinysaur Kit Display

I’m helping my friend Sara at the Squidfire Holiday Market in Baltimore, Maryland on Sunday. She suggested I bring some Tinysaurs, and so I made a display to neatly hold the Tinysaur kits.

I generated the pattern with a python script I wrote, using the sdxf library.

If you’d like to make your own, the DXF files are up on Thingiverse, or you can grab the python scripts and make one to your own dimensions. I cut it on the laser, but there’s no reason it couldn’t be cut on a scroll saw.

first, second, success

Here you can see my first attempt, second attempt, and final. The first two were in cardboard, fantastic for prototyping.

Once all this craft show stuff is over I will probably make a few available in my Etsy shop in case folks who do craft shows are interested in one.