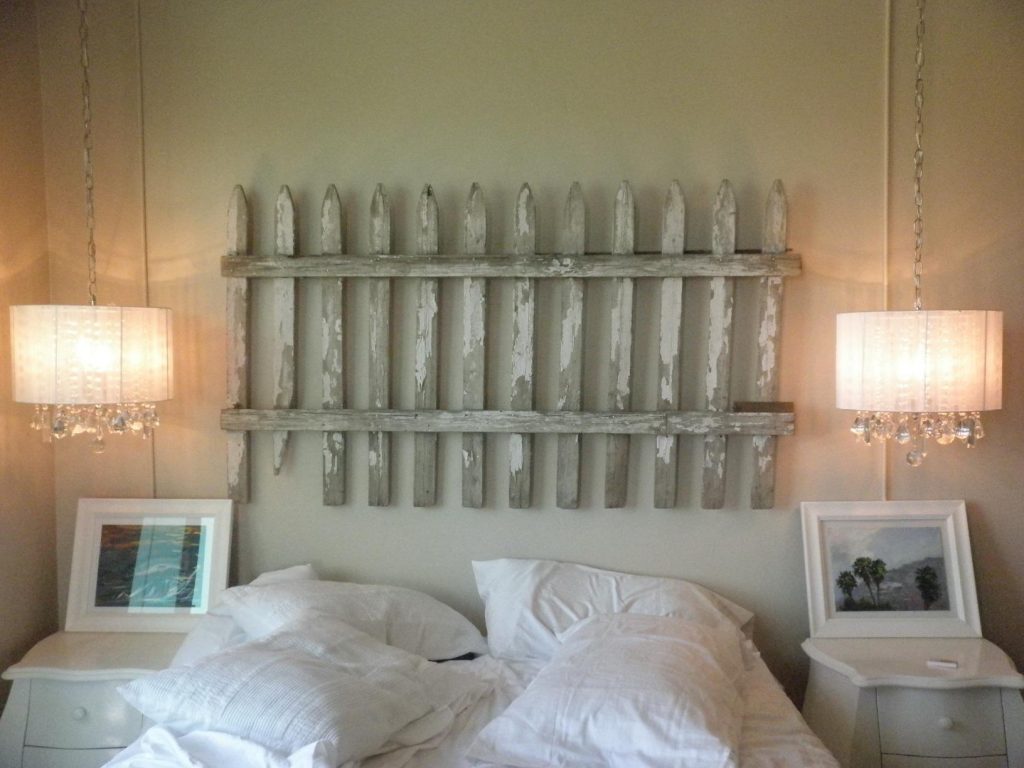
I’m remodeling a house and one of the things that desperately needs replacing is the light fixtures. They’re all 1970s attempts at 1920s styles, and not very good ones. Swapping out a dining room chandelier or other ceiling light is a great way to update a room with just a few hours of work. The options are nearly infinite, and unfortunately so are the prices. As cool as the Restoration Hardware catalog is not all of us are ready to spend next month’s entire paycheck on a lamp that looks like it was built by Howard Hughes. So I started looking into budget options. The lamp field really opens up around $150, and somehow everything that catches my eye is $300+ but there are some nice options to be found for less than a Benjamin if you know where to look.
These pendant lamps and chandeliers each come in under $100, meaning you can get rid of that 1970s reproduction nightmare without breaking the bank.
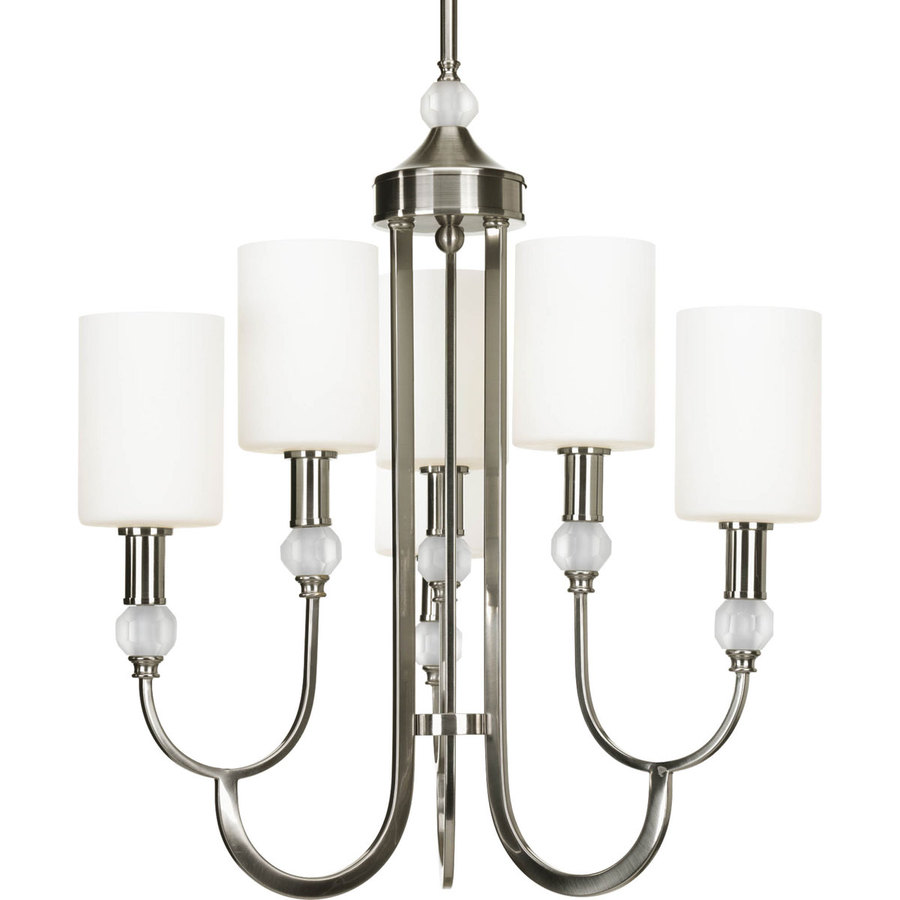
First, some fairly tame options for when you want something more streamlined, but don’t want to hear your mother-in-law’s opinions on the lighting every time you host a dinner party.
If you’re feeling a little trendy (and why not when the lights are so affordable?) you could go for a drum light. Drum lights tend to look a little more casual than chandeliers, and if you hang them close to the ceiling they can be a little more subtle.
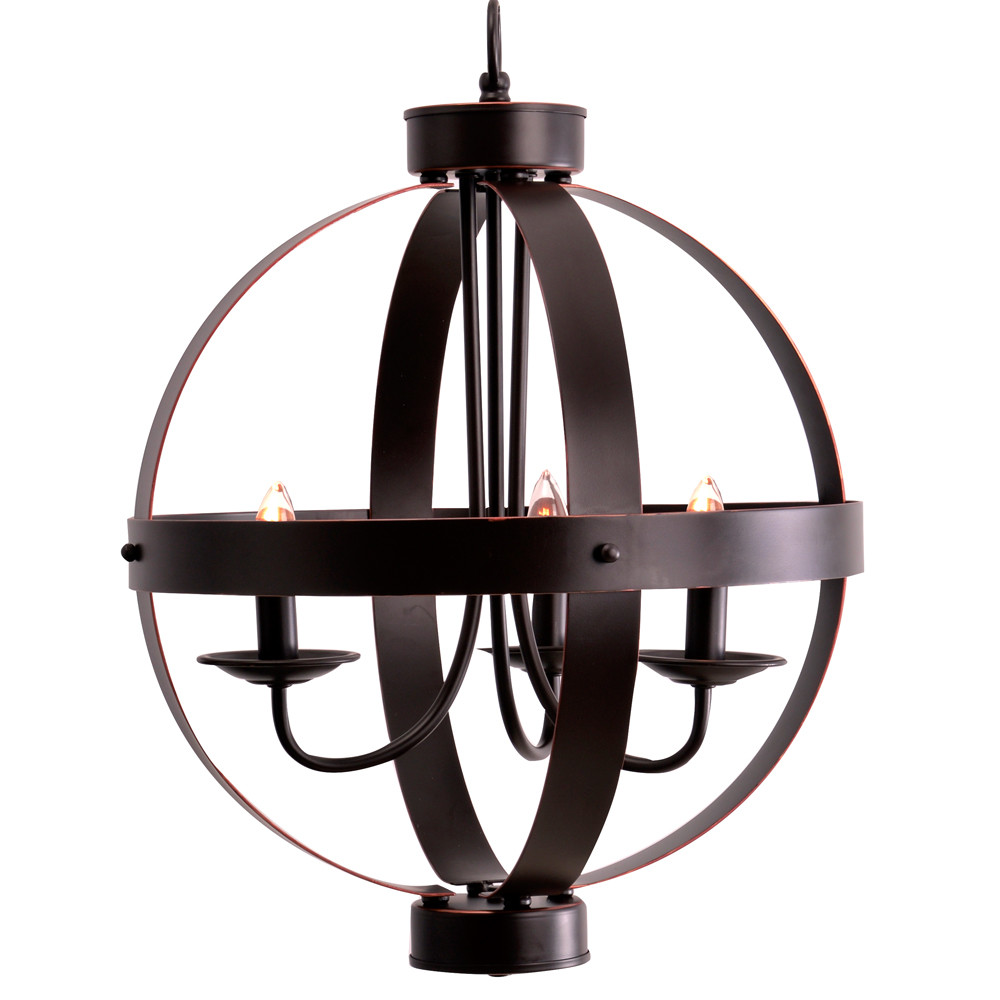
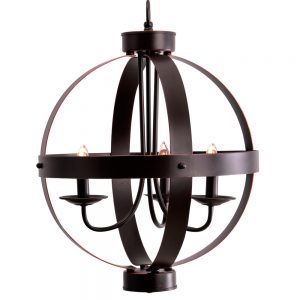
Or you can get a little weirder with these guys.
I know what you’re thinking on that last one… it looks a little cheesy, right? Ok maybe it is a little cheesy, but bear with me. When it’s lit up it looks nice!
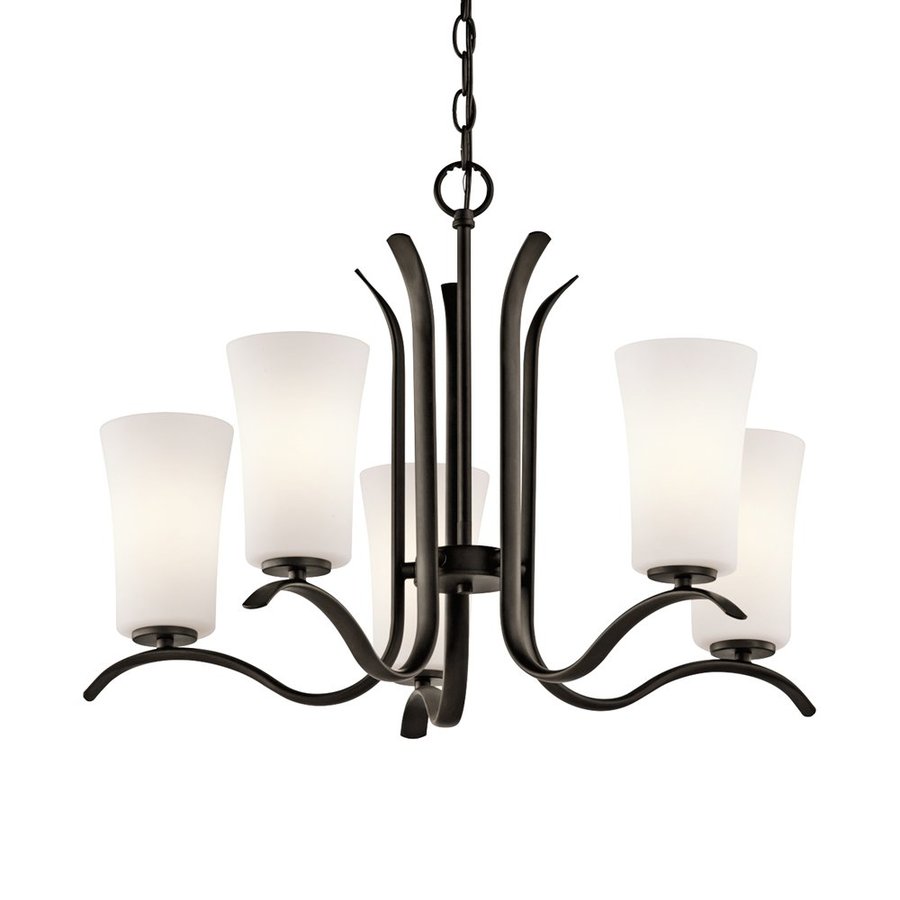
And last but certainly not least there’s this chandelier, which I included because it’s called Khaleesi. I think it looks a bit like a metal octopus, which is admittedly not my thing, but they got me on the name. Well done, marketing team!
Last night I had to go down the shore… again.. to let the painter in this morning (because I didn’t want to wake up at 5am to drive down there). For some reason the outlet covers were not removed / painted under when the painters came last week. The manager was very apologetic and came out this morning with the crew leader to fix it.
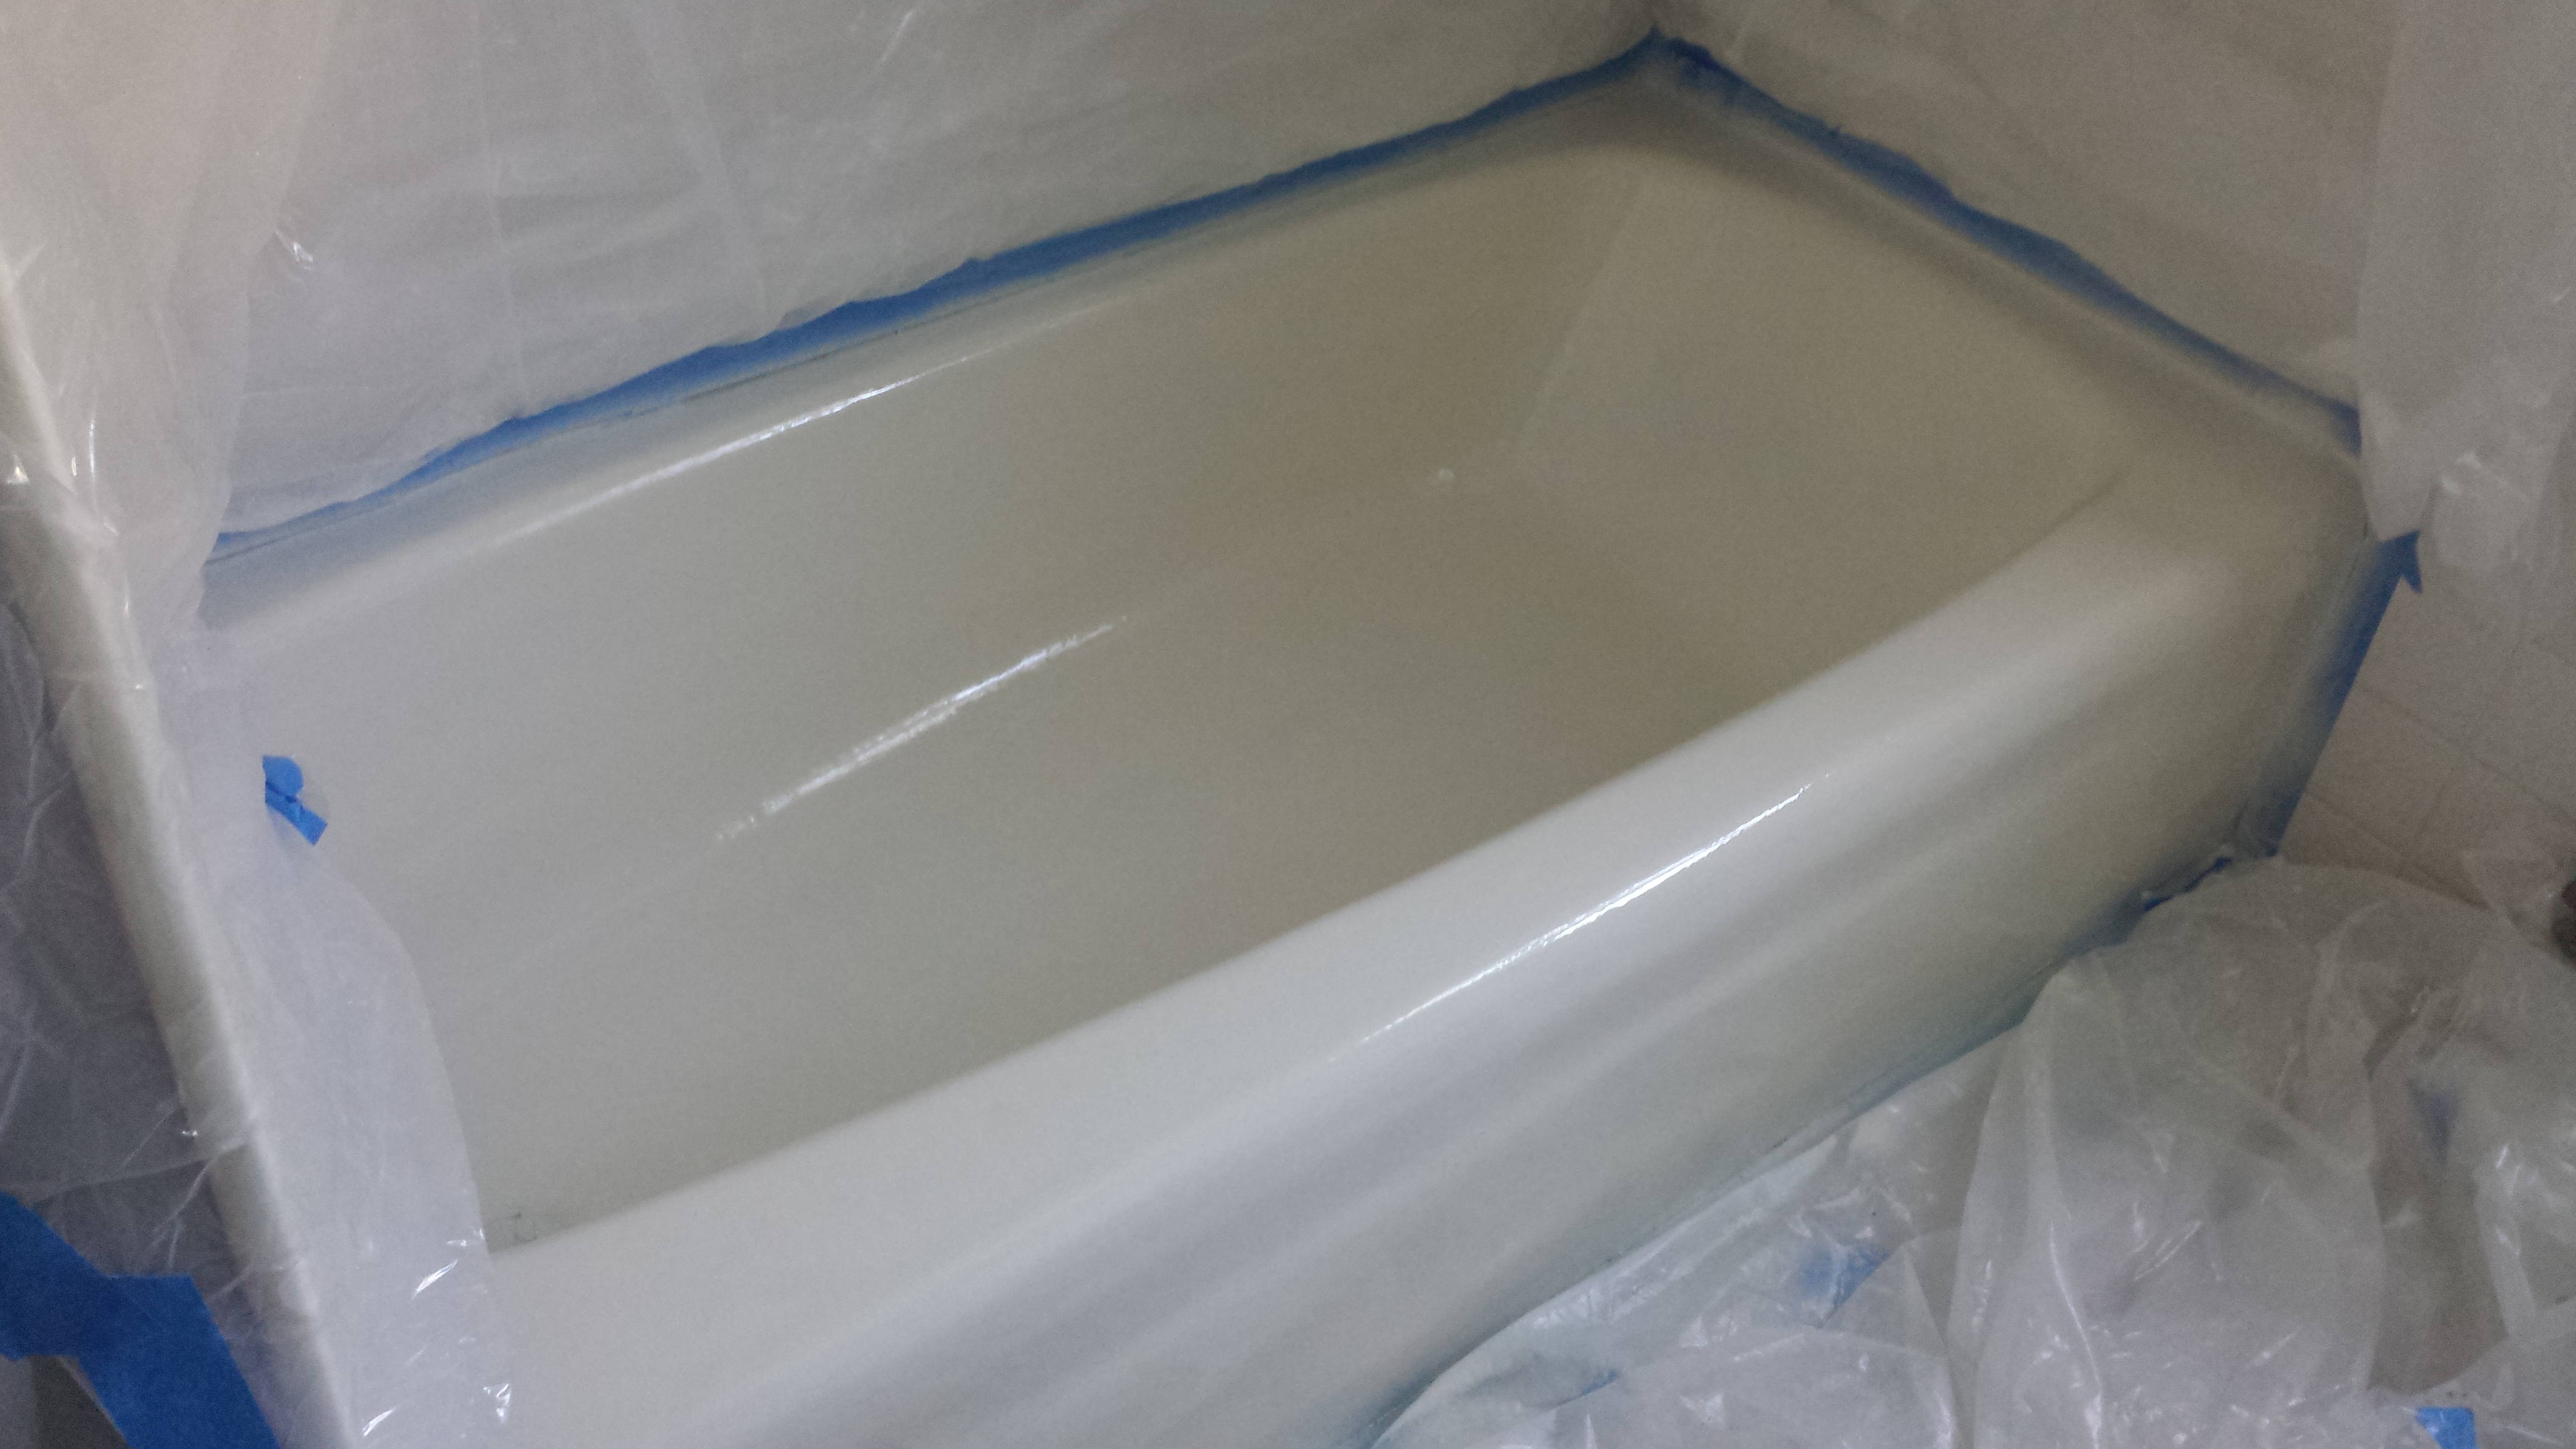
Since I was down there anyway I decided to tackle the tub (which I foolishly did not get a ‘before’ photo of). The finish on the tub was scraped off in a bunch of places, and the yellow fiberglass shows through and looks gross. It was also caulked with white caulk, despite being a bisque colored tub, which makes everything look yellow and gross. So last night I stripped off all the old caulk. That allowed me to discover what a mess the tub surround is. For about 5 minutes I contemplated other options, and then decided to just barrel ahead with the current plan to re-caulk and re-enamel the tub. It won’t look great, but it will look better, and I can deal with the bathroom as a whole at some other point in the future.
One freshly-coated tub
Recoating the tub is fairly easy, I got a tub refinishing kit at Home Depot. First you clean the living daylights out of it using cleaner and steel wool, then you mask everything off, then you spray the enamel on. It looks good, although I’m a little concerned about the durability. The bathrooms are on the to-be-addressed list but there’s a lot of other more critical stuff that has to come first. The enamel needs to dry for 72 hours, so I’ll caulk the seams the next time I’m down there.
I’ve got a new theory about the upstairs shower, which isn’t drawing enough hot water to trigger the tankless heater to fire up. Apparently the cartridge in the temperature knob can get clogged with minerals over time. If the cartridge is blocked up that would explain the low water pressure, as well as why the sink in the same room seems fine (and we’ve got a brand new shower head).
Meanwhile I’m scurrying around trying to coordinate all the furniture/mattress delivery so that everything shows up before the weekend and I don’t have to make multiple trips down to sign for stuff. We expect the house to be full or nearly-full with family, so we need as many beds as possible.
At long last, all the rooms are painted! We painted the upstairs ourselves, but after 4 months of nonstop work I am exhausted (and also 5 months pregnant) so we decided to hire a painter to do the downstairs. But before we could have the walls painted we had to get the new flooring installed in the two downstairs bedrooms.
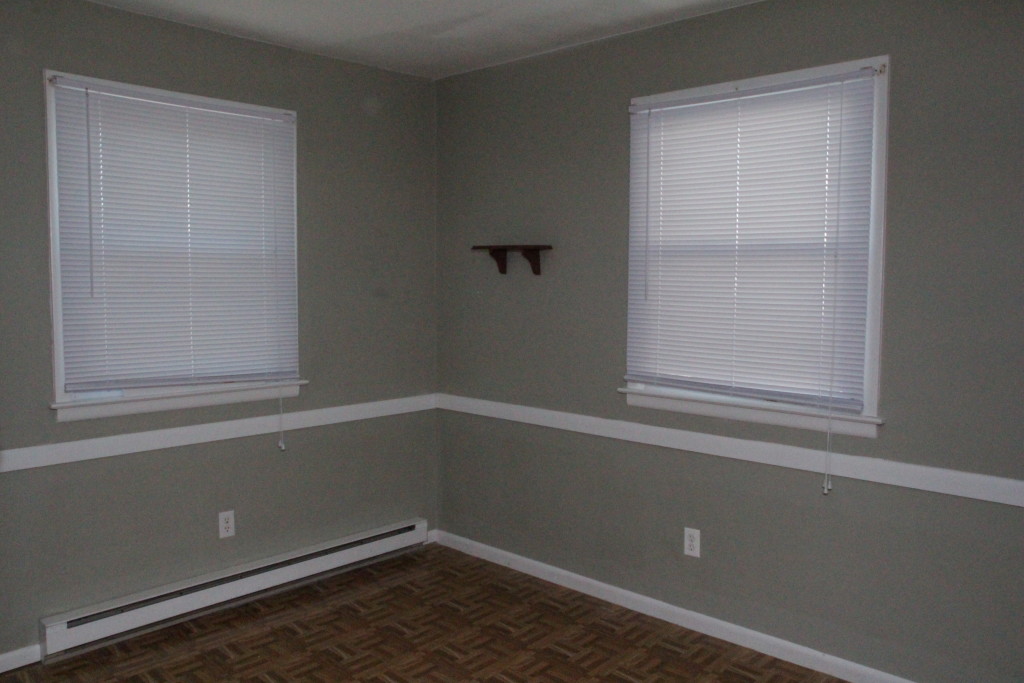
The bedrooms came to us with some fake parquet stick-on vinyl tiles (which tested asbestos free, thankfully). We replaced it with the same click-lock waterproof vinyl we used in the kitchen and laundry room.
Old fake parquet floorThe smaller bedroom with a chair rail (??)
The tiles came up easily but getting the sticky goo leftover was nearly impossible. It dissolves with mineral spirits, but I didn’t really have a mop capable of getting the slick goo up efficiently and wearing a respirator for long periods of time sucks. I ended up scraping it with a putty knife and then putting paper down to just contain the adhesive.
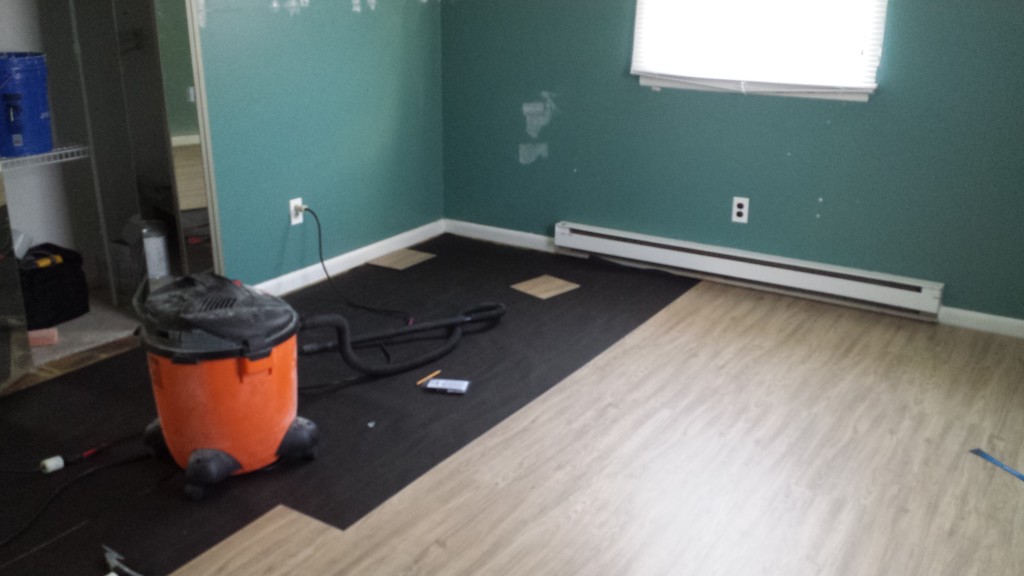
Flooring is half installed in the big bedroom
Apparently I did some math wrong when I ordered flooring because I came up short about 6 square feet. The flooring company warehouse is out in Trenton, about an hour from me. My dad saved the day by volunteering to drive to pick it up on Tuesday, my mom and I came down on Wednesday to finish installing it, and since my father-in-law had pre-cut all the quarter round molding we were able to get everything done in time for the painters on Thursday.
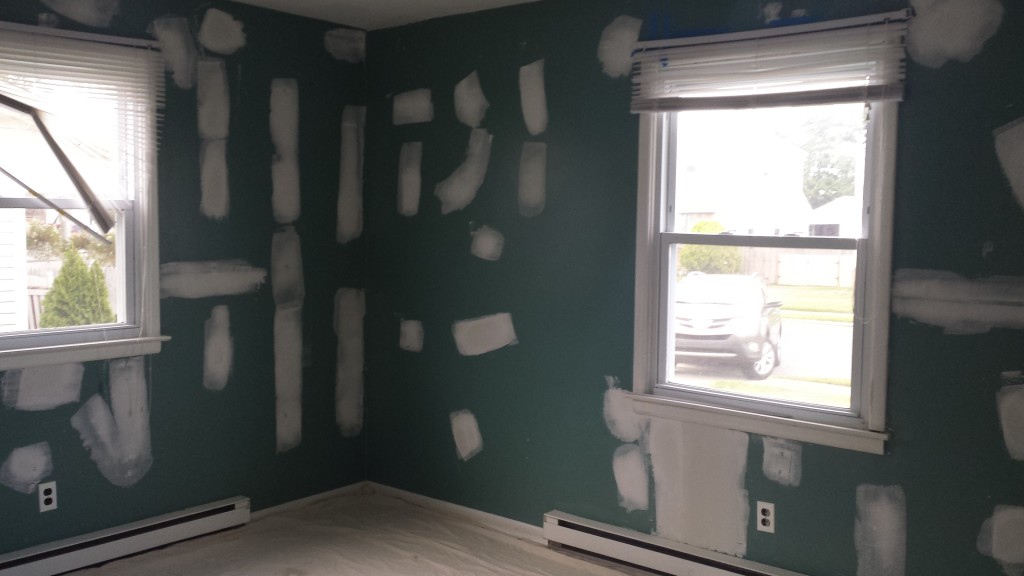
The first day the painters prepped all the walls. They were in pretty rough shape. It took two guys a solid 8 hours of working to get everything spackled and smooth.
Bedroom chicken pox
The painting itself took a crew of 5 or 6 guys ten hours. They managed to sand and put two coats of paint on the ceiling, walls, and trim all in one day. The change is dramatic, the house feels much brighter and more open now (admittedly some of that openness also comes from finally having the house clean).
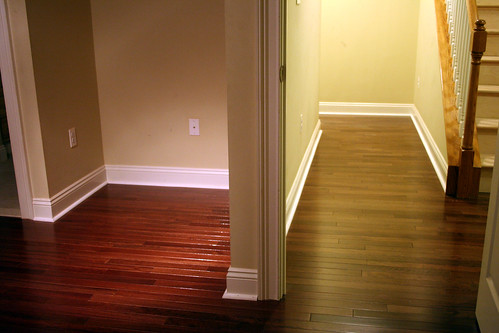
Hallway!
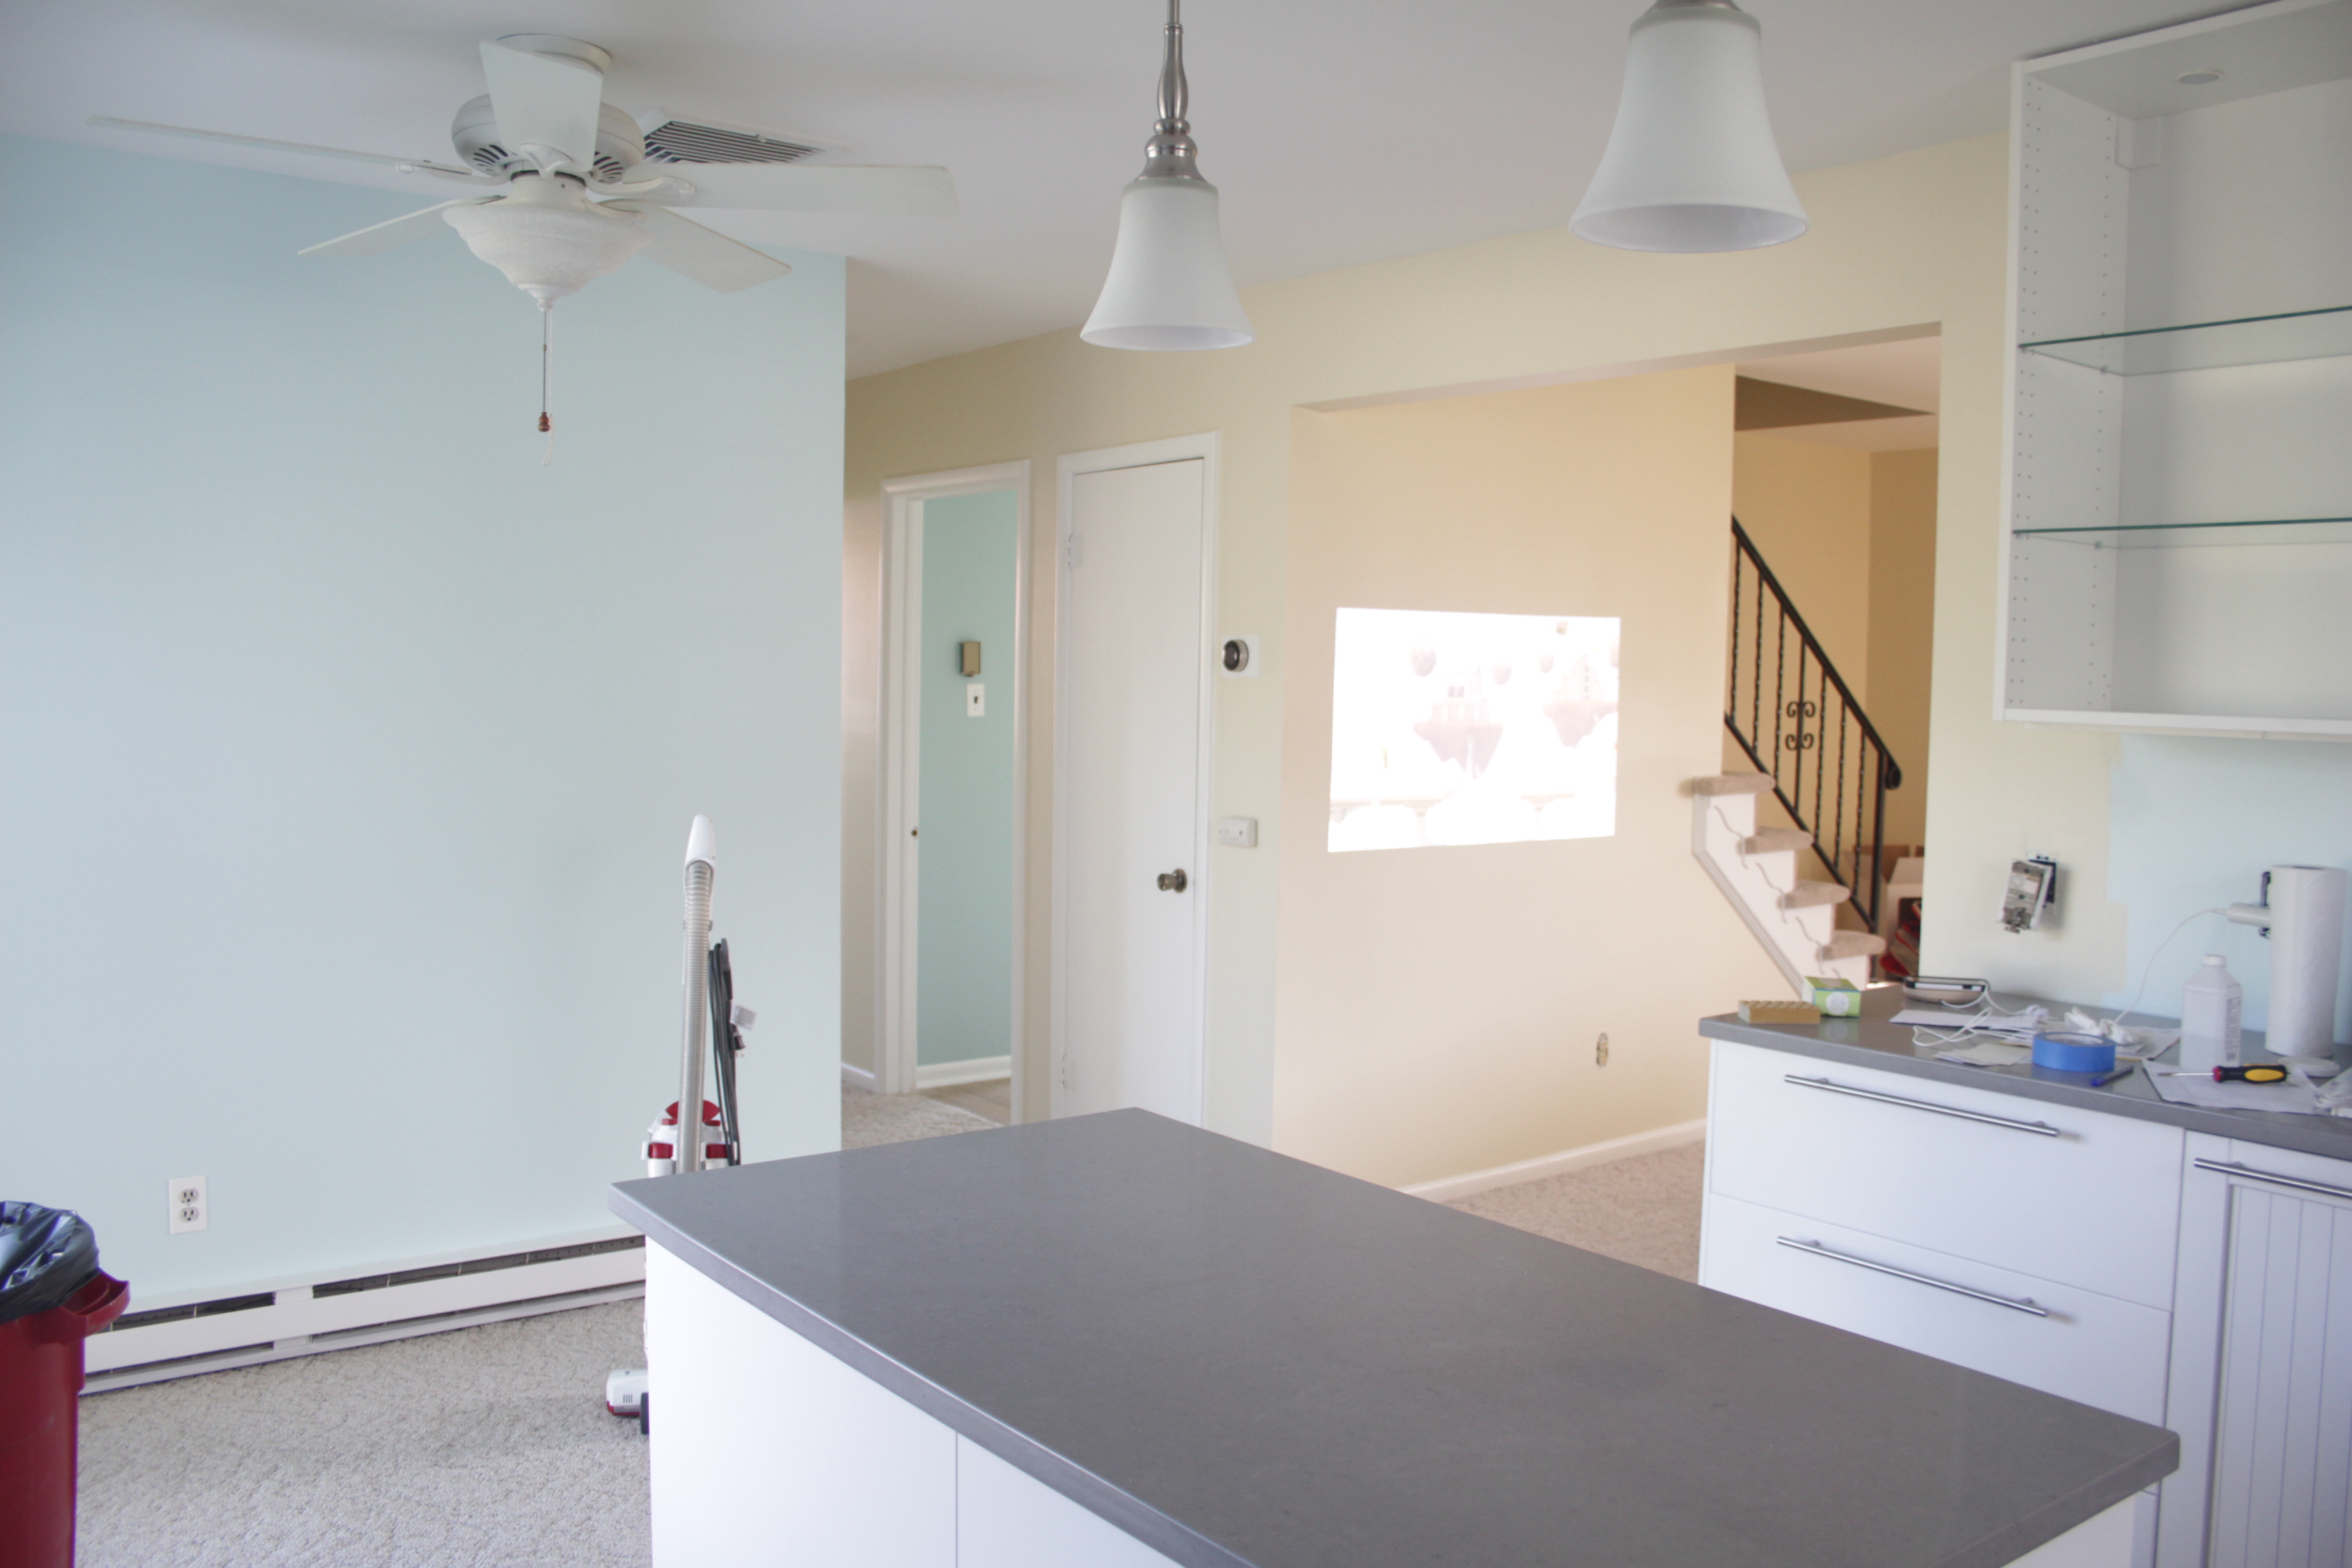
Kitchen Island, Dining, and some of the living room.
Living Room plus husband and projector
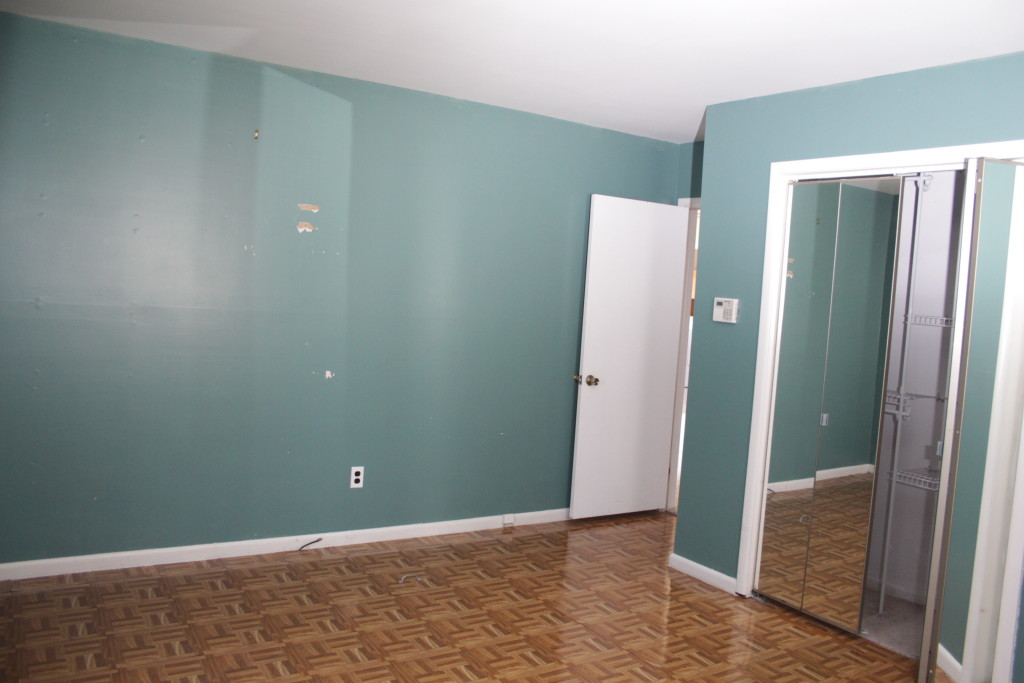
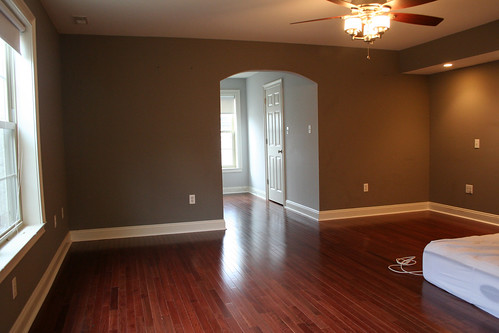
Big bedroom (the colors here are closer to true)
Little Bedroom
Big Bedroom (color looks kinda dark here)
The house is finally starting to look good. Gone are the piles of debris everywhere (except the laundry room and downstairs bathroom). The carpets need a professional cleaning but at least they’ve been vacuumed. There’s a ton of little finishing to do all around the house, but the major stuff is very close to being done. My last big kitchen task is to tile the backsplash.
One slight unrelated aggrevation: the hot water heater has been cutting out periodically. After a phone call to tech support (yes, my water heater has a tech support line) it was determined that the flow rate isn’t high enough for the burner to kick on. The next debugging step is to figure out if the problem with the flow rate sensor, or the plumbing elsewhere in the house. I would not be even a little bit surprised if the problem is the plumbing, the water pressure upstairs seems lower than it should be. Sigh.
Oh well, plumbing can be fixed… and I’m finally approaching the fun part of this whole project… decorating! I’ve logged more hours on Pinterest lately than I’d like to admin. And I might be seriously considering getting a tide clock (but only if I can find a pretty analog one that doesn’t have to be manually set every week).
But whatever that can all come later. Painting is done! Flooring is done! Hooray!
We had our first free weekend in a while so we took some time to tackle stuff around the house.
First, we cleaned out the garage and washed the car! I don’t have a picture of that, because I am a bad blogger. Also, I was busy washing the car. Immediately after we finished washing it, a pop up thunderstorm drenched everything in water and we were very happy to have a garage.
Then we did our part for the economy and bought every household item imagineable from three different stores. Frames from Michaels, window blinds from Lowes, and everything else in the world from Target. Including this salad bowl, which we’re using to hold our surplus of tomatoes from this week’s CSA harvest.
If we get another 6 lbs of tomatoes this week, it’s going to make pasta sauce.
Then we hung blinds over the back faux-french doors. I call them faux-french because they look like french doors, but the “door” on the left is actually completely fixed in place. This was more of an ordeal that we expected, because the doors are hollow metal. But we made it work.
It’s surprising how much of an effect they have on the room. It feels much more like its own space now, rather than an auxiliary space between the kitchen and back yard. We also hung some photos up. After a decade each of living in apartments where we couldn’t really hang things on the walls (or were too lazy to) we’re finally putting up artwork. We even went through the trouble of having mats cut for some of the odd-shaped pieces! The next few weeks will be spent figuring out where everything goes. The reading room was the easiest because it only has one small section of wall.
We also spent some time working on the baby’s room, which is at least half done now. The big accomplishment was getting a room darkening shade up, so maybe one of these days she’ll be willing to sleep in past 6am. We can only hope.
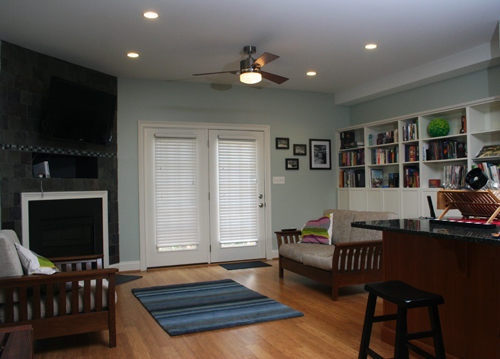
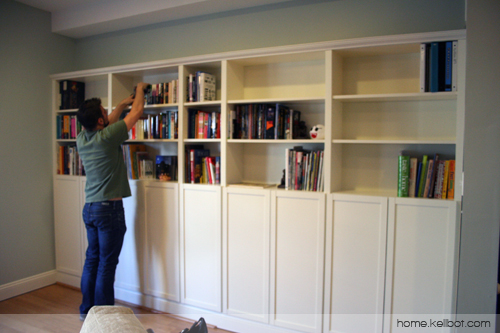
RevolvingDork and I have completed our first DIY home improvement project together: built in bookcases for our living room. It was only a little nerve wracking to coordinate on a project where neither of us really knew what we were doing.
We used Billy Bookcases, closely following the example from Centsational Girl’s blog. After trying a few different combinations we went with four full-width and one half-width bookcase. In between each bookcase is a strip of 1 11/16th inch moulding. We were able to pull up and reuse the floor moulding from the back wall (though as you can see in the photo above we need to get new quarter-round shoe moulding).
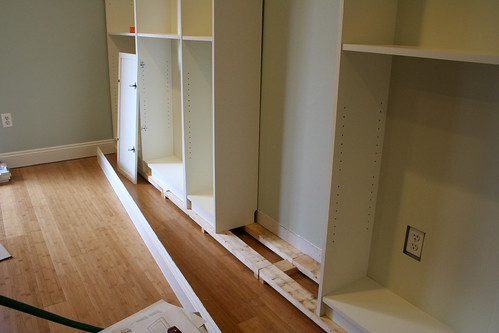
Our base moulding is pretty tall, and because we planned to install doors we needed to make sure the bottom edge of the lowest shelf was above the moulding. All together we needed to raise the bookshelves by 2 and a half inches. We built a frame out of two by fours, and nailed little wooden “feet” to the bottom to get things to the right height.
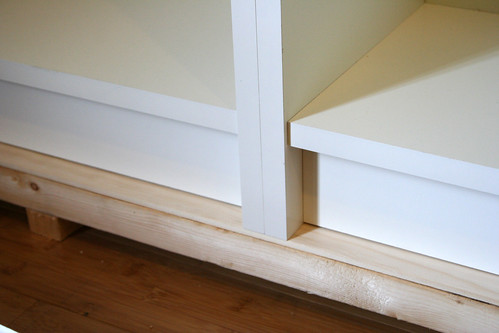
Like most houses, our walls and floor are not perfectly square so we had to fudge things a little bit to get them to line up. We used some scraps of the flat moulding as shims to convince the bookshelves to line up correctly. Conveniently, the crown moulding at the top hides any uneven edges between the bookcases. Once everything was in place we painted all the moulding to match the trim.
I’ve seen a lot of Billy build-ins, but none with doors. The doors weren’t quite as much of a problem as we’d expected; you can get away with up to 1/4″ thick moulding before you have to re-drill and reposition the mounting holes for the door hinges.
The bookcases themselves came in at $500 (more than half of which was the doors), and we spent about another $150 on wood, moulding, nails, etc. Despite being very crafty / hackery, neither of us is very handy so don’t have much in the way of spare lumber or hardware lying around. Thankfully we were able to borrow a compound miter saw from RD’s dad. We started the project on Wednesday and finished it Saturday morning, though it took longer than it needed to because we don’t have a car to easily get large things from the hardware store.
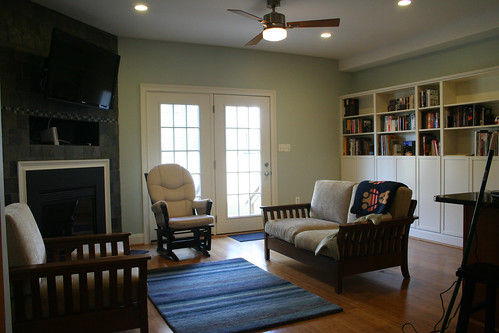
It may not be the most technically perfect bookshelf in the world (don’t look too closely at the mitered base moulding…) but we’re pretty proud of our first home improvement project. As a bonus, the living room is finally a livable space instead of a box maze.
The biggest part of setting up our home network was wiring the house for ethernet. There were two basic phases: running the wire through the walls, and then terminating/testing each wire to make sure it was set up correctly. We hired a family friend who is an electrician to run the wires, and then terminated/tested them ourselves. We installed a total of 34 lines across 4 different floors, all coming into the closet under the staircase.
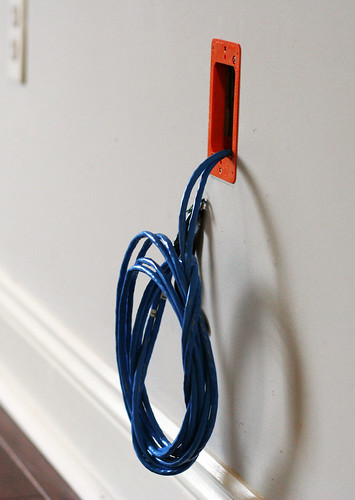
Running the wires proved to be a bigger challenge than expected due to the fact that all of our walls were filled with insulation. A number of access holes had to be cut in the drywall in order to access everything. Four separate boxes of Cat 6 ethernet cable were used, so that multiple lines could be run to the same location at once. The free end from each spool was taped into a small bundle and a long metal wire with a hook was run from the target location (say, the bedroom), through the walls, and into the basement where it was attached to the end of the cat 6 bundle. Then the wire was pulled back up through the walls, bringing the cat 6 cable along with it.
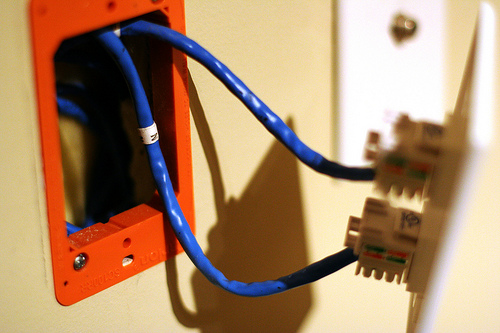
Wires coming into our home office. The orange ring gives the faceplate something to screw into.
Each location in our house got either 2 or 4 wires, depending on how many devices we planned to put in that area. For every location in the house we needed either two or four RJ45 keystone jacks (one for each wire) and a faceplate with an appropriate number of holes. Keystone jacks are available in two basic formats: the standard kind which require a punch-down tool to terminate the wires and a “tool free” type which includes little caps which punch the wires down automatically. I personally prefer the standard jacks.
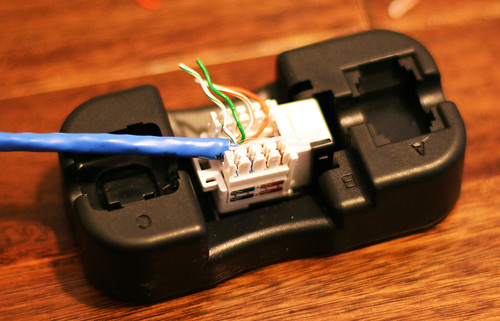
The near side of this jack (white) has been punched down, the far side is still waiting to be done. Each strand of the blue cat 6 cable goes into its own slot on the jack. Color codes on the side tell you where to put each wire. Monoprice included a handy little holder (black) to place the jack in while punching it down.The two keystone jacks have been pushed into the faceplate, which is waiting to be screwed into the wall.
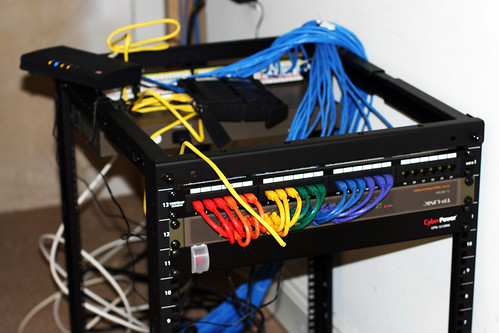
The opposite ends of the cables, which are bundled in the basement closet, get a slightly different treatment. Instead of going into individual jacks, they’re terminated in a patch panel. We used two 24 port patch panels, placing 16 connections on one and 18 on the other. We’ll be mounting these in our server rack, but if you’re going for a minimalist build there are inexpensive wall-mount brackets.
Two patch panels, one face up and one face down. The black thing on the right is a rack-mount power strip.
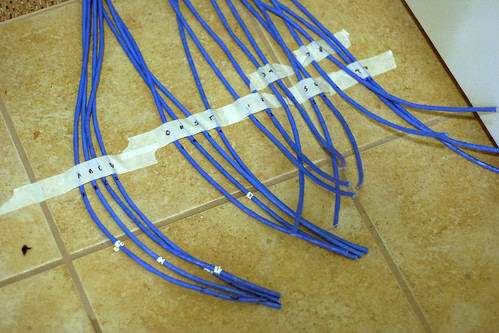
Each wire was marked with a small letter or number at both ends. To keep everything in order and save my sanity, I used masking tape to temporarily keep the wires in alphabetical/numerical order.
18 cables have been punched down into the back of the patch panel.
Each jack in the patch panel is then patched into one of our network switches (which are each in turn plugged into the router) with a 6″ cable. Why not just go directly from the wall to the network switch? The patch panel gives you flexibility to change the network around later by moving the 6″ patch cables rather than tangling up the spaghetti coming out of the walls. Additionally, punching the wires down into the back of the patch panel is considerably faster than crimping a male RJ-45 connector onto the end of each drop.
I briefly considered crimping my own patch cables from the leftover cat 6 cable, but then I remembered that crimping cable ends sucks and a 6″ patch cable costs all of $0.55. The photo above shows half our network cables, the other half are mounted on the back of the rack. I still need to install stress relief for the blue the cables and mount the router + modem nicely somewhere.
The server and switches are all connected to the LAN ports on the router. Our cable modem connection goes into the WAN port. Now the server and anything else on the LAN can see the outside world.
Overall it was a pretty massive project: it took three people a week to get all the wires in place and then another day and a half for my dad and I to button it all up. The next step is to configure the router for the advanced management options we want, as well as configure the wireless access points to provide “seamless” coverage throughout the house. The media server also needs considerable set up, right now it’s just a fresh Linux box with a giant hard drive. I’ll cover the software side of things in part 3 of Our Over-engineered Home Network.
This is part 2 of 3 posts about our home network. Part 1: Our Overkill Home Network Part 3: Coming soon
At last, the painting is done and the house is ready for us to move in! When people ask what color we painted, I say “all of them.” There were no less than 13 different colors used (though because I’m a creature of habit most of them were shades of blue, grey, or beige).
Unfortunately I don’t have great photos of all the different colors, because despite bringing all the rest of my camera stuff I somehow managed to leave the one lens I need at the old place. So the rest of the photos will have to wait until after we move this weekend. But I did manage to take a couple snapshots.
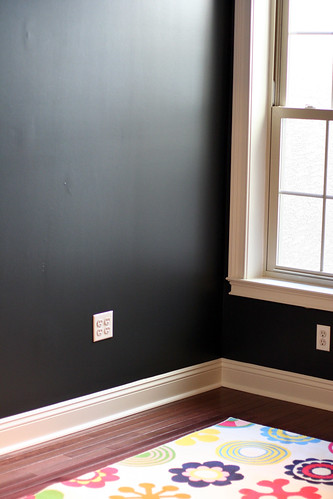
I really enjoy the looks on people’s faces when I say that we painted the nursery black. To be fair, it’s really a very dark slate grey (Sherwin Williams Iron Ore), but it looks pretty black. We’re pairing it with a lot of really bright furniture and decor.
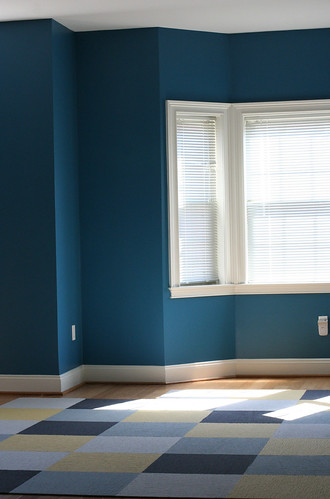
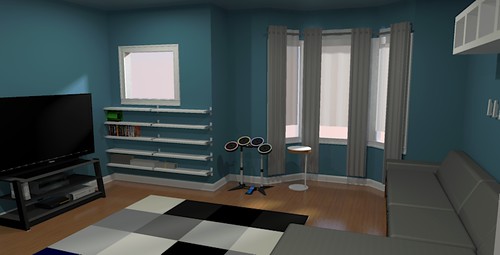
The media room, where our TV and games will go, is blue (Sherwin Williams Turkish Tile) except for one wall. A friend of ours who used to do TV installation said that blue walls make the colors of your TV look awful, so the TV wall is the same dark grey we used in the nursery. The carpet is made up of individual modular tiles, by Flor.
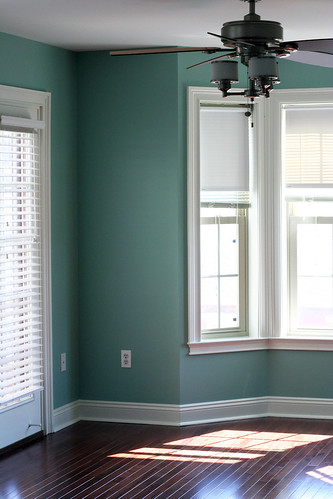
The front part of the master bedroom is a tealy sort of color. Sherwin Williams calls it “Hazel” but depending on the light it looks alternately blue or green.
The painter who did the work painted pretty much every paintable surface in the house, including all the trim and doors. It took about two weeks, but the house looks absolutely amazing. Should anyone be looking for a painter in Philadelphia I would definitely recommend him. After one more cleaning we’ll be all set to move in this weekend.
Offbeat Home featured an article asking “We bought a house, now what?” Since we’re in the process of getting our place ready for move-in, I figured I’d share what we did to keep organized.
Photo by Images_of_Money on Flickr
When we closed on our new place we started a Google Doc titled “New House Things.” Everything we need to do to or buy for the house gets shoved into this document. Since our time is split between two different states, Google Docs has been a lifesaver; it’s impossible to leave the list at the other house.
The day we closed we started listing everything we might want to do to the house. And I do mean everything, from putting in hardwood floors to changing the burnt out light bulbs. The list was sorted into categories of things we needed to hire someone to do, things we could do ourselves but didn’t really want to (at 6 months pregnant I’m not super handy around the house), and then everything else.
Not everything on this list will get done before we move in, or even within our first year of living there. Some of the things on the list would be considerably harder to do after move-in (e.g. painting) so those were on our must-do list. Others fell to the bottom; some were deprioritized for financial reasons, some because we decided they weren’t that important, and some because we’re just too tired to think about them.
We use the same Google doc to store our shopping list, with everything we need from toilet paper to furniture. We also use it to store the paint colors we picked out and the phone numbers of the contractors we’re using. In short, everything we need to get the house in order is in this one document which I can access from my laptop, desktop, and phone.
Things we need someone else to do
Hardwood floors for upstairs
New carpet for basement
Inspect / fix gutters
Get roof checked out
Investigate water damage above window in living room
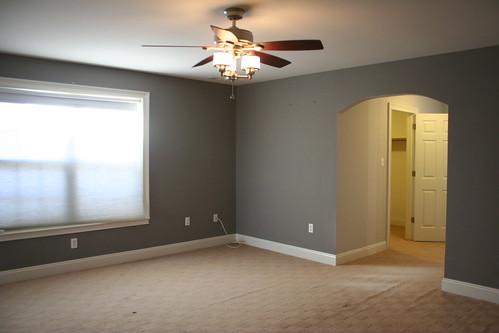
The biggest project for our new home was installing hardwood floors. If you remember, the house came with some stained, poorly-installed carpeting on the top two floors:
The wrinkles are just waiting to trip you in the night
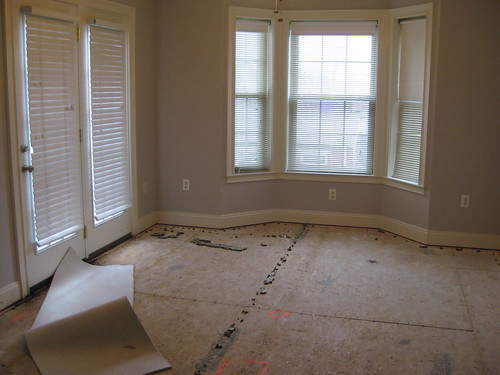
We picked out flooring and hired a contractor to install it. They started on Thursday and spent the day ripping out the old carpet, revealing the plywood subfloor underneath.
I think it looks better than the carpet already
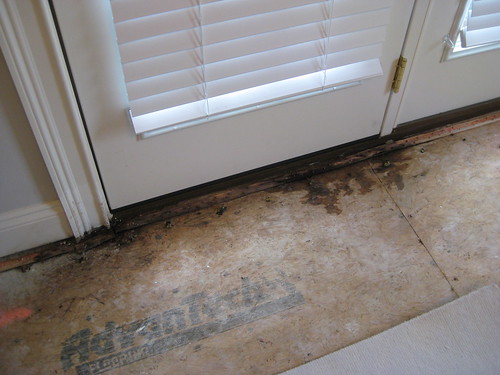
Less than thrilling was the water damage we found under almost all the windows. The tacking strips for the carpet were rotted out in some places. Not exactly what a new homeowner wants to find, especially on a house this young.
Unfortunately it was freshly damp, indicating an ongoing issue
The side of the house is stucco, which has deteriorated and created a gap around each window and door frame. We saw this during the home inspection before we bought the house, I just didn’t expect it to be such a dramatic problem already. Our contractor sealed the cracks with silicone caulk, which we’re hoping will stop the majority of the damage, and once the weather warms up we’ll look into having the house repainted with a waterproof paint.
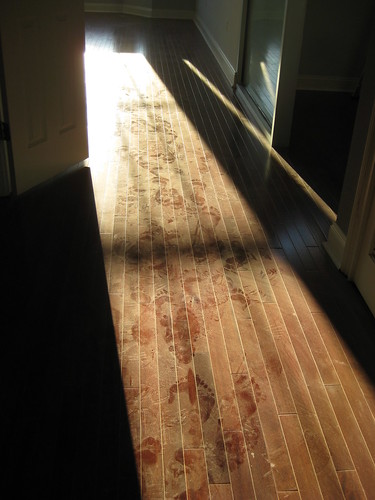
The crew worked through the weekend, and when we returned to the house Tuesday night the floors were done. Everything in the house was covered by a fine layer of sawdust, even the light switches.
Not that it stopped me from walking around in my bare feet
To clean the floors we first vacuumed, then dry mopped (using dry swiffer-type pads), and then gave things a once over with Bona Floor Cleaner. There’s a trick to getting it to clean well – you have to rinse out your cleaning pad (I used a Quickie microfiber mop) frequently to prevent streaking/product build up. This meant at least once per room, usually every 4-5 sprays of the cleaner, being sure to wring out the pad well since wood and water are not friends. For tough spots you still have to get down on your hands and knees with a microfiber cloth.
We'll get a bed eventually
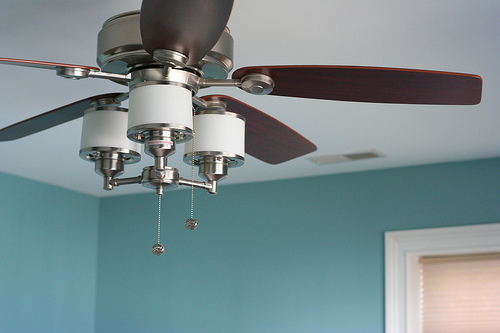
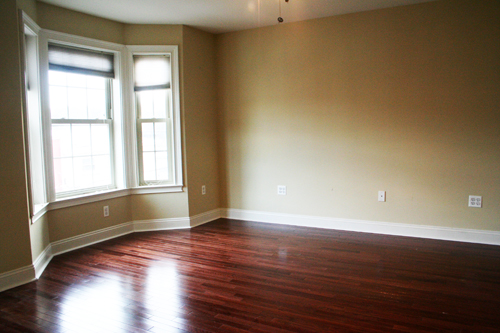
It was about 5pm by the time I finished cleaning so the lighting isn’t great in the photos. But what’s really interesting is that the wood looks drastically different colors depending on the light. This is most visible in the middle bedroom, which has a halogen light ceiling fan, where you can see out into the hallway (which is lit by compact flourescents).
Same wood across the whole photo
Yeah, that isn’t going to make picking out paint colors a headache at all… but we’re really super happy with the floors. They look great. At first I wasn’t sure about the narrower planks, because the trend right now is wider, but I think they give the house character and offset that blah new-construction feel a lot of recently built homes have.
Once the walls are patched up and painted we can drag all our belongings down and start actually living there! In the meantime, Chris and I are testing out hardware setups for our incredibly over-engineered home network / media center.
Now that the floors are in (photos forthcoming after the dust is gone) we can start picking out paint. Picking paint colors is hard. For the time being we’re just focusing on the main floor, which is an open floor plan with a kitchen in the middle and room for seating at either end.
On one end, nearest to the kitchen, we want to create a nice sitting area to chat / read, with built in bookcases. This area opens up to the back patio as well as the kitchen (which has decidedly contemporary cabinets), so we kept it pretty light and airy.
There’s also a fireplace surrounded by blue-green stone on one wall, which dramatically influenced what colors we could use. I got a few different swatch strips from the paint store and taped them all up next to the fireplace to see which hue matched the stone the best.
The chairs we chose in approximately the colors we chose.
Armed with our paint swatch and a sample of our flooring we headed to the furniture store, and spent maybe an hour comparing woods, stains, and upholstery until we got something that looked good together.
At the other end of the house is what we’ve been calling the “media room,” which is basically a shrine to our video game consoles. After keeping things pretty tame in the living room, we went a little nuts with color and opted for decidedly more modern furniture.
Sherwin Williams conveniently provides the approximate RGB values for their paints, and you can see some of the earlier color options on Flickr. After a ton of deliberation we had our color, and a vague idea of what it might look like. I got a sample quart of paint and painted swatches on each wall in the room, to make sure it was going to look right.
After picking out color for just two rooms I’m pretty sick of looking at paint swatches, so I doubt I’ll go quite as nuts with mockups and options for the bedrooms. We’re headed to Disney World next week, and I’m definitely looking forward to a week away from looking at home decor!