It started simply enough. “I would like to watch the olympics on our main television.” After about an hour of cursing at the tv we gave up and contented ourselves to watch the olympics in the kitchen.
We get our TV signal over cable. Although we don’t have a cable TV subscription the broadcast channels are sent unencrypted over the cable line. This works great on our newer Sony TV. It turns out it doesn’t work at all on our older Pioneer TV. After much research I discovered that the Pioneer has an NTSC and ATSC tuner (analog and digital over the air), but not a QAM tuner (cable without a cable box).
The simple solution would be to plug a set of rabbit ears into the Pioneer and call it a day. We probably even have some in the basement. Those of you who know me know that the simple solution is never, ever, the one I go for.

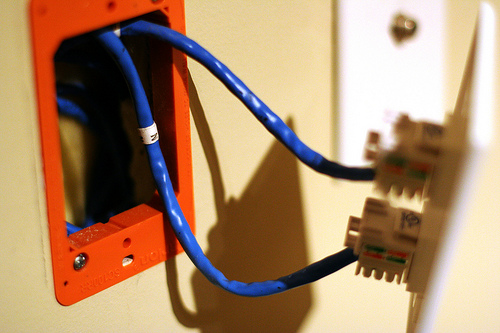
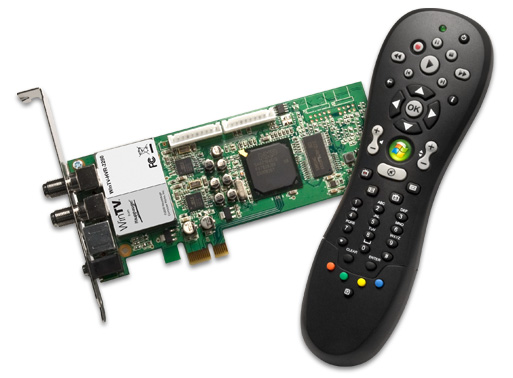
Enter the Hauppauge 2250. Oh yes, we’re adding live tv to our media PC.
DVR / Live TV functionality is experimental in XBMC. It was originally planned for Eden (version 11), but got pushed back to Frodo (verson 12). It’s under active development, and arguably useable, so I decided to go for it. After 3 days and a ton of reading, I have it more or less working. If that’s not a ringing endorsement, what is?
The latest PVR builds of XBMC are meant to work as front ends to one of a handful of backend “TV servers,” software which will handle the nitty gritty of managing the TV tuner card. This can be either in the same machine as XBMC or on a separate one. For now I’m working locally. I chose MediaPortal as the backend because it runs on Windows and has a reasonably active community.
Step 1 was to install the card and see if I could get it to even come up in Windows Media Center. And it did! The setup wizard found 10 channels on the QAM tuner. A number of channels, including NBC and CBS, were missing. After about an hour of poking at it I decided to move on to my ultimate target, MediaPortal.
MediaPortal has two main parts: the TV Server and the client frontend. The client frontend is another media center program, which I ignored. The TV server runs as a service under windows, and is more or less invisible once you’ve got it running. It’s managed with its own configuration tool separate from the MediaPortal frontend.
With the TV server installed and running, step 2 was to scan for channels. This took about half an hour, and found hundreds of channels – many of which were encrypted. I deleted all the encrypted channels (marked with a red T). This left me with about 100 channels. Many of these were data channels (which gave an error when I tried to preview them) or otherwise uninteresting, so I deleted those as well. The remaining 40ish channels included broadcast and cable public access stations.
Step 3 was to identify each station and get scheduling data. The broadcast stations self-identified, but the call signs they used were sometimes opaque. WHYYDT is pretty obviously the local PBS affiliate, but it took me a fair amount of googling to figure out that RT is the station formerly known as RussiaToday, and is offered by local independent station WYBE.
Step 4! Armed with a list of call signs for each station, I started creating a grabber file for MediaPortal’s WebEPG plugin. In theory, listing data is sent along with the signal and can be picked up by the tuner, but I didn’t have any luck with that. WebEPG lets you get listing data via the internet. I copied the IMDB grabber included with the plugin and added a listing for each station in the following format:
<Channel id=”RT” siteId=”WYBEDT2″ />
The Site ID is generally the station’s call sign, with DT added to the HD digital feeds. Subchannels (e.g. 10.2) usually have a trailing number. So our local NBC affiliate, WCAU, can be found at WCAUDT and its substation NBC Nonstop can be found at WCAUDT2. You can double-check to make sure you’ve got the right ID by going to http://www.imdb.com/tvgrid/2012-08-01/WCAUDT/, replacing WCAUDT with the call sign of your choice. You should see the schedule for that station.
Lastly, I needed to install a plugin for MediaPortal that will allow XBMC to communicate with it called TVServerXBMC.
Whew! That concludes the MediaPortal set up, now on to XBMC!
In order to play with the PVR stuff you need to install one of the experimental PVR builds. I went with Margro’s build which includes the MediaPortal add-on. Setup in XBMC is fairly straightforward: enable the add on and a new option for Live TV shows up in XBMC. Assuming everything’s been set up correctly in MediaPortal your TV stations and listing data will be populated and there you have it: Live TV in XBMC.
There are a few bugs in my set up, which I assume are a combination of errors in my confguration, bugs in the still-under-development software, and features which have yet to be implemented. These include:
- Deinterlacing problems on some (but not all) HD channels. This is most visible at the edges of moving objects on screen.
- XBMC/MediaPortal only using one of the two available tuners (meaning I can’t watch one thing while recording another)
- Visual glitches in XBMC, like text overlapping itself
- Occasional trouble tuning stations, which is resolved by trying another station and then coming back
- Occasional video stutter
- Live TV can be paused/resumed, but not rewound / fast-forwarded
It’s still a work in progress, but it’s getting there! In theory one TV backend can serve all the XBMC frontend clients on the network, so getting that up in running is one of my next steps along with ironing out some of the configuration problems.