1970s Shore Home

We has a bathroom!

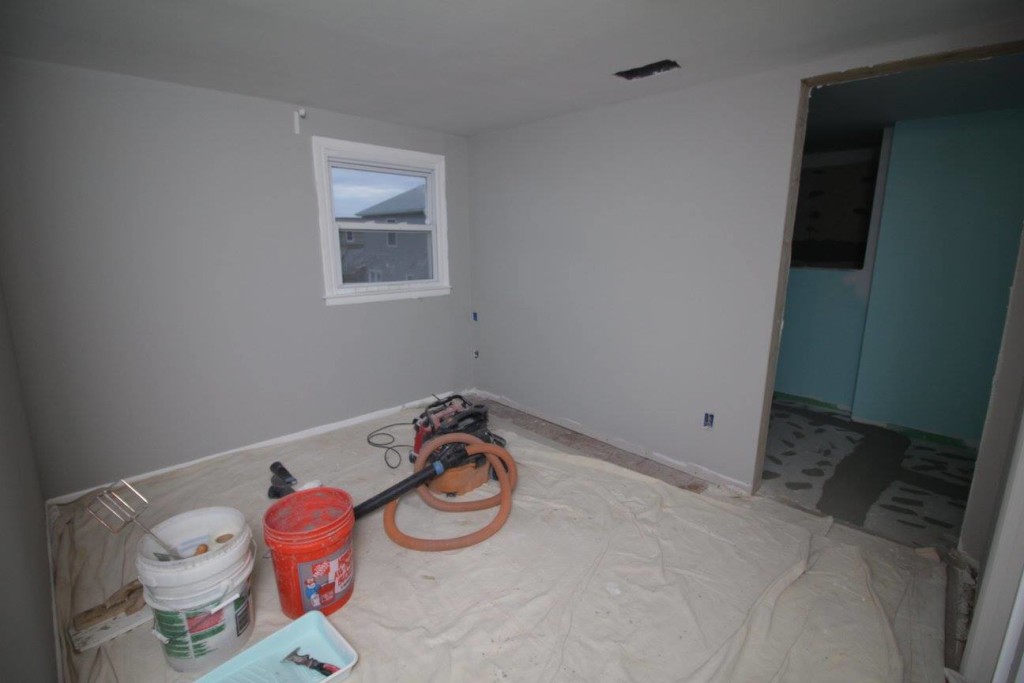
At long last, the bathroom remodel is complete! Ok, it was actually done a while ago, but we’ve been too busy enjoying it to do a full writeup.

Before

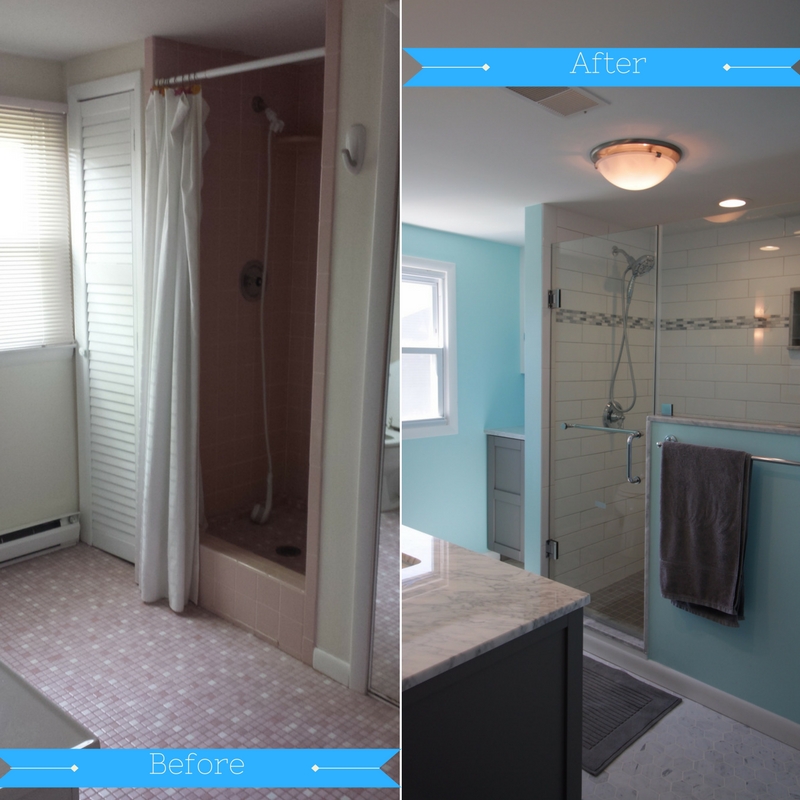
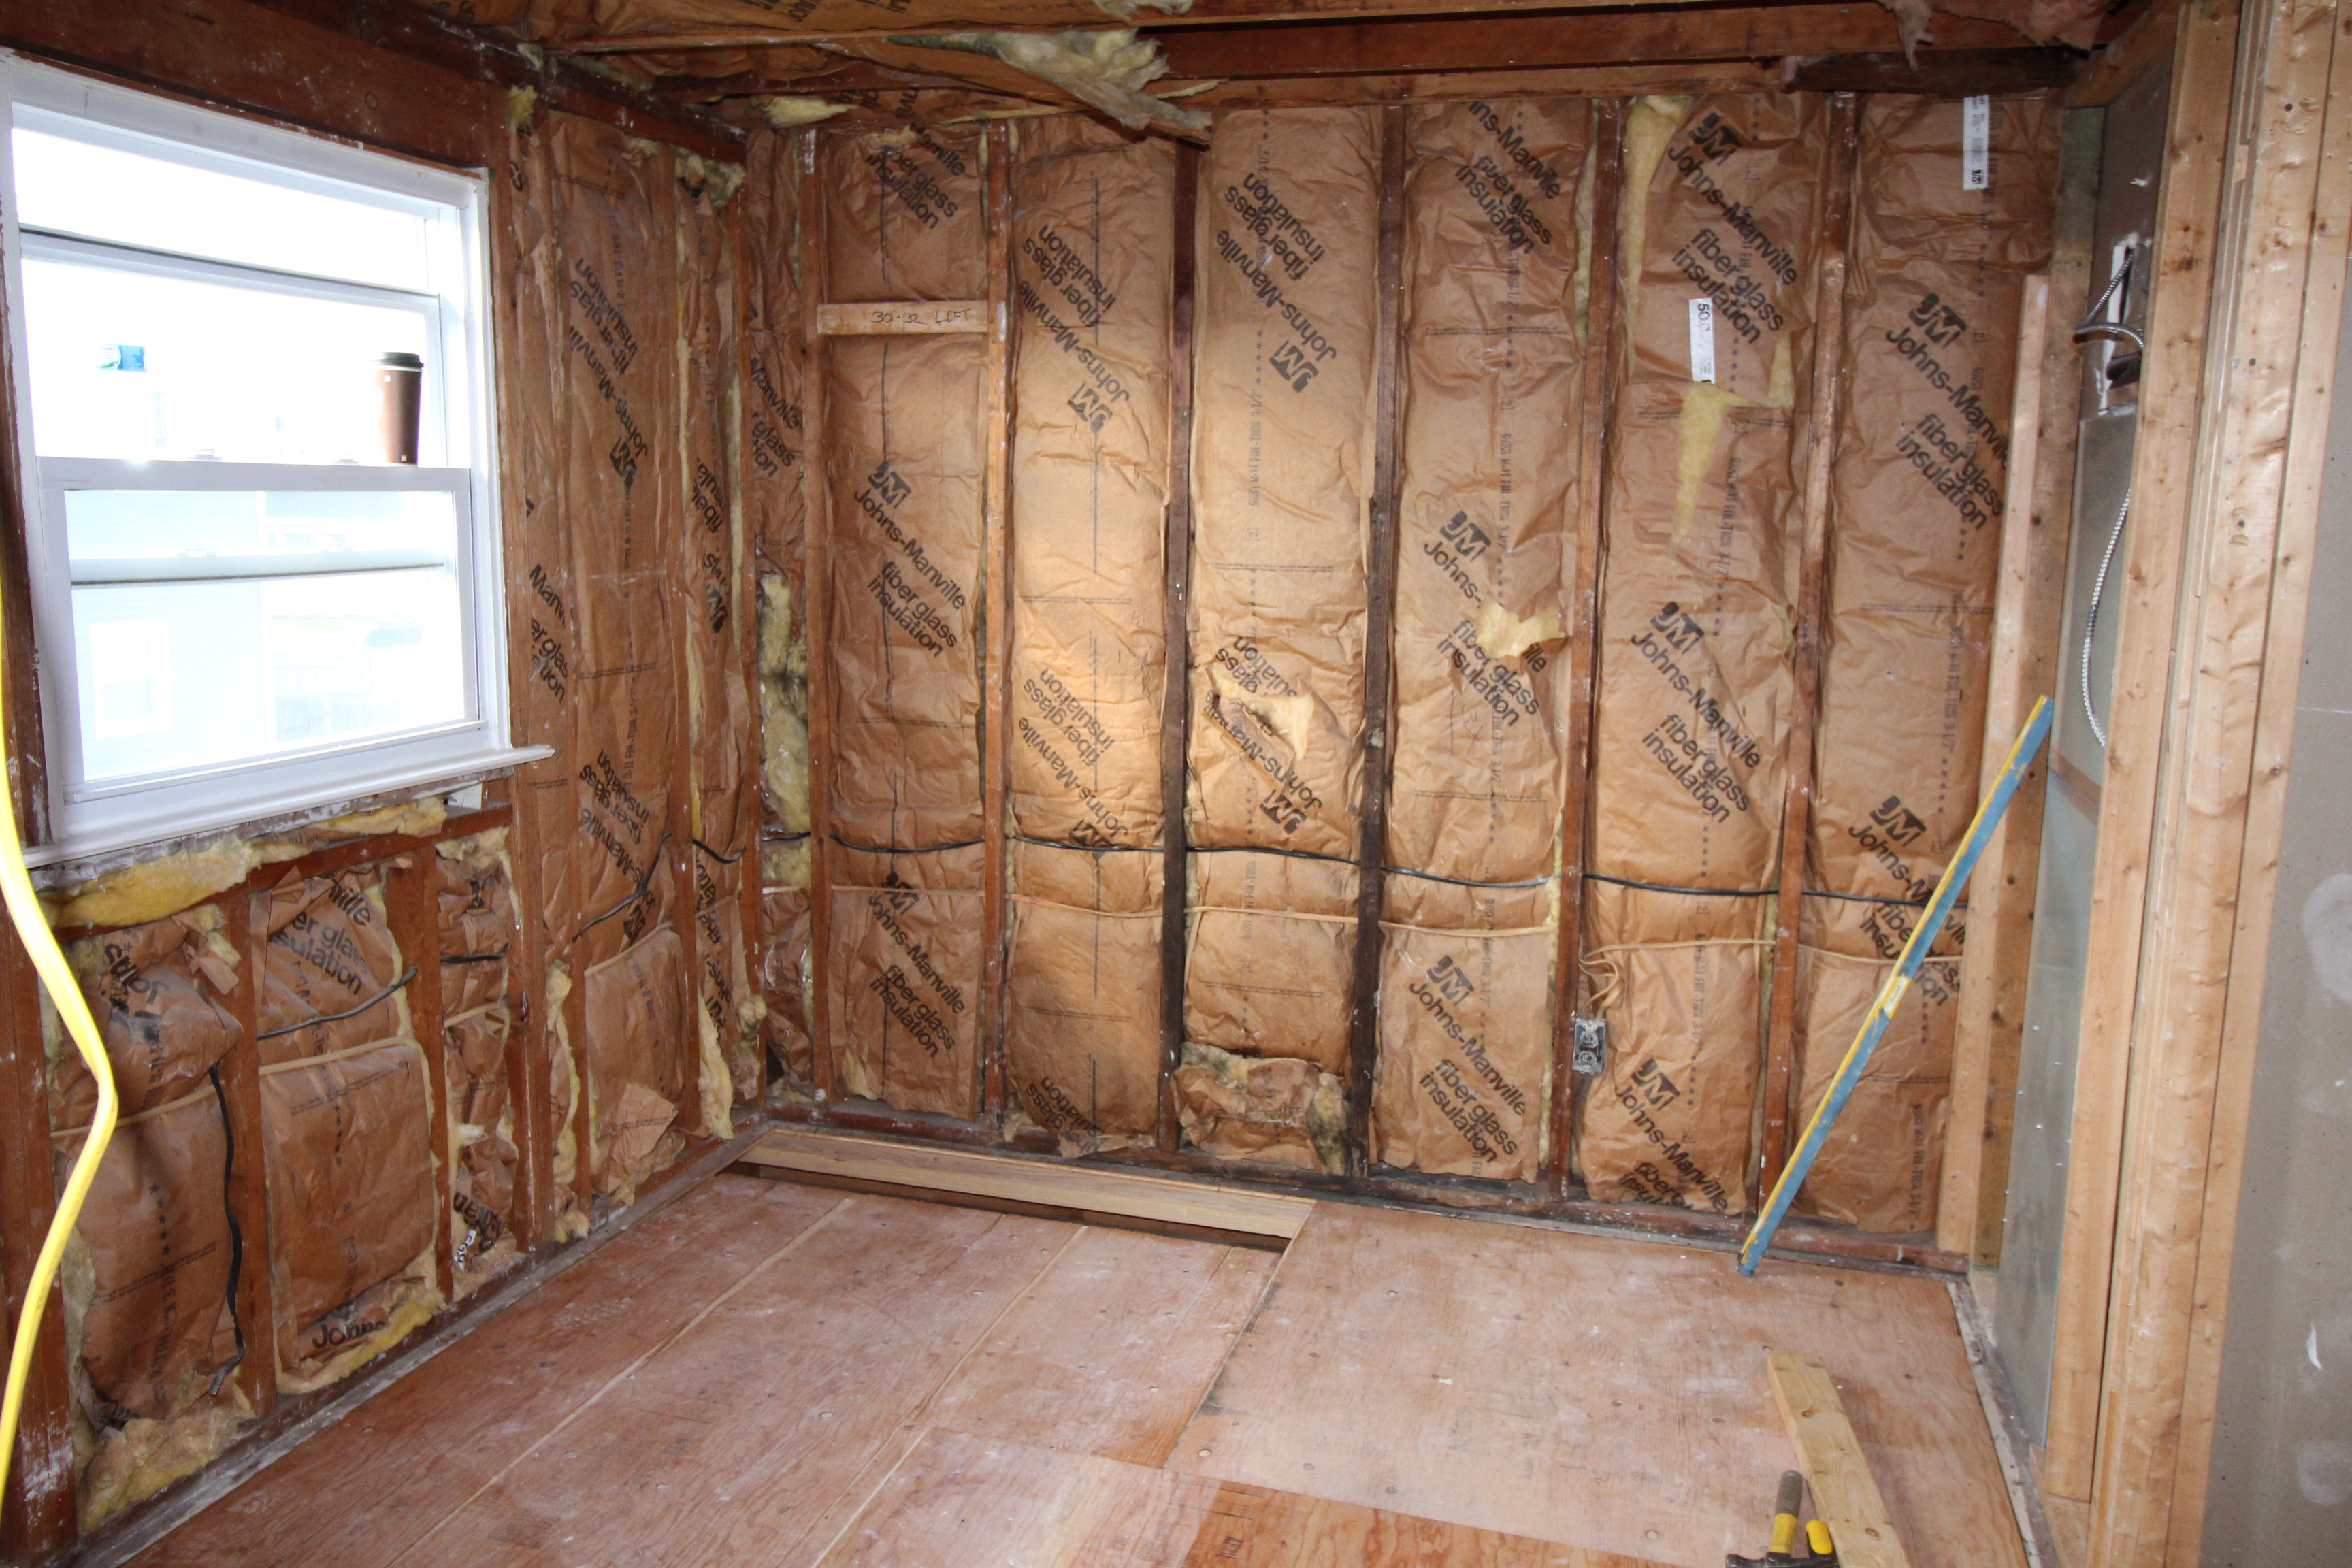
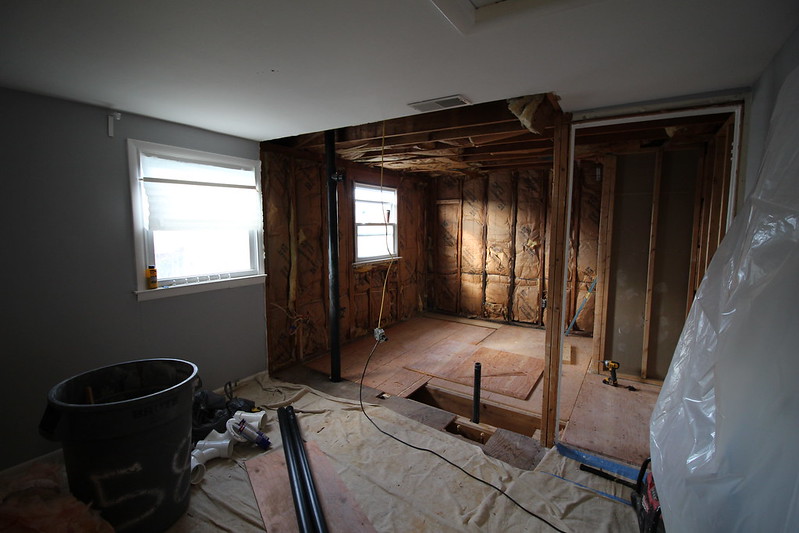
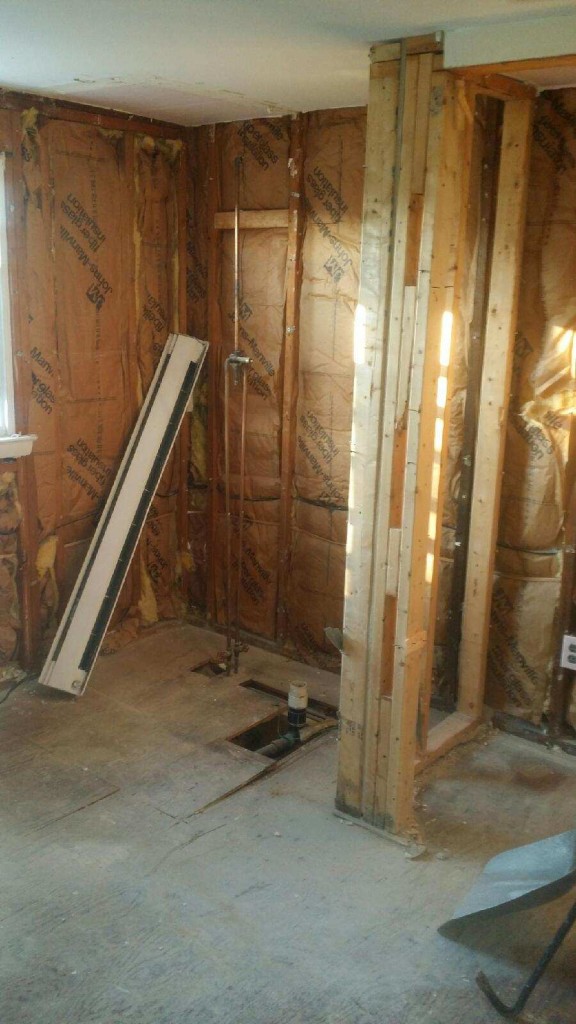
Gone is the pink tile, the awkward (and dangerous!) shower, the useless closet.

IMG_2961

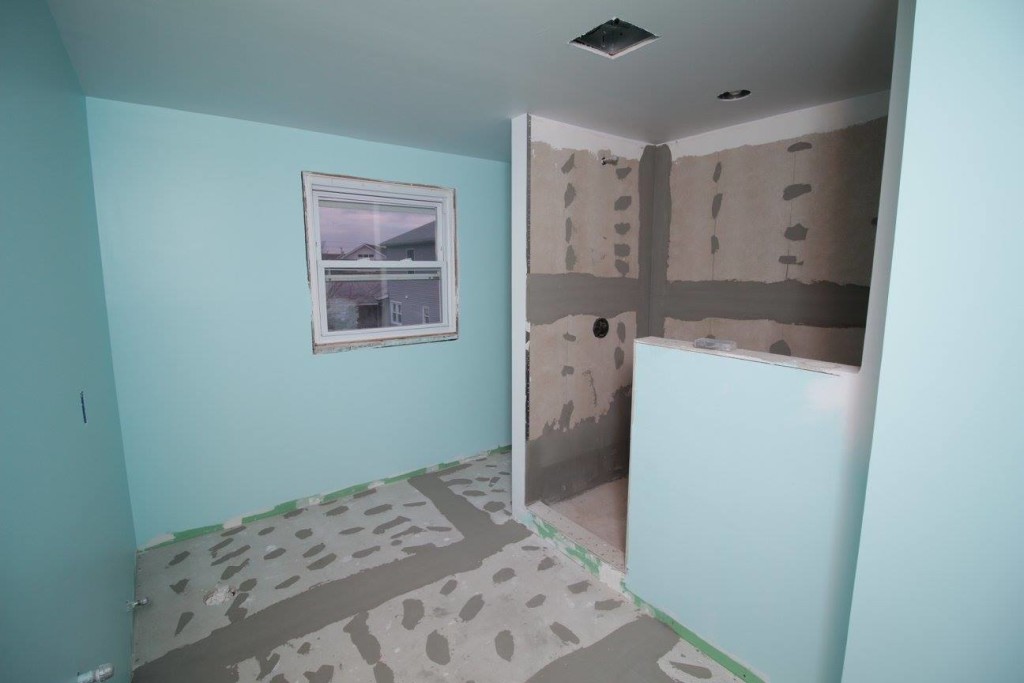
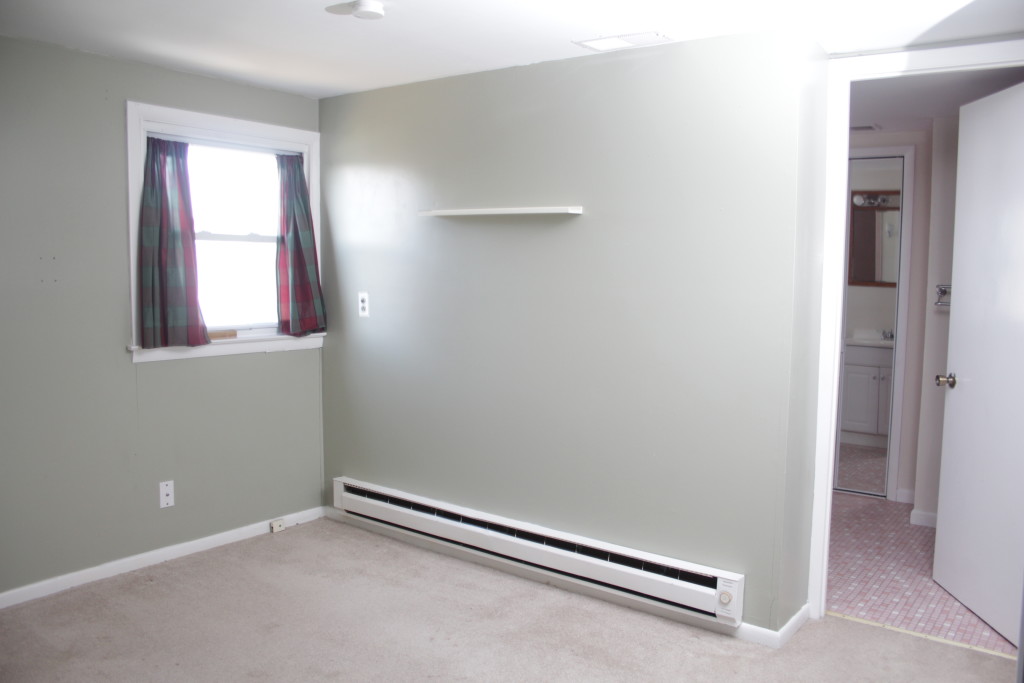
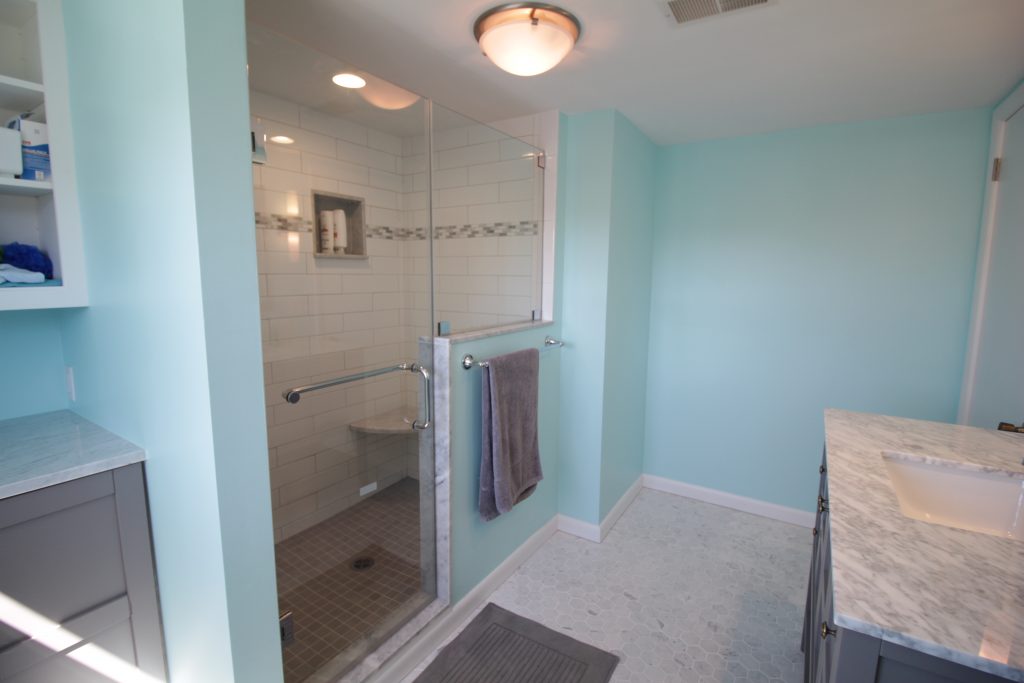
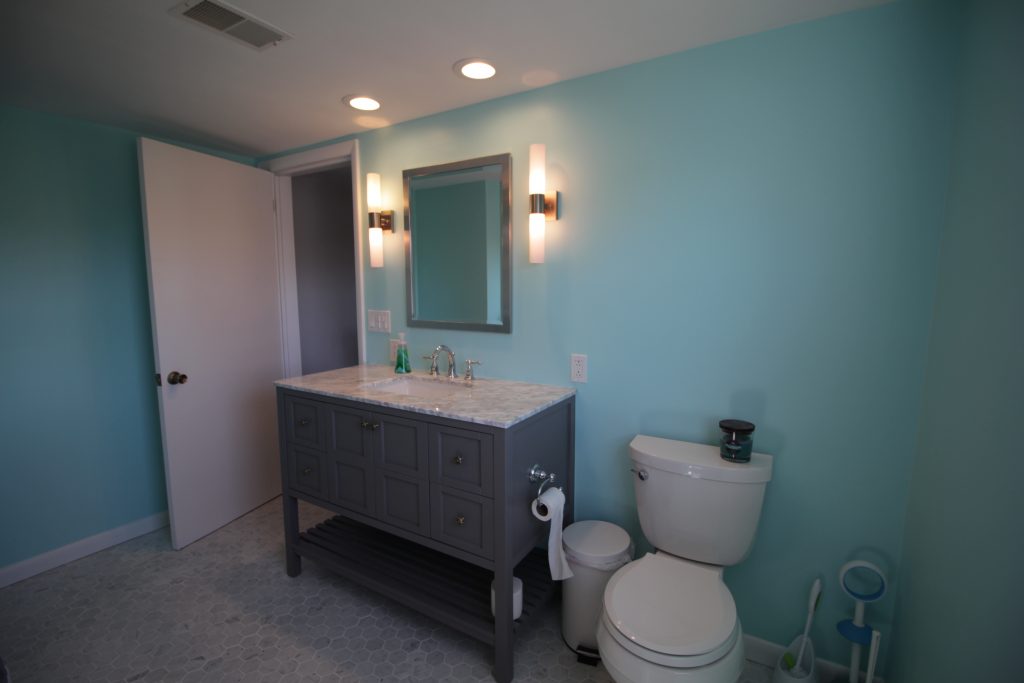
Yes, our bathroom has come a long way from the pink leaky horror show we started with. New flooring, new shower, new toilet, new vanity… pretty much the only thing that stayed the same was the towels and the window.

IMG_2964

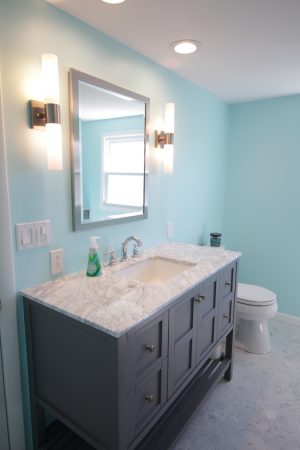
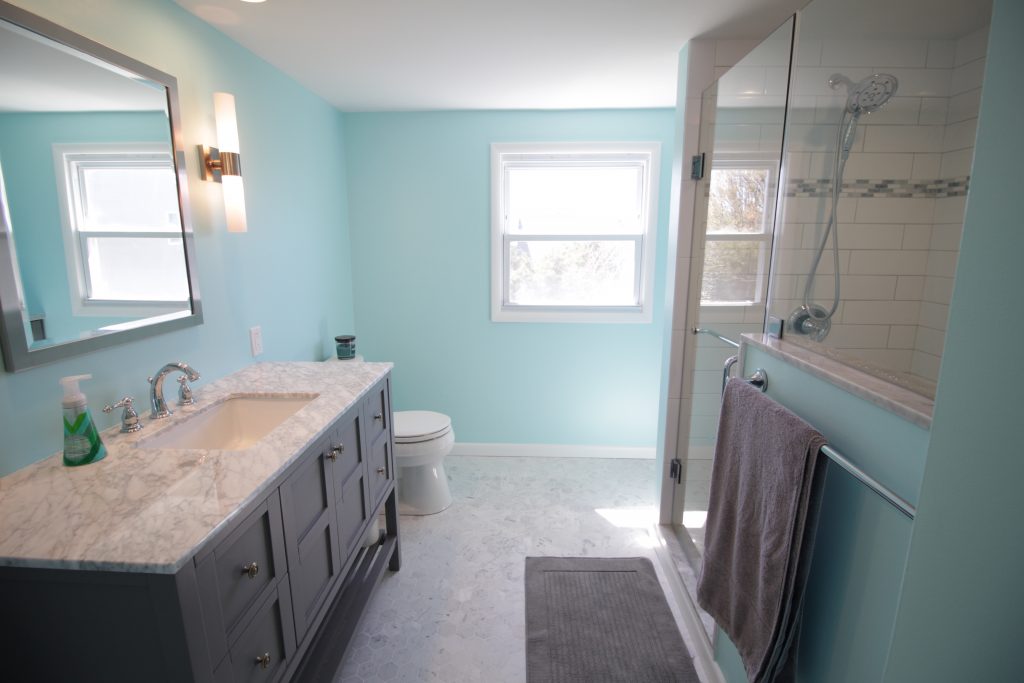
There is now a ton of LIGHT in the bathroom! From all angles! And the sun! It’s a downright cheery place now. And the sad awkward medicine cabinet has been replaced with a mirror (we didn’t really use it for storage anyway). The vanity has tons of storage space for any doodads left behind.

IMG_2965

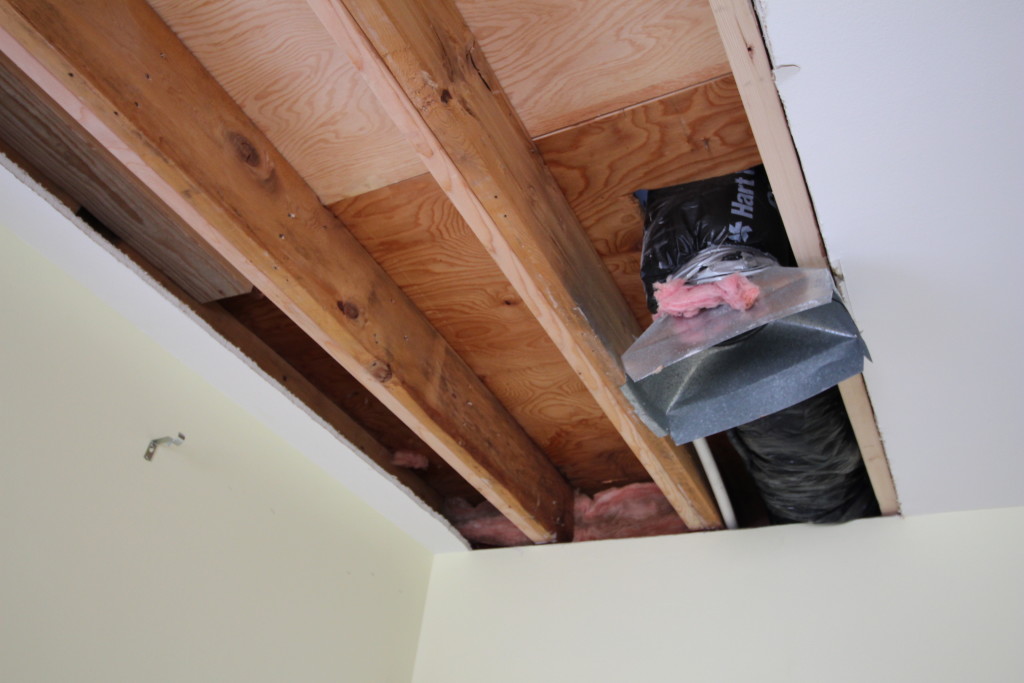
See that light? That light is a bathroom fan. Before we had no bathroom fan and friends, let me tell you, it is LIFE CHANGING. Now this room is all GO FORTH AND POOP. DO NOT BE ASHAMED, THE FAN WILL TAKE THE ODORS AWAY.

Seriously I did not understand how critically necessary bathroom fans were until we had to survive without one. It also does a great job of whisking the damp shower air out of the house, preventing mold and other nastiness.

IMG_2954

The open shelf on the vanity makes a great place to store surplus toilet paper. And the open-ended toilet paper holder leaves NO EXCUSES for not changing out a fresh roll. It’s so easy! The trash can is right there!

IMG_2966

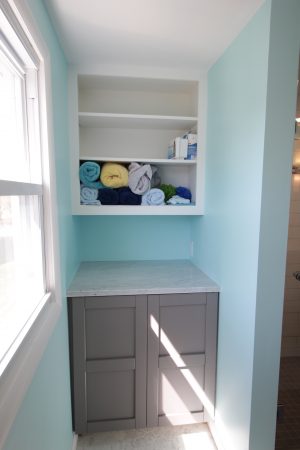
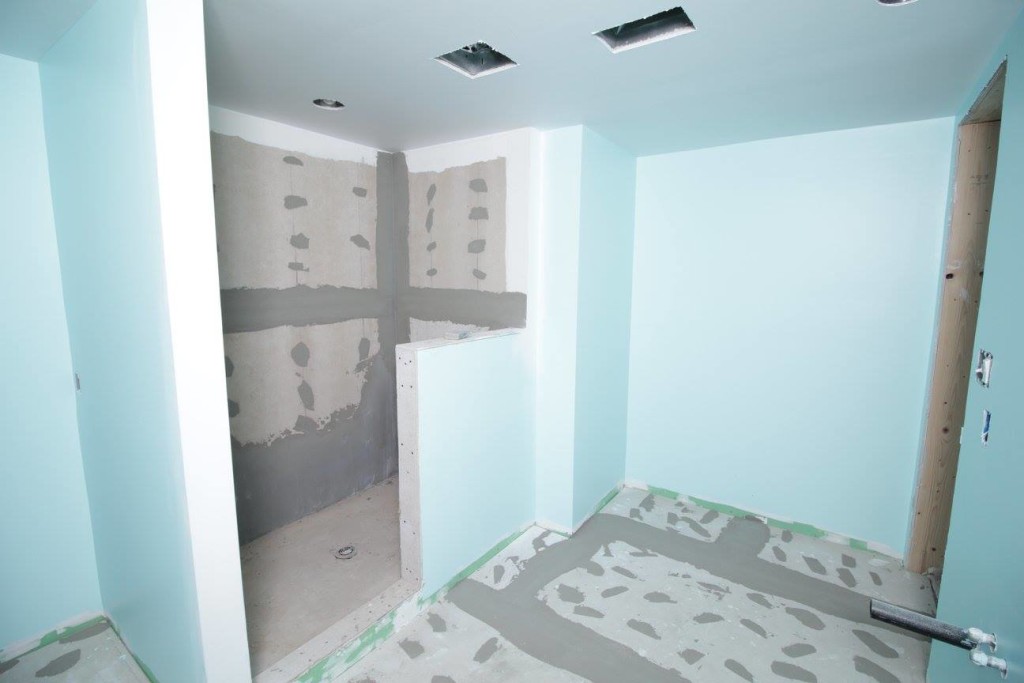
What was once an awkward closet is now a cabinet and open shelves. Guests no longer have to guess which closet has the towels, they’re right out in plain sight. Along with the first aid kit.

IMG_2967

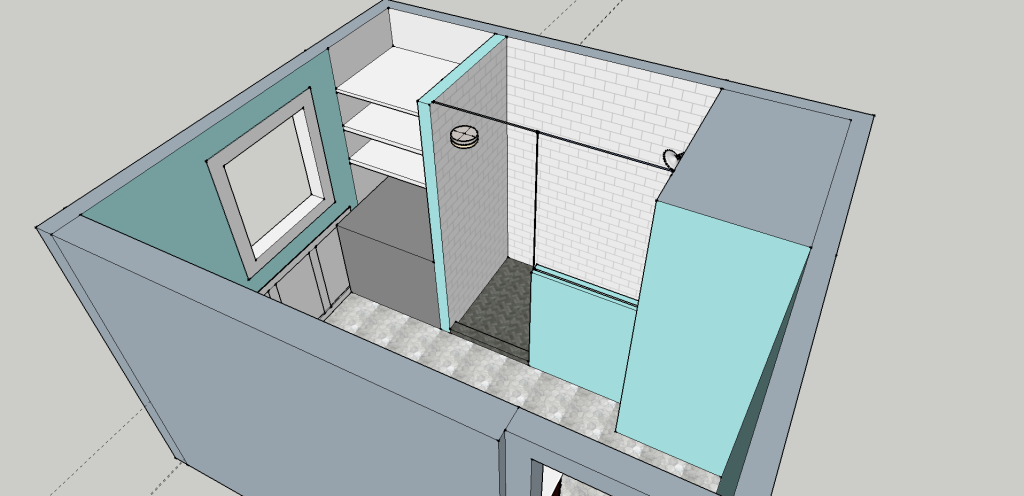
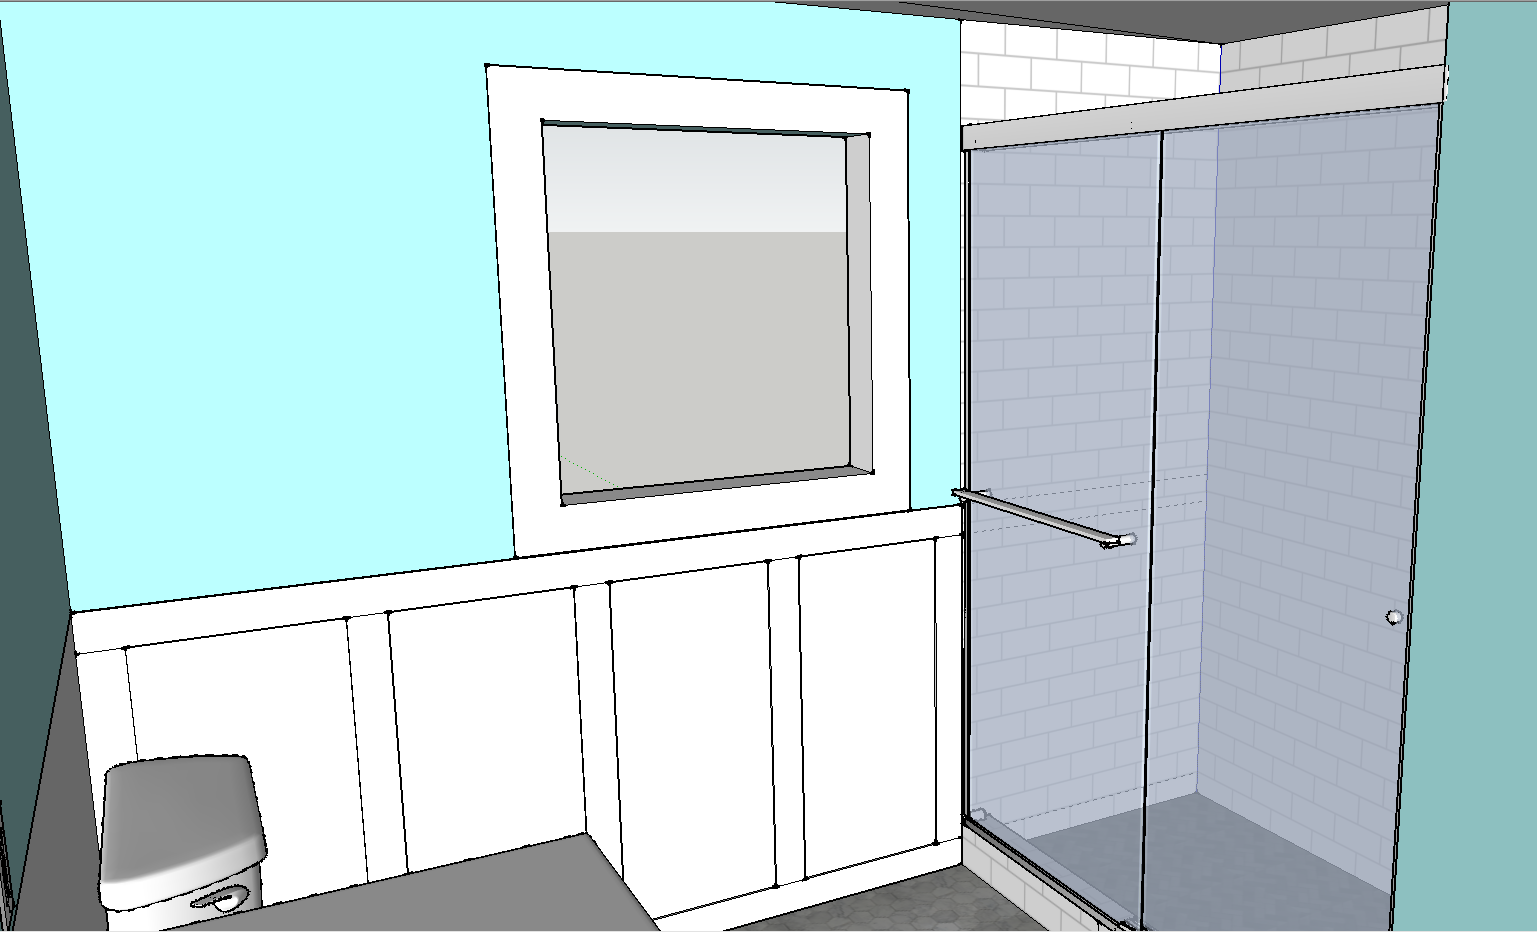
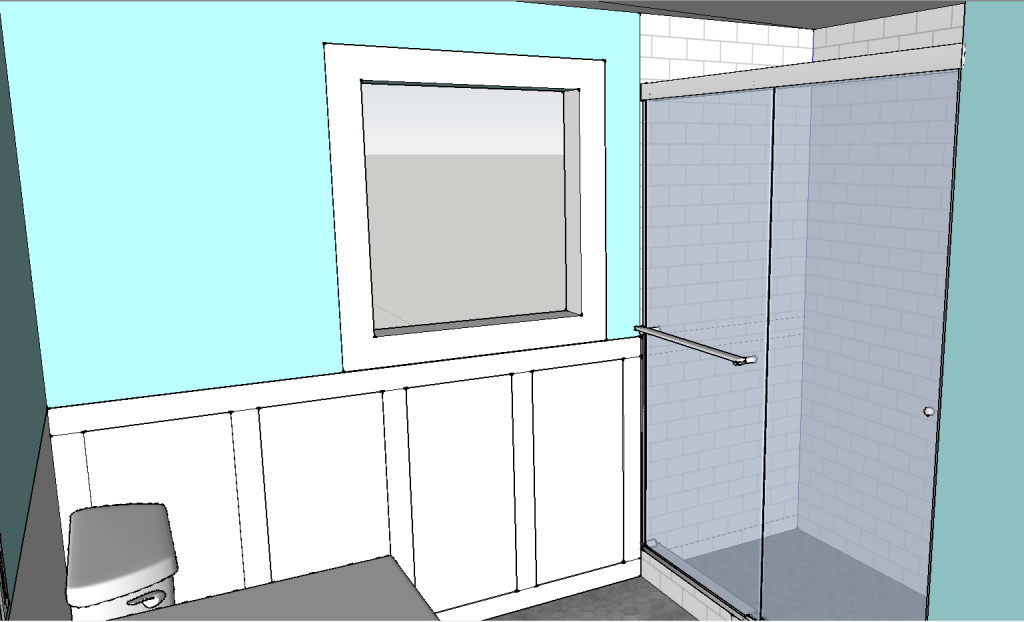
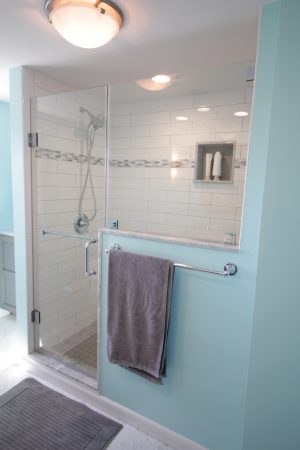
We totally removed closet #2 in favor of a spacious walk-in shower with a seat. Perfect for hosing off the kids after a day at the beach.

IMG_2956

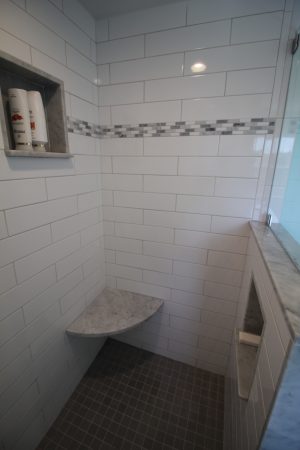
The seat is opposite a detachable shower head. It’s supported by a hidden iron bracket that gives it a neat floating effect. Two niches in the shower mean no collection of random bath items on the floor.

IMG_2953

We still need to get some artwork to go over the toilet, it’s looking a little bare. But mostly we are very excited to have a shower that does not dump water onto the room below.

Furniture and Finishes:

Vanity – Vinnova Florence 48″ vanity in grey
T
oilet – Kohler Cimarron Round Bowl
Shower head –  Delta In2ition 2-in-1 H2Okinetic Shower Head
Toilet paper holder – Moen Madison single post
Faucet – Kohler Kelston wide spread
Fan/Light – Broan 761
Floor tile – 3″ Hexagonal Carerra Marble
Wall sconces – Livex Aero

1970s Shore Home

Quick Bathroom Update

I snuck down to check out the bathroom progress yesterday, newborn baby and 3 year old in tow. The walls are back up, there’s a floor again, the plumbing is all roughed in, and hopefully this week they’ll start tiling.

The downstairs bedroom, which had to be cut into to access the joists, is also all buttoned up and repainted. You’d never know it was disrupted.

12491764_10102943887527846_6521084593319504781_o
The landing before the bathroom, now about 8″ wider. Previously the wall was right up against the window. There’s a small scar on the floor where the wall-to-wall carpet doesn’t cover but we’ll just put some furniture over it.
12496465_10102943887522856_4141808617756079975_o
Looking into the bathroom from the doorway. The shower is now where the closet used to be, and that alcove behind the shower is where a new closet is going. The bathroom will actually feel a little smaller than it did before due to the fact that the shower is an entire foot wider than it was before. Best of all, my dad can now stand in it without hitting his head. There is also a light in the shower and an exhaust vent right in front of the shower.
12471429_10102943887517866_2962169384564819729_o
Another view of the shower.
1970s Shore Home

Clean Slate in the Bathroom

We’re about a week and a half into the bathroom project and demolition was, in a word, enlightening. Other words one might use include “complete horror show” and “dear god what were they thinking?” I’ll dive into the details in a second, but first let’s skip to the end and see where we’re at now:

IMG_2573
Once upon a time there was a bathroom here

You may notice something is missing. Something like… a wall. Or maybe you’ve forgotten, in which case let me jog your memory…

Hm something is different...
Hm something is different…

So yes, we removed a wall. Actually all the walls. And the floor. The whole room was gutted down to the studs and joists, and then we removed most of those as well.

You’ll notice in the ‘before’ photo that the wall between the landing and the bathroom is about a foot thick. Why? We weren’t sure. Maybe there was ducting running through it. Maybe it was full of treasure. Or bees. So we opened it up and found…

Oh.
Oh.

…Basically nothing. Well, we found a lot of questionable plumbing and electrical work. And the wall was framed with 2x3s. Badly. So it’s being torn out and replaced with a wall of more reasonable construction. We’ll gain about 8″ of space on the landing, which is nice. Downside is there will be a scar where the wall-to-wall carpet doesn’t cover, but that’s what area rugs are for.

Where the shower used to be

In a rare bit of good news it turns out the reason the shower was 8″ off the ground is that the person who installed it merely had no idea what they were doing. The new shower will have no problem being installed at floor level.

The electrical situation in the bathroom (and in fact the entire top floor) was rough. Random wires were taped together inside walls, everything was running on one giant overloaded circuit, improperly terminated junction boxes… it made me really glad we’re doing this now, and also amazed that the entire house hasn’t gone up in flames sometime in the last 30 years.

Oh yeah that looks super legit.

All the electrical in (and really anywhere near) the bathroom is being completely removed and redone. On the plus side we’re getting some new outlets in the rooms adjacent to the bathroom.

With the walls out of the way it was time to open up the floor and find out why it was so saggy / bouncy / otherwise shitty. It turns out the answer was very simple… giant chunks were missing from every. single. joist.

Rather than cut holes through the joists, which would have required some basic skills, the original owner just notched them to make room for the drain lines. Which was especially impresive in the case of the toilet drain (far right), which was left with barely 2″ of material. It is amazing no one ever fell through.

We also found out why the pipes were leaking (which is what started this whole process). They weren’t glued together at all. Just dry fit and then covered in silicone at some point when they started to leak. A cookie sheet was found underneath the shower drain, presumably to catch water. Because that is how you solve problems!

To fix the issues every single joist was sistered with new lumber. Unfortunately due to how the HVAC closet cuts into the room this meant having to cut into the freshly painted sheet rock in the room below. Unsurprisingly, it was super moldy and gross on the inside.

IMG_2569

You can see the new lumber (lighter) running along next to every joist
You can see the new lumber (lighter) running along next to every joist, and an HVAC vent popping out.

Moisture damage was a huge problem everywhere. The tile for the floor and for the shower were just installed over the plywood/drywall. The rotting subfloor has now been replaced but you can see the dark stains on the exterior wall studs from 30 years of water damage.

Where the shower will go
Where the shower and new closet will go.

We made a decision to deviate from the original plan. Rather than put the shower on the outside corner next to the window we’re swapping it with the old closet. The shower will now butt up against the HVAC closet (which opens into the adjacent bedroom) and a combination cabinet / open shelving unit will be built between the shower and the exterior wall. The front of the shower will have a half-height wall to allow more light in. The main reason for doing this is to make the pipes easier to run, but it also allows us to make the shower whatever width we want without having to worry about running into the window.

Here's a super rough sketch of the new layout
Here’s a super rough sketch of the new layout

Hopefully by the end of this week we’ll have walls and floors again. Not that I’m likely to see it, at this point I’m too pregnant to stray very far from Philly. I only went down today because my husband was able to come with me and I was sort of daring the baby to come. I am only mostly disappointed it didn’t.

1970s Shore Home

Kitchen, Bathroom, Doom

The kitchen is very near completion! I haven’t had a chance to take photos with a real camera, or write up a recap of the many things I learned in the process, but here’s a quick phone snapshot:

2015-09-24 20.39.27

There are still a bunch of finishing touches to do, but the hard stuff is all done! We had our first weekend of using the kitchen and it worked very well, with two people able to cook without driving each other insane.

When I stepped into the house earlier this week I had a bit of a panic moment: I was immediately greeted by a very musty smell. After all this work on the house, damp musty grossness is absolutely NOT what I want. We had a really dry summer so we haven’t had a chance to see how the house holds up in a storm. After some poking around I found a window that had been left open, and thankfully after a few days the house has returned to its usual neutral scent.

In boring-but-important news, we had our structural contractor install a new beam under the house. Now the bathroom no longer jiggles around when you step! The end of the house is no longer sinking into the sand! It’s still not level, but it’s been raised a few inches. The drywall cracked in a few spots around the door frames but other than that it was a pretty painless process.

Over Pope Weekend we had 10 people total staying in the house, and no one came to blows! So I consider that a ringing endorsement for the house. Unfortunately, over the course of the weekend we also discovered that the upstairs bathroom has sprung a leak. Wamp womp. It’s a really weird leak. There’s a water stain on the ceiling below the shower, but even if the shower is off there is fresh water trickling down the waste stack (which is behind the toilet). The toilet has a tendency to run because it’s an old toilet with an old flapper I haven’t gotten around to replacing.

My totally unscientific theory is that the toilet is leaking, and since the bathroom has a distinct slant towards the shower the shower drain is no longer appropriately sloped, letting water run from the toilet to the shower where it then drips onto the ceiling below.

Please note the fact that the shower starts 6" off the ground.
Please note the fact that the shower starts 8″ off the ground.

There is no easy way to access any of the waste line to see what’s going on. At the very least it will require cutting into the (freshly painted!) bedroom ceiling below it. Due to the bizarre way the shower is built, there’s also a chance we’d have to open up the shower tile. This bathroom is kind of a nightmare and we knew going into it that a full remodel was on the short list of things we wanted to do. But I wasn’t intending to tackle that until next spring at the earliest.

Now I’m trying to decide whether I rip up the bathroom just to fix the drain line, or just pull the trigger on the remodel now. I’ve met with two contractors so far and am waiting on estimates.

If we end up doing the bathroom now it will be a total gut remodel, and I’m contracting out 100% of it. At 6 months pregnant I have neither the energy nor time to do another major renovation.

Layout for new shower
Potential layout for new shower

The last item on the agenda this week was preparing for the potential doom of Hurricane Joaquin. Thankfully the storm went out to sea, but we still had a really nasty nor’easter come through. My dad and I took care of some lingering to-dos, like removing the old HVAC condensation line (which was just sort of flapping around outside the house). Both of our storm doors don’t latch shut, so somewhat counter-intuitively we removed them before the storm so they didn’t fly open and rip off the door frame in the process. Getting replacement storm doors is on the short term to-do list once the storm passes.

So far almost every issue we’ve had with the house is something we’d budgeted to fix when we bought it. What we didn’t anticipate was cramming so much stuff into the first year. Many of the stuff on the “eventually” list became “now” either because they were more urgent than we thought, or because it didn’t make sense to do certain tasks separately. For example, the immediate project of “replace the broken heat pump” became “convert to gas heat” when we found out they cost about the same, and then that morphed into “convert and replace the hot water heater” since we were having gas lines run anyway. Silly me, I thought the electrical panel upgrade was gonna be next on the to-do list, but it’s actually the bathroom. Surprise!