New Construction Townhome, Organization

Putting it all back

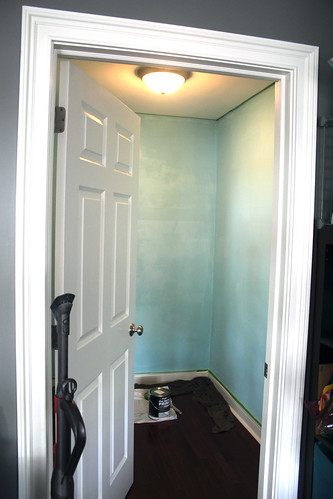
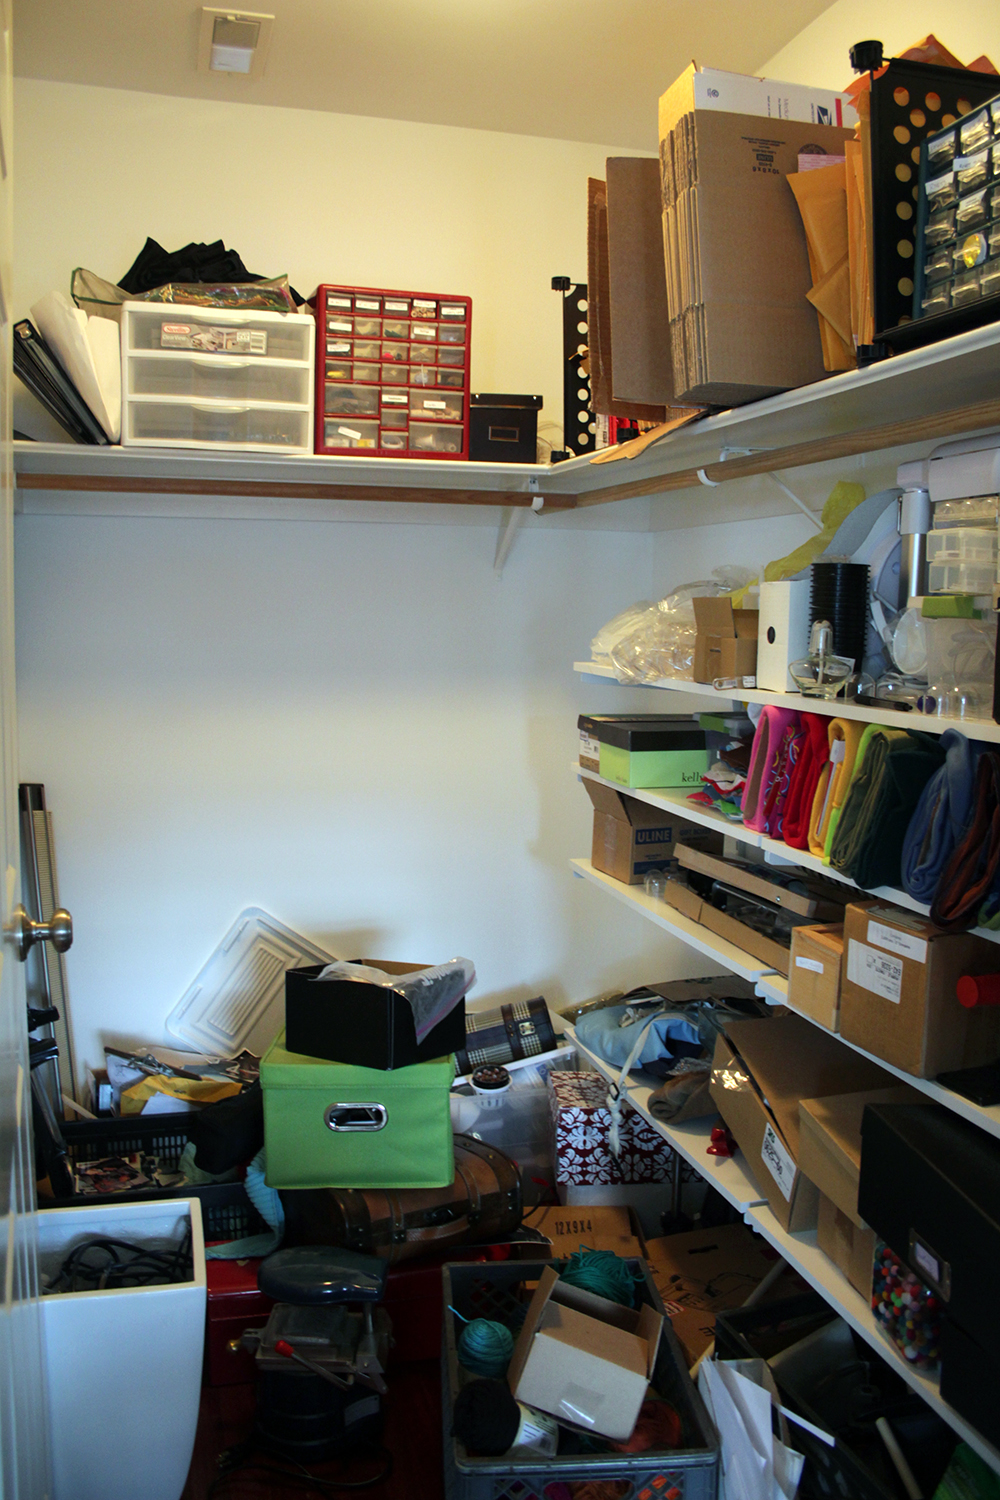
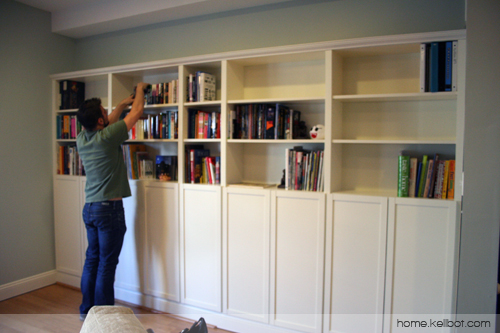
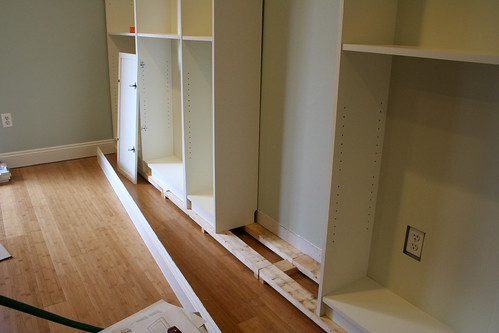
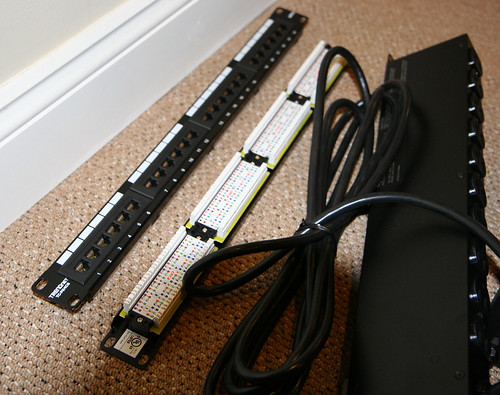
The shelving is up (pictures forthcoming), and I’m now replacing the contents of the closet. For the most part it was easy; the huge pile of stuff has dwindled to just a few errant boxes of flotsam and jetsam. But this last little bit is taking forever. Almost like zeno’s paradox, each box I sort through seems to take twice as long as the last.

Behold: boxes of junk. Junk I suddenly desperately need.

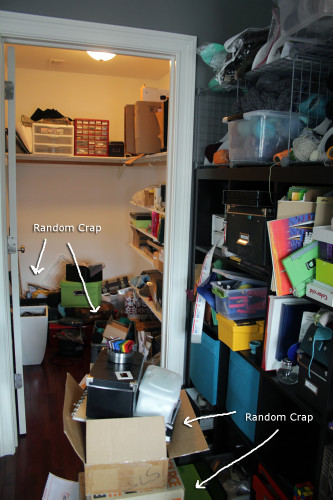
Some of these boxes haven’t been touched since I moved in. After the exhaustion of moving, I punted on the boxes labeled “random crap” and shoved them in the closet “for later.” More than a year after moving, it is taking all of my willpower not to do the same now. In fact, I’m pretty sure there’s one box that hasn’t been touched since I moved out of my apartment in Brooklyn, long before RD and I got married.

Going through each box is exhausting. Each one contains various relics I’ve completely forgotten about until the moment I open it; at which point I can’t imagine parting with. Some things are easy: old bank statements can safely be shredded and discarded now that the information is available online. Others are tougher: college artwork  (some good, some not so good), trinkets given to me by good friends, and various objects that might be useful someday.

Triage on this stuff takes a lot out of me. I part with a lot of small items, rationalizing with myself that although this pin / pencil / whatever meant a lot to me at age 15, it’s just a piece of plastic crap now. The friendship it symbolizes is the enduring thing I should keep. As a result, I’m unable to part with the items from friends I’ve lost touch with. It goes in a bankers box marked “memorabilia,” full of old papers and photos that I plan to scan into the computer “someday.”

Some of it is neat, and doesn’t take up much room, but I’ve got no idea where to put it. Included in this are MRI photos of my brain and neck; the former from a medical study I participated when I was unemployed, the latter from a neck injury sustained while washing my hair. During the brain scan, the MRI tech complimented me on how still I held my head, and asked if I would be willing to participate in other studies. I got my head scanned a bunch that year.

I’ve whittled it down to two bags full of papers “to be filed,” a stack of papers I’ve already sorted but have no idea where to file, and one 8 x 10 box of “random crap” still to contend with. With each trash bag I fear I’m throwing out something I desperately need. Something I’ll curse myself looking for down the line. But given how long I’ve managed to live without while it languished in a box, I suppose that’s pretty unlikely.


New Construction Townhome, Organization

Closet Saga, now with primer!

I’ve got the first coat of primer on the closet wall. It’s tinted to match the paint. I’ll let it dry for the rest of the afternoon, and possibly overnight since I have plans this evening.

Primed Closet

So, before I ripped out huge chunks of drywall from my closet, I did a lot of planning. Ultimately I would like all the things to fit inside my closet, so I can get rid of the huge Ikea bookcase in here. And for that to happen I needed serious shelving. Floor to ceiling, fit-to-my-belongings shelving.

Dear god why do I own all this?

The Container Store’s Elfa is the gold standard in modular shelving, and it’s gotten a lot better looking over the years. Elfa is a standards and brackets system with a mind boggling array of shelves accessories. It’s well made and has stayed fairly consistent over the years – the cart I got freshman year of college is still compatible with what they’re selling now.

The downside of Elfa is the price. Most of the kits on the Container Store website are north of $1000. Ikea, Rubbermaid, and ClosetMaid all offer similar systems. So I sat down and priced them all out (except ClosetMaid which had mostly negative reviews).

Top view of my closet, sort of to scale

I knew I wanted shelves along the back and side wall. Because the door swings in, I decided to leave that wall empty save for maybe a few coat hooks. I tried to price out designs that were as close to identical as possible, so I went for 5 rows of shelving all the way around in an L shape.

Elfa was by far the easiest, because they offer free design planning. I called them up and spent about 20 minutes going over my options with their rep. You can see the designs online as you’re working on them, and when you’re done you get a full parts list and instructions. You can also buy the whole kit with one click. Total quoted price: $950. Ouch.

The option I liked most from The Container store, with white melamine shelves.

With Elfa as the high water mark I moved on to Rubbermaid HomeFree. Rubbermaid provides an online design planner, but I found it irritating to use and ended up just doing it by hand. The HomeFree system features parts that overlap to fit your space, rather than having to get them cut to size. Unfortunately the shelves are only available in 12″ deep, which is shallower than what I need for my stuff. It came in the cheapest at $475, but ultimately wasn’t the solution I needed.

Next I priced out Rubbermaid FastTrack. FastTrack is a much more industrial looking solution, with all wire shelves. You can cut the shelving yourself with a bolt cutter, or have it cut for you in the store. A layout very similar to the Elfa layout (but with wire shelves) came out to $650.

From there I went back to look at the Elfa configuration. I really like how extensible it is. I’m not entirely sure what my storage needs are, so the rep helped me design my system so that it would be easy to add drawers later if I decided I needed them. Most of the individual components seemed about the same price as Rubbermaid’s, why was it so much more expensive? I pulled up the parts list and compared.

It turns out, the Elfa shelves include a lot of “vanity” parts to help things look nicer. Bracket covers, rail covers, etc. Things that help class up the setup but aren’t needed for structural integrity. By dumping all those parts I got the price down to about $800. With a 25% coupon I found online, it came down to $600.

It’s still a lot of money to spend on a closet. I’d love to get the drawers now, but at $65 each for the drawer, gliders, and brackets it’ll have to wait. In the mean time, some extra shelves will go into the ‘someday’ spot for the drawers.

imageContent

In all honesty, even if I’d paid full price for the Elfa, the design service makes it worth the extra $150. I’ve spent the better part of a week planning, pricing, and trying to negotiate the various shelving systems. The phone call with the Elfa designer was so painless I’d do it again in a heartbeat. Of course, we’ll see if I’m still singing their praises after I install the damned stuff.


New Construction Townhome

Closet Saga, Part 1

“Organize my office closet” has been on my to-do list for a long time. This week was the week.

Not shown: piles of boxes outside the closet

I have some cheap Ikea standards and brackets (on the right) which absolutely had to go. They wobble and are a pain to deal with. And I needed shelving on the back. And the wrap-around top shelf and clothing rod weren’t helping matters.

The Ikea stuff came out easily enough (save for the drywall anchors… ugh). But the wrap around shelf was another story. It turned out it had been nailed in all the way around. And there were many coats of paint on the shelves so the nails were near impossible to find, let alone dig out. So I got out a prybar and started pulling the stuff down.

At one point, with a sickening ripping sound, it became clear that some of the drywall was coming along for the ride. It turns out not only was the shelving nailed to itself and the wall, it was also caulked and glued in place. And so a great deal of drywall came down with it. The horizontal stripe below is the totally unpainted drywall, with a scar on the left and all along the top from the caulking.

Please excuse the bad lighting in my closet.

To make things more awesome, all this caulking, nailing, and gluing had been done on unsealed drywall so there was absolutely nothing to keep it from taking giant chunks out of my wall.

Well that sucks.
Well that sucks.

I got a self-adhesive mesh patch to go over the worst spot (shown above) and a big tub of joint compound. The first coat is drying now. In all honesty I’m not being a perfectionist about it – it’s a closet. I used a 8″ wide putty knife to smooth the edges of the layers, and only plan on sanding after the final layer. Most of the closet should be OK with two, except for the huge gash which will need at least 3.

I hadn’t originally intended to paint the closet, because it’s a closet, but now I’ve got to prime and paint at least the patches. And it’s a small enough room that I can probably handle painting the whole thing. And while I’m at it, I’ll change the color to something nice, like the blue we used in the guest room:

6962000425_26e23e6bfe

But seriously, who glues in shelves?

New Construction Townhome

Geek Chic Dining Table

One of our big purchases when we finally closed on our house (besides, uh, the house) was a proper dining room table. We’d been using a folding table from Ikea, and had fallen in love with the gaming tables from Geek Chic at PAX East. We ordered an Emissary table in January and were told they had about a 12 month backlog. Today we got some “baby photos” of our table from the builders!

Cut wood pieces

The table has a drop surface for playing tabletop games…
…And leaves so you can easily take a break for dinner.
There are also 6 drawers for storing character sheets, dice, etc.

It’s scheduled for delivery in early September, and we’re pretty excited.

New Construction Townhome, Organization

Coming Clean

Commenter Tim asked how I keep the house so clean, especially in light of having a baby.

I’ll tell you: I cheat. I almost always do a quick pick-up of a room before taking a photo, and usually only even think to do a house-related post when the house is in a semi-presentable state. In my most recent weekend-update, I’d just vacuumed the room because installing the window blinds left a fine layer of dust and metal shavings everywhere.

Here’s a more honest picture of our media room, where the baby spends most of her time:

I’m proud of the fact that it’s still not too terrible, and our overall level of house cleanliness is decent. Keeping the house in order takes a lot of work, but is crucial to keeping our overall stress level down.

I’m a slob by nature, and RD has worked very hard to try and break me of some terrible habits. This includes:

  • Have a place for everything, and don’t buy anything you don’t know where you’ll put it. I’m a sucker for kitchen gadgets, an affinity RD does not understand, but I’m allowed to buy whatever stupid kitchen items I want provided I can find a place to put them away.
  • Open sink policy – meaning no dirty dishes are left in the sink ever for any reason. Every now and then I backslide on this, but it works pretty well. Dirty dishes are washed immediately and set on the drying rack. We do have a dishwasher but we only use it when we have company over or I want to sterilize the baby bottles.
  • Daily chores. Cleaning a little each day is SO much easier than letting things pile up and then having to set aside an entire afternoon to dig out your living room floor. I had a page-a-day cleaning calendar at the old place, and need to update it for the new place.

The last secret is that I have help. RD’s aunt comes for a few hours each day so I can work (I do freelance WordPress development), but the truth is about half that time gets spent on household chores. I can get some done while Bitmap naps, but having someone occupy her for a couple hours so I can take care of things is amazing. When people ask if I miss living in New York, I think about all the extra help I get by living near so many family members and the answer is unequivocally no. I might miss a few aspects of it, particularly my friends, but I am so very glad we moved down here when I got pregnant. My own parents didn’t get their first night out sans-baby until I was 5 months old. Bitmap is 3 months now and I’ve lost count of the number of dates we’ve had thanks to my in-laws. Family FTW.


New Construction Townhome

Weekend projects

We had our first free weekend in a while so we took some time to tackle stuff around the house.

First, we cleaned out the garage and washed the car! I don’t have a picture of that, because I am a bad blogger. Also, I was busy washing the car. Immediately after we finished washing it, a pop up thunderstorm drenched everything in water and we were very happy to have a garage.

Then we did our part for the economy and bought every household item imagineable from three different stores. Frames from Michaels, window blinds from Lowes, and everything else in the world from Target.  Including this salad bowl, which we’re using to hold our surplus of tomatoes from this week’s CSA harvest.

2012-08-05 14.44.49

If we get another 6 lbs of tomatoes this week, it’s going to make pasta sauce.

Then we hung blinds over the back faux-french doors. I call them faux-french because they look like french doors, but the “door” on the left is actually completely fixed in place. This was more of an ordeal that we expected, because the doors are hollow metal. But we made it work.

It’s surprising how much of an effect they have on the room. It feels much more like its own space now, rather than an auxiliary space between the kitchen and back yard. We also hung some photos up. After a decade each of living in apartments where we couldn’t really hang things on the walls (or were too lazy to) we’re finally putting up artwork. We even went through the trouble of having mats cut for some of the odd-shaped pieces! The next few weeks will be spent figuring out where everything goes. The reading room was the easiest because it only has one small section of wall.

We also spent some time working on the baby’s room, which is at least half done now. The big accomplishment was getting a room darkening shade up, so maybe one of these days she’ll be willing to sleep in past 6am. We can only hope.


RevolvingDork loads the bookshelves
New Construction Townhome

Built-in Bookcases by Ikea

RevolvingDork loads the bookshelves

RevolvingDork and I have completed our first DIY home improvement project together: built in bookcases for our living room. It was only a little nerve wracking to coordinate on a project where neither of us really knew what we were doing.

We used Billy Bookcases, closely following the example from Centsational Girl’s blog. After trying a few different combinations we went with four full-width and one half-width bookcase. In between each bookcase is a strip of 1 11/16th inch moulding. We were able to pull up and reuse the floor moulding from the back wall (though as you can see in the photo above we need to get new quarter-round shoe moulding).

IMG_5923

Our base moulding is pretty tall, and because we planned to install doors we needed to make sure the bottom edge of the lowest shelf was above the moulding. All together we needed to raise the bookshelves by 2 and a half inches. We built a frame out of two by fours, and nailed little wooden “feet” to the bottom to get things to the right height.

IMG_5927

Like most houses, our walls and floor are not perfectly square so we had to fudge things a little bit to get them to line up. We used some scraps of the flat moulding as shims to convince the bookshelves to line up correctly. Conveniently, the crown moulding at the top hides any uneven edges between the bookcases. Once everything was in place we painted all the moulding to match the trim.

IMG_5933

I’ve seen a lot of Billy build-ins, but none with doors. The doors weren’t quite as much of a problem as we’d expected; you can get away with up to 1/4″ thick moulding before you have to re-drill and reposition the mounting holes for the door hinges.

IMG_5935

The bookcases themselves came in at $500 (more than half of which was the doors), and we spent about another $150 on wood, moulding, nails, etc. Despite being very crafty / hackery, neither of us is very handy so don’t have much in the way of spare lumber or hardware lying around. Thankfully we were able to borrow a compound miter saw from RD’s dad. We started the project on Wednesday and finished it Saturday morning, though it took longer than it needed to because we don’t have a car to easily get large things from the hardware store.

It may not be the most technically perfect bookshelf in the world (don’t look too closely at the mitered base moulding…) but we’re pretty proud of our first home improvement project. As a bonus, the living room is finally a livable space instead of a box maze.

Living Room Unpacked

New Construction Townhome

Installing a Modular Rug

We used the Flor modular rug system in our TV room, which is made up of individual carpet squares you assemble yourself.

Each square is 20 by 20 inches. On the underside of each intersection is a small sticker which holds the pieces together. The rubbery backing on the carpet squares keep them from sliding around too much.

Flor Corner In Progress

For the border pieces we cut the squares into thirds. To make the corners line up evenly we needed an extra 2/3 length border piece on the end of the border row.

Flor Corner Done

When it’s done you can’t tell that the pieces are separate, though there are a few “fuzzies” that need to be vacuumed up. My cuts weren’t quite as clean as the factory edges, so I turned the cut edge of each border piece in towards the center of the rug. The pieces with two cut edges were used at the back of the rug (shown above), which will eventually be covered by a couch so no one will see it.

Overall we’re happy with how it came out, and will likely use the Flor squares in a few other places.

PS, notice something different? My blog images are now watermarked, something I’m going to try for a bit. You can read about why I’ve decided to go this route over on the main blog.

New Construction Townhome

On Home Decor Trends

The Restoration Hardware catalog = going over to the home of Howard Hughes, if he were a giant robot & married to a gay solider from WWII.” – Millie De Chirico

I know I’ve been looking at home decor catalogs too much lately, because when I read this I laughed so hard I started hyperventilating. The latest post on Offbeat Home also resonates with me, since I use Pinterest to get ideas for organizing and end up just rolling my eyes at the same ridiculous styles that keep popping up. “[Frack] you, decorative typewriter,” indeed.

Now back to finding the perfect spot for my vintage sewing machine…

New Construction Townhome

Wiring the House for Ethernet

The biggest part of setting up our home network was wiring the house for ethernet. There were two basic phases: running the wire through the walls, and then terminating/testing each wire to make sure it was set up correctly. We hired a family friend who is an electrician to run the wires, and then terminated/tested them ourselves. We installed a total of 34 lines across 4 different floors, all coming into the closet under the staircase.

Cat6 Basement

Running the wires proved to be a bigger challenge than expected due to the fact that all of our walls were filled with insulation. A number of access holes had to be cut in the drywall in order to access everything. Four separate boxes of Cat 6 ethernet cable were used, so that multiple lines could be run to the same location at once. The free end from each spool was taped into a small bundle and a long metal wire with a hook was run from the target location (say, the bedroom), through the walls, and into the basement where it was attached to the end of the cat 6 bundle. Then the wire was pulled back up through the walls, bringing the cat 6 cable along with it.

Cat6 wall
Wires coming into our home office. The orange ring gives the faceplate something to screw into.

Each location in our house got either 2 or 4 wires, depending on how many devices we planned to put in that area. For every location in the house we needed either two or four RJ45 keystone jacks (one for each wire) and a faceplate with an appropriate number of holes. Keystone jacks are available in two basic formats: the standard kind which require a punch-down tool to terminate the wires and a “tool free” type which includes little caps which punch the wires down automatically. I personally prefer the standard jacks.

Cat6 Keystone
The near side of this jack (white) has been punched down, the far side is still waiting to be done. Each strand of the blue cat 6 cable goes into its own slot on the jack. Color codes on the side tell you where to put each wire. Monoprice included a handy little holder (black) to place the jack in while punching it down.
The two keystone jacks have been pushed into the faceplate, which is waiting to be screwed into the wall.

The opposite ends of the cables, which are bundled in the basement closet, get a slightly different treatment. Instead of going into individual jacks, they’re terminated in a patch panel. We used two 24 port patch panels, placing 16 connections on one and 18 on the other. We’ll be mounting these in our server rack, but if you’re going for a minimalist build there are inexpensive wall-mount brackets.

Cat6 PanelEmpty
Two patch panels, one face up and one face down. The black thing on the right is a rack-mount power strip.

Each wire was marked with a small letter or number at both ends. To keep everything in order and save my sanity, I used masking tape to temporarily keep the wires in alphabetical/numerical order.

Cat6 Sorted

Cat6 PanelBeck
18 cables have been punched down into the back of the patch panel.

Each jack in the patch panel is then patched into one of our network switches (which are each in turn plugged into the router) with a 6″ cable. Why not just go directly from the wall to the network switch? The patch panel gives you flexibility to change the network around later by moving the 6″ patch cables rather than tangling up the spaghetti coming out of the walls. Additionally, punching the wires down into the back of the patch panel is considerably faster than crimping a male RJ-45 connector onto the end of each drop.

Patch Cables

I briefly considered crimping my own patch cables from the leftover cat 6 cable, but then I remembered that crimping cable ends sucks and a 6″ patch cable costs all of $0.55. The photo above shows half our network cables, the other half are mounted on the back of the rack. I still need to install stress relief for the blue the cables and mount the router + modem nicely somewhere.

The server and switches are all connected to the LAN ports on the router. Our cable modem connection goes into the WAN port. Now the server and anything else on the LAN can see the outside world.

Overall it was a pretty massive project: it took three people a week to get all the wires in place and then another day and a half for my dad and I to button it all up. The next step is to configure the router for the advanced management options we want, as well as configure the wireless access points to provide “seamless” coverage throughout the house. The media server also needs considerable set up, right now it’s just a fresh Linux box with a giant hard drive. I’ll cover the software side of things in part 3 of Our Over-engineered Home Network.

This is part 2 of 3 posts about our home network.
Part 1: Our Overkill Home Network
Part 3: Coming soon