Uncategorized

PHP Templating with mod_rewrite

There are lots of different methods of implementing design templating in PHP and I pretty much hate them all. So I came up with a new one, which may not be better than the others but at least it’s different.

The template markup is stored all in one file, creatively titled template.php. For organization I stuck it in my /includes folder.

Each content page is in a directory called /pages. So my login page is in /pages/login.php. The content pages don’t contain any calls to the template at all, they contain only the logic/output for that particular page.

The template page is called with a filename in the URL, i.e. template.php?page=login. This little peice of code hangs out near the top of the template page, before any HTML output (but after all the includes for various libraries / any session or cookie handling):

$page = $_GET['page'];

//output buffering is needed so we don't puke the contents of the page above the HTML headers
ob_start();
//Check to see if the file exists
if(file_exists($_SERVER['DOCUMENT_ROOT'].'pages/'.$page.'.php')){
//if so, require it
require  $_SERVER['DOCUMENT_ROOT'].'pages/'.$page.'.php';
} else {
//if not, returna 404 error
header("HTTP/1.0 404 Not Found");
exit;
}
//store the output of our page in a variable
$content = ob_get_contents();
//empty the output buffer
ob_end_clean();

You need to include the page in the template before the start of  the HTML output or else any cookie/session stuff in the page won’t work. Buffering the output lets you call the script now but not display its contents until later.

In the middle of our template markup, where we want the page content to appear, there’s a simple <code>echo $content</code> to place the output on the page.

Of course at this point if you want your template to show up you have to access everything through template.php. http://www.whatever.com/includes/template.php?page=login is not an attractive address. So I use mod_rewrite to hide it.

Putting these lines in my .htaccess file lets us use nice urls like “http://www.whatever.com/login.php”

RewriteEngine on
RewriteRule ^(.*)\.php include/template.php\?p=$1 [QSA]
RewriteRule   ^$  include/template.php\?p=index

The first line just turns on the rewrite engine. The second sends anything ending in PHP to the template page. The QSA flag passes the query string along with it, so mypage.php?id=foo will still pass ‘foo’ correctly.
The last line handles the index page redirect for us if they just come to the bare domain and not a particular page.

Additionally it’s a good idea to add a couple lines to not redirect files which are already in our root directory.

RewriteCond %{REQUEST_FILENAME} !-f
RewriteCond %{REQUEST_FILENAME} !-d
RewriteCond %{REQUEST_FILENAME} !-l

If you are of the opinion that this is a terrible idea which should never be used, I’d love to hear why. I really doubt  I’m the first person to think of it, but I’ve never seen anyone else do it, so I’m wondering if there’s something terrible about it that I’m not aware of. I know there’ll be a performance hit with mod_rewrite, but pretty much every other CMS I’ve seen uses mod_rewrite to make their URLs pretty, so I’m not convinced it’s any worse than the other stuff that’s out there.
Business

Not Yo Momma’s Craft Fair

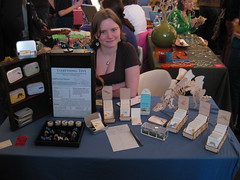
I spent Saturday vending at Not Yo Momma’s Craf t Fair, and event held at LITM, a bar in Jersey City. It was my first show by myself in two years, and also the organizers’ first craft fair.

Not Yo Momma's Craft ShowThe show was interesting, to say the least. Traffic was good and we ended up staying an extra hour because there were still lots of people around, although during that hour the crowd pretty clearly shifted from people who want to shop to people who want to drink. Overall the crowd wasn’t very spendy, people were balking at a friend’s prices for her prints… all of which were sub-$10. Surprising for a place where the average drink price is $9.

Sales-wise I did pretty well, and hit my target of 10x the booth fee. I nearly sold out of the Tinysaur Deluxe Kits, which was surprising, although I only brought ~10 of them. The checkout setup was a little clumsy… buyers had to get a sales slip, take it to the bar, pay, then bring it back to get their goods. It was a little aggravating to have to explain the somewhat complicated system to each customer, but it worked OK so I guess I can’t complain. Still, I would rather just have everyone pay me in cash. Much simpler.

Overall I’d say it was a success, and a nice practice for Spring Bada-Bing in Richmond next month. I mostly remembered how to sell people things, and got an idea of what was working / what wasn’t.

Business

Free

This week’s topic at weeklyblogpost is ‘free.’ I usually am not a fan of writing prompts because they give me flashbacks to grade school, but somehow I’m ok with the ambiguous one-word topics.

Lately I’ve been trying to calculate the cost of free. Specifically in the stuff I give out to promote my business, Tinysaur.

A lot of craft shows give out swag bags full of goodies to the first n number of shoppers, and in theory it’s a way to get some “free” advertising. Free as in you didn’t have to pay anyone else for the placement, but it still costs you the time/materials to make the promos.
Promos
I’m sending out samples rather than promos. There’s a big difference between the two, and I think it’s an important one that’s often overlooked.

Promos are little slips of something with your contact information on it. Business cards, buttons, magnets, etc. They don’t really do anything, and frankly I’m not convinced that sending them out carte-blanche is really worth the effort. All those things are pretty cheap, comparatively, but they’re not free. You still have to design/print/ship them, and most of them will end up going straight into the trash.

Save your promos for people who are already interested. Add them to your outgoing orders, give them out at craft shows, but don’t think that throwing them in a gift bag with 100 other promos is going to get you much “free advertising.”

Samples are a different beast entirely. Samples are just that: a sample of your product. Something that gives people a real idea of what it is you make, and why they might want to buy it. It took me a while to come up with a decent idea for a sample. They need to be cheap enough that you can affort free, but nice enough that someone will want to look at them.

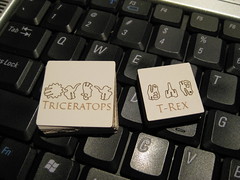
For two upcoming shows, Not Yo Momma’s Craft Fair and Spring Bada-Bing, I’m sending dinosaur skulls. Little sample packs of just the Tinysaur head, pulled from T-Rex and Triceratops. I figure it’s just enough for people to see how small the peices are, punch them out, etc, but still leave them wanting more.

The samples are pretty cheap, but there are still some real costs associated with them. I have to pay per-minute for laser time, and while the plastic bags / tags are *practically* free on a per-promo basis, the time it takes to assemble it all adds up. Sure, I don’t have to front any cash for it, but it’s time I could be doing something else, either for my business or for myself.

I think it’s important not to mix up “free” and “worthless.” If you’re giving things out, make sure they’re things with some value to them. Information people want, things people can try out, something that will actually get looked at before heading to the recycle bin.

Business, Crafting

Spelling Fail

Here’s a short reminder in why you should have someone else proofread your marketing copy. Because after staring at the design for hours, you’re probably going to miss things. Important things. Large things.
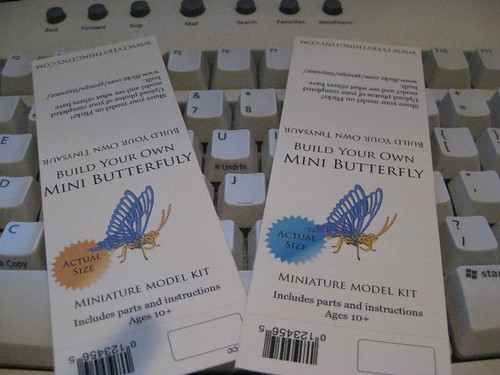
One of these things
Like the fact that you’ve misspelled the word “Butterfly” on all your packaging. Note that the yellow “actual size” sticker version (with the typo) is the 2nd generation of this packaging… the first had a green sticker. Meaning I managed to print off two batches of these typographically challenged babies before Chris said to me, “you know, butterfly is spelled wrong.”

I’m glad my boyfriend can read, even if I can’t.

Crafting, lased

Today’s Wooden Displays

Most of the last week has been spent prepping for a craft show, my first one in about two years. In order to get ready for the craft show, and also to attract some more wholesale clients, I’ve been working on some nice wooden display stands for Tinysaur.

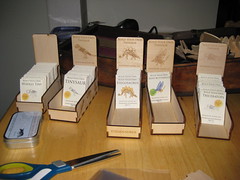
Getting ready for Prime Time These are the displays I’m using for the upcoming show. They’re laser cut/etched wood. Each stand holds a different model Tinysaur. The stand on the far left is a prototype, hence its lack of a dinosaur etching.

Each display holds about 30 Tinysaurs. Each Tinysaur is contained in its own matchbook-style packaging. I plan on using these displays to transport the Tinysaurs, but more on that later.

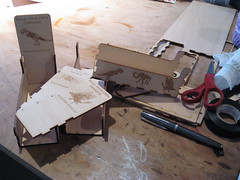
Designing a display takes a while, and is an iterative process. The first time I cut one, I realized the front piece was too short, and had to make a new one. I also decided the runners on the sides were too short, it looked a little stumpy.  So I added two more inches to it. Which turned out to look a little ridiculously long.
Work in progress
When I took the first raster-etched stand out of the laser, I realized I’d made another mistake. I forgot to mirror the right-hand runner, so the dinosaur silhouettes ended up on the wrong side. Oops.

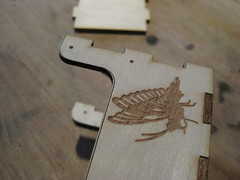
I also had to do some experimenting with the raster image of the dino that appears on the “flag.” The line drawings have a lot of thin lines, which tends to look sort of anemic when etched. I went into Photoshop and used a combination of filters to beef up the lines. You can see the difference in this picture.

Lastly there was the issue of transport. The flags that stick out of the top make it sort of unweildy to pack, and they’re also sort of fragile. Rather than risk them breaking off in transit, I made a second set of backs which are only as tall as the sides.
Raster close up
Then I drilled a few holes in each side of the stand. Since I want the backs to be removable, I don’t want to glue them on. Instead I’m going to run some elastic through the holes and around the back. That way I can switch the backs out easily, and they’re held in place by elastic.

I think the elastic will work OK, but it’s sort of fiddly. I think a beter option would be to use some small bolts to keep things in place. Something to think about for the next version.

Uncategorized

Teaching Classes in New York

If anyone is in New York or the surrounding areas, I’m teaching some classes at NYC Resistor over the next month, hooray!

Needle Bed Learn To Use the Knitting Machine

Sunday, March 8, 1pm-3pm

Learn to knit on our super awesome knitting machines. The class will cover all the basic, troubleshooting, machine care, and how to shop for a machine of your own.

Beginning PHP

Saturday, Feb 21, 1pm-3pm

Learn the basics of PHP, one of the most popular languages for creating dynamic web pages and web applications. We’ll cover everything you’ll need to get your first script up and running, and where you can go from there.

Image Manipulation with PHP and GD

Sunday, March 15, 1pm-3pm

GD image libraries can be used with PHP to manipulate and create images on the fly in your web applications. Create thumbnails, crop images, draw graphs, and more from within your web application.

Small Object Photography

Saturday, March 28, 1pm-3pm

Learn how to take good photographs of small objects on a shoestring budget. You don’t need to spend a lot of money to take good photos of your projects / products / jewelry / etc. Learn about cameras, lighting, and make your own light tent.

Uncategorized

Fun with Cardboard

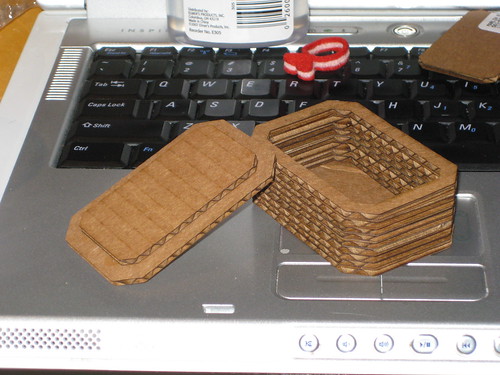
I’ve been playing around with making boxes out of old boxes. I plan on using them to protect Tinysaurs during shipping.
Fun with cardboard

The design was done in QCAD, and inexpensive CAD program. I started using QCAD after I got frustrated with Corel Draw. QCAD has a steep-ish learning curve. Here’s what I did to get the irregular octagonal shape. Command-line commands are in italics:

  1. Make a rectangle to the desired exterior dimensions (3×2 in this case) linerectangle
  2. Bevel each corner (lengths 1 and 3 set to 0.33″) bevel [x 4]
  3. Round each vertex (radius 0.1″) round [x 8]
  4. Select All selectall
  5. Create a new polyline from the segments og
  6. Draw an equidistant polyline (distance -0.25) oq

The source for the box is available in SVG format, download the box here.

Crafting, lased

Laser Sponge

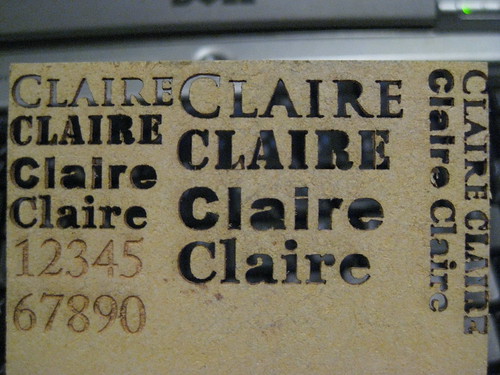
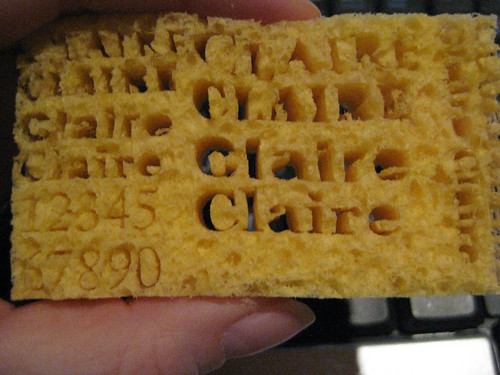
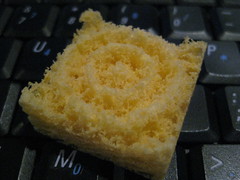
A friend of mine asked me to test out laser cutting on some compressed sponges, which she wants to use for a business card. It came out really well!

Compressed Sponge

Test #2

Both the raster and vector cutting was done at 100% power and 100% speed. Cellulose is surprisingly resiliant stuff. The serif font looked OK down to 14 pt (sideways, on the right). The rest of them looked better at 18 pt and up. Click on the photo above for specific fonts used.

Test #2 expanded

The raster is nice betcause you get to keep the counterforms (spaces inside the letters) rather than having them fall out. You can also get much finer looking lines with the raster, and because it doesn’t go all the way through it doesn’t make the sponge unstable. But, it takes longer, and doesn’t look as nice pre-expansion.

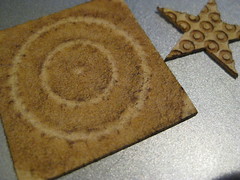
Interestingly, you can also get some pseudo-3d effects with the raster settings and gradients, which I played around with some.
flat sponges rings - AFTER h2o

By the way, the sponges look awesome when they’re expanding:

The sponges themselves are available through craft stores including Blick, or if you want someone else to do the cutting, they’re for sale on Etsy.com.

Crafting, Jacquard Loom

Rapid Prototyping a Jacquard Loom

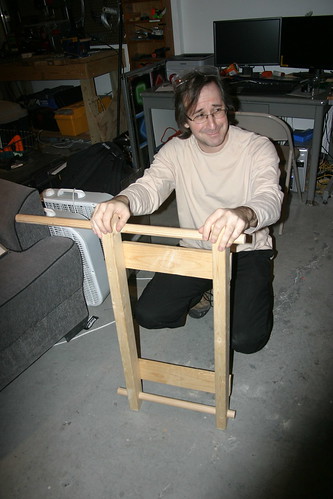
Inspired by the loom at the Berlin Technical Museum, Adam and I have started building our own loom. From scratch. We’re going off of the photos/video of what we saw at the museum, and my dim memory of the looms I used when I was in college.

So far we have the frame mostly built, constructed a reed, and I’ve started working on the head.

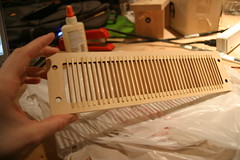
Completed reed The reed on a loom is used to compact the fabric as you weave it, helping to make things even. They usually consist of a wood frame with thin strips of metal making a grill. One or two yarns will go in between each space.

Our was made from a 12″x3″ sheet of poplar and a handful of popsicle sticks. Cutting popsicle sticks on the laser is fun! Although laying them out is a little tedious.

The frame for the reed was cut on the laser and then the popsicle  sticks were glued in. The holes on either side are for attaching the reed to the beater.

We got a bit of a late start yesterday and had to make way for Craft Night in the evening, so work on the loom will resume next Wednesday.

Adam + frame