Crafting, Hacking

Hooked on 'botting

This week I makerbotted for the first time! I know, I know… I should have done this much much sooner. Everything Tiny and Makerbot were actually founded in the same room, the old NYC Resistor location, and it's been really exciting to see things take off for them. But until recently, partly due to the success of Everything Tiny, I never really had time to sit down and get personally aquanited with the wide world of 3D printing.

Part of my probelm was that I always had ideas which were large and complicated, and I never finished the designs. So in an effort to actually produce something, I set myself to a very simple first project: a plastic organizer insert for a mint tin.

Subdivided mint tin

I'm using it to organize my miniature pompom collection. Because I have one of those.

Overall the printing process was pretty easy. Adam, Matt, and Pax were nice enough to help me get over the few problems I ran into. Matt, who is the developer in charge of ReplicatorG (Makerbot's printing software), gave helpful instructions like "now click the picture of the potato with an arrow coming out of it." He then asked if I knew any UI designers looking for work.

Here are the issues I ran into on my maiden print:

The model didn't adhere to the bed.  Because my design is pretty thin, it didn't stick very well to the bed of the makerbot, even with the heated build platform. This was easy enough to fix, we turned on the raft (a layer of plastic which goes down evenly before you start the real print, and is removable later).

The plastic was coming out goopy. The main issue with my first two attempts was that the plastic was coming out much too thick, and kind of lumpy/grainy. This caused two problems: first, it looked terrible, with little lumpy bits everywhere. But more importantly, the lumpy goopy bits would build up and then harden. Then when the extruder head came by again, it would hit these plastic lumps and move the model, throwing off the registration.

There were two suggested fixes here: first was to increase the speed, so that the build platform would move faster (allowing for less material to build up). This was met with a certain degree of success, but Adam suggested cheap cialis online that the plastic we were using, which had been sitting out at Resistor for quite some time, had absorbed too much water from the air to really be useful. The moral of the story here is to store your plastics in airtight containers with some desiccant. In the end, we switched plastics.

My machine wouldn't talk to the Makerbot. This ended up being an issue with my machine, a somewhat unhappy eeePC. When I switched to my mac, all was happy again. Also, the eee is way too underpowered to really be generating gcode for prints. I was able to cold-boot my mac, install RepG, install the drivers, and generate the print's gcode from scratch in the time it took my eee to get halfway done generating the same gcode.

The build platform wouldn't heat. This one took us the longest to debug. One of the connectors was visibly damaged (names were named but I won't reprint them here), but it worked just often enough to make us think something else was the problem. After some thorough testing with the  multimeter, and some careful coaxing of the connections, power was restored to the build platform.

Here's the source model, which I've uploaded to Thingiverse. Note that this is meant to fit mint tins that I purchase wholesale, and as such may not fit the Altoids tins. I created the object in Google SketchUp and then exported it to STL for use with RepG. GoogleSketchUp is OK for doing things quickly, but there are a lot of things I wanted to do with the design that I couldn't convince SketchUp to let me do. Particularly, I wanted nice rounded edges on the top of my model.

I'm happy with the final print, and really stoked about Makerbotting more models in the future!

Hacking

Becoming a Licensed Ham

We have a number of licensed hams at NYC Resistor, but until recently I never quite understood the draw of ham radio. Honestly, I didn’t see what was so exciting about contacting a random person and telling them their signal strength, maybe along with the weather if you had a good signal. And in a world of email, broadband internet it can be hard to understand the appeal of amateur radio.

Admittedly part of my interest is just for the sheer nerd value. We refer to hams as “beardos,” due to the fact that almost everyone using a ham radio sounds like they are a middle aged man with an intense beard.  But lately I’ve been thinking about how our incredibly powerful network of internet and phone lines is also incredibly fragile. Like how an errant backhoe in Massachusetts can kill my connection for hours. Or how my husband and I managed to lose each other, despite being only a few blocks away, when cell phone service was out for an hour. In light of some of the recent natural and man-made disasters, the ability to send a message 1000 miles per watt of power seems a lot less silly.

I’m studying to take the Technician exam, which involves learning a small amount of radio science on top of the basic electricity I already know. By far the hardest part is navigating all the acronyms. Hams love acronyms. Everything written about it is so full of acronyms and jargon it’s pretty much impossible to read without prior study, which can make it a little difficult to get started.
While I usually find the for dummies series painfully oversimplified, I actually found Ham Radio For Dummies to be pretty handy. It’s by no means comprehensive, and a little out of date, but it got me to a point where I could at least navigate the ARRL website.

I’m still not quite passing the practice tests, so I have a little more studying to do, but hopefully I’ll have my ham license in hand by the beginning of next month!

Software

Got a new pen. Installed Zork on it.

This past week, I picked up a Livescribe pen. I think it’s the most impressive gadget I’ve seen in a long while, though every now and then I have to stop to consider the fact that I carry around a 1 gigahertz computer complete with keyboard and touch interface in my pocket. I remember long ago seeing an ad for a machine for a 400 hz machine and thinking it was a typo – nothing could possibly be that fast.

Anyway, so, pen. The nickel tour is that it records whatever you write* and can also record voice. I had a microcassette recorder in college. I used it to tape a handful of lectures, and never listened to the tapes ever again. So the voice recording capabilities weren’t really a huge selling point.

What’s cool about the Livescribe is that it indexes the audio to your writing. So I can tap on a bulleted list, and hear the full conversation from thath point. Which is much more useful than having to search an entire conversation for the 10 second clip I care about.

It syncs with Evertnote, though not particularly elegantly. With a paid evernote account, you can search your notes (using OCR), and since I didn’t feel like paying for the Livescribe OCR add-on, that’s a win. Evernote’s OCR does an OK job of translating my half-cursive-half-print writing.

Evernote tries to find the word "game" in my writing


But, let’s get to the most important thing about this pen: it plays Zork.

Zork is a free application for the pen. It’s a direct port of the Zork we all know and love, and it uses the pen’s LCD window to scroll text (e.g. “You are west of a house”). You write your actions on the page, it reads them in, and then spits out the appropriate snarky Zork response.

The handwriting recognition is generally very good, but I had some odd trouble getting it to read the phrase “open mailbox.” If you look at the command list, you can see where I forgot to save and had to start over after turning off the pen. Modern autosave has spoiled me.

Saving/restoring is pretty cool, you draw a little picture (the circled 1 and 2) and tap it twice. Then you tap the one you want to restore when you go to load a game. Neat trick.

Overall the pen is a neat bit of technology. Maybe not a critical one, but definitely neat.


*provided you write it on special paper. You can print your own special paper if you have a nice enough printer, and even design your own special paper if you really want to hack around with their SDK.

Personal

State of the Kellbot

Things have been very, very busy around here. Here's some of how I'm spending my time:

Wedding

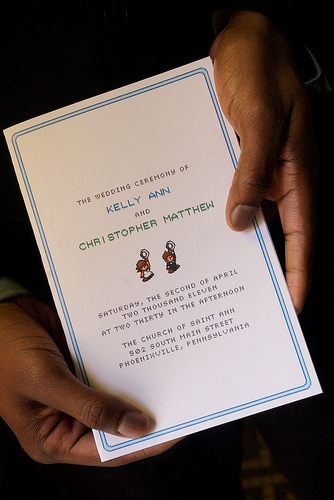
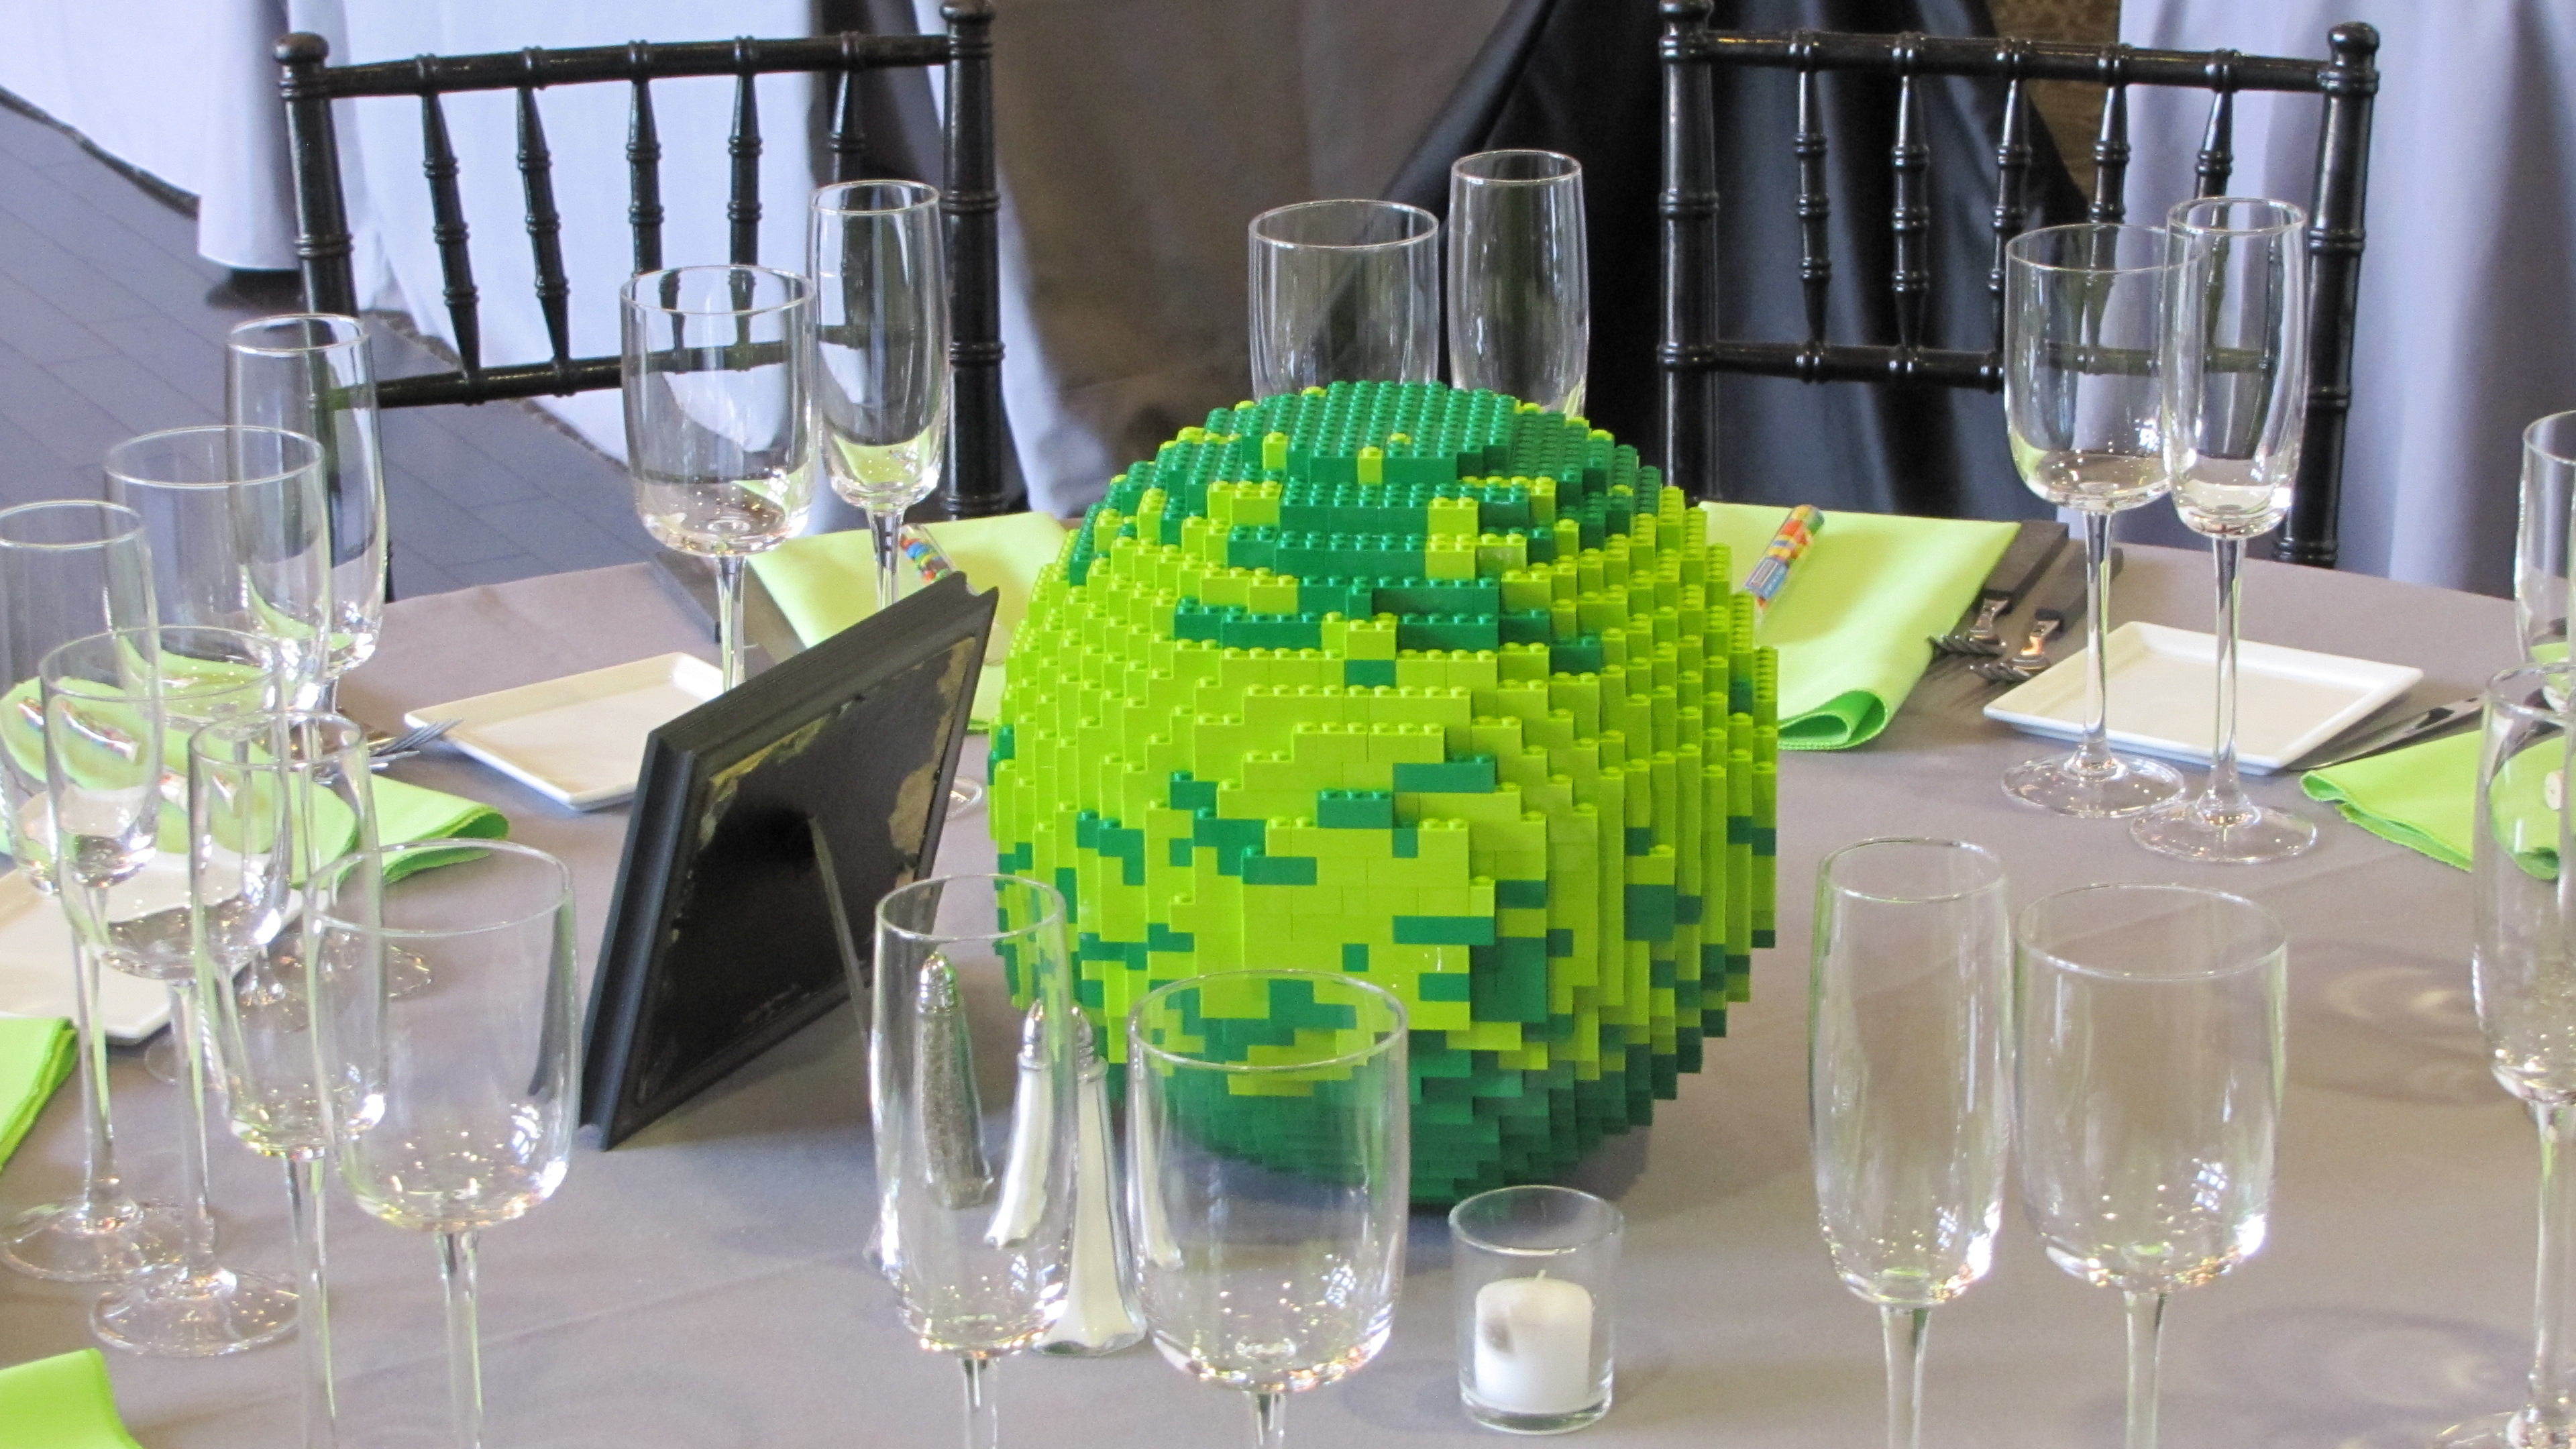
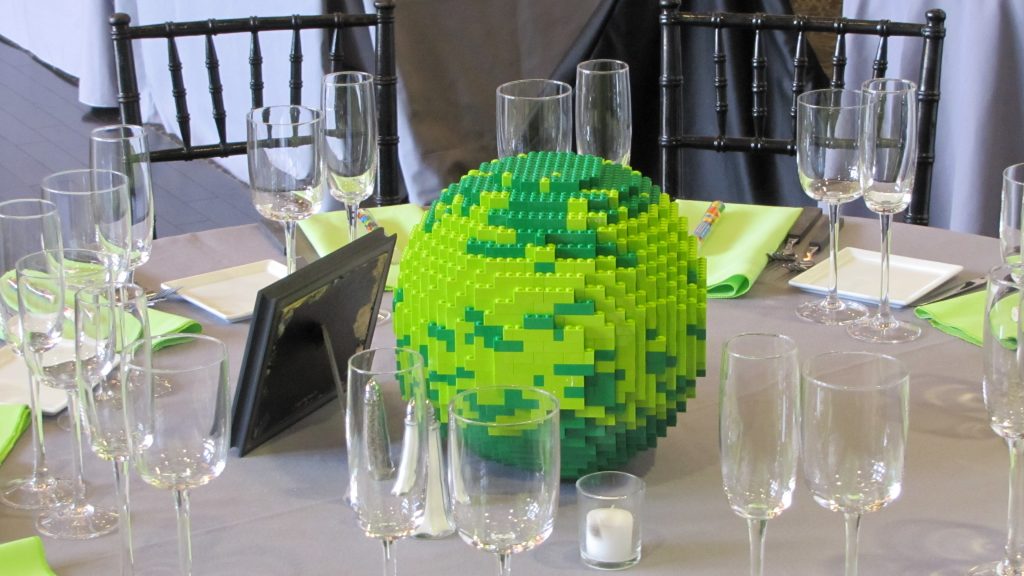
I am getting married in early April. We went a very DIY route, hand making everything from the invitations to the centerpieces (which are made from approximately 25,000 individual lego bricks). I've been dutifully documenting the processes, but haven't had time to write up blog posts about everything we're doing.

A New Startup!

Technically, it's my old startup. But we're doing it for real this time. For those of you who are following along at home, you'll remember that about this time last year I was starting a startup. And then a few things happened and my personal finances looked a little scary, and long story short: I bailed. 

But I'm back at it! The company is called BitBot Media, and is the new home for all my professional startup projects. The project under the most active development is a health game, which I'll get to in just a second.

I'm working out of General Assembly, a new coworking space in midtown Manhattan. It's a beautiful space with a great collection of people. The space opened in mid December, so there are still a few kinks to work out (I frequently complain about people taking phone calls in the library) but overall it's pretty great.

So about that game…

The working title of the game is ExeRPG, and it's a browser-based RPG meant cheap cialis to encourage consistent workout habits. It might not be the next Grand Theft Auto, but finding the drive to exercise seems to be a comon problem among our friends.

We're in a private email-based alpha right now while we work out some of the major gameplay mechanics. It's a slow process, but has already provided us a lot of valuable feedback. We expect to have a full beta up by May. We're also planning on running a Kickstarter campaign to fund our initial development. If you're interested in the project you can sign up for our mailing list at http://www.exerpg.com

Developing a long-form game has been a huge learning process. I hope to blog as much of it as I can over on the game development blog.

Overall it's a busy time for me, hopefully post-wedding I can sit down and finish up some of the draft blog posts I've got lying around.

Programming, Software

Bit Depth Problems with RMagick / ImageMagick

I just spent the entire afternoon debugging a problem I couldn’t find elsewhere, so I’m documenting it in the off chance someone else runs into the evil thing.

I’m composing some images on the fly using ImageMagick via RMagic. It grabs one file, floods the image with a given color, and layers another on top of it. Locally, it works great, and gives me “body parts” like this one:

Unfortunately, when I push the code to Heroku, it starts going through a goth phase and filling everything in with BLACK LIKE SOUL:
I spent a very, very long time trying to suss this one out, checking out everything from opacity to gem versions. Finally, I checked the ImageMagick version (Magick::Magick_version).
Local: “ImageMagick 6.6.7-1 2011-02-08 Q8 http://www.imagemagick.org”
Heroku: “ImageMagick 6.6.0-4 2010-06-01 Q16 http://www.imagemagick.org”

Ok, so Heroku’s is a bit older. But that’s not the critical issue. The bigger problem is the Q16, which is reporting the quantum depth. I don’t understand nearly enough about image processing to talk about what that really means. But long story short, it means my images had different default bit depths and it was causing everything to blow up. Or something.

I was able to fix it by changing how I instantiated the Pixel for the fill. Before, I was using

fill_image.colorize(1,1,1,Magick::Pixel.new(r,g,b))

where r, g, and b are integers between 0 and 255.

Conveniently, RMagick has added a from_color method to Pixel, which lets you define a pixel based on a color name. I passed in a hex value, and everything magic(k)ally works normally again:

color = '#ababab'
fill_color = Magick::Pixel.from_color(color.upcase)
fill_image = fill_image.colorize(1,1,1,fill_color)

I wish I understood a few more of the particulars about what is really going on here. But for the time being I need to move on to finishing this up. Any insight is welcome in the comments.

Family

On Death and Grief

In college I took a class called “Death: Myth and Reality.” The course examined death from all angles, from the science of what physically happens after death to how we as humans handle the idea. The variety of ways people cope with death is enormous, even within a single culture or religion. I was raised with the understanding that it was a natural part of life, albeit a very sad one, and never really had difficulty coping with the loss of my grandparents over the years. I consider myself fairly OK with the idea of death. Our foster kittens don’t always make it, which is hard on us, but at least we’re able to provide them warm and loving homes for their abbreviated lives.

A family member, my fiancee’s cousin, passed away unexpectedly this week. He and Chris were very close growing up, and about the same age. We saw him regularly, though not always frequently since he lived a few hours away. It’s been very, very hard for Chris, his family, and myself. And I’m quickly learning that the grief of losing a peer is completely unlike that of losing a grandparent.

When you don’t see someone every day, it takes longer to process what it really means when they’re gone. It’s too abstract to simply know that somewhere, elsewhere, they’ve ceased to be. The first wave of grief was mostly for the other family members, the sadness of knowing people you care about are upset and the grim realization that there’s nothing you can do. I cried because Chris was crying. Chris traveled south to be with his family, and I stayed in New York until we had a better idea of what was happening.

It took a few days to process what was going on. To understand where all the holes were going to be. An empty seat at the “kids” table (who are mostly in their 20s) at family gatherings. A missing guitarist in the ska band we insisted we would form “soon.” An XBox Live ID sitting dormant on our friends list. Each of these revelations came like a fog settling around me. And if this is how I feel about someone I’ve only known since I got together with Chris, the pain his immediate family is in must be unbearable.

I’m grateful for the friends who have buy generic cialis offered support. I’ve learned that the hardest question to answer is “how are you doing?” My reflex is to answer “fine,” because that’s the universally accepted response for the question. But I’m not fine, and it feels incredibly hard to condense how I feel into something that answers what seems like a simple question. I’ve taken to responding with “it’s going.” I’ve also learned that attempting to “be strong” by doing things like going to work instead of going to be with family is unnecessary and unhelpful. There is nothing I do that is so critical it can’t wait until Monday, and simply being around family going through the same thing has made things infinitely more bearable.

When I met up with Chris yesterday he reminded me of a conversation we had with his cousin, whose name is Mike, when we were at the beach this summer. We were watching Pawn Stars, a TV show about a pawn shop. Mike mused that working at a pawn shop would be “a fun job, except for all the ghosts.” We giggled a bit at the idea of haunted pawn shops, and then we realized he was quite serious. This made us laugh a little harder. But Mike seemed pretty certain that people live on after death in the things they own. While I’m not sure that “Ghost Hunter Pawn Stars” will be the next hit reality TV show, I do think people’s possessions can help us keep them alive in memory. And who knows, perhaps if Mike has some free time in the afterlife he will take to haunting a pawn shop.

DIY Lego Wedding Centerpieces
LEGO

Lego Sphere Factory

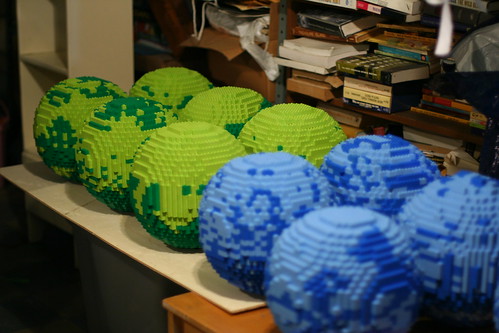
This weekend was spent at RevolvingDork’s parents’ house, which they kindly let us turn into a Lego sculpture factory.

Basement Spheres

We had a total of 12 people over on Saturday attempting to make 15 Lego spheres. Each sphere is about 25cm (10ish inches) in diameter. They follow a pattern I created using Blender and the techniques/scripts described here and here.

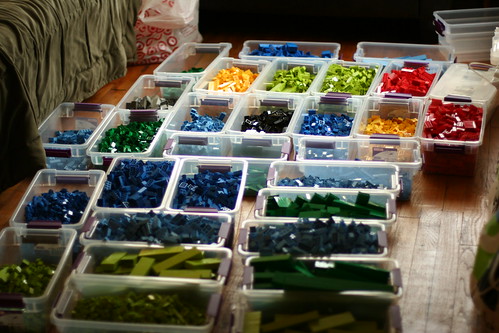
We used a lot of Legos. Approximately 22,000. Most of them were sourced from BrickLink, though we did buy a few sets new from Toys R Us. When build day came we realized we didn’t have enough, so RD made a last-minute trip to the Lego store. He was able to talk the staff into letting him buy a few boxes in bulk.

Legos

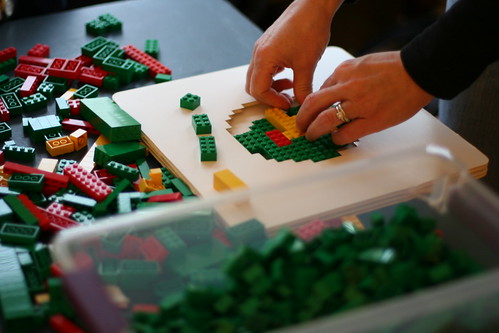
In order to make the build process easier, we laser-cut jigs out of foam core for each of the 27 layers. The jigs served as templates for each layer, avoiding the frustrating and time consuming counting I had been doing when building them earlier. We didn’t use a script to output the vector cut paths, RD just traced them by hand in Illustrator.

Building with a jig

To put it plainly: assembling these is hard. There are lots of overhangs and ragged edges where you really need a 1×1, but of course those aren’t very structurally stable. The first few layers are definitely the hardest, and there are a number of tips and tricks we figured out along the way to make things easier. And by easier I mean possible.

The spheres were built mostly hollow, though thicker at the top and bottom for structural support. A few folks incorporated a center column to make placing the top easier. Personally I found it easier to start thickening the walls around the top 1/3rd and using long 2×8 pieces to mesh in the top.

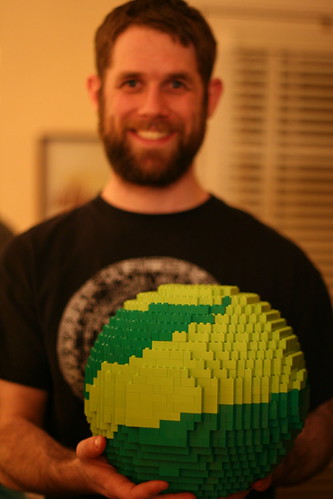
John decided to get fancy with his; rather than a simple mottled pattern he made an artistic swirl.

John and Sphere;

After 12 hours of work on Saturday we had 6 complete spheres and a number of half-finished ones. On Sunday RD, myself, and my soon-to-be mother-in-law finished up the leftovers, for a total of 13 spheres completed this weekend. I’m pretty impressed, and honored to have the sort of friends who would give up their Saturday to assemble these ridiculous sculptures.

These were used as the centerpieces in our wedding, and the ones that survived the evening intact were given to family and friends (with first dibs going to those who made them).

DIY Lego Wedding Centerpieces

Cupcakes by Whipped Bakeshop
Wedding

Cake!

I used to be very anti-wedding. Everything about weddings seemed incredibly stupid and overdone. I was pretty adamant that should I ever get legally married, I would elope.

Then I saw this cake:

The most amazing cake I have ever seen

Upon seeing the miracles of icing one can produce with a wedding cake, I revised my statement: I would be willing to get married, but ONLY if I could have the most awesome cake in the world. Though since I was single it was hardly a pressing issue.

Fast forward a few years to now, Chris and I are indeed selecting a wedding cake. And oh my are there cakey options. We went to a cake tasting where we were presented an array of cupcakes in different flavors and icings. They were all incredibly delicious but by the time I left I was done with sugar for a week.

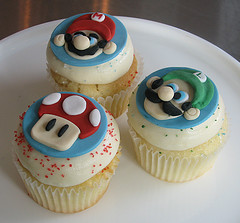
Cupcakes by Whipped Bakeshop

We ended up going with Whipped Bakeshop, a cute bakery in Philly which ironically enough got its start on Etsy.

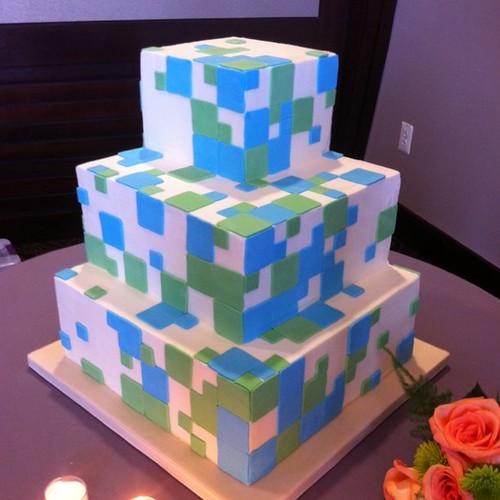
In a rare fit of restraint we decided not to go the super video game route with our wedding decor, and instead opted for a much more mild “pixel” theme.

I realize Mrs Manners does not approve of “themes” at weddings. She believes the “theme” is marriage. And while I do take the teachings of Mrs Manners to heart, I’m letting this one slide. Mrs Manners will not be attending my wedding. Plus, we’re not including any of the tree-killing reply cards she so hates in our invitations. Clearly that’s what the custom wedding reservation CMS I’ve written is for.

Come on now, really, how could you have two web developers get married without one?

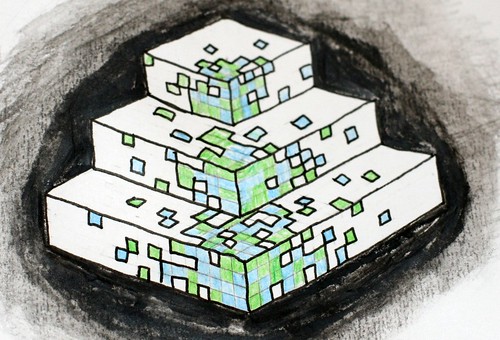
Here’s the sketch of our cake, I’m pretty excited to see it in person:
Cake Sketch

Not only does it look awesome, but it will be made of THREE different flavors (each on a different tier): chocolate, lemon, and carrot ginger.