Everything with the house is two steps forward one step back.
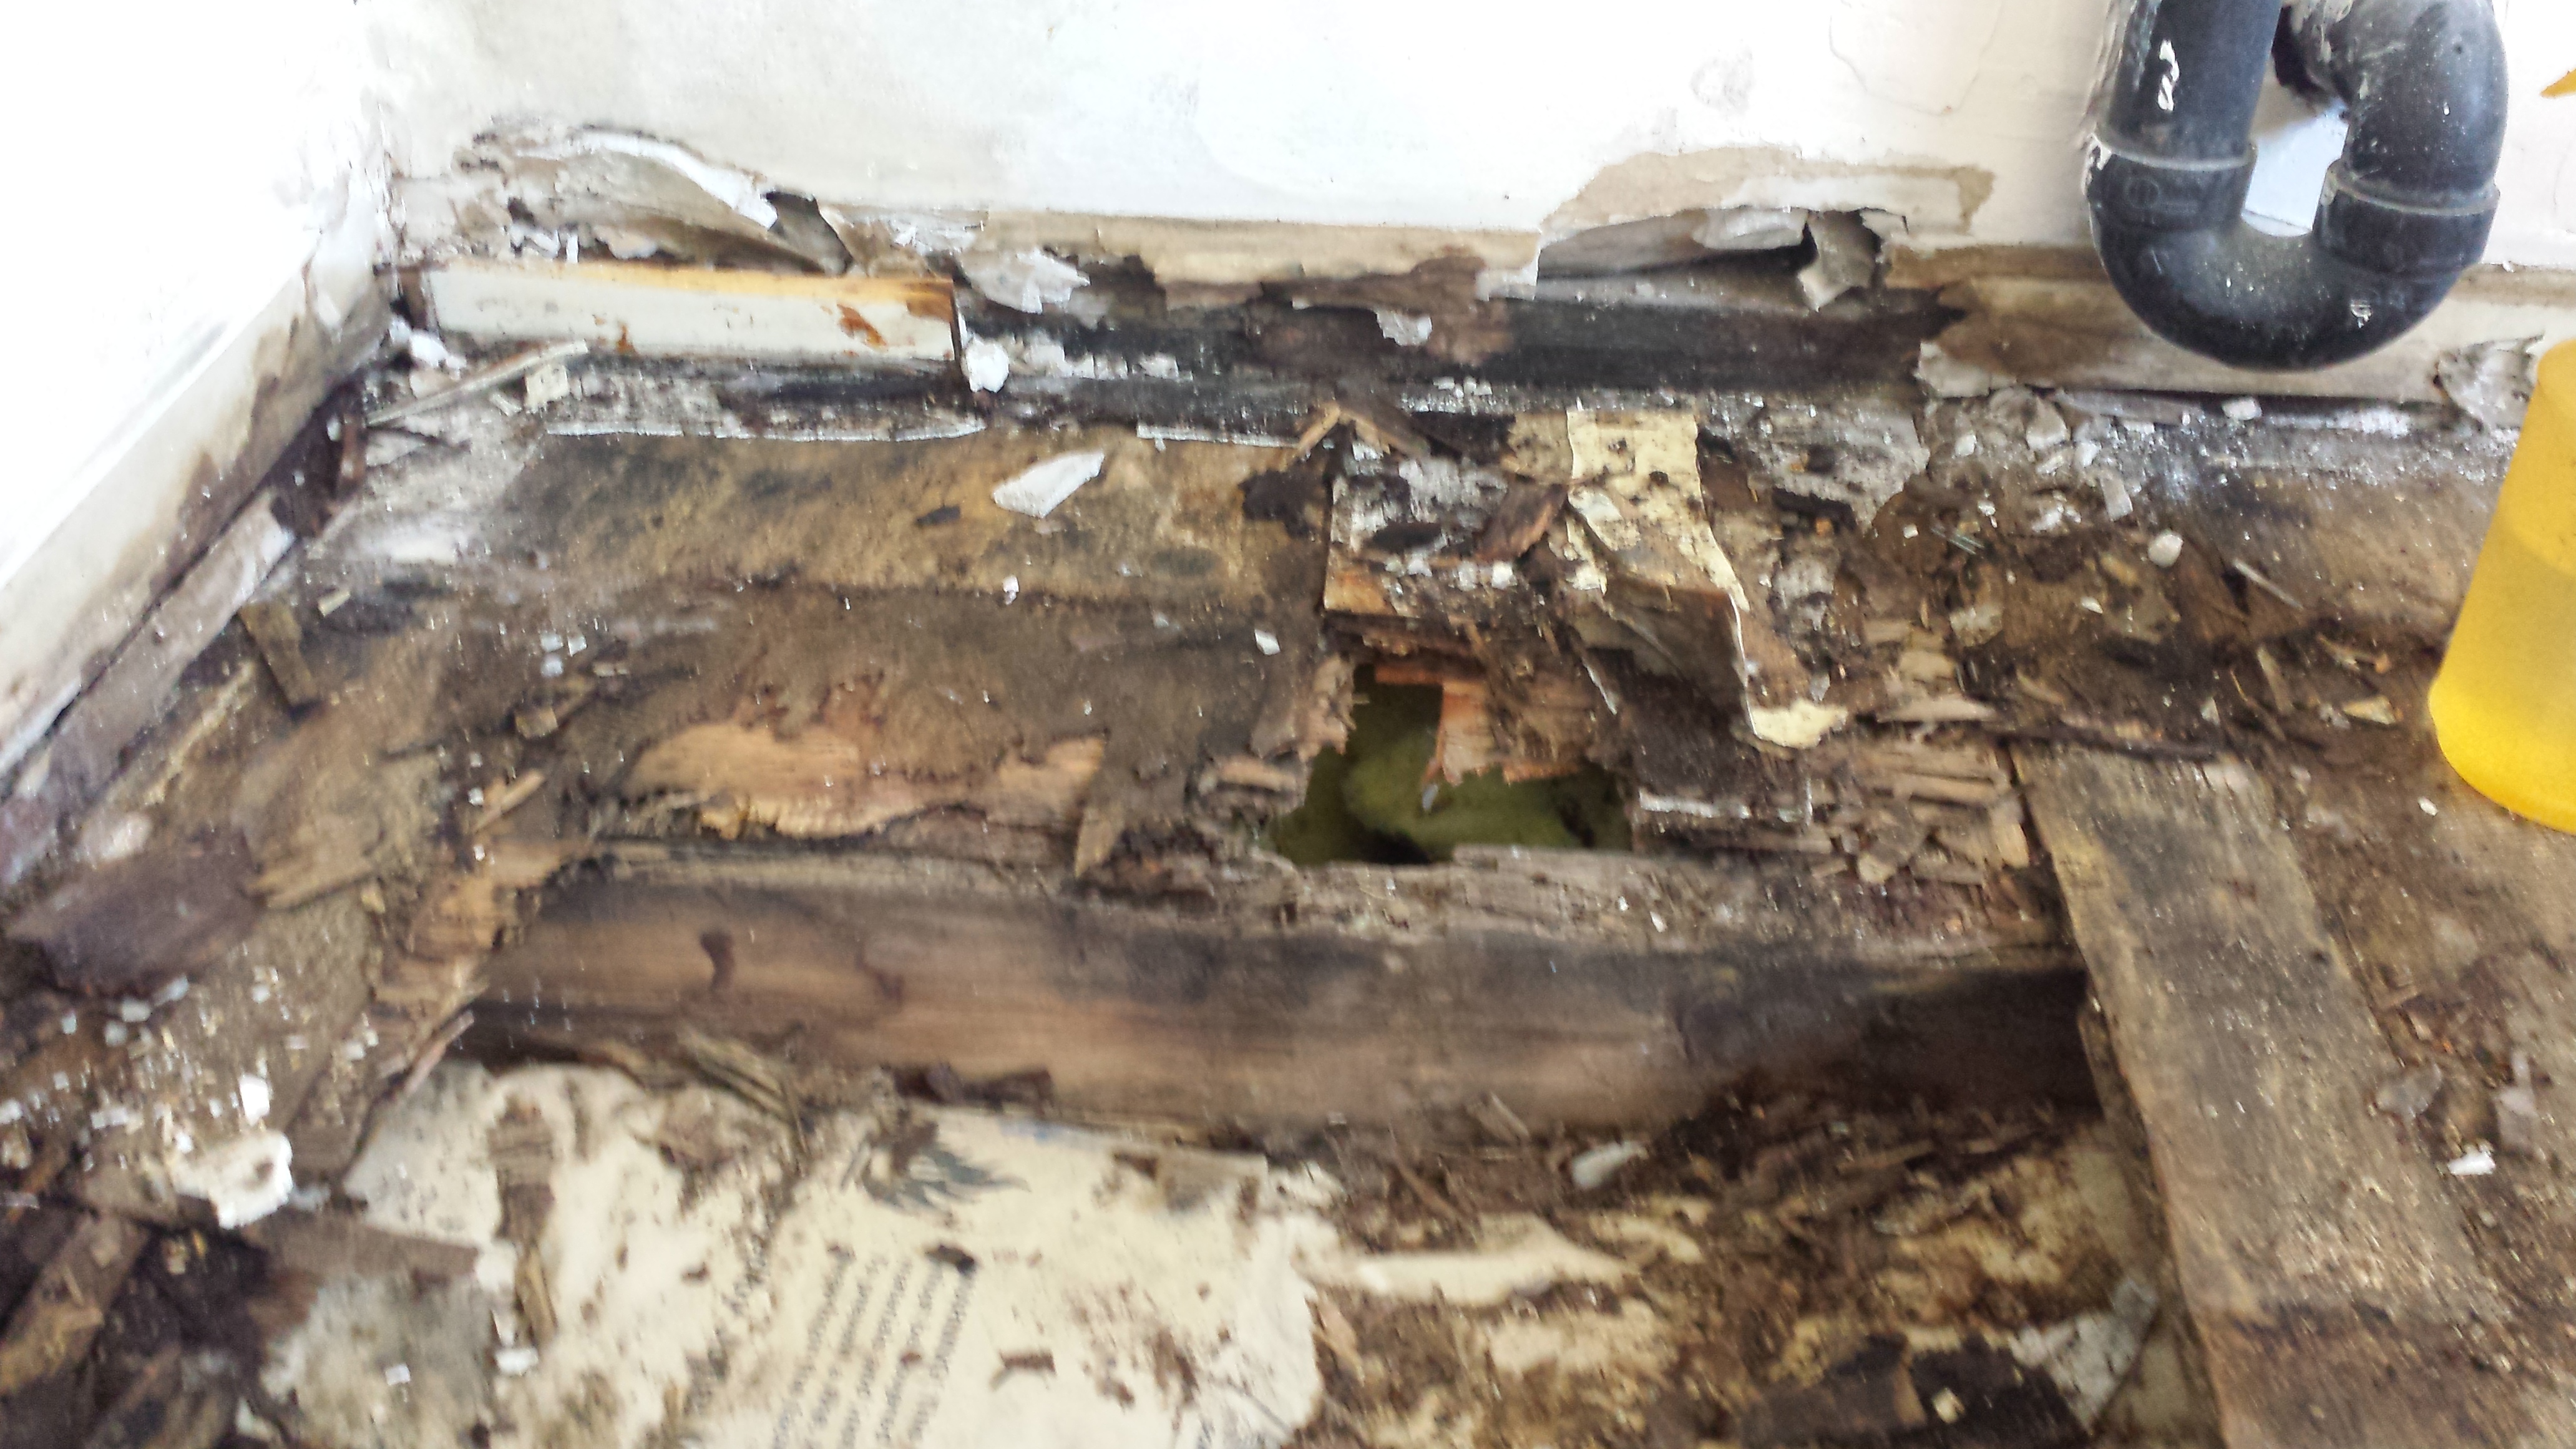
We took out the hot water heater and I went to replace the rotten subfloor below it. In theory this is a fairly straightforward process. Remove the old plywood, cut new plywood to fit, put new plywood in place. In practice nothing ever goes as planned and I don’t know why I was even a little surprised that the joist under the subfloor was rotted.

This is the point where I called up the contractor who had just finished the crawlspace repairs half an hour earlier and asked if they could add this project to my tab. The flooring situation in the laundry room is quickly spiraling out of the realm of things I can sanely attempt to DIY. There’s also the time factor. If I were to try to do this myself it would be another week before I can get down there to even start, and it probably would take me multiple weekends, delaying the kitchen installation even further. In contrast, the contractor said he can have everything done Monday.
I also had another contractor flounce on me. The guy who was supposed to do the vents did not like that the crawlspace guys took out the existing vents, and refuses to do the work now. He was really dramatic and shitty about it, so if that’s how he’s gonna be I’m just as glad to be rid of him.
The other thing I decided not to DIY is the drywall repairs in the kitchen. When we took the soffit out we discovered there isn’t drywall all the way up to the ceiling (surprise!). Drywall is something I can technically do myself but I’m not very good at it and I don’t have the tools to deal with the large sheets we’d need to haul up near the ceiling.
This part of rennovation is just really frustrating because there’s not a lot of visible change and the to-do list is getting longer, not shorter.
The original plan for this weekend:
- Remove soffit in kitchen – success! Chris and his dad got that thing down. We only had one unpleasant surprise lurking behind it, a hot water line that sneaks through the corner on its way upstairs. Since that’s over the fridge anyway I’m just going to build a frame around the fridge that lets the cabinet sit a foot out from the wall. Something like this.
- Remove hot water heater – success!
- Spackle and sand walls in master bedroom – A qualified success. This did in fact happen, but like all things it took longer than expected. There was a really bad drywall seam under the window which I was trying to smooth out. When I was sanding it I noticed that the trim on the window was a good inch away from the wall (and someone had tried to glob silicone caulk in there to compensate). I pulled off the trim and found that a wooden shim had slipped and was pushing the drywall out. I knocked the shim back in place and that let the drywall move back where it should be, but then I had to re-spackle it and wait for it to dry.
- Prime and paint master bedroom – Nope. See above.
- Remove rotten plywood in laundry room – Nope. After I saw what a horror show the joist was I just stopped.
- Bonus: Priming another bedroom and the upstairs landing. This wasn’t on the original agenda but Matt and Chris took care of this while I was frowning at the hole in the laundry room.
- Extra bonus: our contractor fixed the broken shed door because he was tired of dropping it on his foot.
Huge thanks are also owed to Chris’s mom, who wrangled the toddler while we did all this. Kiddo came through the house a few times like a tiny foreman. “Everyone is working on fixing up my beach house!” she announced.
Do you guys have an estimate for when you’d like the house to be ready for you guys and guests?
And are there any tools beyond the basics that you’d recommend for aspiring home DIYers?
Originally we were hoping memorial day but it’ll probably be more like 4th of July weekend. There’s nothing crucial we absolutely have to be done for, but it would be nice to at least have use of the bedrooms and not have any gaping holes in the floor by the time summer holiday weekends roll around.
I’d suggest only getting tools as you need them, and borrowing whenever possible. For big stuff you’re not likely to use again renting is also an option. There are some general tools that are worth investing in: a good cordless drill and set of drill bits, a good respirator (the dust masks are a joke), and a good pry bar (both small and large). Vice grips also come in really handy because old houses have tons of stuff that is completely patined/rusted in place.
Nothing ever goes as planned with any project like this does it? Next weekend is paint and tile flooring for us, but if you want help the weekend after that may be possible. I know extra hands doesn’t always equate to a faster timeline but anything I can do to help. <3