The photo below shows the old kitchen in the house I’m remodeling. It was taken from the doorway and shows pretty much the whole room. Notice anything missing?
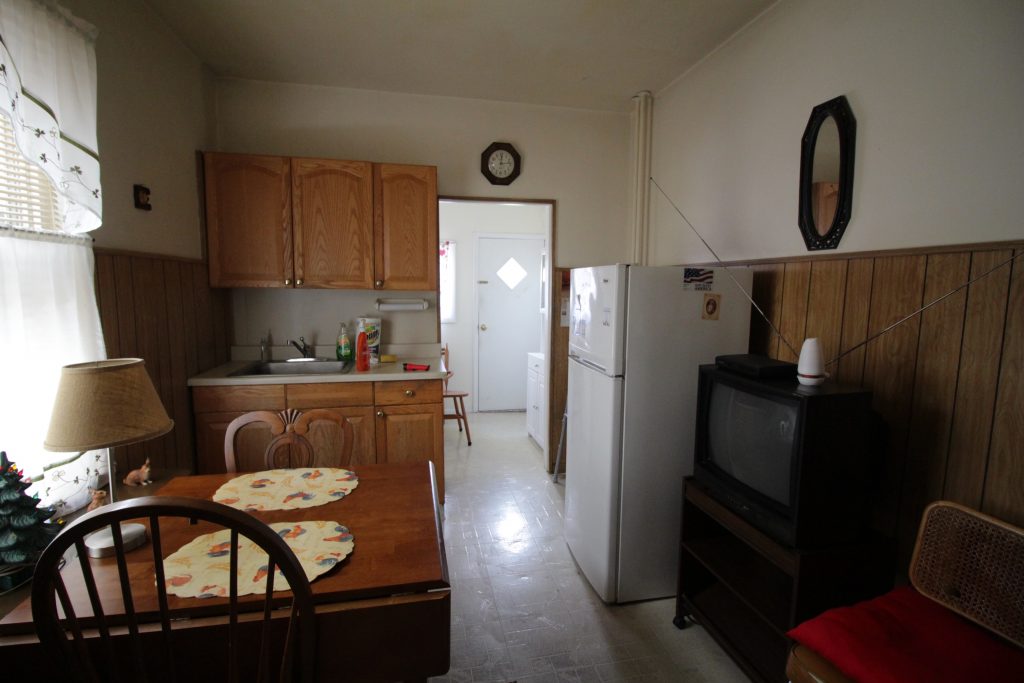
That’s right, this kitchen lacks a stove. There actually is a stove, it’s in the room behind the kitchen on the same wall as the sink. This means that if you have a pot of hot something on the stove you have to carry it around the corner into another room. There’s no counter space next to the stove, so you’ve got nowhere to set things besides the stove itself. The paneling, flooring, and cabinets are all things I could live with; having the stove another room was not.
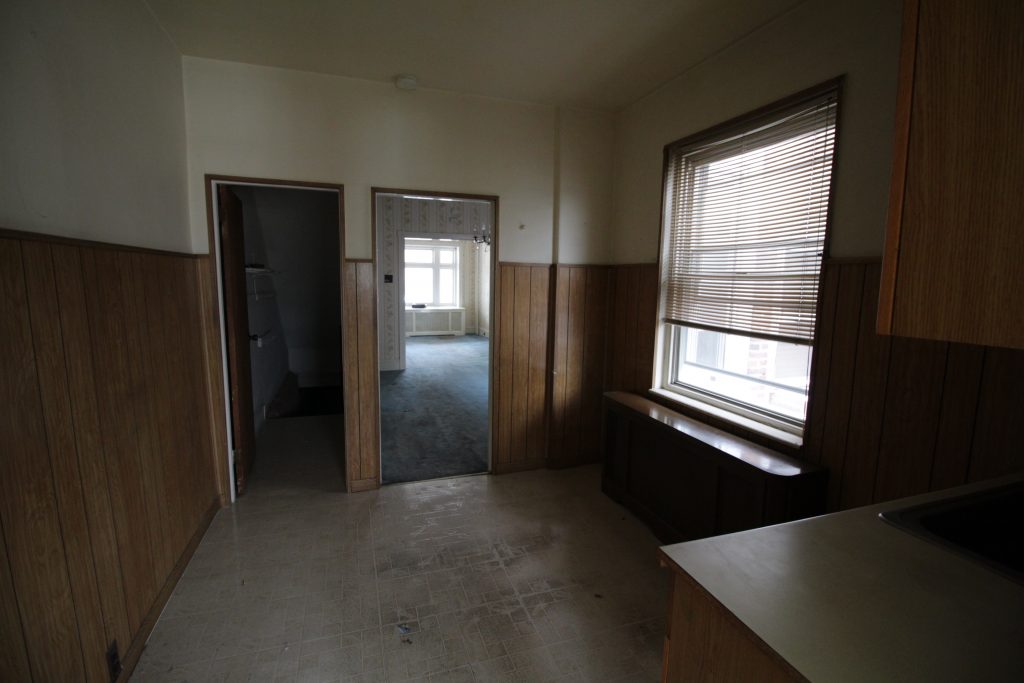
On one wall we’ve got a giant window and giant radiator taking up nearly all the space. On the other (next to where I’m standing taking the above photo) we’ve got a door to the basement, significantly cutting into where we can put things. The previous owners put the fridge in the middle of the room which I guess makes sort of a work triangle with the back room stove but… ugh.
The first major step was to move that doorway. I put it around the corner, in the dining room. This gives us more space in the kitchen as well as a small storage area behind the door at the top of the basement stairs.
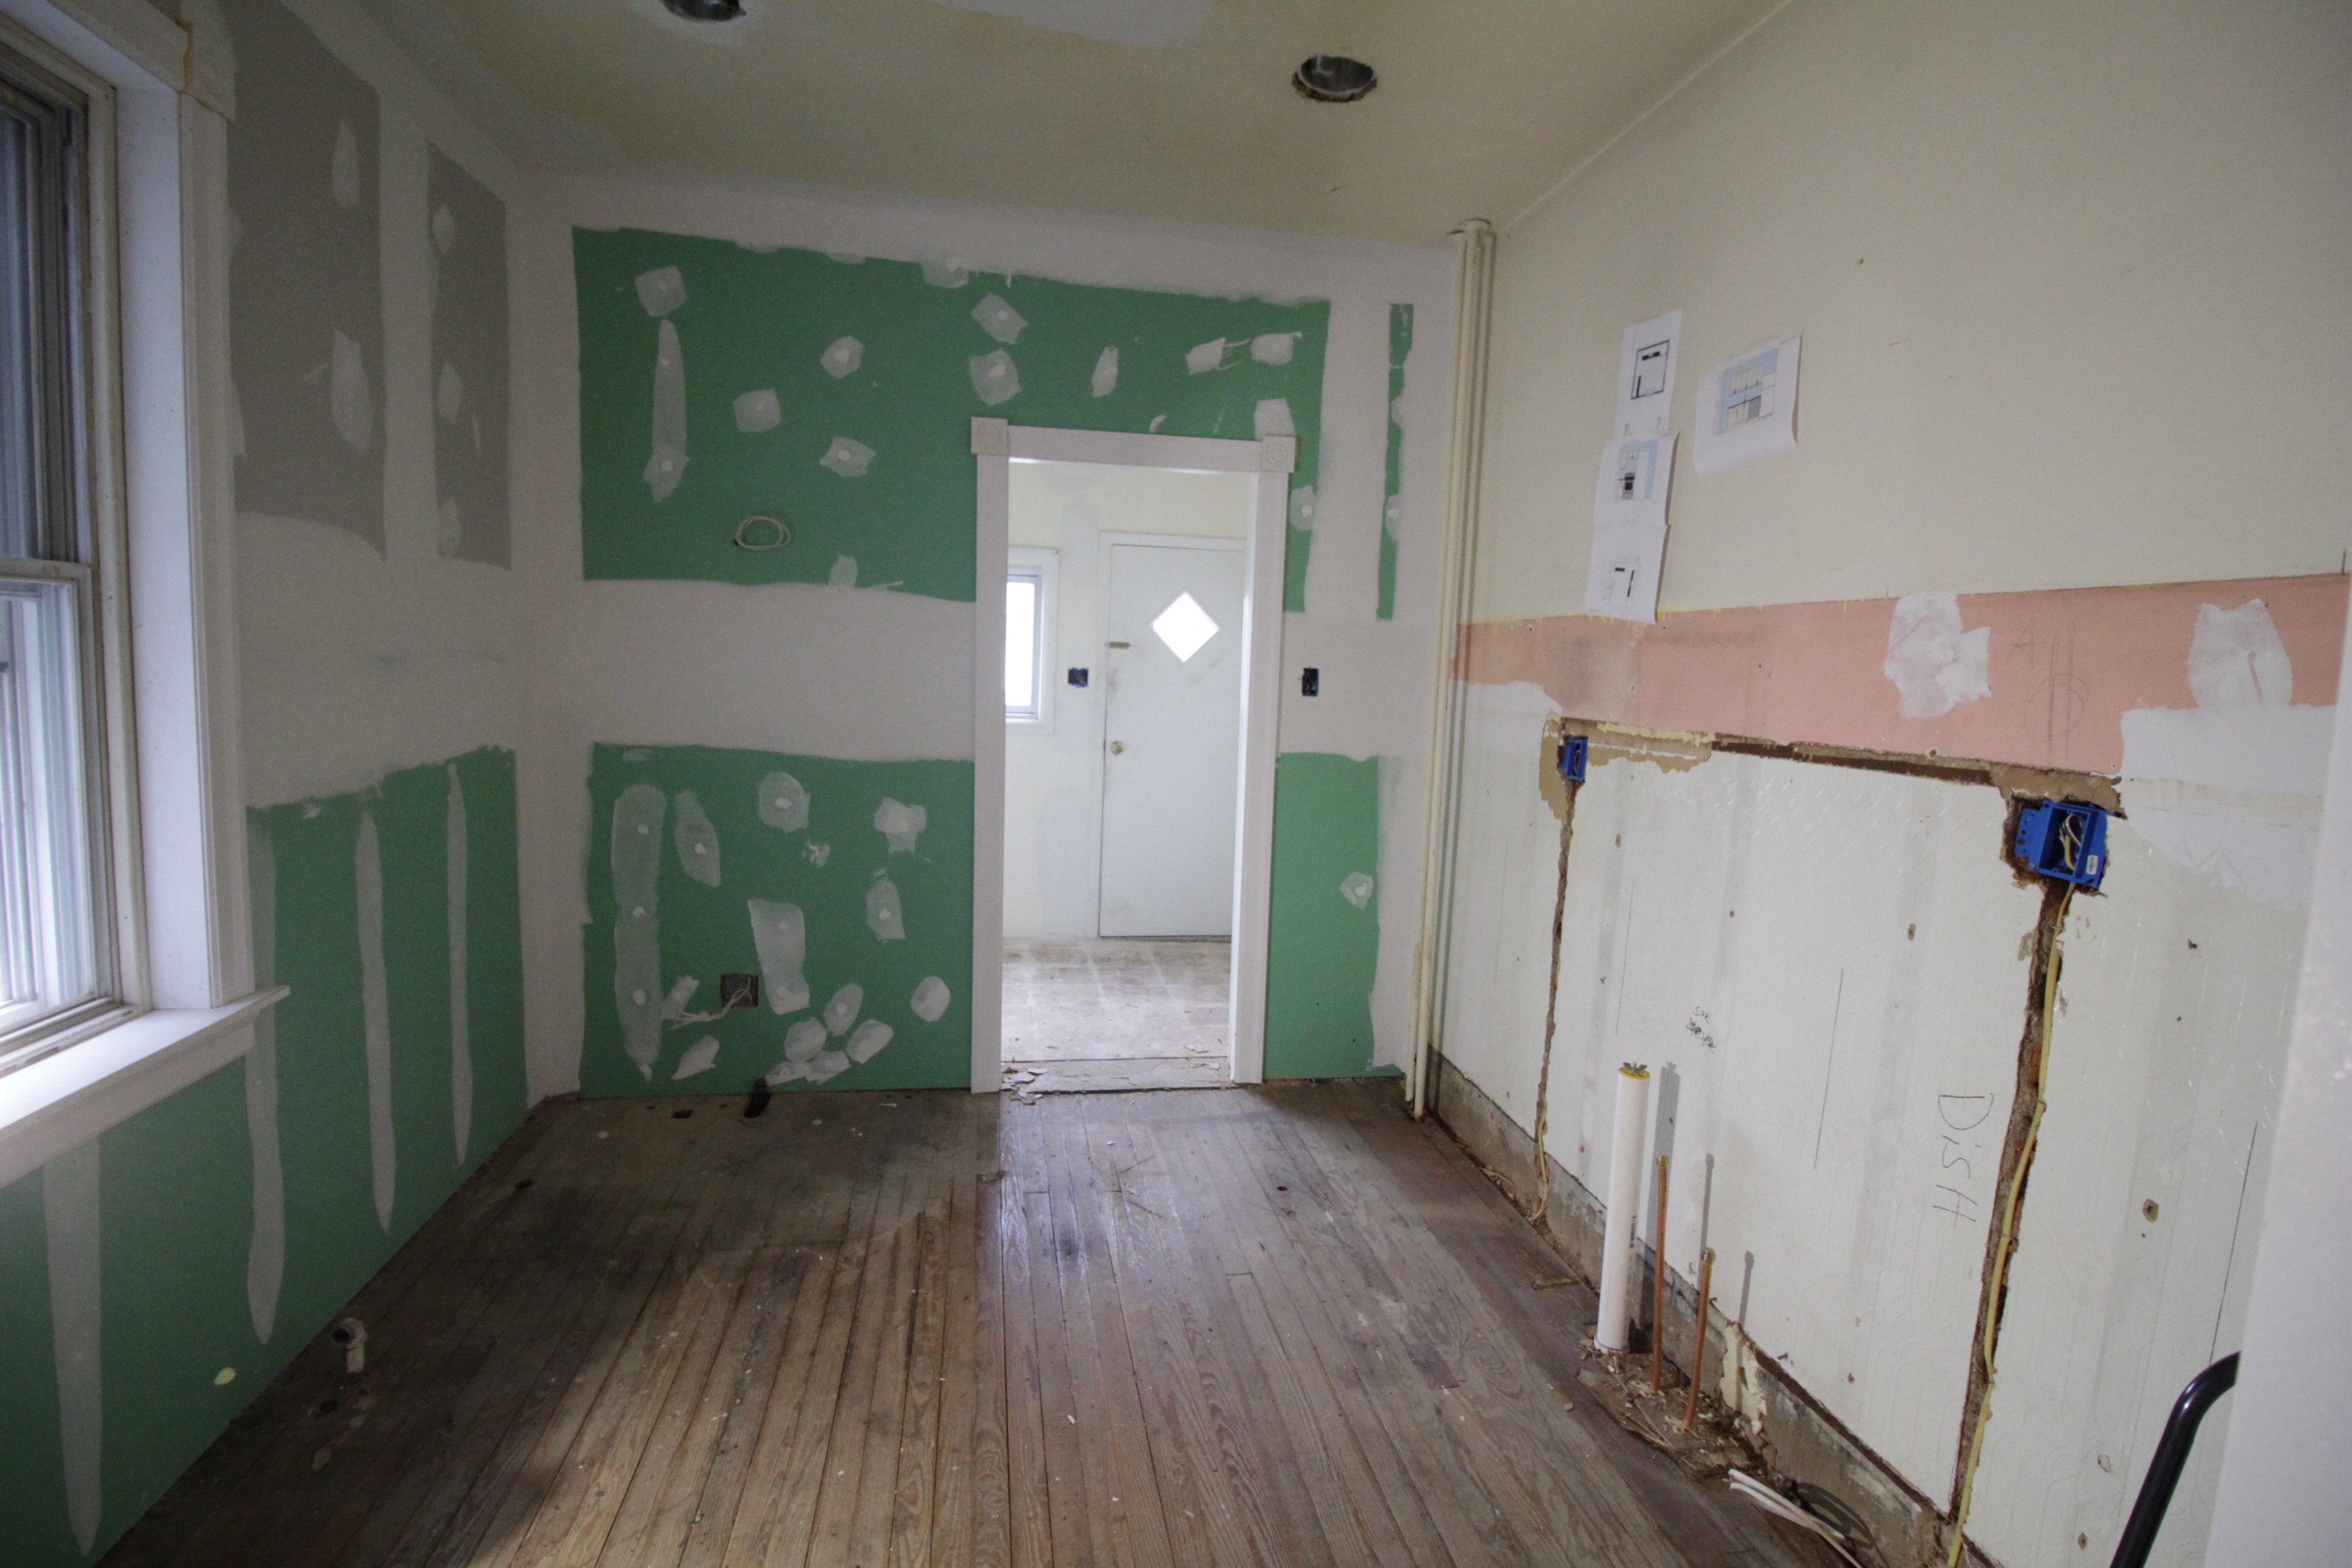
That hole above the new drywall is for the central air! We ended up hanging new sheetrock over this wall. Underneath the wood paneling it was in pretty rough shape. Before the wood paneling, which tore up the plaster with a million nails, someone had glued a faux tin textured… thing… and it wanted to take the plaster with it when it came down. Sheet rock over plaster isn’t my favorite thing in the world, but in this instance it was our best option.
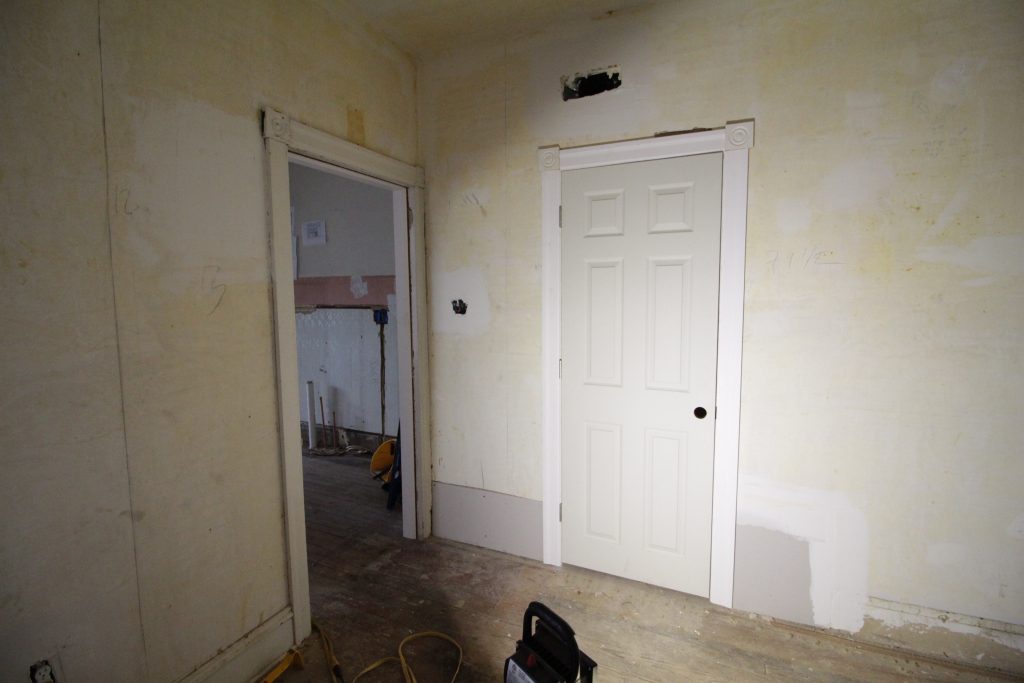
With the doorway moved we installed a new prehung door and fit it with trim to match the rest of the house. On the left is the existing doorway to the kitchen with original trim, and on the right is the new door with new trim. The wide angle camera lens I used is doing some funny things with the perspective, the door looks much wider than it really is. In reality the space between the door and doorway is wider than the door itself.
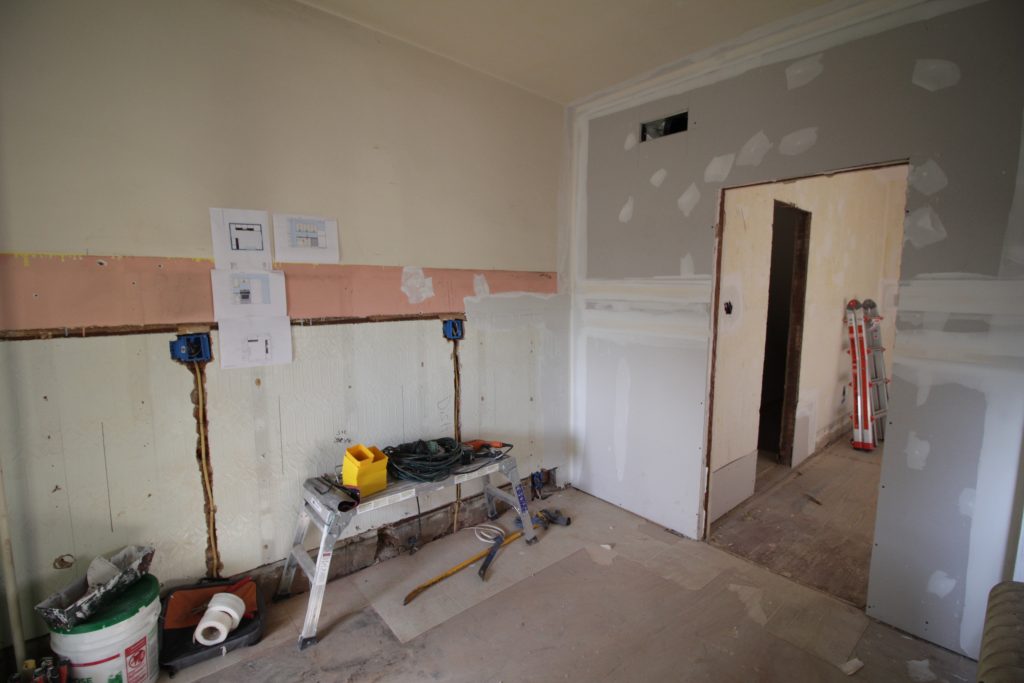
The contractors removed the cabinets and moved the utilities. I was all excited to start putting it back together. And then I started looking at the flooring, which I was going to just floor over with click-lock vinyl. Specifically I looked at the spot where the cabinets had been to figure out what I was going to do about it.
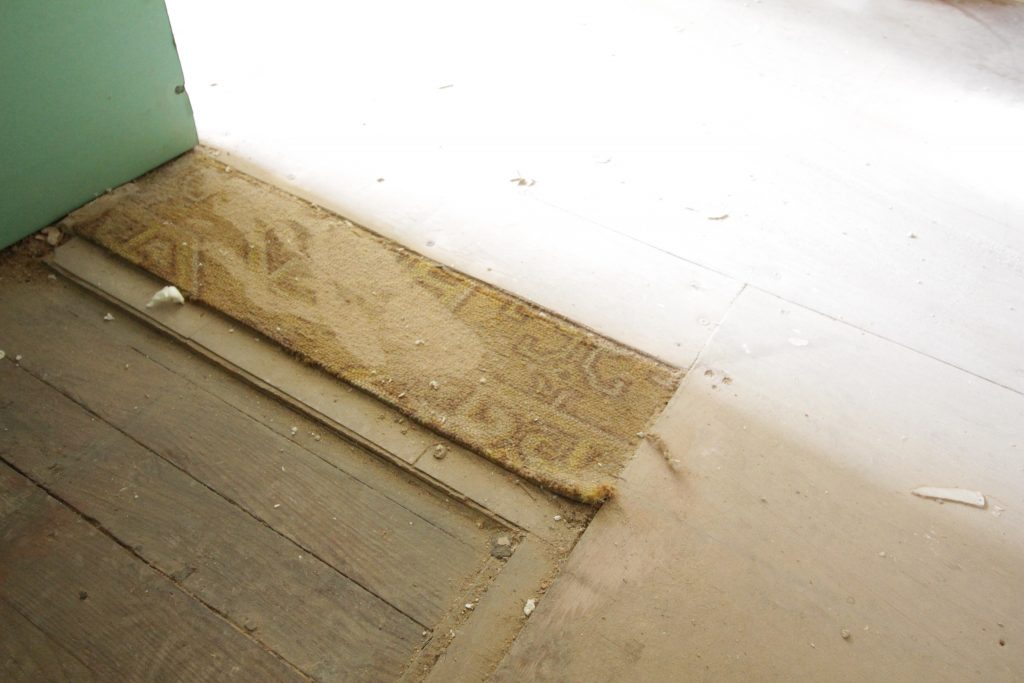
Why yes, that IS carpet. The flooring here is more than half an inch thick, and that’s after I’d peeled up the first layer. There are at least 3 layers of flooring here and they’re all rotted / falling apart. The thought of putting even more thick flooring on top of that made me a bit ill. I made a somewhat hasty decision to take it all out.

All things considered this part wasn’t too bad. It took my dad and I about 3 hours, the last of which was just removing all the *&@$# nails from the floor. The hardest part was that it’s just really dark in there. The recessed lighting isn’t working yet, and with all the rain we’ve had there wasn’t much natural light coming in. My dad brought a small work light (sitting on the window sill) which helped… unless one of us was standing in front of it. “Hey where’d the light go?” “I’m a human eclipse!”
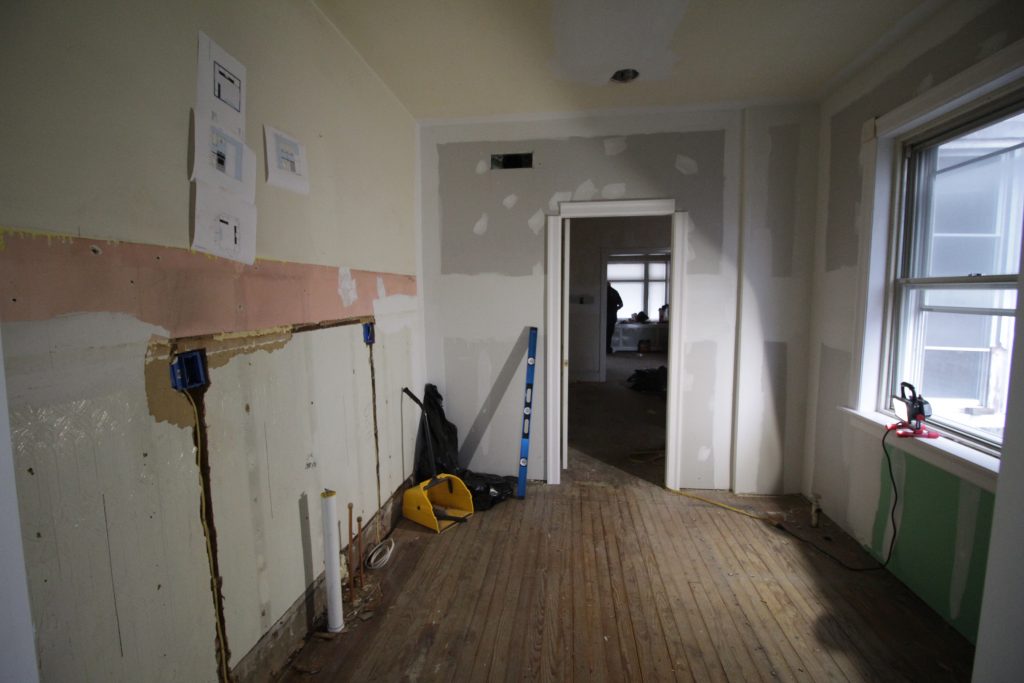
With the flooring out I think we officially have a blank slate with this kitchen. The next step is to finish and sand the walls. Then we put in the flooring and replace all the trim. Once the trim is in we can paint. Of course by “we” I really mean my contractor. I’m also having my contractor hang the mounting rails for the cabinets because the wall they’re going on is masonry and I don’t have any of the equipment needed. Then I can build and hang the cabinets myself.
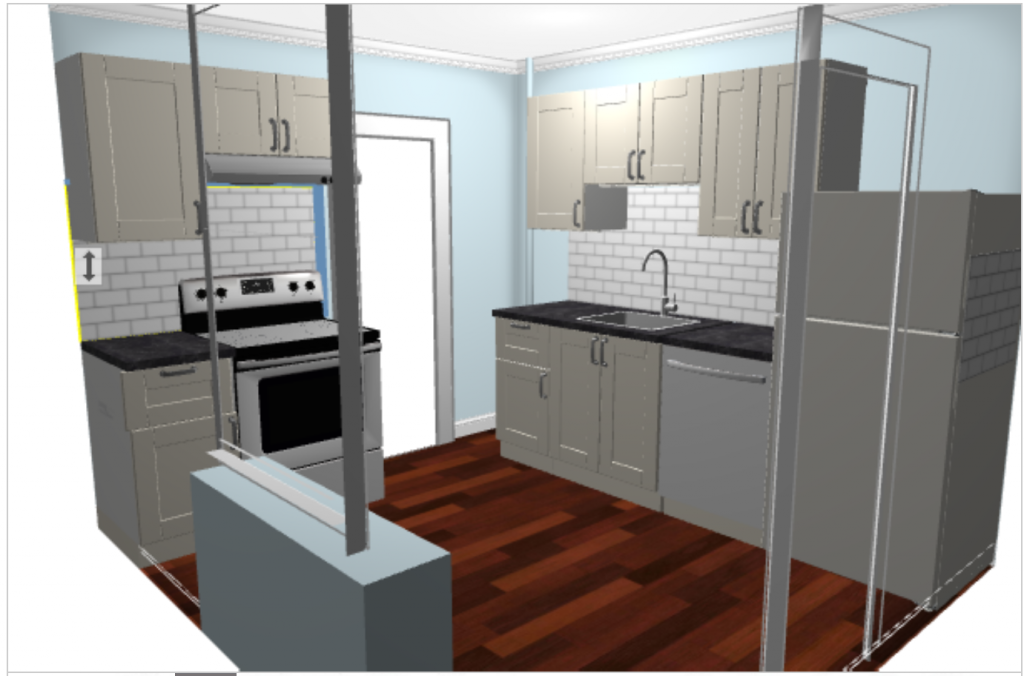
I’m using Ikea SEKTION again, because it’s affordable and since I’ve used it before it’s a known quantity. I also like that it’s modular, meaning if a tenant destroys one of the doors I can pick up a replacement locally and install it with minimal hassle.
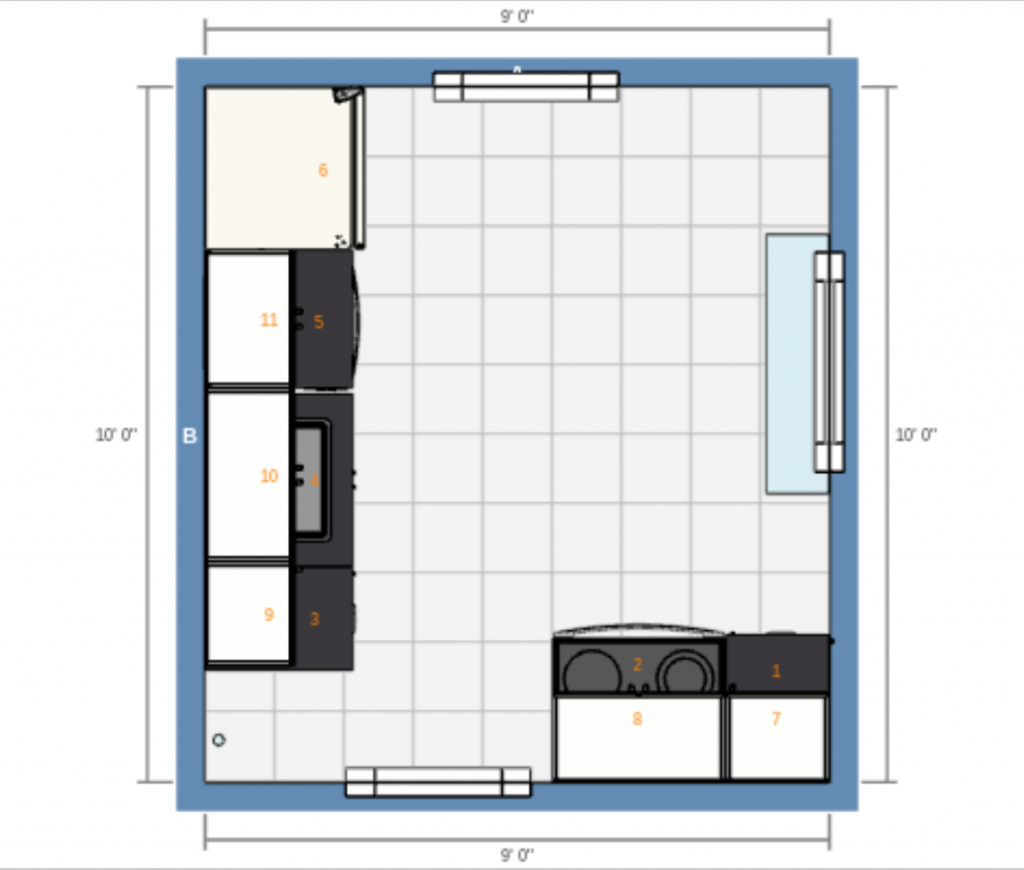
The layout isn’t perfect but I think it’s the best we’re going to do on the budget I have. Moving the radiator and resizing the window wasn’t an option for this project. The radiator pipes in the southwest corner keep me from taking the cabinets all the way into it. It’s a bit of an awkward space, but still not nearly as bad as having the range in a totally different room!
I still need to decide what I’m doing for the backsplash. The cabinets will be white and the counters I’m going with are a black and white textured granite called ‘white mist,’ which I’m hoping will be forgiving when it comes to hiding minor tenant damage. The floors will be a warm wood look vinyl plank.
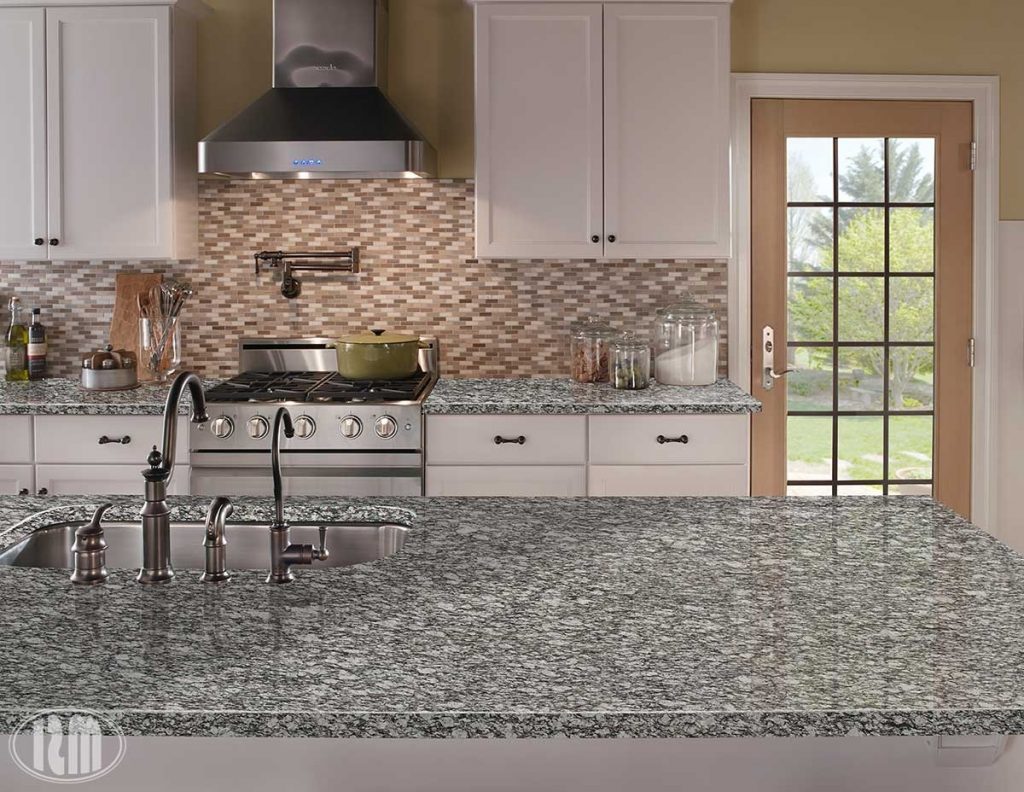
I’m trying to find an affordable tile backsplash with some color in it but I don’t want it to feel completely dated in a few years. If anyone has suggestions I’m all ears!