We’re still a week out from closing on the house, but due to the timing of the Ikea kitchen sale (now) I’m trying to line up as much as I can so we can hit the ground running and take advantage of the sale.
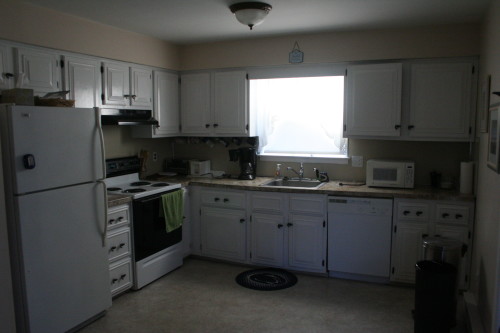
If you remember from the huge to-do list the kitchen currently looks like this:
I mean, it’s not the worst.
It actually doesn’t look too bad in this picture, but in person the cabinets are all sagging at odd angles and the counter top is some sort of faux-stone print laminate. I’ve seen much worse but for somewhere we’ll be cooking big family meals I think we can do better.
We’re going with Ikea for the new cabinets because they hit a good spot between price and quality. I know there’s much higher quality stuff you can get, but since the house is in a flood zone I’m not about to put fancy all wood custom cabinets in it. The modular sameness of Ikea is actually appealing because should the worst happen we can just replace the damaged cabinets ourselves.
I plan on installing the cabinets myself but I’m hiring a designer to do the layout. There’s a ton of important stuff to consider in a kitchen design that I’m just not familiar with. Also the more time I spend with the Ikea kitchen planning tool the more I want to scream and run away. Reviews for Ikea’s in-house planning service are a mixed bag so I’m going with a third party designer.
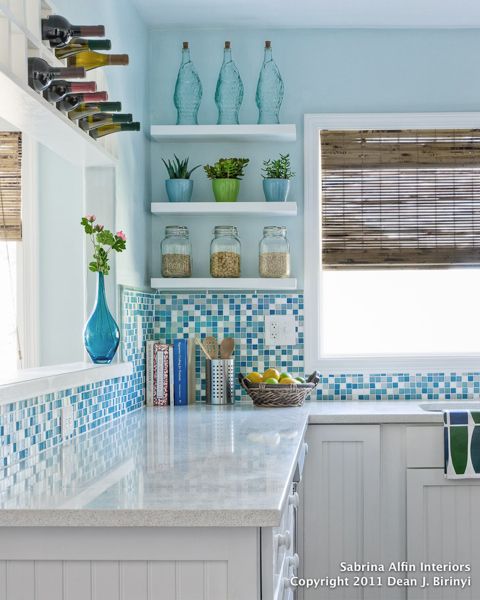
At this point I have spent a ton of time on Pinterest looking at kitchens. Here’s the general style we’re going for:
I’m not a huge fan of open shelving but I like the blue beachy look here and the tile backsplash.
For flooring I’m 90% sold on wood-look vinyl plank. I like the way wood looks but the kitchen floor extends into the laundry room and that just seems like asking for trouble. Vinyl tolerates water much better than something like Pergo and isn’t as much of a pain to install as tile. From what I’ve read 80% of the work is in the floor prep. If your floor is flat then everything is easy and it looks good for years. If your floor is not flat then it pops and warps and looks awful. I guess I’ll be spending a few weekends this summer elbow deep in leveling compound.
TrafficMaster Allure from Home Depot
Not really sure what we’ll do about appliances. I hate hate hate electric coil stoves like the one that’s there. I’m debating springing for an induction cooktop. The rest of it seems fine, if a bit old. It’s tempting to move the fridge into the laundry room to use as a beer fridge and get something a little nicer for the kitchen. This is where I start to hyperventilate with the kitchen planning. In order to plan cabinets you need to know the size of your appliances, but the cabinet layout influences the appliance choices!
My next step, after closing, is to take a million measurements of the kitchen and adjacent room (which is sort of a dining room I guess) to send to the kitchen designer. Start to finish usually takes 3 weeks for design/revisions, during which I’ll remove the existing cabinets and poke around in the walls to see if there are any nasty surprises. I told the designer I’m willing to consider moving plumbing / electrical or cutting a passthrough window into the living room, but it would be a pain in the ass. All three walls are load bearing so having anything done to them won’t be cheap or easy.
So yeah. DIY kitchen installation with professional design. I know just enough to know that I have no idea what I’m getting myself into. Friends who have been though this: TELL ME ABOUT YOUR KITCHENS!
Inspection was last week. Man, 40 year old houses sure to have a lot of shit wrong with them. This is really the first time I’ve had to deal with most of this stuff. The places I lived in college were post-civil-war era shit holes slowly collapsing into the earth, but I was renting so I didn’t care.
Aside from the usual working/parenting thing, my spring will be spent coordinating or DIYing a whole bunch of household stuff. I can’t tell you how AMAZEBALLS it will be to have access to the place next door (my in-laws’) so I can retreat to the peace and quiet of somewhere that is not a construction zone.
In some ways it feels completely ridiculous to even start listing this stuff given that we haven’t closed yet. But I’d really like to get the major stuff done in time to enjoy the house this summer. So we’re getting quotes now in order to hit the ground running at closing. We close in 3 weeks and that feels forever away but is actually super fast given that we just put the offer in at the beginning of this month. Part of me is still thinking I’m jumping the gun, all “don’t count your chickens before they hatch,” but I don’t think “bracing for what could be thousands of dollars in repairs” is the same as chicken-counting.
Hello kitchen. I can’t wait to destroy you.
First, contractor stuff. I.e. stuff I am nowhere near insane enough to even think of trying to do myself
New heat pump. We could theoretically get the old one fixed maybe, but I can’t imagine any situation in which it’s worth it to fix a 15 year old heat pump. The energy savings alone make a new more efficient one worth the money.
Exterior grading. The slope of the land is towards the house, which is kind of awful if it rains.
Engineered flood vents. These will help keep the underside of the house from rotting, which seems like a good thing.
Replacing an oversized circuit breaker. Easy but not something I want to DIY.
New countertops in the kitchen. Goodbye laminate.
Second, DIY stuff. Little things I can do myself. Or big things I can foolishly do myself.
New kitchen/laundry room floors. I want to do wood but vinyl plank is probably more practical.
New kitchen cabinets
Next, Stuff I’m on the fence about. Aka stuff I could do but don’t want to.
Painting. Painting sucks, y’all. It really really sucks.
Replacing the not-grounded outlets with GFIs. I can do this myself easily, but we might spring to actually have the outlets grounded.
Carpet cleaning. I mean I can rent a steam cleaner from the grocery store but I feel like a pro would do a better job?
Last, stuff that will have to be done in the not so distant future. This stuff isn’t on the agenda for omgrightnow, but it was all earmarked as “aging, budget for a replacement” by the inspector.
Roof replacement. Yeah, that’s gonna suck. Here’s hoping the current roof hangs on a few more years. But at this point we need to at least have someone come eyeball it once a year. I don’t want to find out the hard way when the roof fails.
Water heater replacement. Now accepting arguments for/against tankless water heaters.
We’ve got until Saturday to decide how to approach this with the seller. Obviously a lot of this stuff is “nice to have” and therefore not something we’d bring up with them. But the structural stuff, grading, and flood vents are definitely things that need to be done sooner rather than later. Fingers crossed the negotiations go OK and we can get a credit towards fixing it.
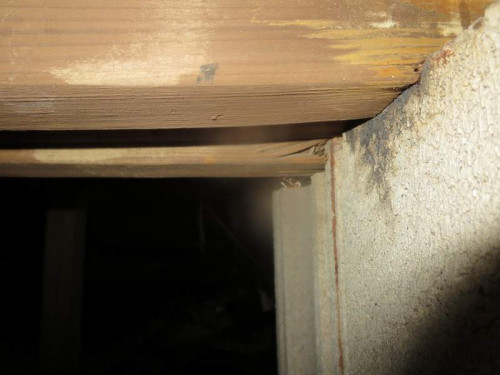
One of the things that came up during the shore house home inspection was some cracking along the foundation. Foundation cracks are not an unusual part of settling, but these were bigger than usual. About 3/8″ wide and running all the way through to the crawlspace under the house.
This crack could be nothing, or it could be bad news
We called in a structural engineer to look at it and should hear back next week.
Additionally, some support beams under the house weren’t properly footed. These beams were clearly added later to mitigate some problems (not uncommon given how old the house is and how soft the ground is on the island) but they should have been set into poured concrete footings.
Water + wood + house = bad news long term
Lastly one of the joists is rotting. This is not surprising that the house isn’t properly vented underneath. It needs to be “sistered,” wherein they add new lumber on either side of the bad spot in order to shore it up.
Here’s the rotting support beam:
Bad news bears
And here’s a diagram that shows what they do to fix it:
An illustration of some sistered joists
So yeah. While this stuff is a little terrifying now that I’ve written it all out, it’s not super uncommon for a home this old. Overall the structure is in good shape. When we get quotes back from the contractors we’ll approach the seller for a credit towards fixing this stuff. I’d probably be panicking right now except we’ve seen much, much worse.
Still, fingers crossed that everything comes back OK from the structural engineer!
Let me start by saying that I never really wanted a beach house. I’ve been in enough hurricanes that the idea of owning property near the beach is more terrifying than alluring. Super Storm Sandy ravaged the New Jersey coast in 2013, bringing flood waters near or above what FEMA defines as the “100 year flood” level. While many businesses have bounced back, condemned houses and drawn-out reconstruction efforts still dot the neighborhoods along the Jersey shore.
So naturally, that’s where we’re buying a vacation house.
Our family vacations at the Jersey shore each summer and as we’ve grown the sleeping arrangements have become increasingly cramped. On weekends we pile six adults, two toddlers, and two dogs into my father-in-law’s 1,000 square foot house. When the next door neighbor’s house came on the market last year we joked about buying. The longer it sat on the market the more we eyed it up. In January the sellers dropped the price considerably, and we decided it was time to think about it more seriously.
Won’t You Be My Neighbor
The house got through Sandy mostly unscathed, and after checking it out we decided to put in an offer. We had the inspection this week and while there’s some stuff we need to follow up on, nothing was too horrible. That said, it’s a 40 year old house. It has a bunch of stuff that’s at the end of its lifespan, including the roof. But it’s all in decent shape right now, so we can spread the costs out over the next few years.
The flood risk is a non-trivial consideration in all of this. The house is built below “base flood elevation” or BFE. BFE is the “hundred year flood” level, or the expected flood level in the “one percent chance” flood. I don’t really like the term “hundred year flood” because it falsely implies that such a flood only happens every hundred years or so. But the distribution is not necessarily even. Every year there’s a 1% chance of such a flood, regardless of what happened the year before. This means that over a 30 year period (the length of most mortgages) there’s about a 26% chance of having a “hundred year flood.” Never mind any effects climate change might have on flood / sea levels. But I digress.
I mean, it’s not the worst.
One thing I am VERY excited about with the house is the chance to put in a new kitchen. The one that’s there now is original to the house, and it’s pretty sad. A fresh coat of paint made it look tolerable for the real estate photos, but in person it is a very tired kitchen. IKEA just released a new line of cabinets sooooooooo… yeah. This is happening. I’m going to DIY as much as I can, like assembling the cabinets and putting down a wood floor, and hire professionals for things like the electrical (duh) and maybe painting (I fucking hate painting).
This is the direction I’m heading in
At this point we’re getting a few more estimates from contractors. There’s some foundation cracking that could be nothing or could be significant and we need to find out which (and get a credit from the seller if it needs fixing). I’m filling up a Pinterest board with kitchen photos, and doing boring things like getting insurance quotes, but other than that we’re just waiting for closing. If all goes to plan we’ll get the keys in mid March, get contractors in there this spring to fix the big stuff, and maaaaaaaaaaaybe have the kitchen done by summer. Maybe. We’ll see.
For the past few months I’ve been waking up in a cold sweat freaking out about things I forgot to take care of. A lot of it is little, like forgetting to schedule a hair appointment until after they’ve closed for the day. Some of it is bigger, like the Kickstarter I did a few years ago that fizzled out (more on that in another post) and a few things are huge, like the fact that I completely bungled my corporate tax filings for the last 3 years.
With some nudging from my therapist and support from my husband I finally managed to get on top of things. My to-do list has gone from “deal with 3 years of back taxes” to more mundane stuff like “clean up the dried paint in the bathroom.” I used a handful of different strategies to gain control, which I’ll detail in a sec, but the biggest key to staying motivated has been to turn it into something like an art project.
Step 1: I wrote down everything I was putting off
AKA I made a to-do list, but with some very specific guidelines.
First, everything on the list had to be something I’d been putting off for a while. None of my normal daily/weekly chores got put on there. Although I hate going to the grocery store, hunger will eventually lead me there so I don’t need to put it on my list of terrible to-dos.
Second, if it was a big task (like “unfuck my accounting”) I wrote down only the first step in the process. Whatever was on the list had to be eminently doable (if sucky). So instead of unfuck my accounting I wrote call accountant. Luckily I had the name of a good accountant already. If I hadn’t, I would have written find an accountant.
And most importantly, I limited the list to what would fit on a post-it note. I’m not rattling off every task I could possibly hope to accomplish in the next month, just the stuff I really need to get around to.
Step 2: I dedicated an hour a day to working on my list
This was my therapist’s idea and at first I balked. An hour? Where am I going to find an extra hour? And then I thought what do I even do in a day? Because I work from home, freelance, my work and my meta-work and my home life and my hobbies sometimes start to blend together. In order to find that extra hour I had to tease them apart and work more efficiently.
Once I committed myself to the hour I could no longer engage in productive procrastination to avoid my terrible tasks. I set a timer and sat down with my list. During the hour I only worked on things that appeared on that list. After a week the list was dwindling. Two weeks in I’ve cleared out everything on the original list – some of which had been there for years.
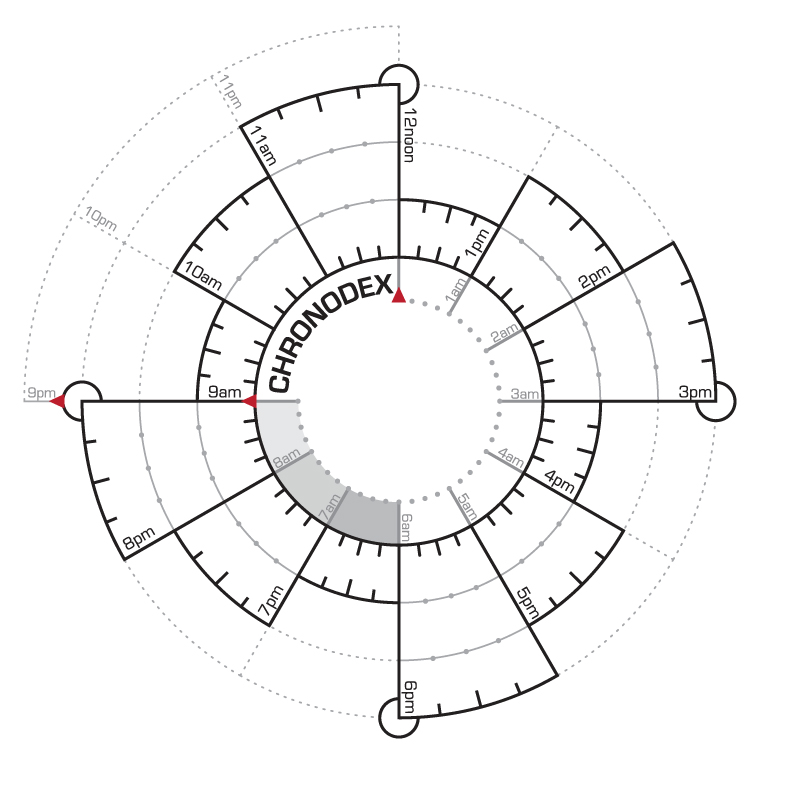
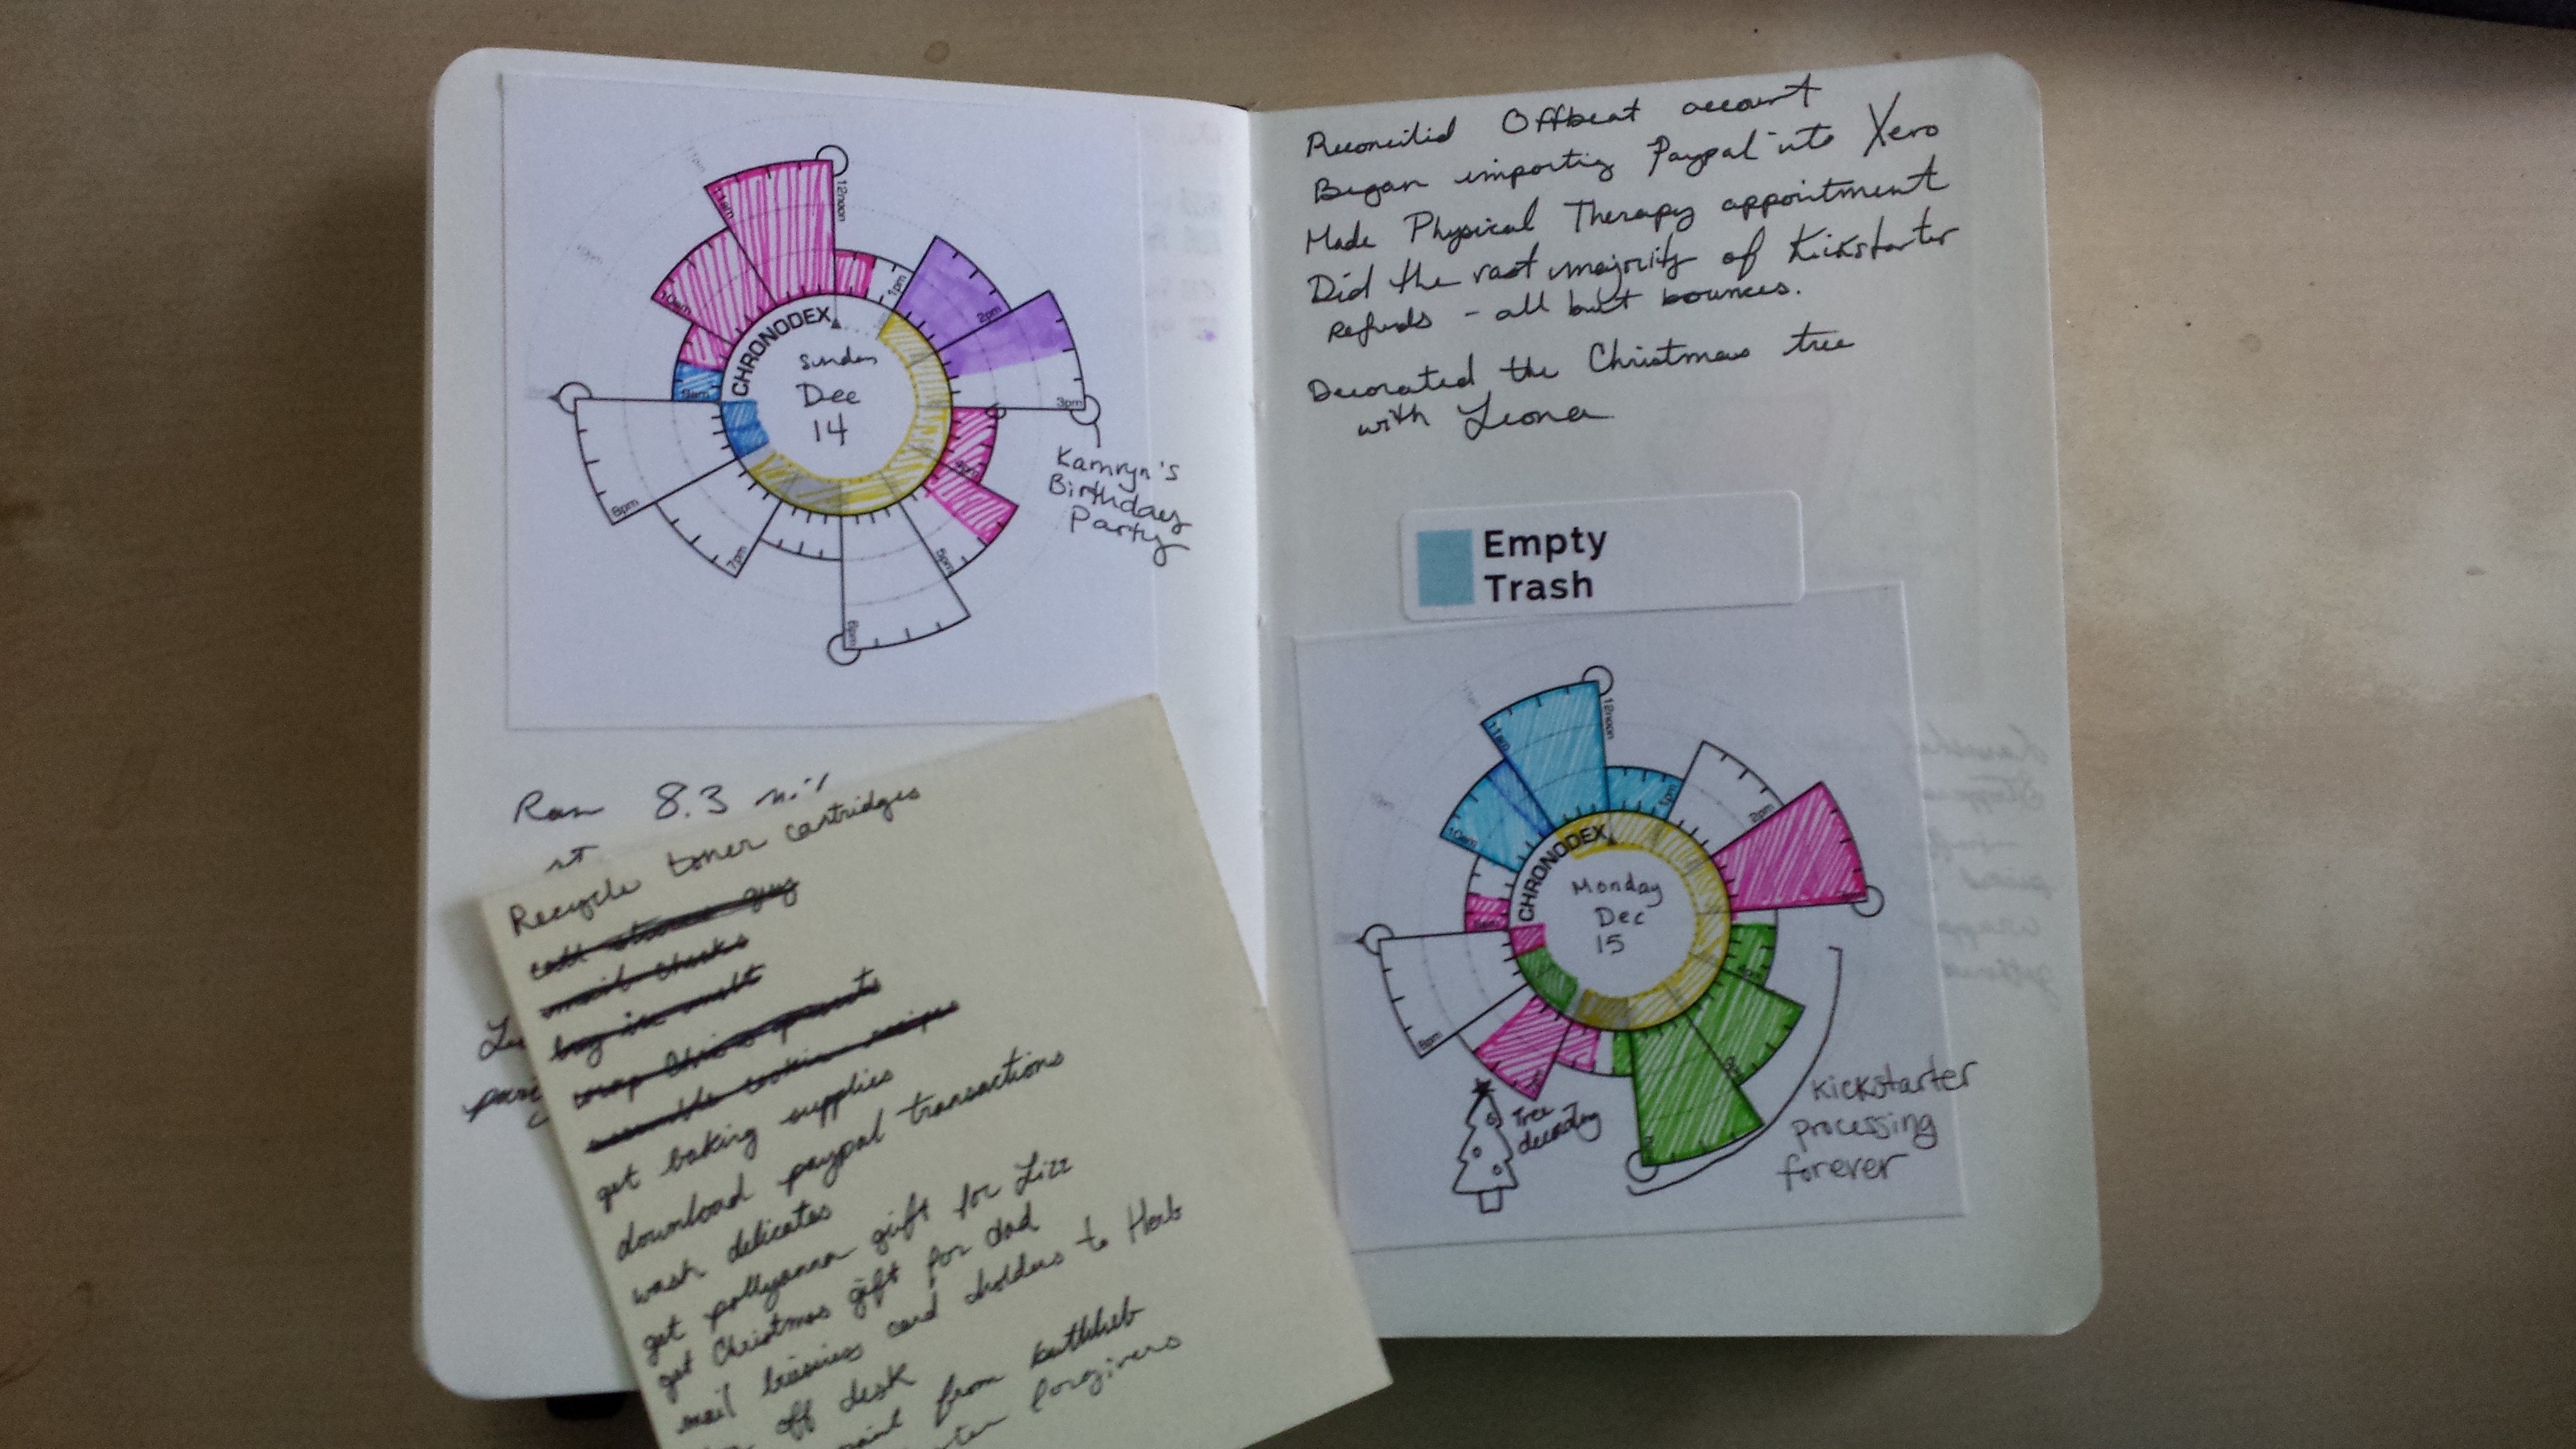
Step 3: I started logging what I was doing with Chronodex
This is where the wacky circle thing comes in.
Chronodex was designed as a paper planner. The circle represents a clock, and each wedge is an hour. The different sizes of the wedges just make it easier to differentiate them. It’s meant for folks who primarily care about 9am to 9pm, as midnight to 9am are on the interior of the circle and 9pm to midnight are sort of ghosted around the exterior. If you shade in your various appointments and responsibilities you have a nice visualization of your day.
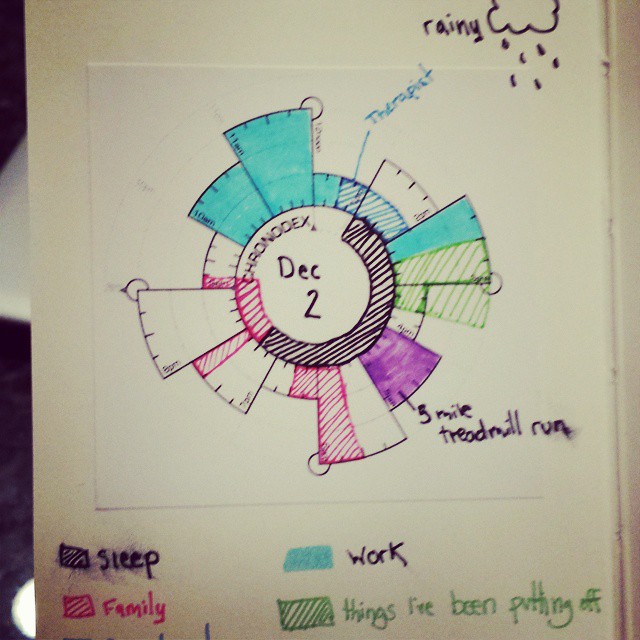
I have google calendar for appointments, but I use Chronodex to record what I’ve done in a day. Rather than print out an entire 6 months of dated pages I printed a bunch of blank Chronodex cores on sticker paper and slap one in my Moleskine notebook each day. This allows me the flexibility to take up more/less space as needed on any given day. I use different colored pens to shade in what I did: billable work, meta-work, family time, exercise, sleep, terrible to-do time.
My first day’s Chronodex. I have since given up on logging the weather despite loving to draw clouds.
If you look through the gallery of how people use Chronodex, everyone uses it a little differently. There’s no right or wrong way to shade in the wedges, that’s where the art project comes in.
Once I started accounting for my time, some really important things happened. I started to feel better about myself because I was acknowledging the things I accomplished in a day. I started thinking about my time in 15 minute blocks which has helped me focus a lot on the task at hand. I am better at stopping myself from jumping between work, home, and play because I’ve internalized that I’m “in a work block” or “in a family block.” When I take a break I take a full 15 or 30 minute break instead of just shoving food in my face while sitting at my keyboard. My reward for being productive is that I get to shade in that time on my Chronodex afterwards.
Step 4: I started having time for chores
Now that I’ve been dedicating all this time to my terrible to-dos, I don’t actually need the full daily hour to do them anymore. It’s tempting to us that time for goofing off, but instead I’ve started adding some routine chores into my schedule. This is the stuff I should be doing but often don’t and then either a) it gets gross or b) my husband takes care of it and pretends not to secretly resent what a slob I am.
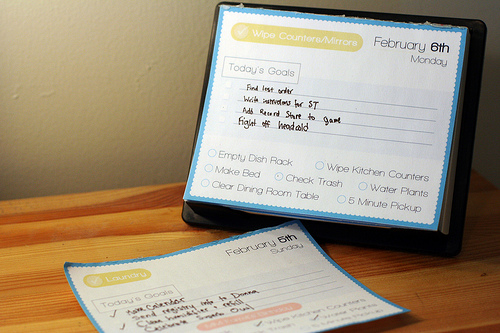
This is not the first time I have tackled chores with an overly complicated art project. Behold:
Oh yeah, I remember you now
That project served me very well. It fell by the wayside when we moved and I had a bigger house with WAY MORE THINGS that needed doing. Also I reinstalled windows and no longer have a python environment handy to generate the pages.
The biggest problem I have with a pre-printed list of chores though is that it becomes your tyrant instead of a tool. If you fall behind you have this paper trail of failure plus the question of “do I just skip those chores or is my entire day now going to be nothing but cleaning?”
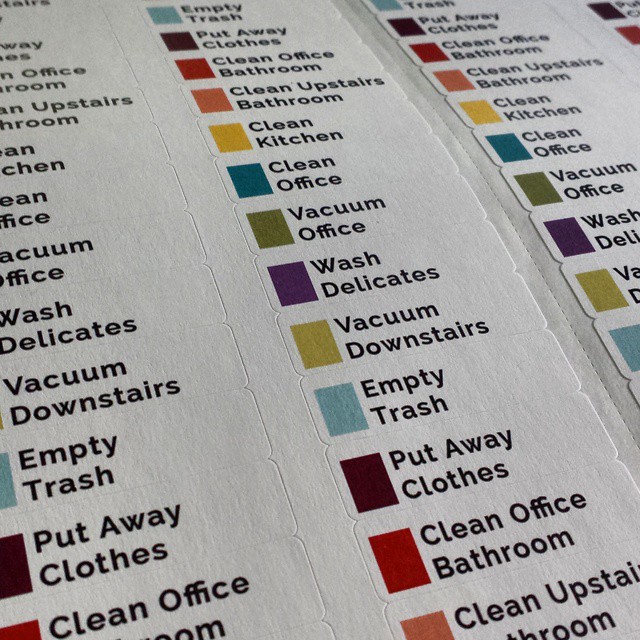
For this iteration I printed out a bunch of common chores onto some return address labels. Apparently you all have a boner for labels, because this was one of my most liked items on Facebook this week.
If there is one thing you all love it is colorful labels.
I cut them into sets of 8 or so and keep a sheet of them alongside my to-do list in my notebook (which I use as a bookmark). When I do a chore, I put that sticker on the page. The colors mean nothing; I just like colorful things. This is basically a more boring version of what you might use for a 7 year old. The stickers behave sort of like a repeating to-do list. I limit these chores to things I can do in 15 minutes or less.
Step 5: Profit
Actually I think the only people profiting here are the label companies. But I sleep better at night now that I no longer have a list of years-old to-do items hanging over my head.
My biggest takeaway from this is that I do better with accountability than expectation. Which is to say, when I plan my chores or tasks for the week out in advance I never seem to live up to the standard I’m setting. But if I hold myself accountable to what I’ve accomplished each day – regardless of what it is – I can get a lot done.
I love the flexibility stickers offer me. I can skip a day or do something different tomorrow and it’s not this weird scar in my notebook. On weekends I don’t usually need to be such a taskmaster, so unless I’ve got a lot going on I don’t bother.
And most importantly, this works because I am highly motivated by charts and graphs. Seriously. I cleaned my office bathroom yesterday expressly so I could get a sticker. I focus on work instead of checking Facebook just so I can shade that 15 minute wedge in blue. If the idea of sitting down with a pack of multicolored pens doesn’t fill you with excited anticipation, this won’t help you at all.
Speaking of pens, these are my very favorite. They don’t bleed through the pages and make a nice smooth line.
Frequently Asked Questions
Doesn’t this take kind of a while?
Yes. I spend about 15 minutes a day updating my stupid Chronodex. But I consider it time well spent because I’m actually getting things done the rest of the day instead of checking Facebook 500 times.
What about free/leisure time?
I experimented with shading in those things too after the fact and it was just too much for my taste. I like the visual effect the space has when I don’t have a scheduled task.
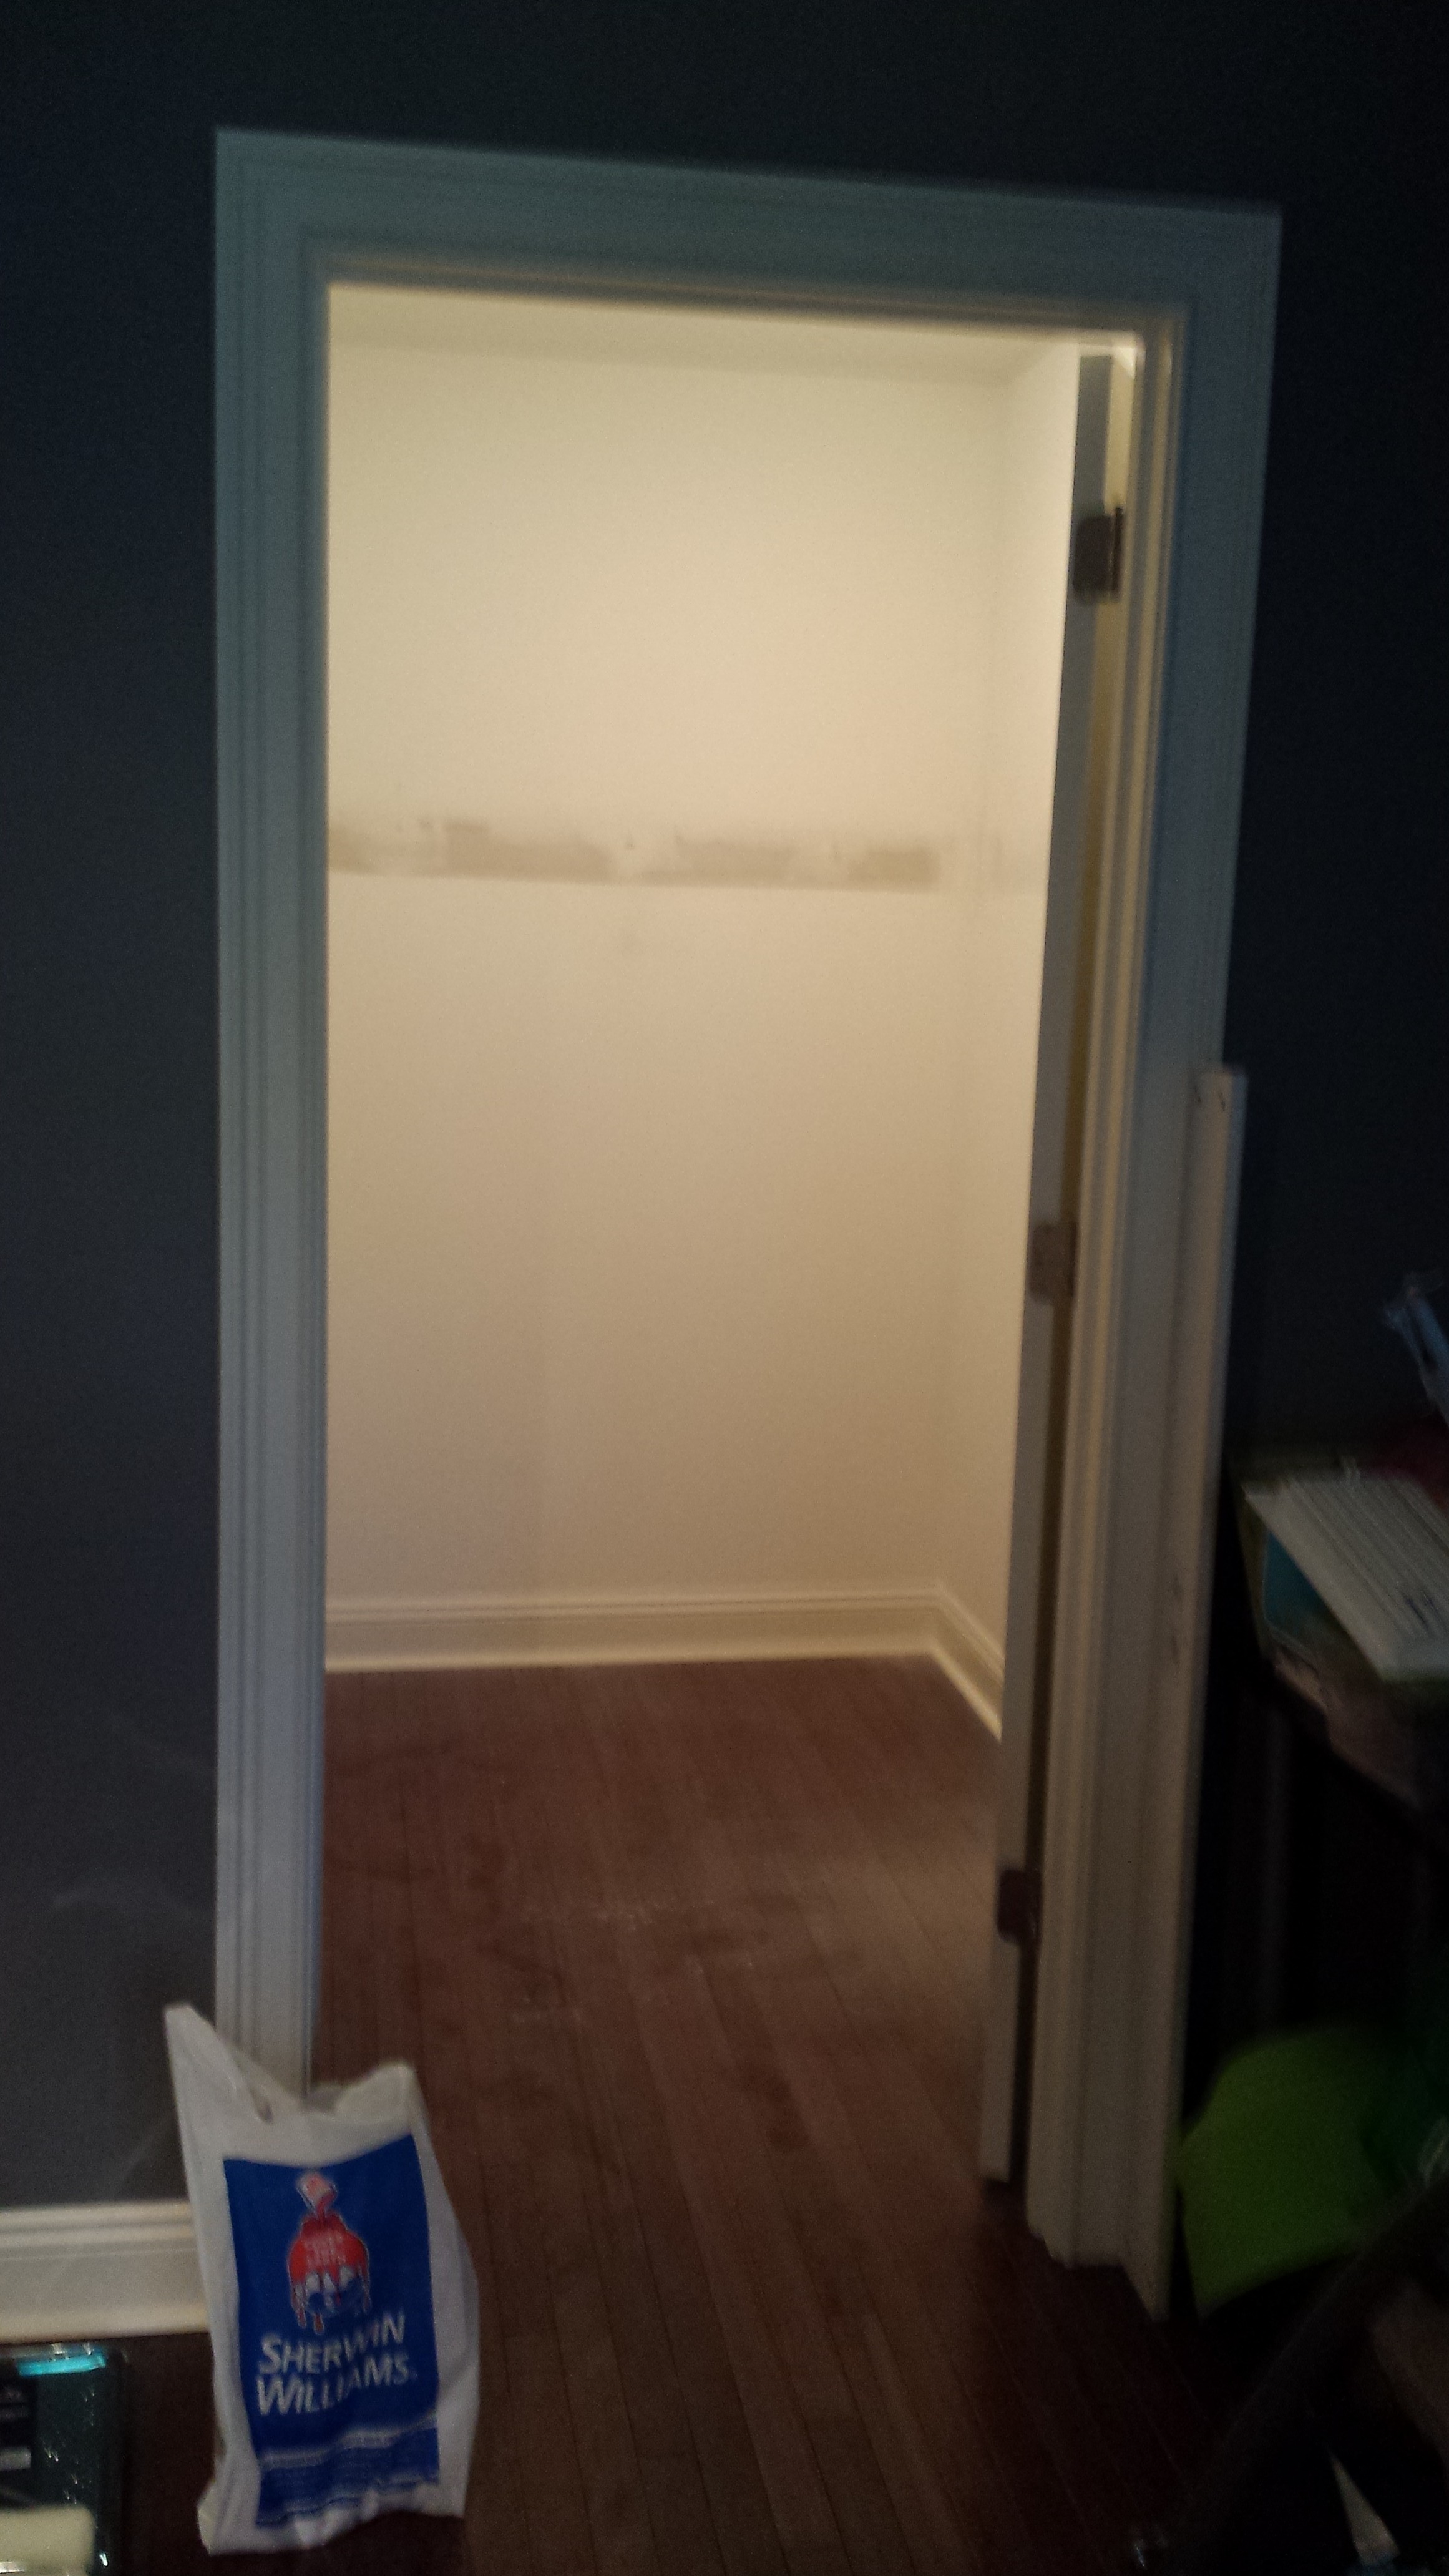
It’s my favorite time of year… time for the Container Store elfa sale. This year the closet in my daughter’s room got a makeover. Her closet consisted of hanging organizers from Ikea which were the source of much cursing due to their poor design and awkward center of balance. I have been planning this closet for months waiting for a sale. The day before the sale started I sprung into action, preparing the closet for Operation Shelving 2.0
The closet suffered many of the maladies that my office closet did, namely shelving that was glued to the walls. Thankfully this time there was a little less glue so I was able to get away with just one day of sanding/spackling. I also was a little less picky about them this time around.
Walls patched and awaiting paint
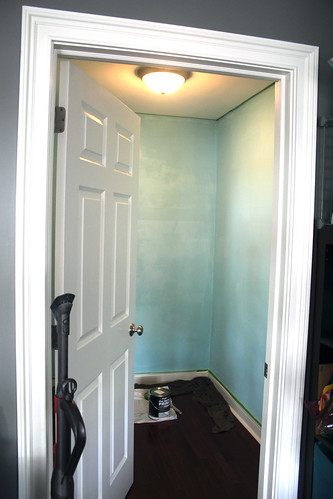
It was at this point that my daughter looked into her empty closet and said “you broke my room. Fix it.” This time I opted to just paint over the patches rather than redo the whole room. Unfortunately I managed to pick the wrong shade of white from our pile of leftover paint. I decided I didn’t care and just left it. If you notice it, you can kindly keep your mouth shut.
Walls painted. You almost can’t tell I used the wrong white!
I love the way the elfa system is organized. The whole thing comes in these nice organized bags. The little one has all the mounting hardware, the big one has various smaller elements for the closet and a separate side pocket containing customized instructions for installing the whole thing.
It’s like Christmas for closets
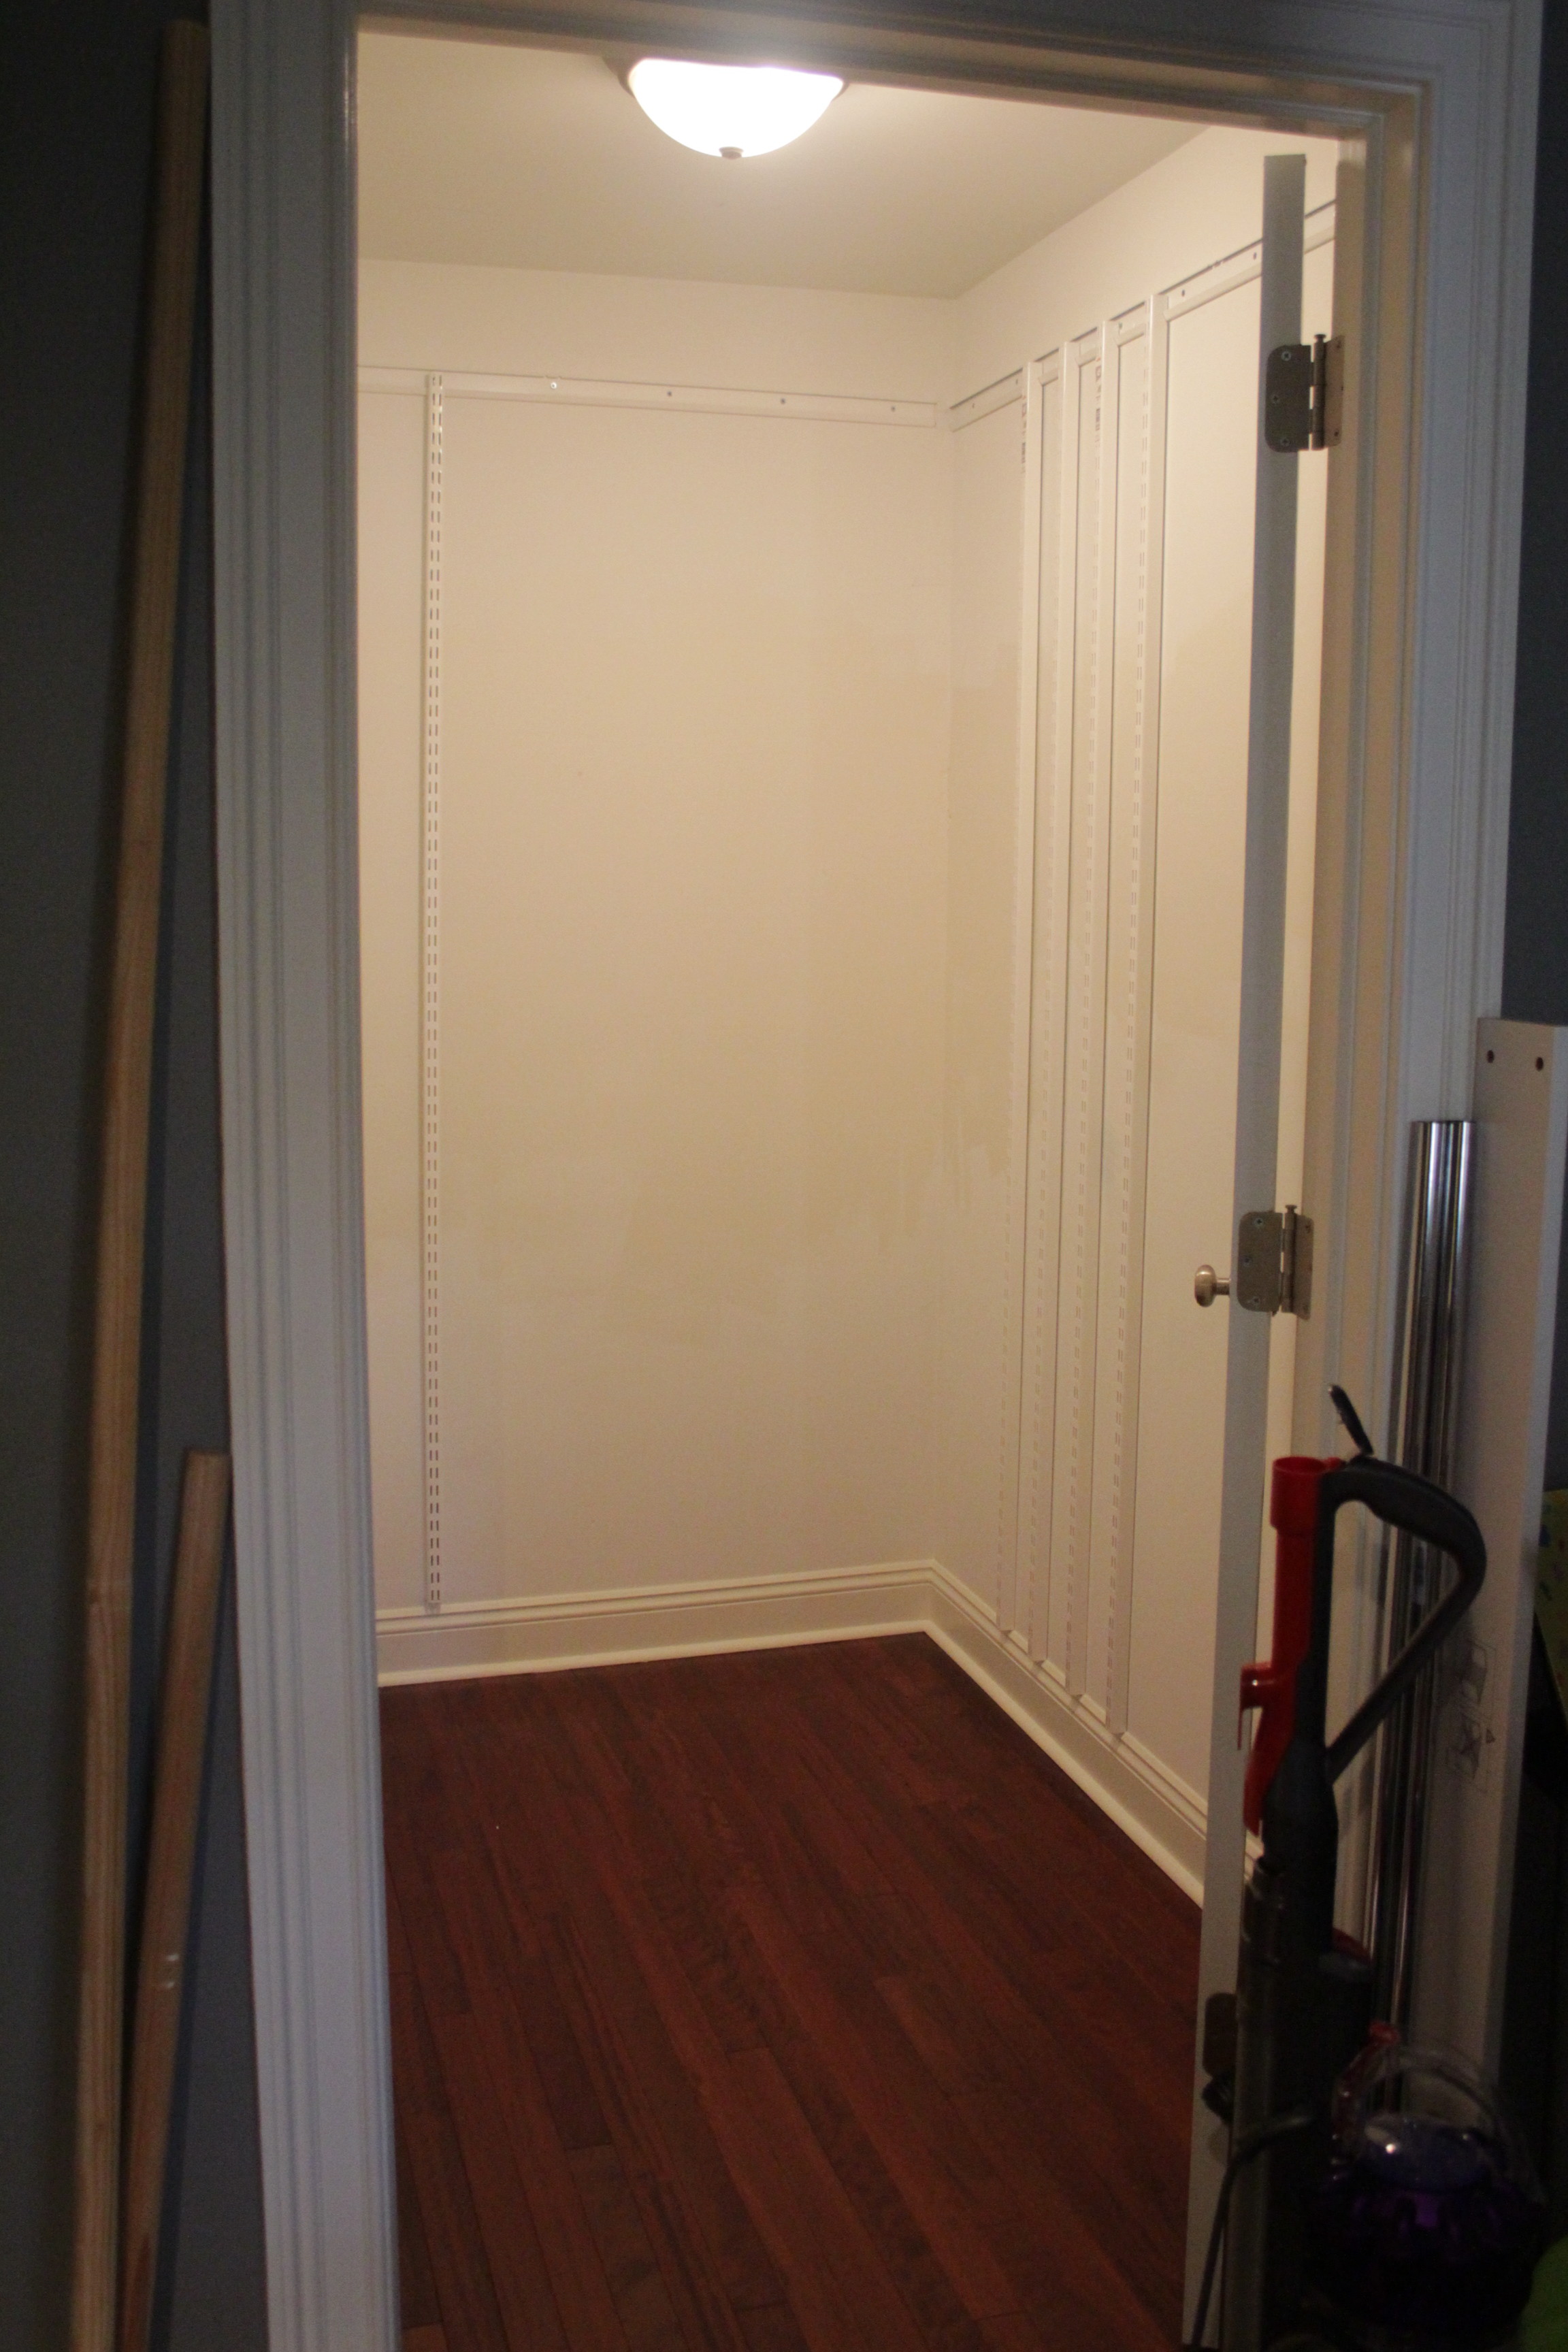
Feeling like an elfa pro after doing my office closet, I happily set to work on the toddler closet. Unfortunately I got a little too confident, and did not measure the height for the top tracks correctly. As a result the hanging standards (vertical bits) overlapped my baseboard molding by about half an inch. Tragedy. I spent a couple hours cursing myself, wringing my hands, and contemplating my two options: rip out the top track (drywall studs and all) and reinstall it higher up, or cut an inch off the bottom of the vertical standards. Since I lack the tools to cut them myself option 2 required a trip out to the suburbs to have them cut. Both options sort of sucked.
After a quick phone call to The Container Store I went with option 2. Thank you to the staff at the Container Store in King of Prussia, who cut the standards for free (despite it being my mistake) and had me in and out of the store in about 10 minutes. I managed to get the standards installed just in time for toddler bedtime.
Day 3 of Operation Closet was spent putting up the shelving and deciding on the spacing I wanted. For this closet I splurged on some of the “nice to have” finishing touches like bracket covers and shelf fascia. Stuff that’s not functional but makes the closet look nice. I didn’t bother with those for my own closet, but they do make things look cleaner and nicer.
As I put everything back in the closet I started culling stuff that was too small. I am a bit ashamed to admit that some of the stuff hanging up had been in the 9-12 month sizes (she’s two and a half now). When all was said and done she had about half as many hanging clothes and an entire additional storage bin full of too small stuff.
See the nice wood fronts on the shelves?
Drawers!
Hanging space!
Since the door blocks this part (thanks, builders) we’re storing outgrown clothes and baby stuff here
So now the toddler’s room is “fixed” and I can now easily find socks that fit her. So ends another fruitful elfa sale. Look out, master bedroom closet. You’re next.
I was browsing Pinterest for work (yes that is an actual thing) and saw a pin on how to whiten your pillows. It links to a “magic whitening formula,” most of which is probably just OH MY GOD DID EVERYONE ELSE KNOW PILLOWS WERE WASHABLE?
Somewhat skeptical, I went to the Closet of Old Gross Pillows (aka the guest closet) and read the tags. Lo and behold, they all say they’re machine washable. By George, I’ll try it!
Since I have a high efficiency front loader, the recipe in the article won’t work for me. But with a little improvising I came up with something that worked really well.
1 tbsp powdered laundry detergent
1 tbsp borax
1 tbsp dish detergent
bleach to the “max” line in my machine’s bleach dispenser
For the love of god, defer to the instructions on your machine if you decide to try this. I use a very low-suds detergent, and did not have any issues in my machine, but please use common sense and err on the side of caution.
My machine has a pretty good soak setting, but for the grosser pillows I stopped it during the rinse cycle and ran them through again. Then I chucked them in the dryer. Martha says to make some felted dryer balls to fluff them up, but aint nobody got time for that. They dried just fine on their own.
So how’d they come out?
When I pulled them out of the dryer I thought “meh, they still look kinda dingy.” And then I set them down next to the ones that hadn’t been washed yet.
Prior to washing, the left and right pillows were the same color. Gross!
I think most of the credit goes to simply washing the pillows, rather than the “magic” whitening solution, but I’m happy either way.
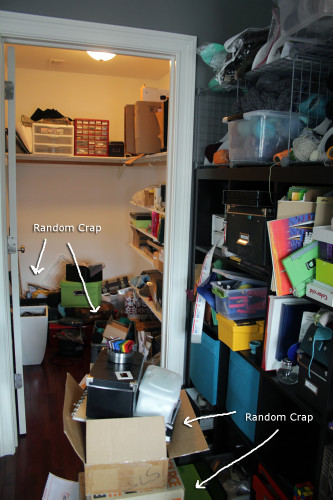
The shelving is up (pictures forthcoming), and I’m now replacing the contents of the closet. For the most part it was easy; the huge pile of stuff has dwindled to just a few errant boxes of flotsam and jetsam. But this last little bit is taking forever. Almost like zeno’s paradox, each box I sort through seems to take twice as long as the last.
Behold: boxes of junk. Junk I suddenly desperately need.
Some of these boxes haven’t been touched since I moved in. After the exhaustion of moving, I punted on the boxes labeled “random crap” and shoved them in the closet “for later.” More than a year after moving, it is taking all of my willpower not to do the same now. In fact, I’m pretty sure there’s one box that hasn’t been touched since I moved out of my apartment in Brooklyn, long before RD and I got married.
Going through each box is exhausting. Each one contains various relics I’ve completely forgotten about until the moment I open it; at which point I can’t imagine parting with. Some things are easy: old bank statements can safely be shredded and discarded now that the information is available online. Others are tougher: college artwork (some good, some not so good), trinkets given to me by good friends, and various objects that might be useful someday.
Triage on this stuff takes a lot out of me. I part with a lot of small items, rationalizing with myself that although this pin / pencil / whatever meant a lot to me at age 15, it’s just a piece of plastic crap now. The friendship it symbolizes is the enduring thing I should keep. As a result, I’m unable to part with the items from friends I’ve lost touch with. It goes in a bankers box marked “memorabilia,” full of old papers and photos that I plan to scan into the computer “someday.”
Some of it is neat, and doesn’t take up much room, but I’ve got no idea where to put it. Included in this are MRI photos of my brain and neck; the former from a medical study I participated when I was unemployed, the latter from a neck injury sustained while washing my hair. During the brain scan, the MRI tech complimented me on how still I held my head, and asked if I would be willing to participate in other studies. I got my head scanned a bunch that year.
I’ve whittled it down to two bags full of papers “to be filed,” a stack of papers I’ve already sorted but have no idea where to file, and one 8 x 10 box of “random crap” still to contend with. With each trash bag I fear I’m throwing out something I desperately need. Something I’ll curse myself looking for down the line. But given how long I’ve managed to live without while it languished in a box, I suppose that’s pretty unlikely.
I’ve got the first coat of primer on the closet wall. It’s tinted to match the paint. I’ll let it dry for the rest of the afternoon, and possibly overnight since I have plans this evening.
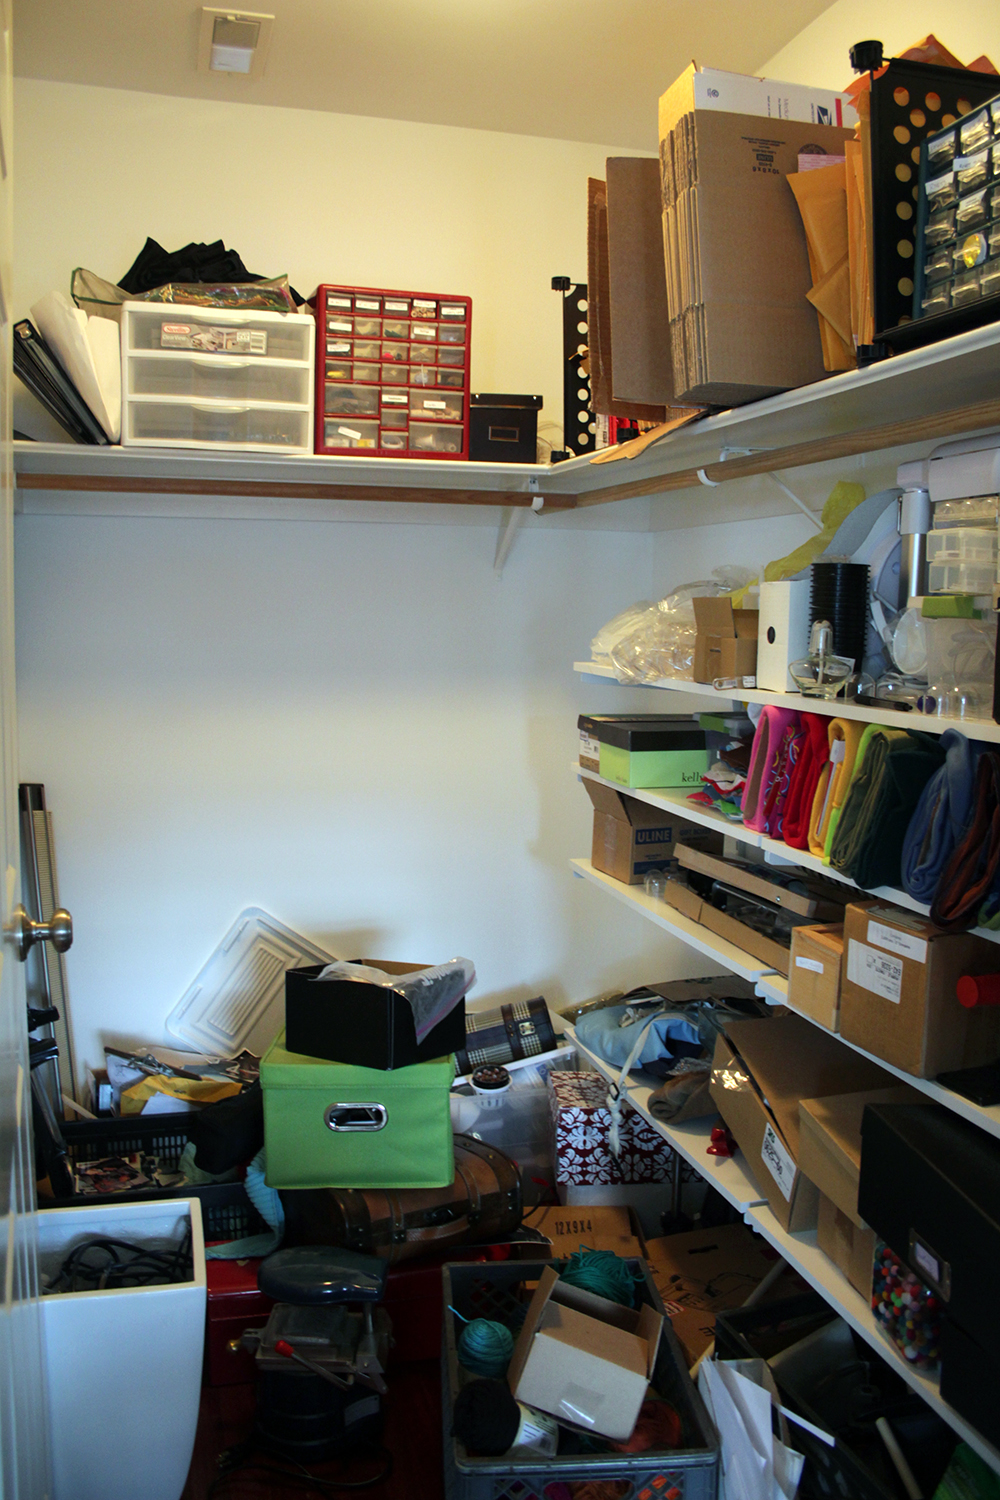
So, before I ripped out huge chunks of drywall from my closet, I did a lot of planning. Ultimately I would like all the things to fit inside my closet, so I can get rid of the huge Ikea bookcase in here. And for that to happen I needed serious shelving. Floor to ceiling, fit-to-my-belongings shelving.
Dear god why do I own all this?
The Container Store’s Elfa is the gold standard in modular shelving, and it’s gotten a lot better looking over the years. Elfa is a standards and brackets system with a mind boggling array of shelves accessories. It’s well made and has stayed fairly consistent over the years – the cart I got freshman year of college is still compatible with what they’re selling now.
The downside of Elfa is the price. Most of the kits on the Container Store website are north of $1000. Ikea, Rubbermaid, and ClosetMaid all offer similar systems. So I sat down and priced them all out (except ClosetMaid which had mostly negative reviews).
Top view of my closet, sort of to scale
I knew I wanted shelves along the back and side wall. Because the door swings in, I decided to leave that wall empty save for maybe a few coat hooks. I tried to price out designs that were as close to identical as possible, so I went for 5 rows of shelving all the way around in an L shape.
Elfa was by far the easiest, because they offer free design planning. I called them up and spent about 20 minutes going over my options with their rep. You can see the designs online as you’re working on them, and when you’re done you get a full parts list and instructions. You can also buy the whole kit with one click. Total quoted price: $950. Ouch.
The option I liked most from The Container store, with white melamine shelves.
With Elfa as the high water mark I moved on to Rubbermaid HomeFree. Rubbermaid provides an online design planner, but I found it irritating to use and ended up just doing it by hand. The HomeFree system features parts that overlap to fit your space, rather than having to get them cut to size. Unfortunately the shelves are only available in 12″ deep, which is shallower than what I need for my stuff. It came in the cheapest at $475, but ultimately wasn’t the solution I needed.
Next I priced out Rubbermaid FastTrack. FastTrack is a much more industrial looking solution, with all wire shelves. You can cut the shelving yourself with a bolt cutter, or have it cut for you in the store. A layout very similar to the Elfa layout (but with wire shelves) came out to $650.
From there I went back to look at the Elfa configuration. I really like how extensible it is. I’m not entirely sure what my storage needs are, so the rep helped me design my system so that it would be easy to add drawers later if I decided I needed them. Most of the individual components seemed about the same price as Rubbermaid’s, why was it so much more expensive? I pulled up the parts list and compared.
It turns out, the Elfa shelves include a lot of “vanity” parts to help things look nicer. Bracket covers, rail covers, etc. Things that help class up the setup but aren’t needed for structural integrity. By dumping all those parts I got the price down to about $800. With a 25% coupon I found online, it came down to $600.
It’s still a lot of money to spend on a closet. I’d love to get the drawers now, but at $65 each for the drawer, gliders, and brackets it’ll have to wait. In the mean time, some extra shelves will go into the ‘someday’ spot for the drawers.
In all honesty, even if I’d paid full price for the Elfa, the design service makes it worth the extra $150. I’ve spent the better part of a week planning, pricing, and trying to negotiate the various shelving systems. The phone call with the Elfa designer was so painless I’d do it again in a heartbeat. Of course, we’ll see if I’m still singing their praises after I install the damned stuff.
“Organize my office closet” has been on my to-do list for a long time. This week was the week.
Not shown: piles of boxes outside the closet
I have some cheap Ikea standards and brackets (on the right) which absolutely had to go. They wobble and are a pain to deal with. And I needed shelving on the back. And the wrap-around top shelf and clothing rod weren’t helping matters.
The Ikea stuff came out easily enough (save for the drywall anchors… ugh). But the wrap around shelf was another story. It turned out it had been nailed in all the way around. And there were many coats of paint on the shelves so the nails were near impossible to find, let alone dig out. So I got out a prybar and started pulling the stuff down.
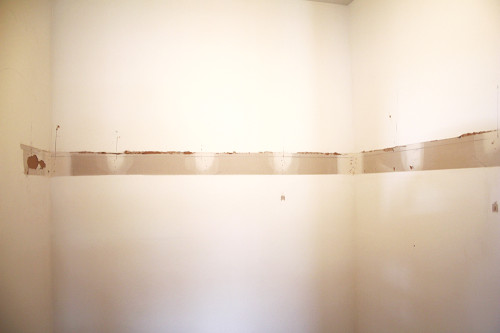
At one point, with a sickening ripping sound, it became clear that some of the drywall was coming along for the ride. It turns out not only was the shelving nailed to itself and the wall, it was also caulked and glued in place. And so a great deal of drywall came down with it. The horizontal stripe below is the totally unpainted drywall, with a scar on the left and all along the top from the caulking.
Please excuse the bad lighting in my closet.
To make things more awesome, all this caulking, nailing, and gluing had been done on unsealed drywall so there was absolutely nothing to keep it from taking giant chunks out of my wall.
Well that sucks.
I got a self-adhesive mesh patch to go over the worst spot (shown above) and a big tub of joint compound. The first coat is drying now. In all honesty I’m not being a perfectionist about it – it’s a closet. I used a 8″ wide putty knife to smooth the edges of the layers, and only plan on sanding after the final layer. Most of the closet should be OK with two, except for the huge gash which will need at least 3.
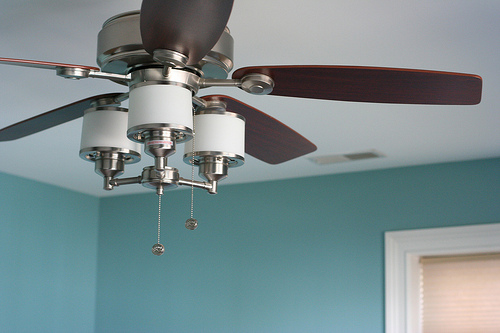
I hadn’t originally intended to paint the closet, because it’s a closet, but now I’ve got to prime and paint at least the patches. And it’s a small enough room that I can probably handle painting the whole thing. And while I’m at it, I’ll change the color to something nice, like the blue we used in the guest room:


 This was my therapist’s idea and at first I balked. An hour? Where am I going to find an extra hour? And then I thought what do I even do in a day? Because I work from home, freelance, my work and my meta-work and my home life and my hobbies sometimes start to blend together. In order to find that extra hour I had to tease them apart and work more efficiently.