We’re filling the shore house with family for Labor Day weekend and it’s finally starting to look like a house! We still have to do a massive cleaning, and a huge trip to the recycling center, but things are starting to come together. I know I say that a lot but it’s really true this time!
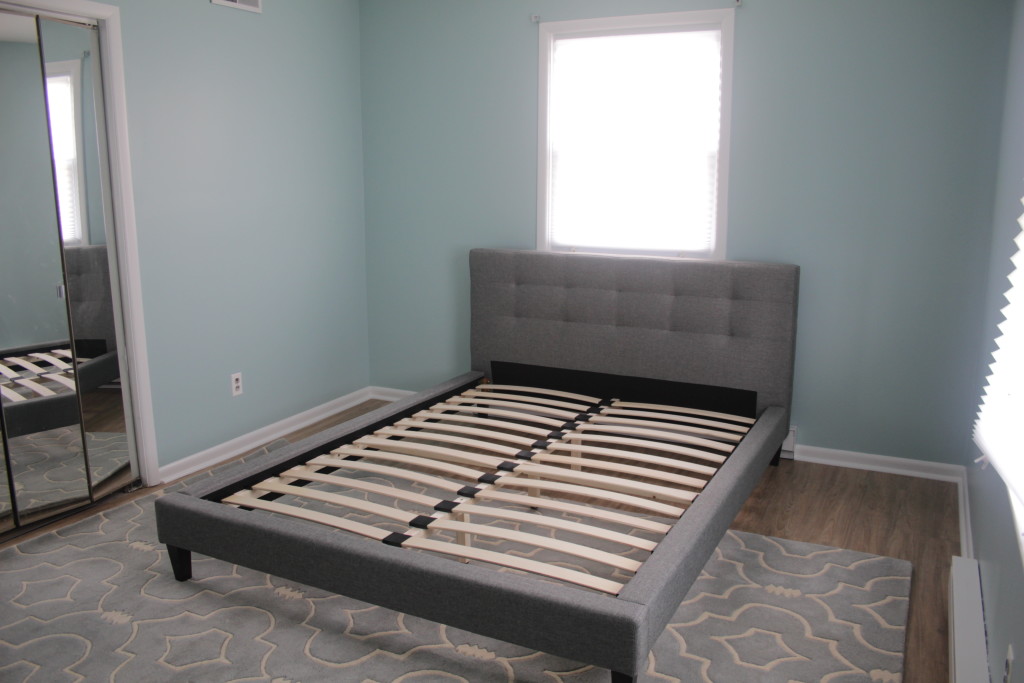
Master Bedroom
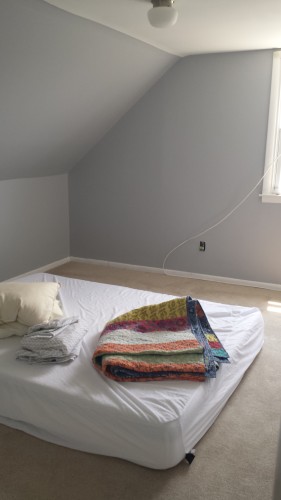
The master bedroom is looking good. I’m not keeping the mirrored closet doors forever, but there’s a bed! And a carpet! I still need to get curtains, and I’m running into some decision fatigue. There’s so much blue in the room (both the rug and bed have a slight blue tint to them) that I’m thinking beige. Boring old beige.
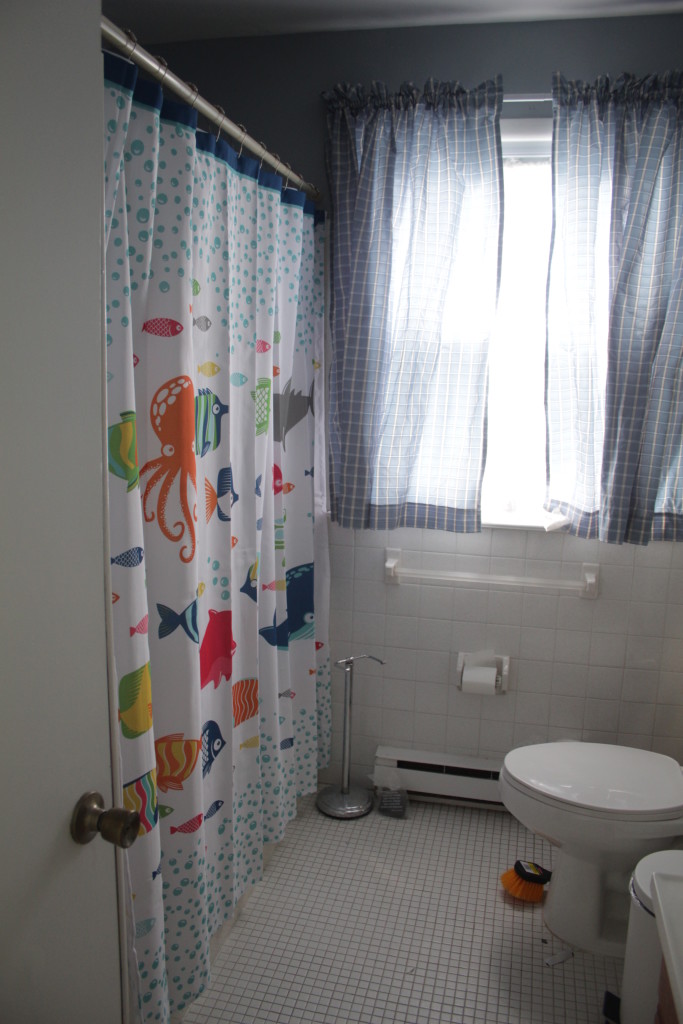
Shower is ready to use!
The bathroom still needs a thorough cleaning, but the shower has been re-coated and re-caulked and we got a festive new shower curtain from Target. The last step in here is to replace the shower head with the hand shower we got, but it’s totally a usable shower right now!
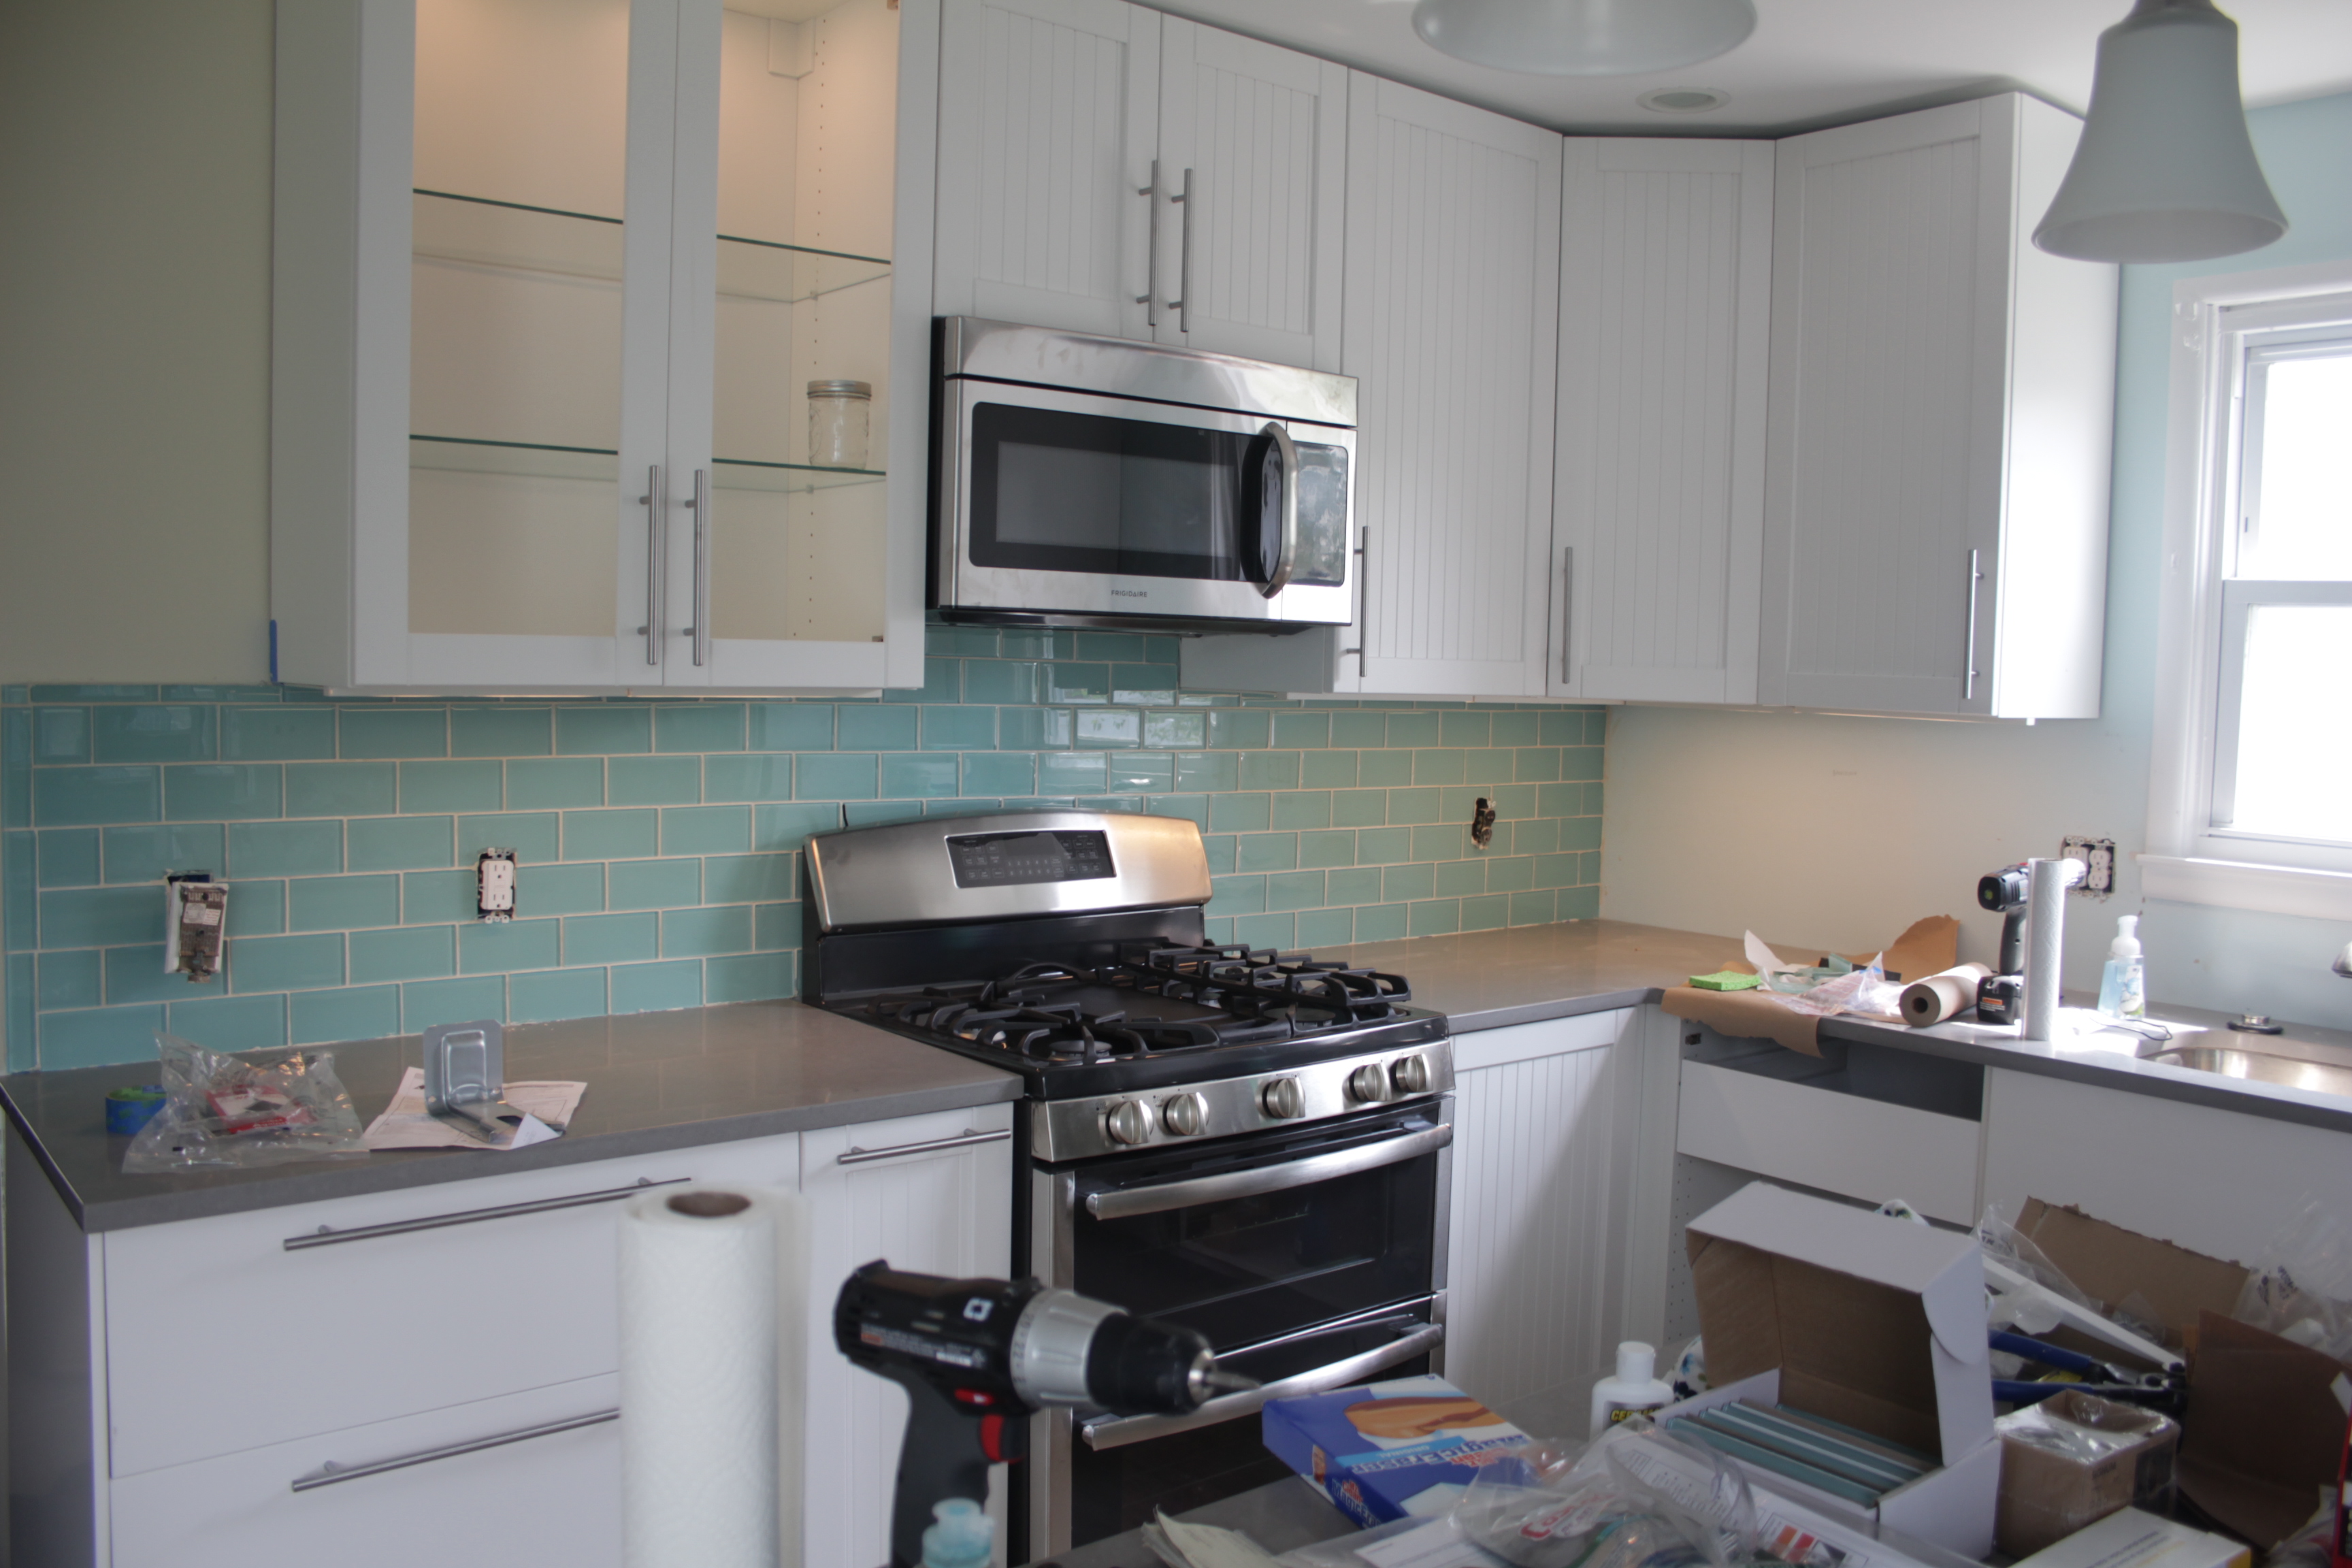
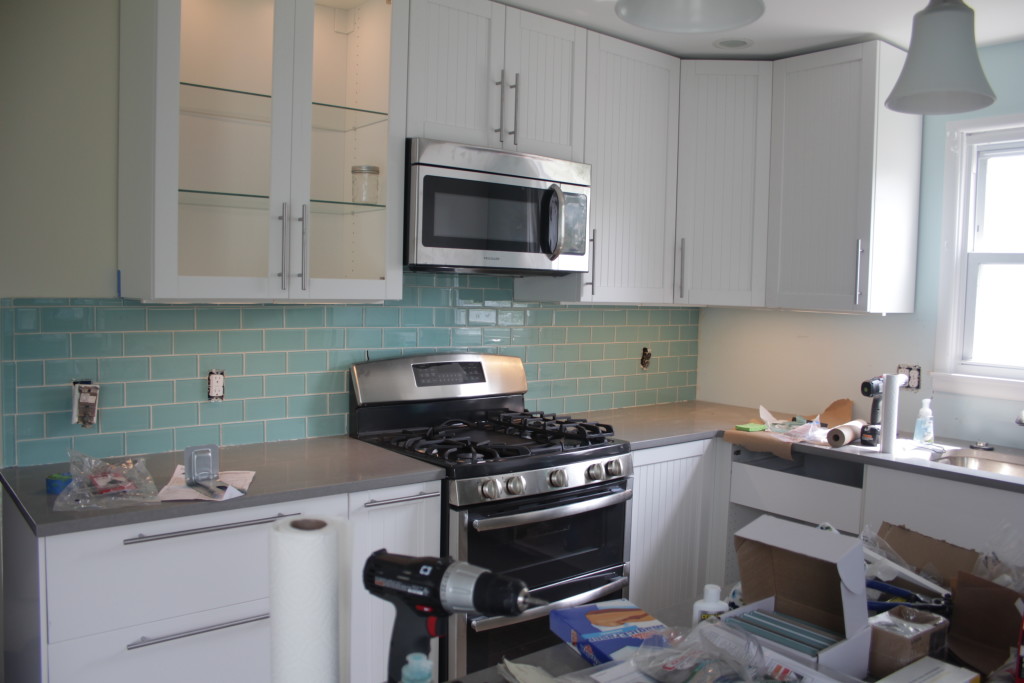
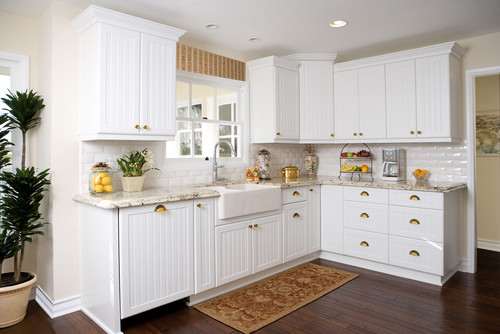
Kitchen, with half the backsplash and a working stove!
We did one wall of backsplash tile. I would have loved to do both but it took two of us a solid 7 hours to do just the one wall! It looks OK but not perfect. I learned a lot in the process, and I still need to caulk where it meets the counter top. The oven is also hooked up and working, as is the dishwasher, so aside from needing to clean up all the construction debris we have a working kitchen!
You guys you guys it’s finally here… the moment I’ve been waiting for… when I can stop “camping out” in a half-finished home and start actually making it into a space for guests and friends and us. I’ve been doing what I can here and there in the rooms that are finished, but now it’s finally time to pull the trigger and order some of the larger items I’ve been eyeing up. I’ve been haunting the local thrift store for months and coming up dry, but managed to snag some good end-of-season clearance prices on stuff online and at the big box stores (Target, Lowes, Ikea).
Instead of cleaning my office like I said I would, I put together mood boards for the rooms! Aren’t I just the pinnacle of responsibility?
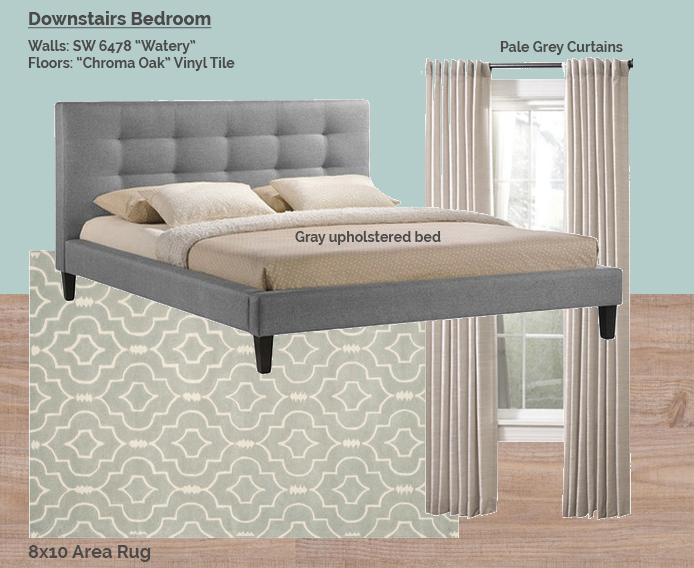
Room #1: Downstairs big bedroom
The master bedroom (for lack of a better term, it’s the biggest) gets a lot of natural light so I tried to keep the colors a little calmer in there. It’s a good sized room and I’d like to eventually get a couple chairs as well. I’m still in the market for some inexpensive bedside tables for that room.. and lighting! It’s one of the few rooms that doesn’t have any wired-in lights. It also has these super-90s mirrored accordion doors on the closet. I hate the mirror doors but I haven’t seen anything else I like much better. Current plan is to hang curtains across the closet opening instead. I haven’t decided if those will be the same color as the window curtains, or slightly different.
5 bucks says those mirror doors are still there a year from now because I haven’t made up my mind. Also I guess I’ll have to get some sort of comforter or duvet cover for this room, it gets pretty cold downstairs if you crank the AC enough to cool the upstairs (thanks, crappy duct layout).
Lazyweb, bring me: lighting, closet door/curtain ideas, bedside table, and comforter ideas for this room!
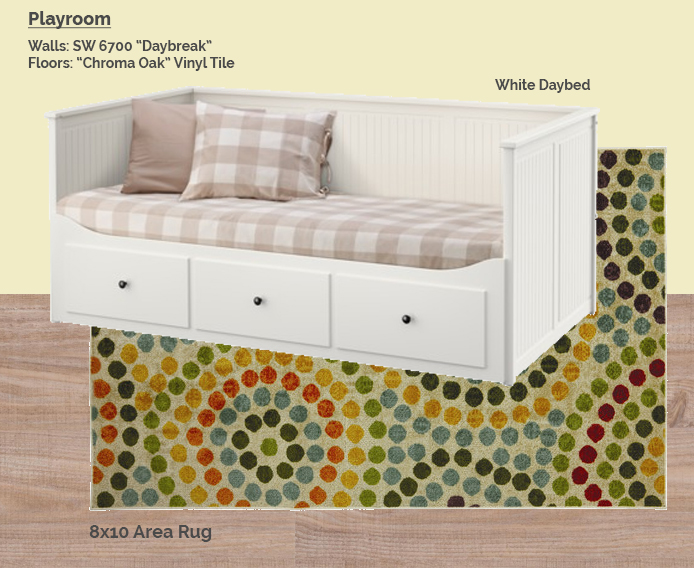
Bedroom #2 aka the “Playroom”
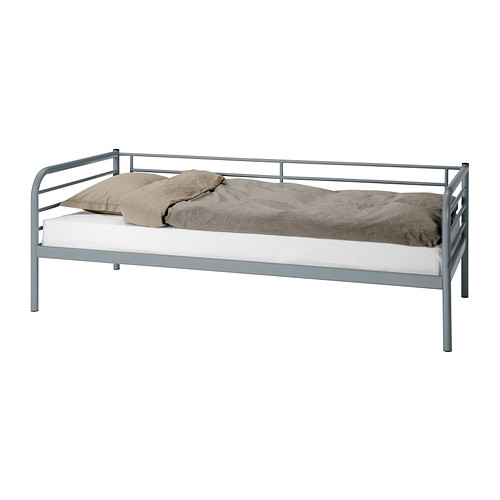
I’ve been calling the 2nd downstairs bedroom the “playroom” but it’s really more like “a bedroom where we will store all the toys so they don’t clutter up my living room. We picked out a fun rug and a daybed which pulls out into a double AND has storage. Anyone who has been to Ikea in the last decade probably recognizes it. Beyond that… I got nothing. We’ll need toy storage (though it does have a small closet) and lighting, but it’s not a very big room so I’m trying to keep things fairly compact/modular.
Lazyweb, bring me: child-friendly lighting, toy storage
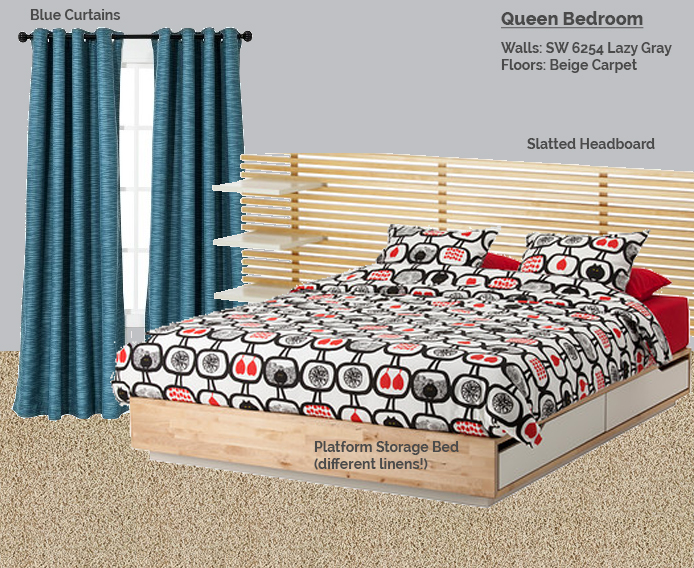
Bedroom #3. It has a queen bed!
As we move upstairs you will quickly see my design ideas get far less… cohesive. Also I start referring to the rooms by the size of the bed in them. The “Queen room” has an Ikea bed that again many folks will recognize, some Target curtains and not a lot else. I did get a quilt for this room, which looked SUPER CUTE in the store and SUPER CUTE when I washed it and KIND OF MEH when I put it next to the curtains. Urp. Here’s a photo from the Kohl’s website:
Also while I really like the Ikea bed itself (solid wood! storage!), the white melamine drawer fronts kind of kill the look. Looking at the assembly directions they’re really simply constructed. It’s basically a board with a groove in the bottom and some holes on the sides. I feel pretty confident I could create new drawer fronts in a nicer wood (and with handles instead of the weird 80s cutouts) some day down the line. Who wants to take another $5 bet on whether I ever actually do that?
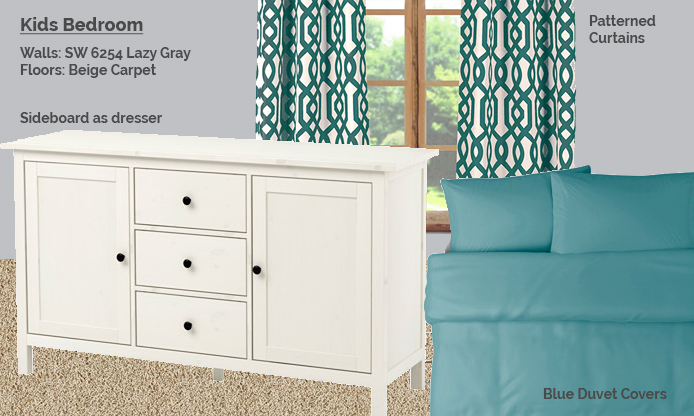
Bedroom #4. For kids!
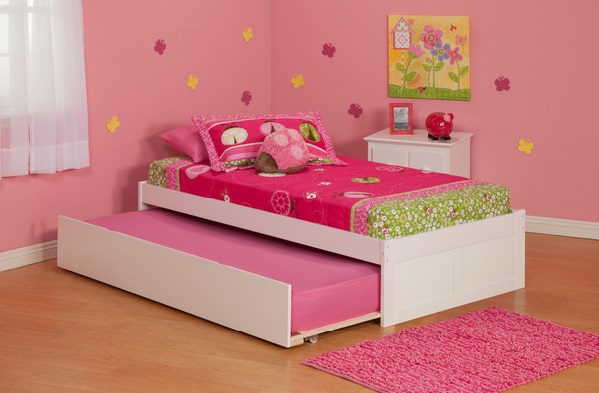
The kids’ bedroom is actually pretty close to being done. I initially had some crazy plans for bed nooks, and I still might do that someday, but for the time being I’m gonna content myself with just two beds hanging out. There are two twin beds against the wall (visible here), one of which has a pull out trundle underneath it. The other has storage. While we don’t need a ton of storage in this room, I’m looking at getting a sideboard to use as a dresser since there’s no closet in that room. There’s a ceiling light in there but I’ll probably put one on the sideboard as well.
Lazyweb, bring me a kid-friendly lamp!
Bedroom #5 has no plan. No plan at all.
When it comes to the 5th bedroom there is no plan. Only Zuul. This is the room that my husband and I have been staying in during construction, and therefore it has items based on what was necessary for us to sleep. It has an Ikea bed from 2009 which we migrated down from elsewhere, a duvet cover I think is cute, two accent tables I got on impluse because they were cute AND ON SALE, and that’s about it. There is no plan for this room, other than to someday replace the bed with something that isn’t awful (the one we have is actually the older version of the one pictured, and it’s really weirdly low to the ground). I’m not even sure if I want the accent tables in that room, or if I want to abduct them for elsewhere. Also the duvet.
Not shown: beige curtains that were purchased exclusively for their light-blocking properties, and a roller shade that is really difficult to operate.
Lazyweb, how much of this room should I cannibalize for other rooms?
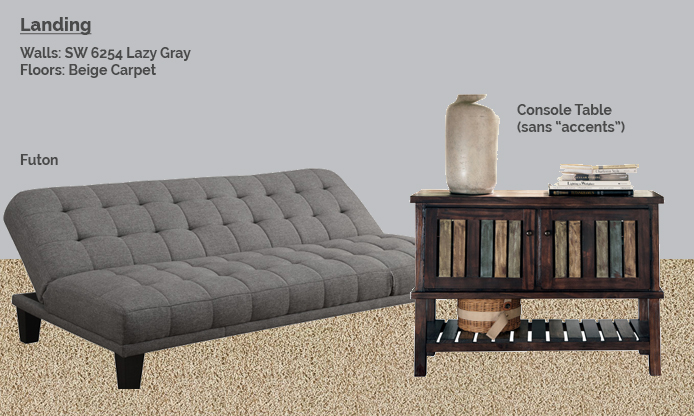
You guys, I am getting kind of tired of photoshopping together all these items of furniture, but there’s only one left so I’ll saunter on. No, it’s not the living room. I have no idea what the plan is for the living room. Right now it has a sectional my husband has owned since before we got together, and since there’s a place to park my butt I’m pretty much done for now. No, the last “room” is the landing at the top of the stairs, which we’re totally sticking a futon in just like the previous owners did.
Someday a TV will go here. Right after I have some outlets added.
The idea is that the kids can all pile onto the futon and play video games while the adults have distinguished conversation in the living room. Just kidding, the kids will pile onto the futon and play video games upstairs because they haven’t yet learned to hold their own against the adults playing Super Smash Bros downstairs.
And that, my friends, is the current decorating plan. Clearly some of the rooms are more thought out than others. Also, putting together these mood boards (which is a totally normal thing to do on a Wedesnday night, right?) has made me absolutely hate the carpet upstairs. And downstairs. And all carpet. Can you put an area rug on top of carpet? Is that legit?
Last night I had to go down the shore… again.. to let the painter in this morning (because I didn’t want to wake up at 5am to drive down there). For some reason the outlet covers were not removed / painted under when the painters came last week. The manager was very apologetic and came out this morning with the crew leader to fix it.
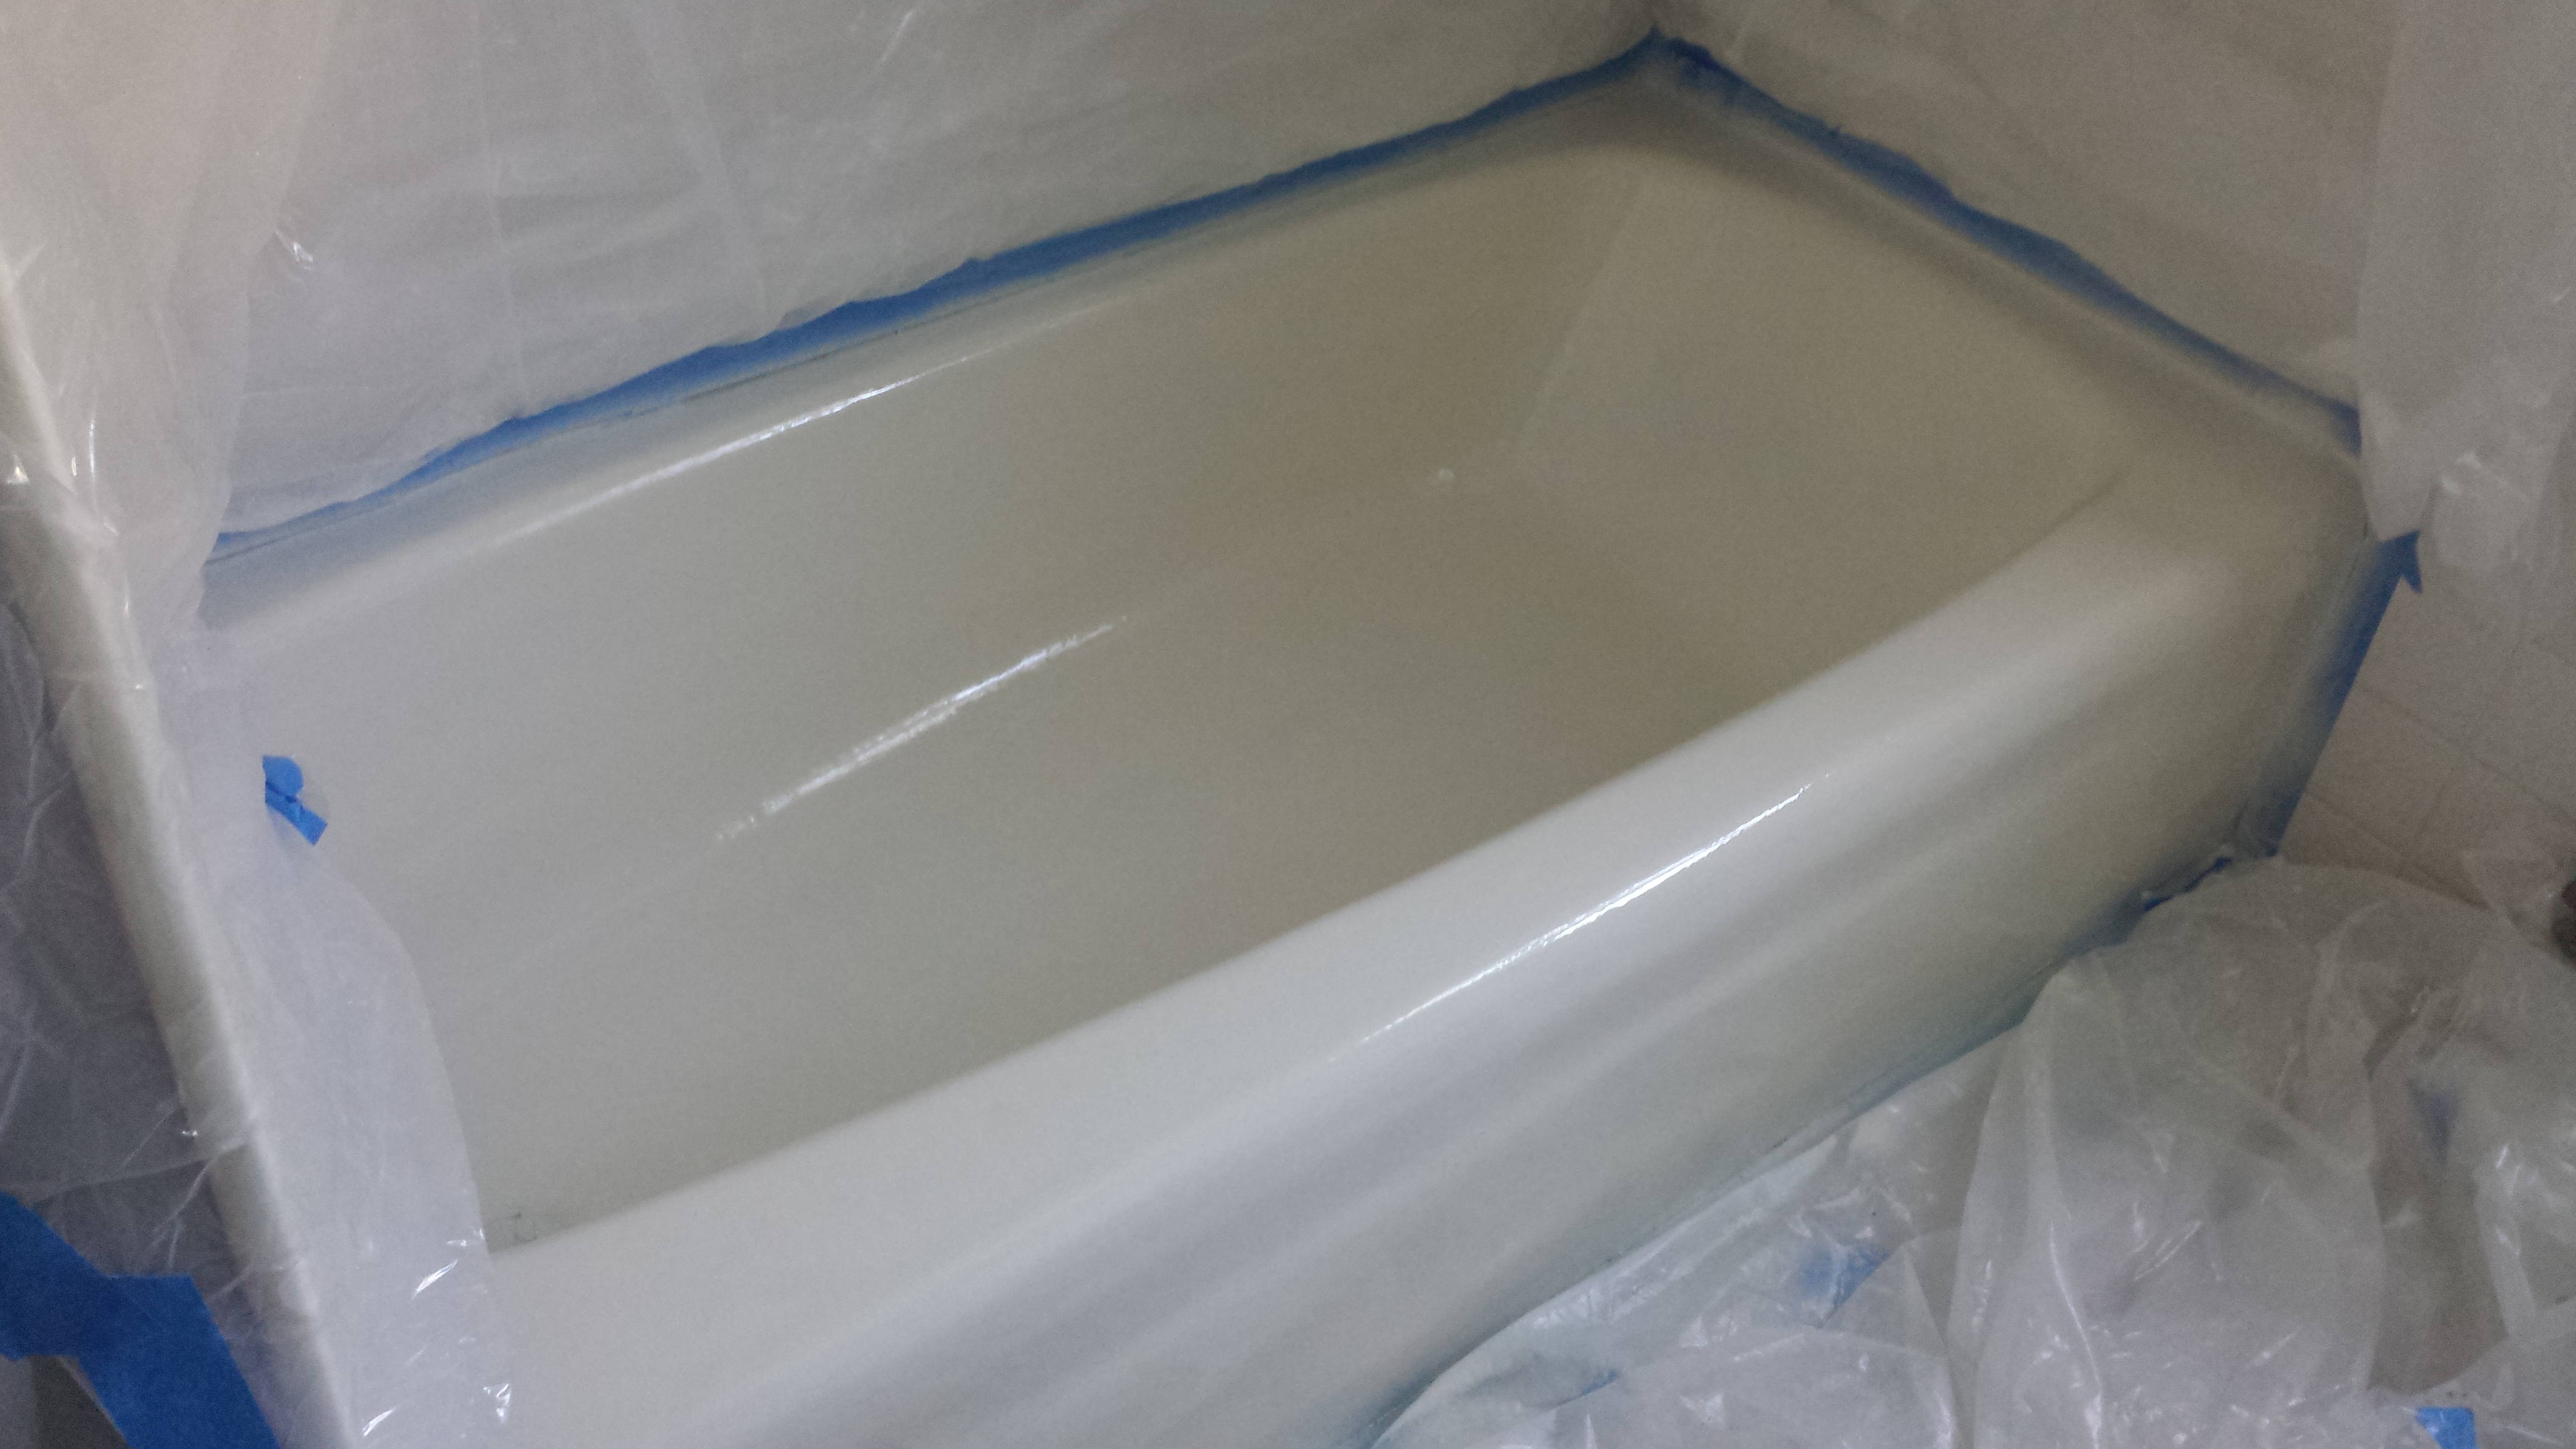
Since I was down there anyway I decided to tackle the tub (which I foolishly did not get a ‘before’ photo of). The finish on the tub was scraped off in a bunch of places, and the yellow fiberglass shows through and looks gross. It was also caulked with white caulk, despite being a bisque colored tub, which makes everything look yellow and gross. So last night I stripped off all the old caulk. That allowed me to discover what a mess the tub surround is. For about 5 minutes I contemplated other options, and then decided to just barrel ahead with the current plan to re-caulk and re-enamel the tub. It won’t look great, but it will look better, and I can deal with the bathroom as a whole at some other point in the future.
One freshly-coated tub
Recoating the tub is fairly easy, I got a tub refinishing kit at Home Depot. First you clean the living daylights out of it using cleaner and steel wool, then you mask everything off, then you spray the enamel on. It looks good, although I’m a little concerned about the durability. The bathrooms are on the to-be-addressed list but there’s a lot of other more critical stuff that has to come first. The enamel needs to dry for 72 hours, so I’ll caulk the seams the next time I’m down there.
I’ve got a new theory about the upstairs shower, which isn’t drawing enough hot water to trigger the tankless heater to fire up. Apparently the cartridge in the temperature knob can get clogged with minerals over time. If the cartridge is blocked up that would explain the low water pressure, as well as why the sink in the same room seems fine (and we’ve got a brand new shower head).
Meanwhile I’m scurrying around trying to coordinate all the furniture/mattress delivery so that everything shows up before the weekend and I don’t have to make multiple trips down to sign for stuff. We expect the house to be full or nearly-full with family, so we need as many beds as possible.
Guys can we talk about window treatments for a minute? Most of the aluminum / vinyl mini blinds that were in the shore house were in pretty rough shape. And the curtains were not to my taste. So now that the house is painted and nice looking I’ve started to turn my attention towards window treatments. At home in the bedrooms we have cordless cellular shades (which came with the house) and then curtains hung over the window. This way it can be super duper dark in the bedroom even with the sun decides to rise at 5:30 or some horrible hour. This has been essential in getting my kid to sleep past dawn, and it works great.
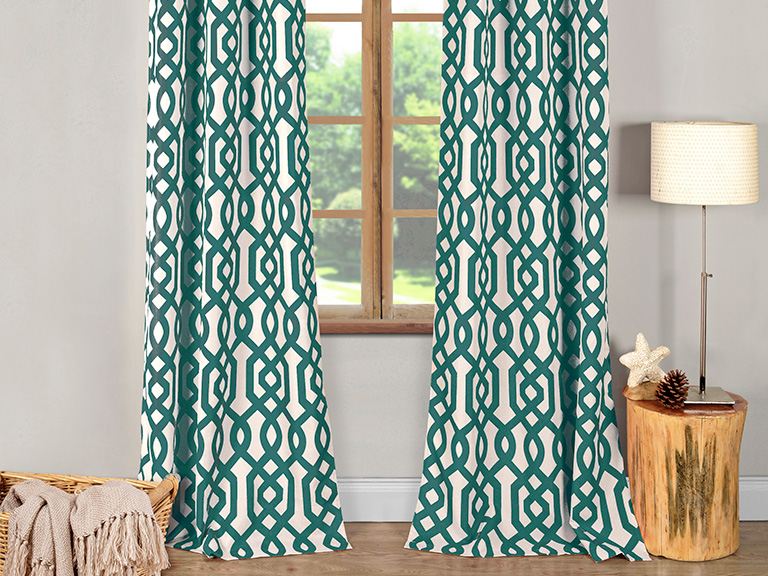
Shopping for curtains is sort of fun, and not too intimidating. There are a good number of inexpensive options at Target and Lowes, so it doesn’t feel like that much of a life commitment. I even snagged some from Woot.com that like.
I find these totally acceptable at $20/pair
Aside from needing to hem the ones for the upstairs (damn you, not-even-eight-foot ceilings) curtain shopping went pretty well. Until today.
For some reason I am in curtain limbo. I set out this morning in search of curtains for the 2 downstairs bedrooms, and came up empty handed. Since the downstairs have colored walls (upstairs is gray) I wanted to see stuff in person to make sure the color looked good. Everything I found that I liked was mysteriously out of stock. Target was super weird: none of the display curtains seemed to be anywhere on the shelf. But I made a note of the styles I liked and figured I’d order them online. Except my notes must not be good enough because I can’t find any of them online. So now I’m just curtain-less. Good luck keeping up with the glaring summer sun, new AC system!
Next I went to Lowes to look at shades/blinds. Holy shit you guys, those cordless cellular shades I love cost a fortune, it turns out! Thanks, person who we bought our house from, for buying nice things I am way too cheap to ever purchase on my own. I mean I guess if I was doing one or two windows I could stomach the cost, but I have ten. Then I looked at vinyl/aluminum mini blinds, which are cheap. And ugly. So ugly. I hemmed and hawed for about 10 minutes before turning to the display of disposable stick-on paper accordion shades. And bought ten. That’s right, I bailed on this decision. I’ll return to it in 6 months when the paper shades start falling down.
The other thorn in my side is the sliding glass doors. They’re problematic for a number of reasons. First, the seal is busted. Water is trapped inside, and the only way to really fix that is to get new doors. They are also really hard to open and close. And also I hate pretty much every window treatment option available for sliding glass doors. Curtains are bulky and annoying, vertical blinds are ugly, and a nice multi-layer drape system is too expensive to spend on a door that has to be replaced in the next year anyway.
Not convinced this is an improvement over the vinyl ones
So don’t be surprised if you come to visit and find that all my curtains just have a sheet tacked up over them, college style, because I am incapable of making any decisions about window treatments.
Had a fairly relaxed weekend down the shore with some work, but not the usual breakneck pace. A couple friends came in to visit from out of town which means I actually set foot on the beach for the 2nd time this summer.
Most of my effort went into painting the cabinet doors, which I primed last time I was down there. Unfortunately the painting did not go as smoothly. I kept getting all these tiny air bubbles in my paint despite using a conditioner which is supposed to eliminate those sorts of problems. Eventually I found that thinning the paint with a little water helped, but I only figured that out 2/3 of the way through the process. I have 5 doors that are done, another 7 or so doors that need their final coat of paint, and then another 10 doors that have irritating bubbles I must sand down and recoat. So overall paint progress is about 60%.
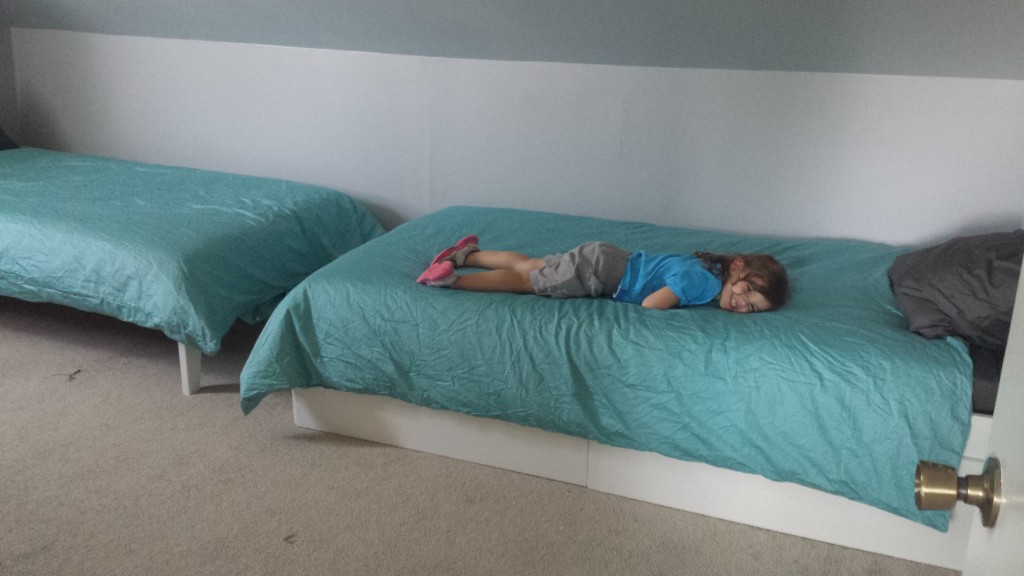
Two twin not-ikea beds
I set up the two twin beds we got from Wayfair. Honestly they made me appreciate how easy Ikea stuff is to assemble, the Wayfair beds were a pain. The manufacturing tolerances were clearly too great and a lot of stuff just didn’t fit together well. The bed on the right has two drawers for storage, and the bed on the left has a trundle bet I have yet to assemble. Also is ironing sheets a thing? Because I could not for the life of me prevent the Ikea duvet covers from looking like a crinkled mess.
I might eventually turn the beds so they come out into the room, but with the HVAC system still mid-replacement (it’s located in that room’s closet) I figured having the beds out of the way was good.
Our fancy hipster mattress. I put off making it until next time. Also I need a bed.
The snazzy new Tuft and Needle bed arrived on Friday. Unboxing it was surprisingly dramatic. I didn’t take a video of it because there are dozens on instagram already, but it is surprisingly fast to go from a 2″ thick thing that looks freeze-dried to an actual 10″ thick queen mattress. It feels like a mattress. I’m not sure I like it drastically better than the ikea mattress + foam topper from Amazon combo, but they net out to similar prices anyway.
The pink tile in the bathroom is sort of growing on me, which is actually a shame because that whole bathroom has to be redone. There’s no way to fix the deathtrap shower without ripping up the tile, and the tile is also not in great shape. I can’t imagine putting fresh pink tile back in, but I’ll be kinda sad to lose this stuff.
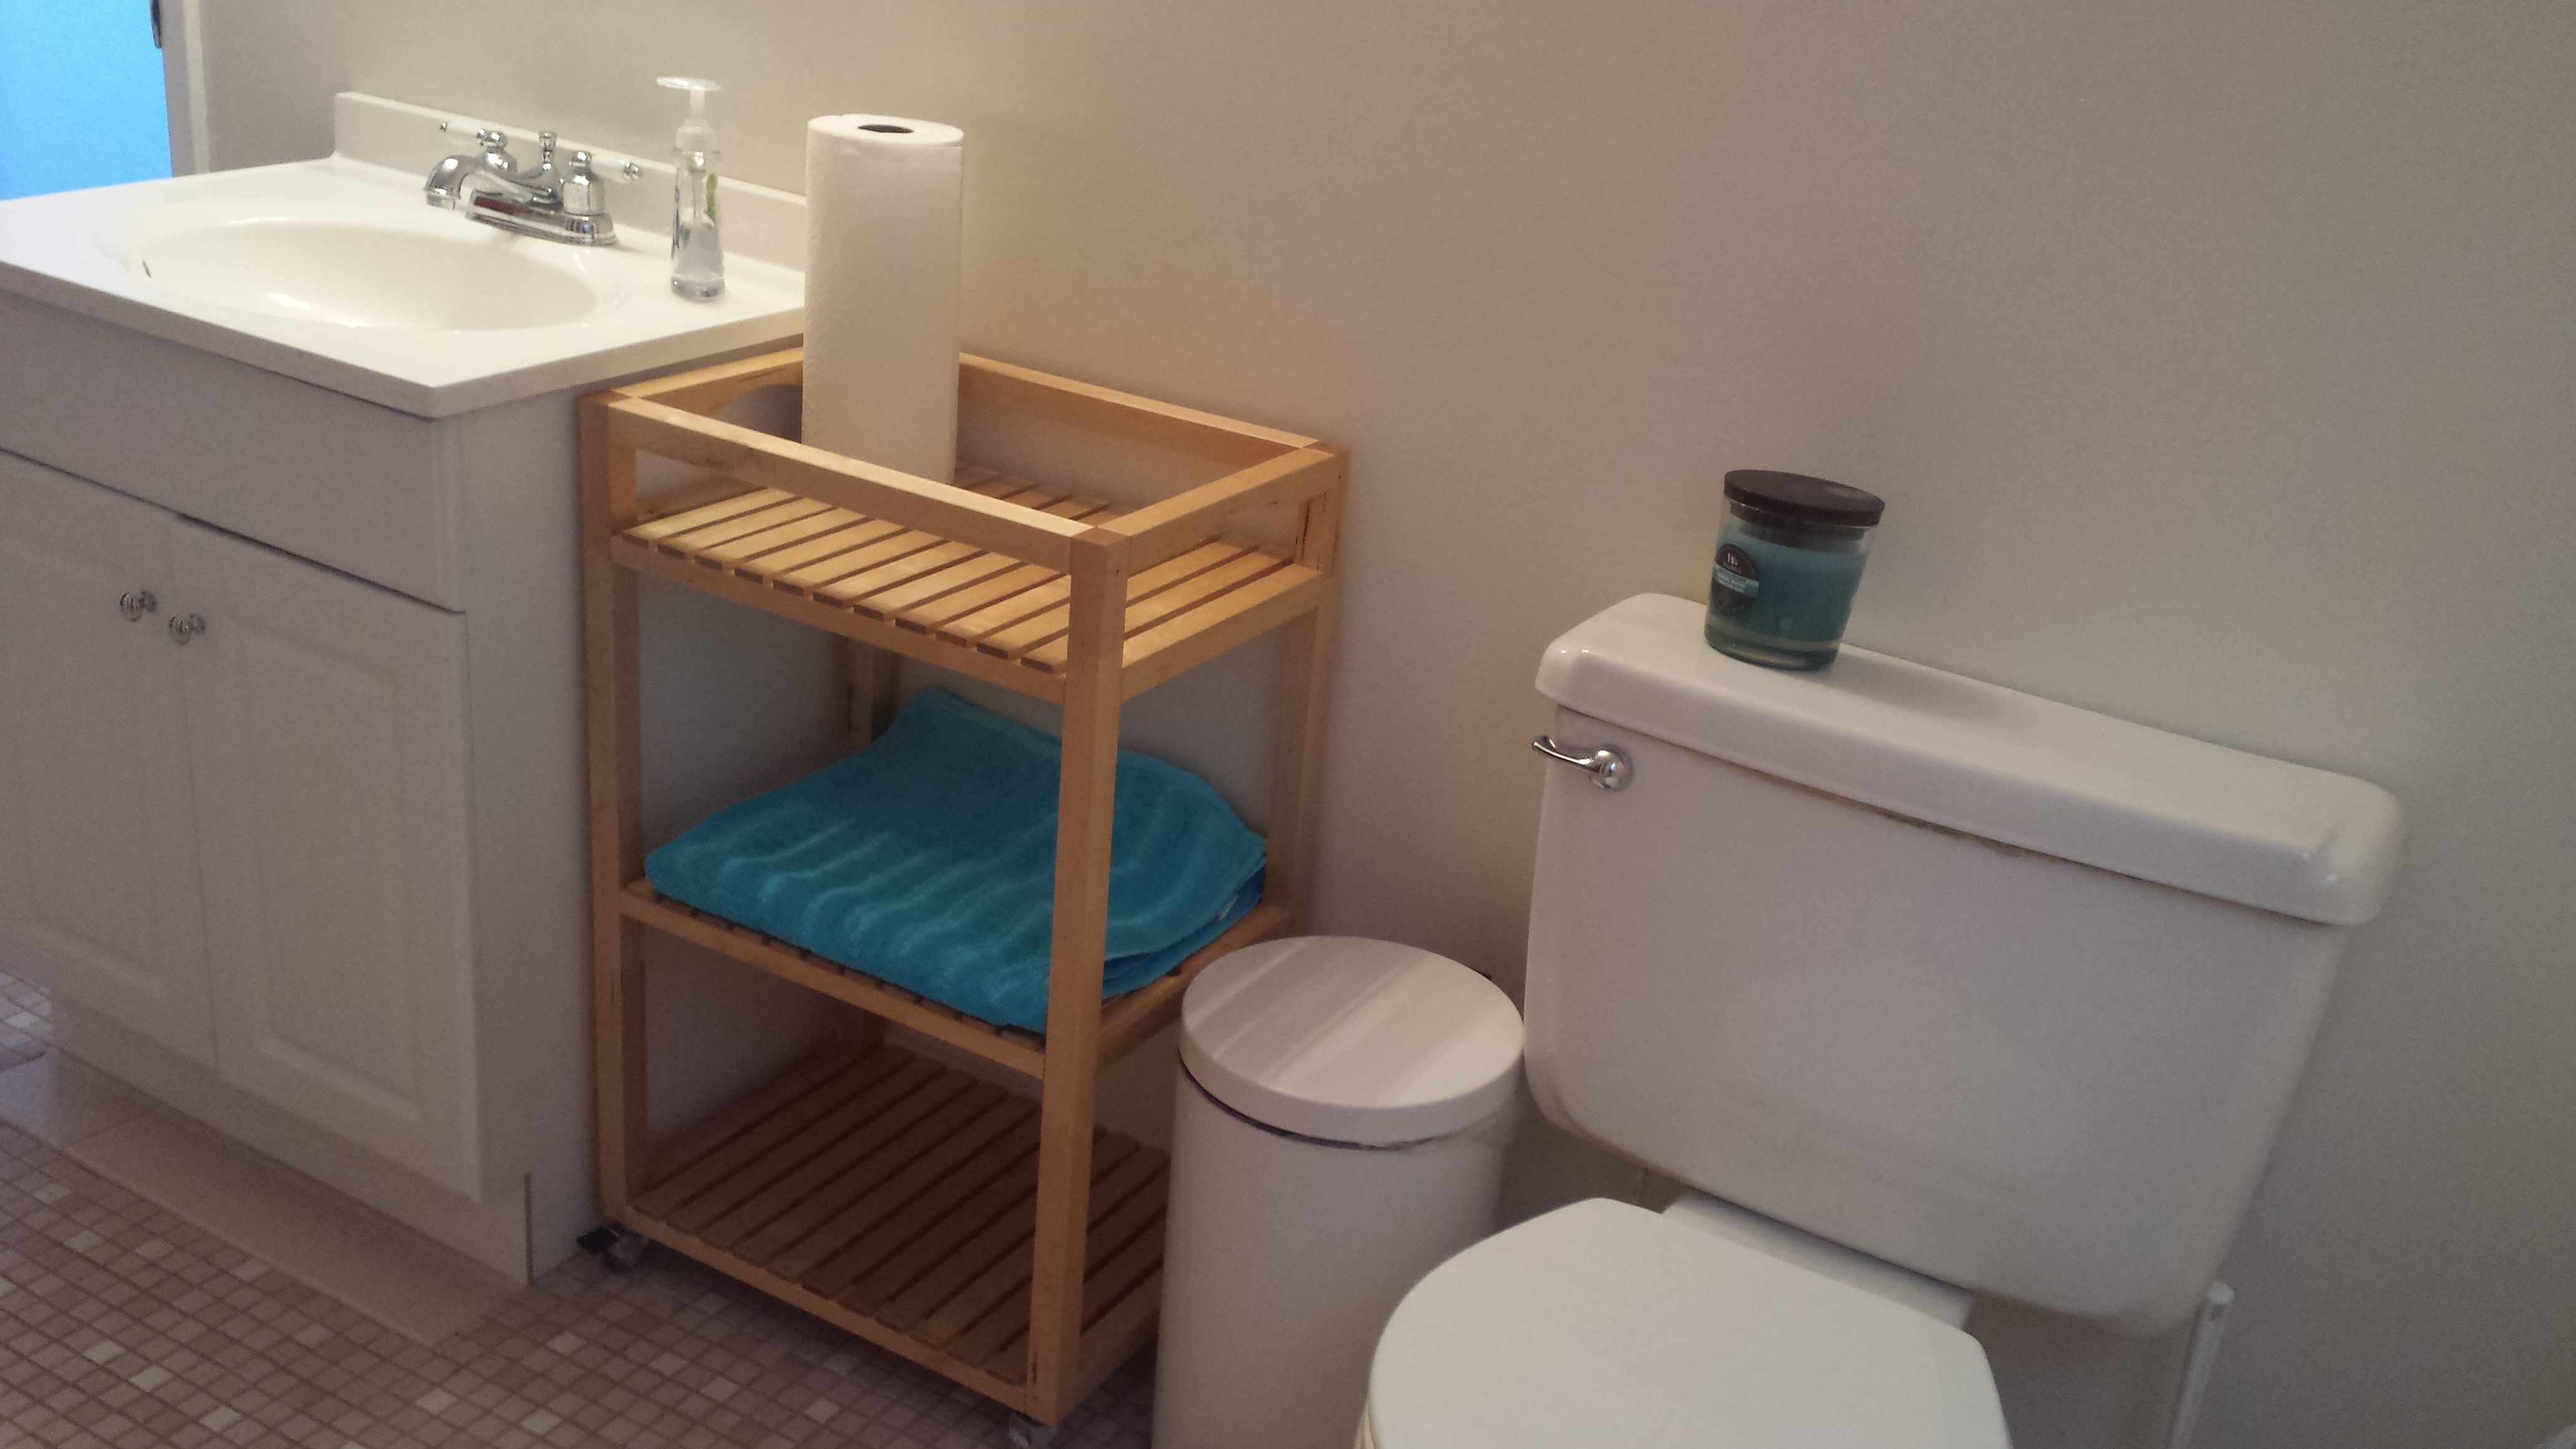
While we still don’t have hot water the bathroom now has a little cart to hold things, and there’s a hand towel hanging on the towel rack so you can dry your hands. The kiddo helped assemble the cart and she’s actually pretty good with an Allen wrench.
Bathroom!
Another big task for the weekend was ripping up the stick on tile in the small first floor bedroom. The tiles came up easily but they left behind a gross sticky residue that we weren’t able to get up satisfactorily. We tried both water and mineral spirits. When I say “we” I really mean my friends because they did all the work in that room. Since the goo won’t totally come up I’m just going to put some paper down over and it and lay the new flooring on top. It’s that or replace the subfloor (lol no).
Leona tested out the new mattress by jumping on it repeatedly
As sort of a progress update, here’s the major stuff still left on the to-do list:
Kitchen
Finish painting the doors and put them on
Get a painter to fix the ceiling/walls the last guy did badly
Get the counters installed (next week maybe?)
Get the plumber to connect the sink / dishwasher / fridge
Tile the backsplash
Add various trim so things look nice
Downstairs Bedrooms
Pull up the tile in the big bedroom
Remove / paper over the gunk on the floor
Lay new flooring (same stuff that’s in the kitchen)
Get the painter to paint
Put up curtains
Upstairs
Get a bed for the Tuft and Needle Mattress
Get some sort of nightstand-like things for the bedrooms
Maybe get an electrician to add another outlet to the landing
Finish painting the trim in the one bedroom.
It’s actually starting to feel like a manageable list. I’m REALLY hoping to have hot water by the end of the month, but I’m not holding my breath.
Kitchen stuff at the shore house is mostly back on track. The inspector is coming out on Tuesday, which should clear us to get the hot water heater installed (!!!!) later that week or early the week after. Chris and I got the fridge cabinet raised to the correct height, and in theory someone will call me next week with an install date for the counter tops. The front bedroom is making an OK spray booth for the cabinet doors. I can’t fit nearly as many in there as I could fit in the backyard, so I’ll have to do it in more stages, but no bugs landed in my paint job so that’s nice. Ikea is still out of stock on my damned parts but in theory they’re getting a shit-ton this weekend. FINGERS CROSSED I can start cutting down my Ikea trips to like… bi-monthly.
Now I can move on to more fun stuff… beds!
Right now the plan is to have two twin beds, one trundle, a double bed, two queen beds, and a twin daybed that pulls out into something sort of resembling a short king bed (or a wide full bed, depending on how you look at it). The double we already have, the rest we still need to accumulate. I’ve been scouring thrift stores / yard sales and coming up empty, so we’ll probably end up buying them new.
I got two of this bed, one with a trundle and one with storage, for the “kids room” at the shore house.
At the same time we are also upgrading the toddler’s crib at home to a “big girl bed.” After a failed trip to a “real” furniture store she picked out an Ikea bed that honestly I think is pretty ugly, but it’s one of the cheapest beds so whatever. At that price you can have whatever ugly bed you want, kiddo. It comes with an optional trundle which we’re planning on getting… but is out of stock until next week. WHY DO YOU HATE ME IKEA STOCK GODS?
It has that cozy, mental institution vibe.
It also occurred to me yesterday that between the two twin beds, Leona’s bed, and two trundles… I am in the market for five twin mattresses. That is a lot of twin mattresses, and mattresses really aren’t the sort of thing you want to pick up secondhand unless you know the person. Even then… kids mattresses… probably best to buy new. Thankfully because these mattresses are for kid / guest use I can get away with the cheaper options. Right now I’m planning to get the cheaper-but-not-cheapest Ikea models unless anyone has suggestions.
For one of the queen mattresses I decided to give Tuft and Needle a try. They sell a 10 inch foam mattress and are apparently “disrupting” the mattress industry… whatever that means. They are comparatively inexpensive, made in the USA, and have a solid return policy. They have lots of promo photos of hipster-looking people unboxing their mattresses. I hope this mattress turns my small sloped-ceiling room into a magnificent brick loft with original hardwood floors.
When all is said and done we will be able to sleep 4 couples and 3 singles in the house on real mattresses. There aren’t any immediate plans for pull-out couches but down the road we could potentially expand the number of non-air-mattress guests even further. WE WILL BE MATTRESS BARONS.
BTW if anyone sees good deals on bed linens, let me know!
Everything with the house is two steps forward one step back.
We took out the hot water heater and I went to replace the rotten subfloor below it. In theory this is a fairly straightforward process. Remove the old plywood, cut new plywood to fit, put new plywood in place. In practice nothing ever goes as planned and I don’t know why I was even a little surprised that the joist under the subfloor was rotted.
Insulation can be seen below the rotten joist and torn up floor
This is the point where I called up the contractor who had just finished the crawlspace repairs half an hour earlier and asked if they could add this project to my tab. The flooring situation in the laundry room is quickly spiraling out of the realm of things I can sanely attempt to DIY. There’s also the time factor. If I were to try to do this myself it would be another week before I can get down there to even start, and it probably would take me multiple weekends, delaying the kitchen installation even further. In contrast, the contractor said he can have everything done Monday.
I also had another contractor flounce on me. The guy who was supposed to do the vents did not like that the crawlspace guys took out the existing vents, and refuses to do the work now. He was really dramatic and shitty about it, so if that’s how he’s gonna be I’m just as glad to be rid of him.
The other thing I decided not to DIY is the drywall repairs in the kitchen. When we took the soffit out we discovered there isn’t drywall all the way up to the ceiling (surprise!). Drywall is something I can technically do myself but I’m not very good at it and I don’t have the tools to deal with the large sheets we’d need to haul up near the ceiling.
This part of rennovation is just really frustrating because there’s not a lot of visible change and the to-do list is getting longer, not shorter.
The original plan for this weekend:
Remove soffit in kitchen – success! Chris and his dad got that thing down. We only had one unpleasant surprise lurking behind it, a hot water line that sneaks through the corner on its way upstairs. Since that’s over the fridge anyway I’m just going to build a frame around the fridge that lets the cabinet sit a foot out from the wall. Something like this.
Remove hot water heater – success!
Spackle and sand walls in master bedroom – A qualified success. This did in fact happen, but like all things it took longer than expected. There was a really bad drywall seam under the window which I was trying to smooth out. When I was sanding it I noticed that the trim on the window was a good inch away from the wall (and someone had tried to glob silicone caulk in there to compensate). I pulled off the trim and found that a wooden shim had slipped and was pushing the drywall out. I knocked the shim back in place and that let the drywall move back where it should be, but then I had to re-spackle it and wait for it to dry.
Prime and paint master bedroom – Nope. See above.
Remove rotten plywood in laundry room – Nope. After I saw what a horror show the joist was I just stopped.
Bonus: Priming another bedroom and the upstairs landing. This wasn’t on the original agenda but Matt and Chris took care of this while I was frowning at the hole in the laundry room.
Extra bonus: our contractor fixed the broken shed door because he was tired of dropping it on his foot.
Huge thanks are also owed to Chris’s mom, who wrangled the toddler while we did all this. Kiddo came through the house a few times like a tiny foreman. “Everyone is working on fixing up my beach house!” she announced.
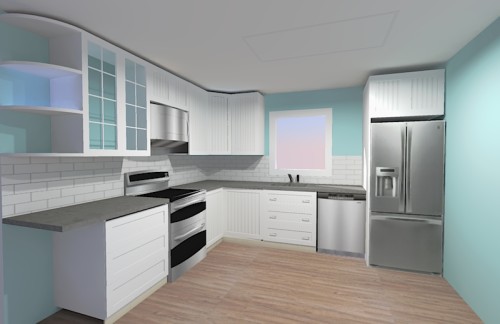
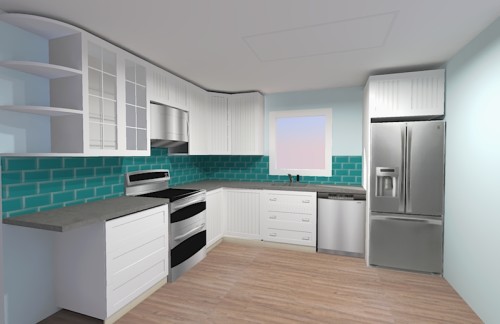
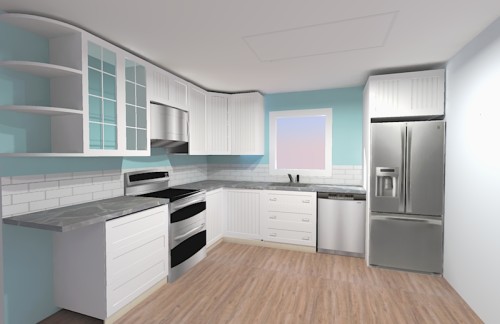
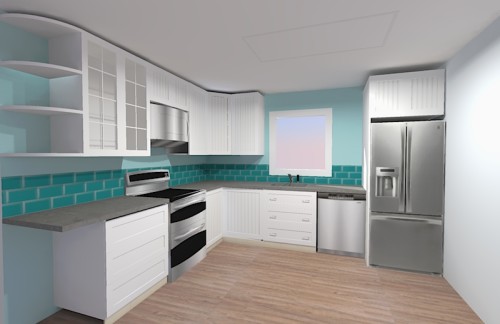
Following up on yesterday’s backsplash indecision: I found some more ideas I liked and mocked them up in SketchUp. SketchUp continues to be a rather poor way to visualize these things, but it’s all I’ve got so I make do.
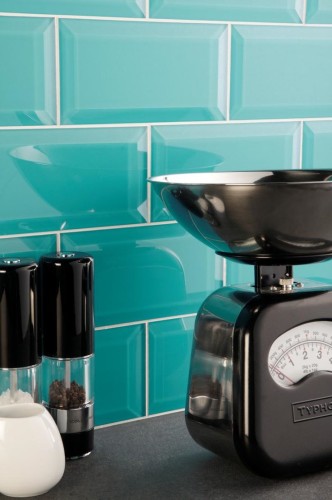
I found this tile on Pinterest and fell in love with it:
oh hello, beveled glass tile
Once again the sketchup mockups were a bit underwhelming, but I played around with a few different tile / wall options. Never mind the missing lower cabinet, I accidentally deleted it and don’t feel like re-creating it right now.
I think ultimately I need to go lighter on the backsplash, even though I kind of want to cover the entire house in that teal tile.
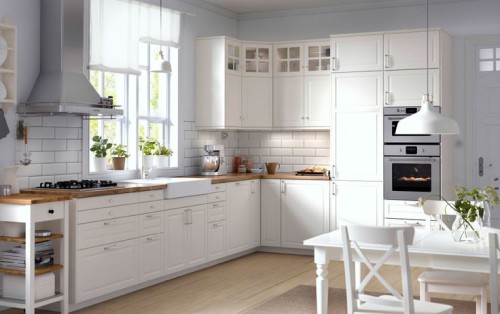
One of the things you can do to class up an Ikea kitchen is to spring for non-Ikea doors. There are a couple companies that do this, most notably SemiHandmade and Scherrs. I’ve had my eye on some beadboard panel doors:
As far as default IKEA options go the only one I’m even vaguely into are the white BOBDYN doors.
I mean it’s OK
I don’t really have anything against the IKEA doors, except maybe the shade of “off-white” is a little too far “off” for my tastes. But really I’m splitting hairs. I just love the look of the beadboard doors.
Unfortunately the quote for my beloved custom doors came in at literally twice the price of the IKEA doors. Ouch. I understand why: it’s an apples to oranges comparison. BOBDYN is made of MDF (aka particleboard) with a white veneer. Scherrs doors are solid wood. Oh, yeah, that “twice as much” quote doesn’t include painting, I’d have to do that myself (or pay extra). It’s a much smaller jump from Ikea’s solid wood doors to Scherrs. But the price gap between MDF and solid wood is significant. If we go with IKEA we’re looking at $1000 worth of doors. Even with the money we’re saving by DIYing a lot of stuff I’m just not sure I can justify shelling out an extra grand on doors.
It’s not all lost yet; the Sherrs folks are looking to see if we can rework the quote to be a little more budget friendly by swapping out a few things, but at this point I’m not optimistic. At the end of the day I have to think about other things that money could go towards (like a nice stove).
Overall I’ve been dealing with a lot of sticker shock over just how much all this stuff costs. I’ve never redone a kitchen before – both the condo and our current place had nice kitchens when we moved in. This stuff is nuts. Right now we’re looking at spending almost $14k on a 10′ x 10′ kitchen, using mid-grade stuff (except those countertops; I will die for my quartz countertops) and DIYing all we can.
So yeah kitchens are insane.
Update 3/27: it turns out I can’t read. The new quote came in much lower, and then I realized I’d misread the original quote. I did not notice the 25% discount applied, which cut the price of the doors by $500. So the solid-wood doors are still 50% more than the ikea MDF but… maybe it’s worth it?
For the past few months I’ve been waking up in a cold sweat freaking out about things I forgot to take care of. A lot of it is little, like forgetting to schedule a hair appointment until after they’ve closed for the day. Some of it is bigger, like the Kickstarter I did a few years ago that fizzled out (more on that in another post) and a few things are huge, like the fact that I completely bungled my corporate tax filings for the last 3 years.
With some nudging from my therapist and support from my husband I finally managed to get on top of things. My to-do list has gone from “deal with 3 years of back taxes” to more mundane stuff like “clean up the dried paint in the bathroom.” I used a handful of different strategies to gain control, which I’ll detail in a sec, but the biggest key to staying motivated has been to turn it into something like an art project.
Step 1: I wrote down everything I was putting off
AKA I made a to-do list, but with some very specific guidelines.
First, everything on the list had to be something I’d been putting off for a while. None of my normal daily/weekly chores got put on there. Although I hate going to the grocery store, hunger will eventually lead me there so I don’t need to put it on my list of terrible to-dos.
Second, if it was a big task (like “unfuck my accounting”) I wrote down only the first step in the process. Whatever was on the list had to be eminently doable (if sucky). So instead of unfuck my accounting I wrote call accountant. Luckily I had the name of a good accountant already. If I hadn’t, I would have written find an accountant.
And most importantly, I limited the list to what would fit on a post-it note. I’m not rattling off every task I could possibly hope to accomplish in the next month, just the stuff I really need to get around to.
Step 2: I dedicated an hour a day to working on my list
This was my therapist’s idea and at first I balked. An hour? Where am I going to find an extra hour? And then I thought what do I even do in a day? Because I work from home, freelance, my work and my meta-work and my home life and my hobbies sometimes start to blend together. In order to find that extra hour I had to tease them apart and work more efficiently.
Once I committed myself to the hour I could no longer engage in productive procrastination to avoid my terrible tasks. I set a timer and sat down with my list. During the hour I only worked on things that appeared on that list. After a week the list was dwindling. Two weeks in I’ve cleared out everything on the original list – some of which had been there for years.
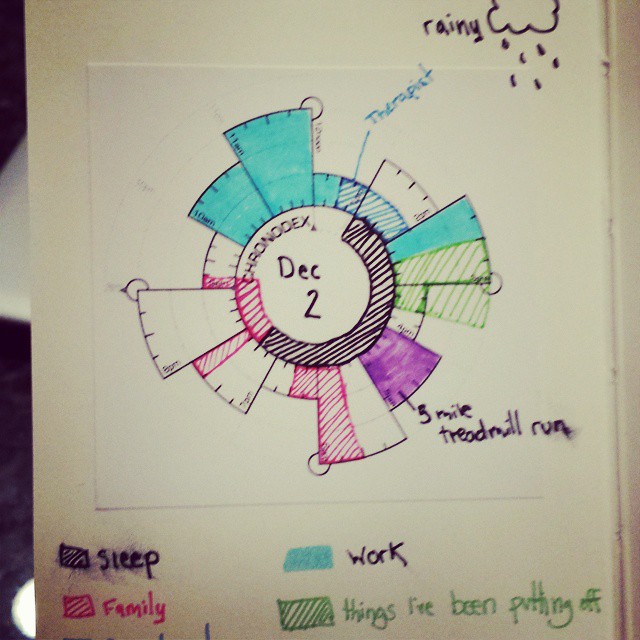
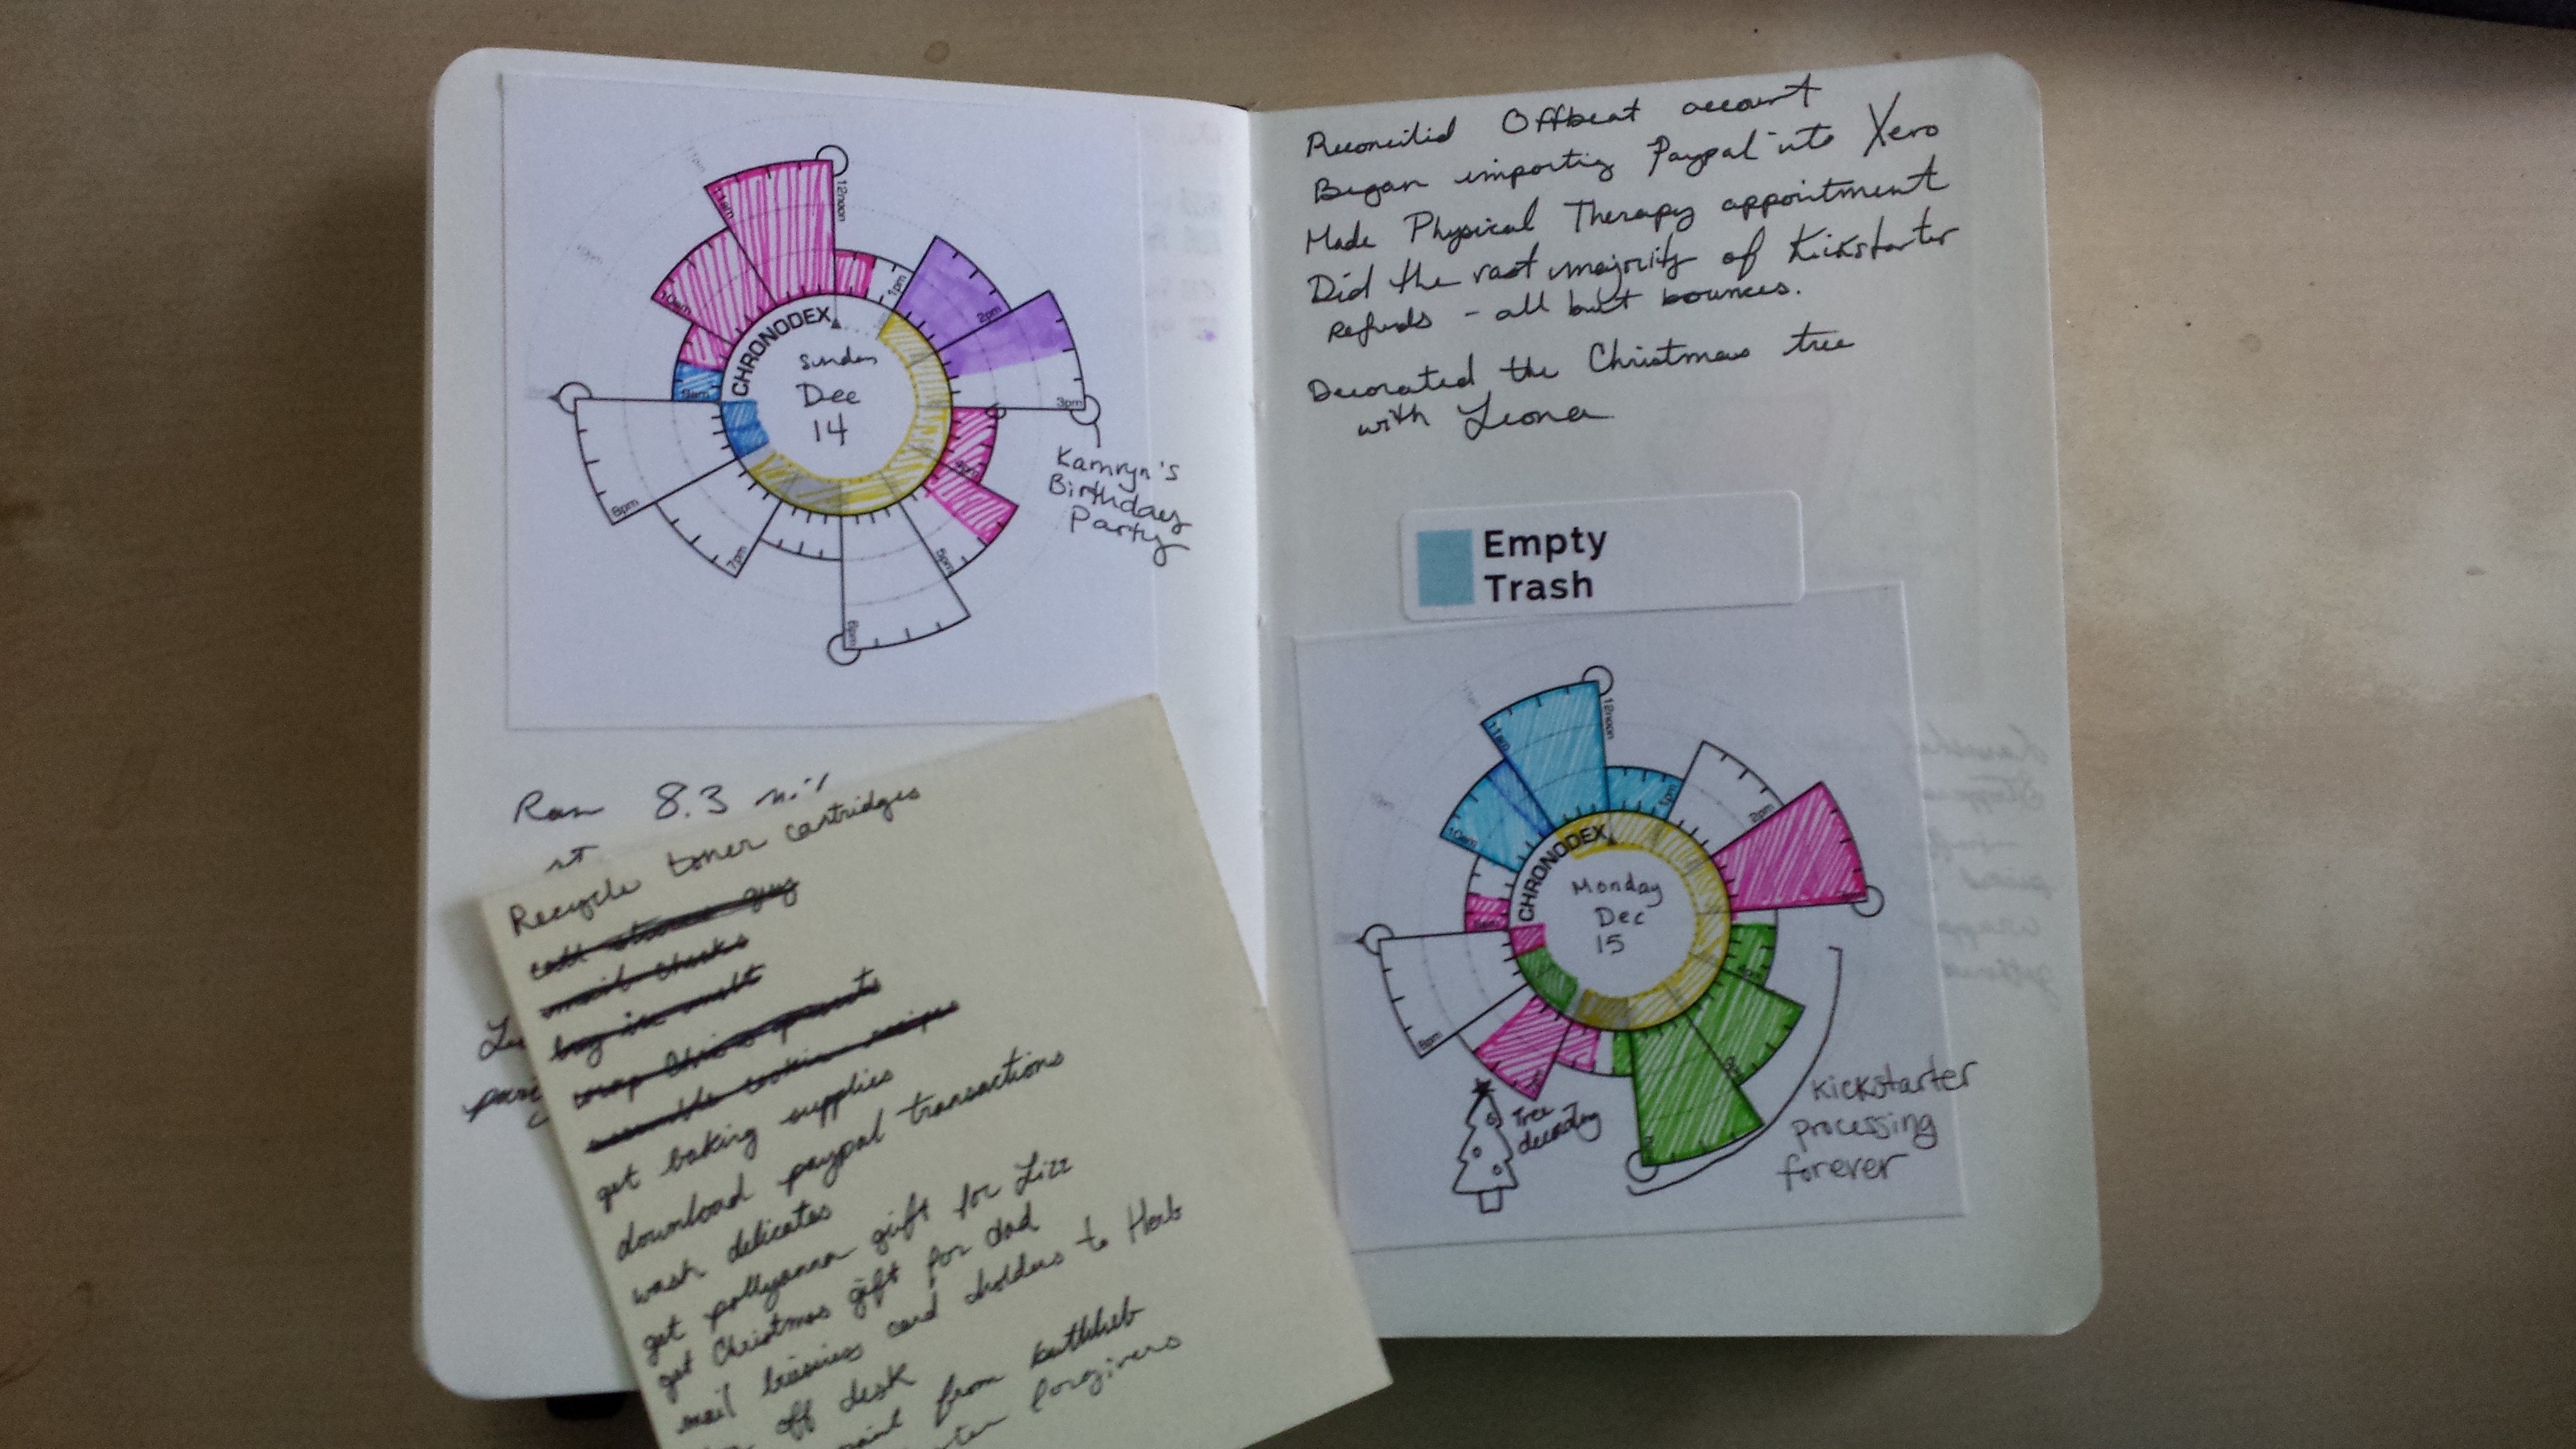
Step 3: I started logging what I was doing with Chronodex
This is where the wacky circle thing comes in.
Chronodex was designed as a paper planner. The circle represents a clock, and each wedge is an hour. The different sizes of the wedges just make it easier to differentiate them. It’s meant for folks who primarily care about 9am to 9pm, as midnight to 9am are on the interior of the circle and 9pm to midnight are sort of ghosted around the exterior. If you shade in your various appointments and responsibilities you have a nice visualization of your day.
I have google calendar for appointments, but I use Chronodex to record what I’ve done in a day. Rather than print out an entire 6 months of dated pages I printed a bunch of blank Chronodex cores on sticker paper and slap one in my Moleskine notebook each day. This allows me the flexibility to take up more/less space as needed on any given day. I use different colored pens to shade in what I did: billable work, meta-work, family time, exercise, sleep, terrible to-do time.
My first day’s Chronodex. I have since given up on logging the weather despite loving to draw clouds.
If you look through the gallery of how people use Chronodex, everyone uses it a little differently. There’s no right or wrong way to shade in the wedges, that’s where the art project comes in.
Once I started accounting for my time, some really important things happened. I started to feel better about myself because I was acknowledging the things I accomplished in a day. I started thinking about my time in 15 minute blocks which has helped me focus a lot on the task at hand. I am better at stopping myself from jumping between work, home, and play because I’ve internalized that I’m “in a work block” or “in a family block.” When I take a break I take a full 15 or 30 minute break instead of just shoving food in my face while sitting at my keyboard. My reward for being productive is that I get to shade in that time on my Chronodex afterwards.
Step 4: I started having time for chores
Now that I’ve been dedicating all this time to my terrible to-dos, I don’t actually need the full daily hour to do them anymore. It’s tempting to us that time for goofing off, but instead I’ve started adding some routine chores into my schedule. This is the stuff I should be doing but often don’t and then either a) it gets gross or b) my husband takes care of it and pretends not to secretly resent what a slob I am.
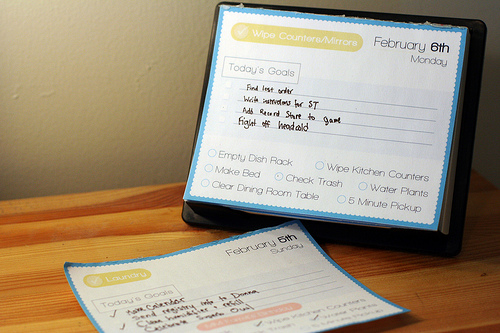
This is not the first time I have tackled chores with an overly complicated art project. Behold:
Oh yeah, I remember you now
That project served me very well. It fell by the wayside when we moved and I had a bigger house with WAY MORE THINGS that needed doing. Also I reinstalled windows and no longer have a python environment handy to generate the pages.
The biggest problem I have with a pre-printed list of chores though is that it becomes your tyrant instead of a tool. If you fall behind you have this paper trail of failure plus the question of “do I just skip those chores or is my entire day now going to be nothing but cleaning?”
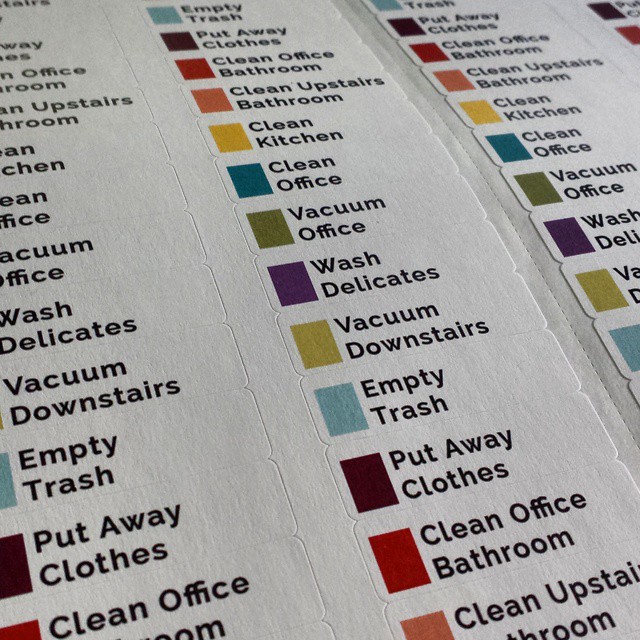
For this iteration I printed out a bunch of common chores onto some return address labels. Apparently you all have a boner for labels, because this was one of my most liked items on Facebook this week.
If there is one thing you all love it is colorful labels.
I cut them into sets of 8 or so and keep a sheet of them alongside my to-do list in my notebook (which I use as a bookmark). When I do a chore, I put that sticker on the page. The colors mean nothing; I just like colorful things. This is basically a more boring version of what you might use for a 7 year old. The stickers behave sort of like a repeating to-do list. I limit these chores to things I can do in 15 minutes or less.
Step 5: Profit
Actually I think the only people profiting here are the label companies. But I sleep better at night now that I no longer have a list of years-old to-do items hanging over my head.
My biggest takeaway from this is that I do better with accountability than expectation. Which is to say, when I plan my chores or tasks for the week out in advance I never seem to live up to the standard I’m setting. But if I hold myself accountable to what I’ve accomplished each day – regardless of what it is – I can get a lot done.
I love the flexibility stickers offer me. I can skip a day or do something different tomorrow and it’s not this weird scar in my notebook. On weekends I don’t usually need to be such a taskmaster, so unless I’ve got a lot going on I don’t bother.
And most importantly, this works because I am highly motivated by charts and graphs. Seriously. I cleaned my office bathroom yesterday expressly so I could get a sticker. I focus on work instead of checking Facebook just so I can shade that 15 minute wedge in blue. If the idea of sitting down with a pack of multicolored pens doesn’t fill you with excited anticipation, this won’t help you at all.
Speaking of pens, these are my very favorite. They don’t bleed through the pages and make a nice smooth line.
Frequently Asked Questions
Doesn’t this take kind of a while?
Yes. I spend about 15 minutes a day updating my stupid Chronodex. But I consider it time well spent because I’m actually getting things done the rest of the day instead of checking Facebook 500 times.
What about free/leisure time?
I experimented with shading in those things too after the fact and it was just too much for my taste. I like the visual effect the space has when I don’t have a scheduled task.


 This was my therapist’s idea and at first I balked. An hour? Where am I going to find an extra hour? And then I thought what do I even do in a day? Because I work from home, freelance, my work and my meta-work and my home life and my hobbies sometimes start to blend together. In order to find that extra hour I had to tease them apart and work more efficiently.