Crafting

Craft Room Redux

The craft blogs are full of reorganization photographs. I think it’s a universal: we all trash our workspace during the holiday madness. Only when we dig out in January do we look around and say “oh god I have to do something about this.”

Or at least that’s what I did:

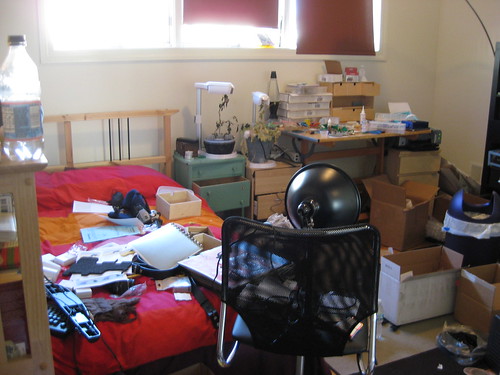
The beginning.
The beginning.

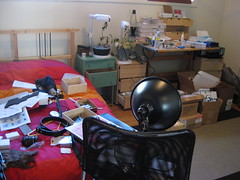
Uh yeah. There’s cheap online viagra a workspace somewhere in there. Where, I’m not sure. As such operations had to be moved downstairs, the only place with any remaining horizontal surfaces. Oh any my plants died. The DIY aeroponics project was actually incredibly successful. But even pseudo-aeroponic systems need water added every few weeks.

The first step is admitting you have a problem.

The second step is (wait for it…) throwing out all the trash and putting away everything you can. I know it seems obvious but when faced with a room that looks like the scene of a recent natural disaster it can be overwhelming and hard to know where to start. For me, I accumulated a number of new things over the holiday season, so a lot of stuff never had a “home” to begin with. Which led to it simply floating around the room, helping to hide the rest of the junk.

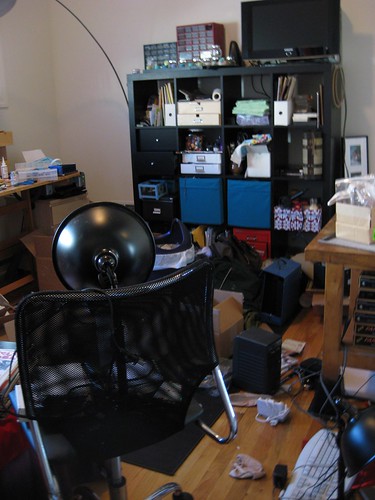
Suddenly, with the trash in the trash can and everything either put away or sitting in a box / on a table awaiting further instructions, you can see the floor:
Step 2Step 2

You still can’t sit in the chair or on the bed, and the tables are still covered in crap, but hey! I have a rug!

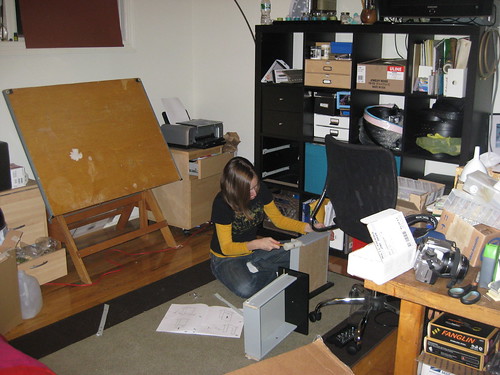
At this point, I was at a bit of a loss. If you look at my shelving unit, all the cubes are full. And yet there’s a ton of stuff lying around I don’t know what to do with. It’s hard to see in the pictures, but there’s a secondary workbench on the right which is also piled high with items in need of a place to be. And this is when you call in the big guns. Have a friend come over and help you, if you know anyone vaguely organized.  Your friend will not only keep you motivated and prevent you from simply sitting on the floor staring at the mess (my mother has seen me do this just about every time I move), they’ll also keep you honest. They say things to you like, “Kelly, if you put that box in front of the magazine file and then need a magazine, are you just going to put the box on the floor and leave it there?” And then you (if you’re me) say, “… yes,” and find a better place for said box.

Progress

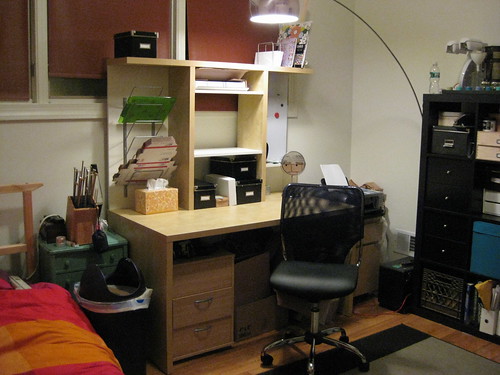
I thought we needed more shelving, but my superstar amazing organizer friend managed to rearrange what was on the existing shelves to fit almost everything. In the above picture we’ve got most of the leftovers condensed to the workbench while my friend assembles some additional drawers for the ubiquitos Ikea EXPEDIT shelving. The workspace still needed some work though, otherwise it would just revert to its natural disaster state as soon as she left. We went to Ikea and got a nice wide desk to replace the drafting table I’d been working on, and separated the workspace into building/making on the right workbench, and shipping/administration/finished products on the left table.

Done!
Work table

It doesn’t look quite as dramatic in the pictures, but anyone who has been in the room is stunned with the transformation. I’m excited to have a workspace I can actually use. Yay!
Crafting

Last Minute Displays

7 (1)

My craft show displays, like so many others’, are in a constant state of flux. I’m constantly adding new products to my line, and for some reason I don’t usually think about how to display them until right before a show. This month I had discount viagra sales back to back weekend shows, Squidfire and the Brooklyn Lyceum, so I scrambled to put together some new displays for my new line of pendants and my older line of belt buckles whose display I wasn’t totally happy with. I had about a week to get it all together.

Belt Buckle Display

Belt Buckle Display

The belt buckle display is made of PVC and wood, and the cost of all the materials was about $20. The goal for the display was to put many of the buckles at eye level and keep the belts themselves from getting tangled up. Bonus points for being able to easily see the backs of the belts to view sizing info.

Parts list:

  • 18″ long piece of 1×6
  • 2 metal flanges for 3/4″ pipe
  • 4 6″ lengths of 3/4″ PVC pipe
  • 2 16″ lengths of 3/4″ PVC pipe
  • 6 3/4″ PVC straight couplings
  • 2 couplings to fit the 3/4″ pipe into the flange threads
  • 3 16″ strips of rectangular molding
  • Scraps of 1/8″ plywood
  • 18 magnets
  • C clamp to keep it from falling over

To make the rails to hold the buckles/belts, I took the rectangular molding and glued magnets evenly along them, 6 per rail. The buckle backs are steel, so they stick to the magnets pretty well. I used some ceramic magnets and some neodymium magnets because that’s what I had lying around, but if I were to do it again I’d probably use all neodymium.

To attach the rails to the PVC I laser cut some rings (shown on the left) out of some scrap 1/8 plywood and glue them to each end of the rails. While I’m lucky enough to have a laser, it’s something you could pretty easily cut by hand with a little patience and an appropriately sized drill bit.

The rings slip over the PVC, and rest on top of the coupling. The whole thing is surprisingly sturdy, and breaks down easily to fit in my Big Box of Craft Show Gear. The C clamp helps keep things stable. The last show I did had super wobbly floors that shook the table any time someone walked by.

Eventually I’d like to make some cloth covers for the PVC pipe, so it’s not so ugly, but for the time being the display worked pretty well. I sold a good deal more belt buckles than usual, and I think having them all easy to see was a big part of that.

Pendant Display

Pendant Display

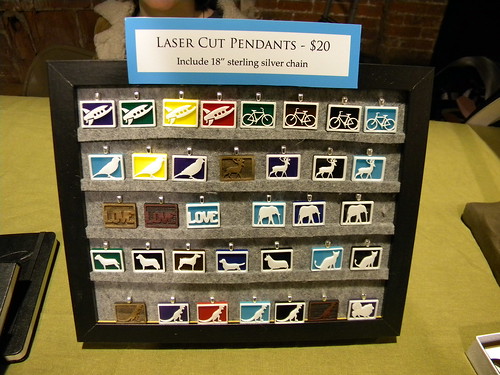
The pendant display was made literally the night before the show. I grabbed an Ikea frame and a 12″ square piece of grey industrial felt I had lying around. I cut the felt to fit the frame, and had some leftover. From that I cut narrow 1/4″ strips of felt the same width as the frame. I glued them at pendant-sized intervals, and the pendants are just thin enough that they can sit on the felt rails. And unlike my last slapdash jewelry display, this one doesn’t have nails sticking out the back to stab me.

Overall I’m pretty happy with the two displays, although I sometimes wonder what craft shows would look like if it wasn’t for Ikea. The Tinysaurs themselves are in need of some new display furniture, so I’ll probably put something together for them in the spring. I’m free from craft shows for a whole four months!

Crafting

Papercraft Nikon F

Tiny Prototype

For about a year now I’ve been trying to get some more models/kits designed for Everything Tiny. But it’s a super slow process, and admittedly one I don’t spend enough time on.

Today I prototyped a model of a Nikon F, the first SLR camera I used. I started fairly large, cutting with an xacto knife, and ended up somewhere which is still a little bigger than what I hope to get down to.
F Party
The largest model is about 1/2 the size of a real Nikon.

There’s still a ton I need to add (F stop / focus rings on the lens, the little button to open the back, etc) but they’re at a good stopping point for today.

After I was done modeling I googled “papercraft camera” to see what other people have done. I specifically waited until after I had my design roughed out. Olympus came out with some which make my little paper models look pathetic. Oh well. Since I want other people to be able to build these I need to keep it a little more sane anyway.

Crafting

Dinosaur Moleskines!

 I’m incredibly pleased to announce a new product line: embossed Moleskine journals!

Dinosaur Moleskine

They’re currently available in the Dinosaur buy viagra now and Deer design. These are genuine Moleskine notebooks, not cheaply made knock-offs. They’re filled with 200 sheets of creamy lined, plain, or square grid paper. Each notebook has an elastic band to hold it shut. I’ve got one I’ve been using for years, they’re perfect for fitting in a purse or small bag.

They’re now available in the Everything Tiny Etsy Shop!

Business, Crafting

Crafty Bastards and Tinysaurs Under Glass!

First thing’s first: if you haven’t already, vote for Tinysaur in the Craftiest Bastard Contest. If you live in the DC metro area, come by the show on Saturday, October 3 (eek, that’s tomorrow!). The show is in Adams Morgan, details can be found on the Crafty Bastards webste.

I’m excited because I’ve got some new items for this show… stuff which isn’t even available in my online shops yet! It’s been in the works for a while, and I’m proud to present you with:

Tinysaurs Under Glass

Triceratops Under Glass

The glass bell jars are hand blown by Kiva Ford. They look way better in real life than in the snapshot I took earlier. Turns out glass domes are sort of tricky to photograph. I’ve made them for T-Rex, Triceratops, Woolly Mammoth, and the Butterfly. Sorry, no love for Stegosaurus. he’s just a wee bit too long.

Due to the inordinate number of things that could go wrong in shipping (well OK just one: breaking) I probably won’t be selling these online soon. Unless I can come up with a way of packaging I feel is secure enough. So you’ll just have to come to the show to see them.

Crafting

Hipster Jewelry

Yesterday afternoon I was struck by a desire to make some big acrylic jewelry. For hipsters. Using stereotypical hipster things like deer and owls. Something which would provide instant gratification.

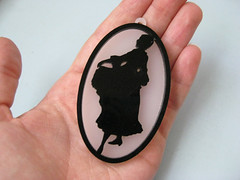
Hipster Jewelry DeerHipster Jewelry Woman

Two hours later I had these two pendants, cut from acrylic plastic on the laser. Each pendant is two layers, one black and one white, glued together. Each one is about 2.5 inches in the longest direction. Chris’s response to them was “I thought they’d be bigger.”

I’ve listed them for sale on Etsy and 1000 Markets under the title “Hipster Jewelry.” Chris suggested that this might be a bad idea, as hipsters notoriously hate hipsters. I pointed out that they LOVE irony. He wasn’t sure they’d be up for meta-irony.

My mother asked what a hipster was, and why I would make jewelry for them. It’s hard to explain what a hipster is to someone who has never had an occasion to interact with them. Or why they have such overbearing self loathing. I told her it is a deroggatory term for people who try to be a certain type of trendy. As for why I made the jewelry – it was just sort of a wild hare. One that I could easily satisfy.

Business, Crafting, Etsy

The Secret to Selling on Etsy

Every now and then I peek into the Etsy forums to gather information. It’s a good place to crowdsource… tons of people killing time on the internet who LOVE to share their opinion with you.

Invariably I see a thread asking about what the secret is to sell on Etsy, how people get so many sales, how much to relist in a day, etc. And I think I am fully qualified to answer these questions. I have an active Etsy shop, generally selling multiple items per day. I also used to work at Etsy, so I have an inside view of how the whole system works.

It turns out the secret to selling on Etsy is the same as selling anywhere: hard work and good products.

Ok, maybe that’s not the most helpful answer. So allow me to elaborate with a list of tips.

  • Take better photos.
    I don’t care how long you spent on your photos. They’re not good enough. Mine sure as heck aren’t. You need to do more than just snap an accurate picture of the product. You need to sell it. I’ve seen a lot of Etsy sellers complain that they shouldn’t have to be photographers. BS. You’re a salesman, and your photos are the biggest part of your sales pitch. If you aren’t willing to put serious and continuous effort into them then you’re not serious about selling online.
    For some quick tips, check out my article, Common Photo Mistakes and How to Avoid Them
  • Make something people want.
    Do market research. And no, posting a forum thread titled “do you think people want to buy ____” doesn’t count. Browse the sold items. What’s selling? Read blogs related to what you’re making. What are they featuring? Does your stuff fit in with that? Or are you still making stirrup pants? Stop. Stirrup pants hurt us all.
    Look at not just styles but also what people are selling. Where is there a void in the market? Fill it.
  • Make something other people aren’t.
    I hate to break it to you, but if you’re making snap bibs out of Amy Butler fabric you’re already at a disadvantage. Why? Because there are already 100 other people selling them. It’s like putting a Starbucks up on every corner and then wondering why you’re only getting 1/4 of the foot traffic.

    Do an Etsy search for your product. If you make bibs, search “bibs.” How many of the search results are the same as what you make? What makes yours different? It’s going to have to be something. Better photos, better prices, better selection, better construction, different style, whatever. But it’s got to be something or you’ll just be lost with the other 20,000 search results.

  • Build a cohesive line.
    Lets say you make pouches. Rectangular zippy pouches out of pretty fabrics. Great. So now you’re “that girl who makes pouches.” It’s pretty nondescript, and when I search for “pouch” on Etsy I’m going to get a ton of other people’s stuff, which I might like better.

    Pick a common theme and run with it. Make pouches in different shapes. Now you’re “that girl who makes round pouches,” and that already sets you apart from other people. Or maybe all of your fabric features skulls on it. Or flowers. Or math equations. Or your pouches all come with built in flashlights. Whatever. Transform yourself to “that person who makes generic” to “that person who makes specific.” You’ll stick in customers’ minds better, be easier to find, and sell more.

  • Give up.
    The flip side of building a line and putting all this effort into your products is you have to be able to let it go. If it’s not working out, you may just need to move on to something else. Not all of your ideas are going to be million dollar sell outs. That’s OK.

    A few years ago I had a line of jewelry that I liked, my friend liked, it went well together without being boring… and it didn’t sell. Anywhere. And for whatever reason I just kept trying to sell it other places instead of moving on or changing it. Needless to say it didn’t work, and I’ve still got a ton of stock for it lying around on a shelf. If you really want to sell, at some point you have to evaluate what you’re doing and change if it’s not working.

  • Take better photos.
    No really, it’s important. And yours still aren’t good enough.

Those are the big secrets. As far as relisting and other nonsense… I relist whenever things sell out, which is once a day or so. By selling something unique I find that even days later I’m still on the front page of search results

There’s also a lot of chatter about twittering/blogging, and whether those are good at driving sales. Yes and no. If you have something interesting to say, eventually people will read it, and if you’ve got your products showcased next to what you’re saying then it’s free advertising. But starting a blog and just posting when you list a new item isn’t interesting to anyone except you.

But it all comes back to your products. You can blog, twitter, and photograph all you want but it isn’t going to do a damned thing if you’re not selling an interesting product at the right price. So get off the Etsy forums and take a hard look at your products. Then fix them and try again.