We spent the weekend working on the house again, but it didn’t feel nearly as satisfying as last week’s kitchen demo.
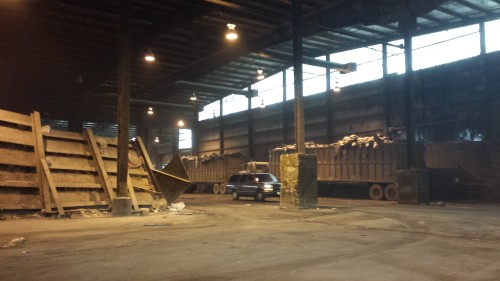
The big adventure for the weekend was taking a load of debris to the dump. The local transfer center and garbage collectors won’t take bulky trash like ours, so we drove it to the big dump in town. My dad brought down his trailer (hitched to a Volkswagen Passat) and we completely filled it. When you get to the dump they weigh your car and give you a slip of paper. When you leave they weigh you again and charge you based on how much you dropped off. We had over 600 pounds of debris from the kitchen, and it cost about $30. It was a surprisingly clean dump and didn’t smell too horrible. For a dump.
Not shown: giant bulldozers
After that we went to 84 Lumber to get luan for the floor. We’re nowhere near ready for it yet, but we had the trailer so I figured we’d make use of it.
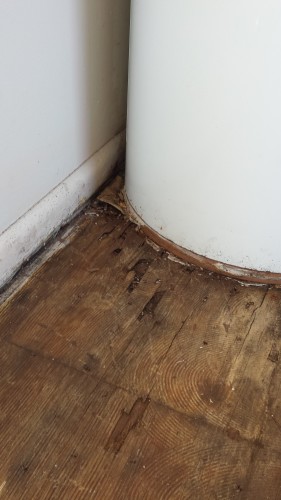
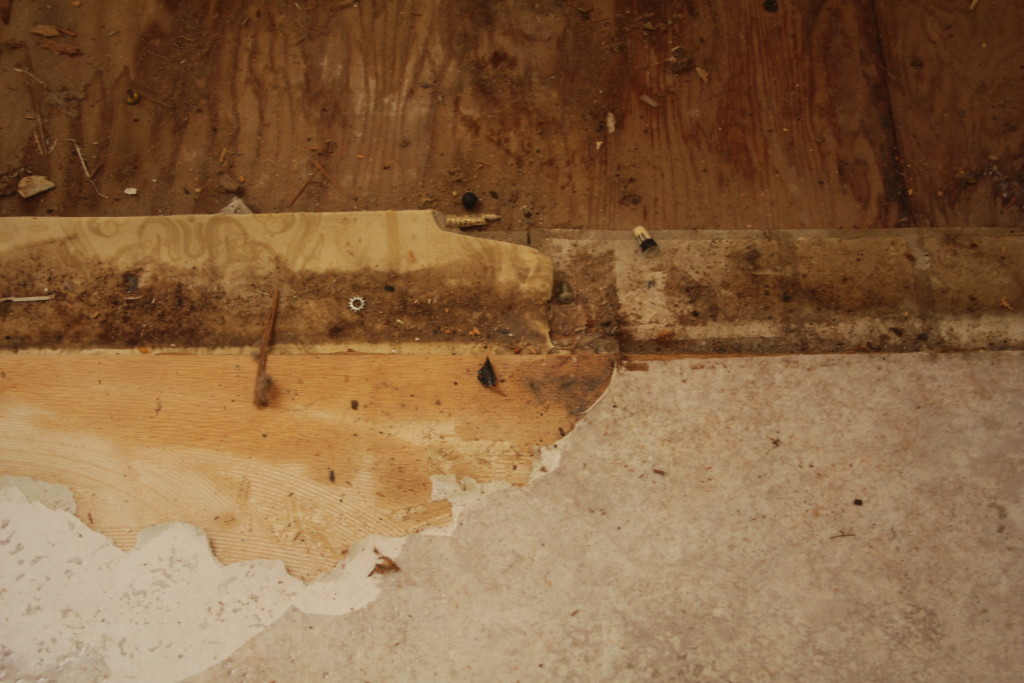
The final round of flooring removal in the laundry room was grueling. Thanks to water damage the staples are all rusted and were a huge pain to get up. It took easily 3x longer than the stuff in the kitchen. But it’s all gone except for a few small squares trapped under the hot water heater. Unfortunately the plywood subfloor under the hot water heater is in really rough shape. You can see how the weight of the heater is causing it to compress because it’s rotted. It actually looks better in this picture than it does in real life.
The wood sags a good 5mm under the heater.
The short wall next to where the fridge used to be came down this weekend too.
Now with 25% fewer walls!
The other task for the weekend was priming the walls upstairs. We got about 1/3rd of the way done with the walls. The trim is kind of a mess and I’m deciding if I care enough to scrape/sand it or replace it (it’s cheap stuff, less than a dollar per foot). No one will notice either way, but I will. Gross gloppy trim drives me nuts. Because that’s the kind of neurotic I am.
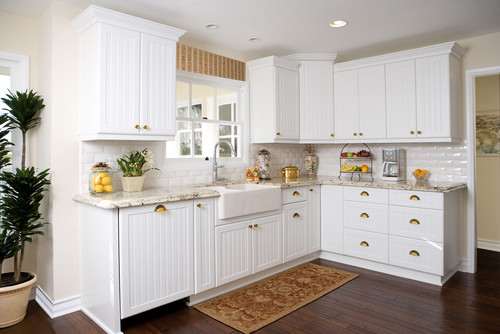
One of the things you can do to class up an Ikea kitchen is to spring for non-Ikea doors. There are a couple companies that do this, most notably SemiHandmade and Scherrs. I’ve had my eye on some beadboard panel doors:
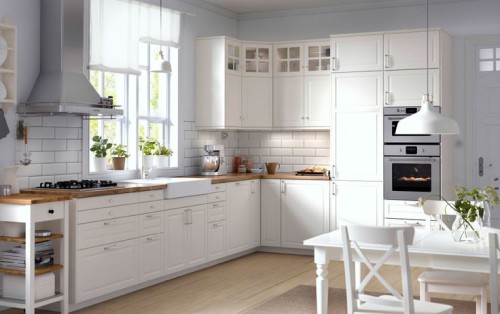
As far as default IKEA options go the only one I’m even vaguely into are the white BOBDYN doors.
I mean it’s OK
I don’t really have anything against the IKEA doors, except maybe the shade of “off-white” is a little too far “off” for my tastes. But really I’m splitting hairs. I just love the look of the beadboard doors.
Unfortunately the quote for my beloved custom doors came in at literally twice the price of the IKEA doors. Ouch. I understand why: it’s an apples to oranges comparison. BOBDYN is made of MDF (aka particleboard) with a white veneer. Scherrs doors are solid wood. Oh, yeah, that “twice as much” quote doesn’t include painting, I’d have to do that myself (or pay extra). It’s a much smaller jump from Ikea’s solid wood doors to Scherrs. But the price gap between MDF and solid wood is significant. If we go with IKEA we’re looking at $1000 worth of doors. Even with the money we’re saving by DIYing a lot of stuff I’m just not sure I can justify shelling out an extra grand on doors.
It’s not all lost yet; the Sherrs folks are looking to see if we can rework the quote to be a little more budget friendly by swapping out a few things, but at this point I’m not optimistic. At the end of the day I have to think about other things that money could go towards (like a nice stove).
Overall I’ve been dealing with a lot of sticker shock over just how much all this stuff costs. I’ve never redone a kitchen before – both the condo and our current place had nice kitchens when we moved in. This stuff is nuts. Right now we’re looking at spending almost $14k on a 10′ x 10′ kitchen, using mid-grade stuff (except those countertops; I will die for my quartz countertops) and DIYing all we can.
So yeah kitchens are insane.
Update 3/27: it turns out I can’t read. The new quote came in much lower, and then I realized I’d misread the original quote. I did not notice the 25% discount applied, which cut the price of the doors by $500. So the solid-wood doors are still 50% more than the ikea MDF but… maybe it’s worth it?
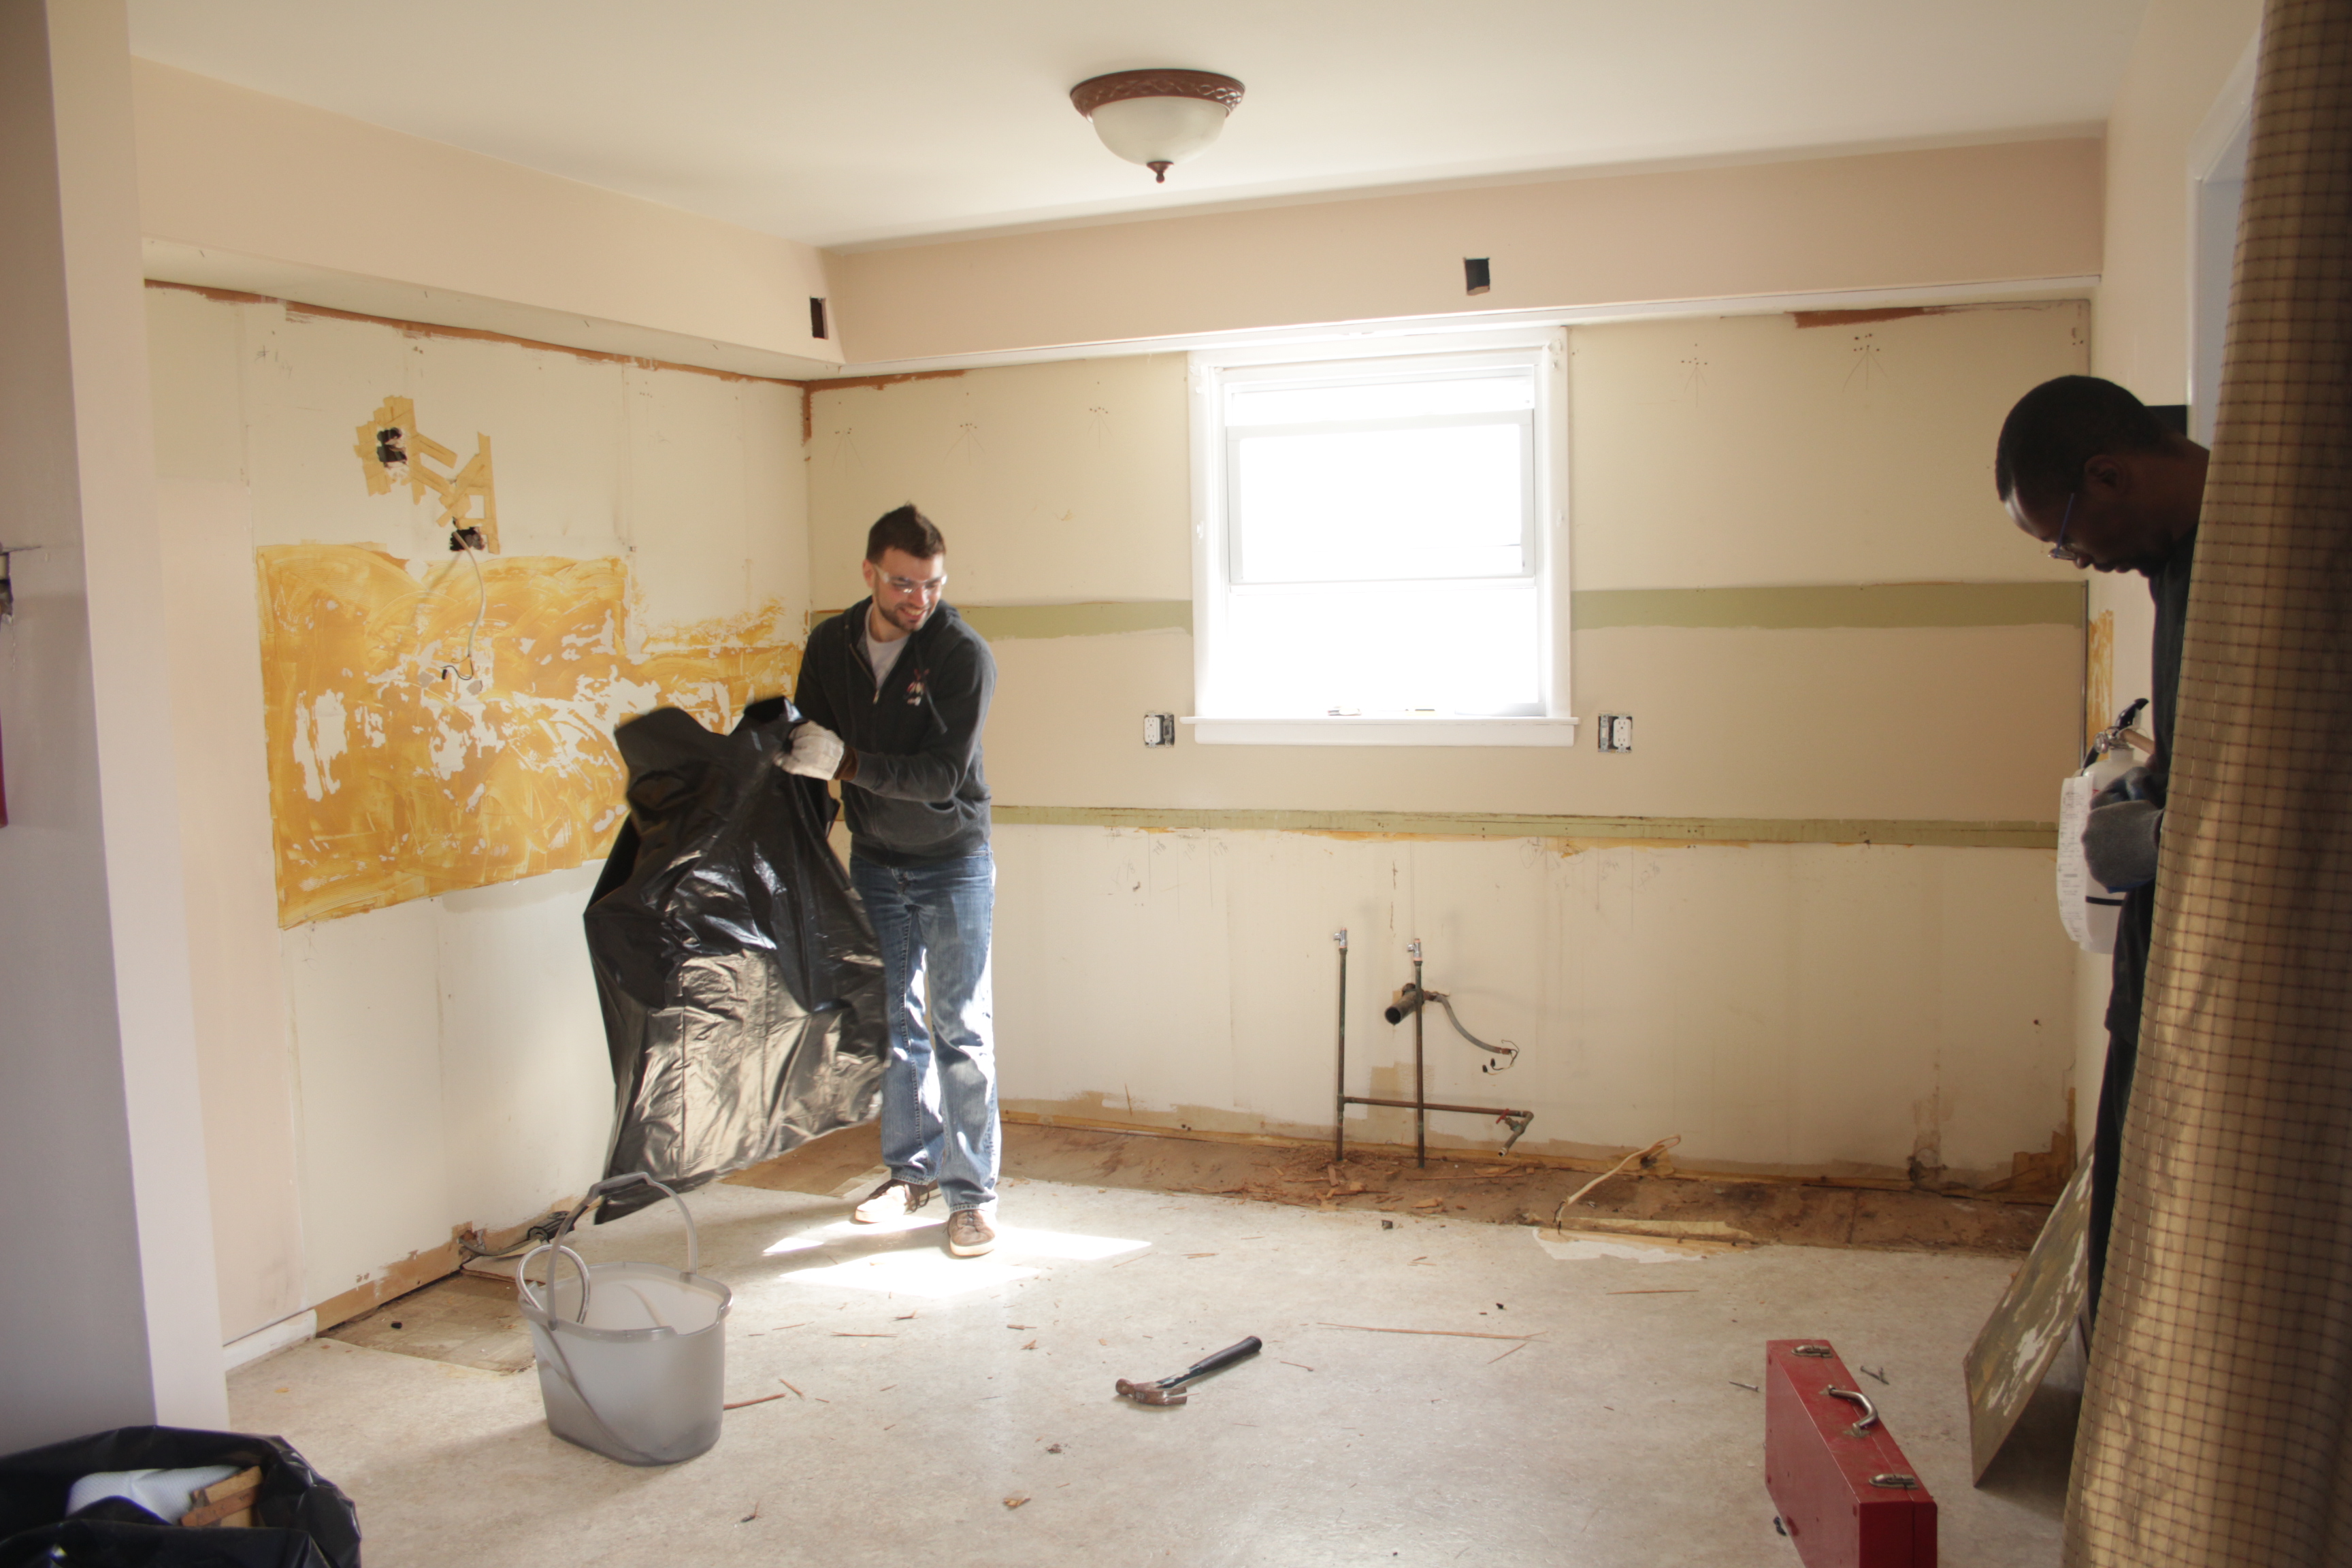
This weekend seven of us descended upon the shore house to rip out the kitchen and begin prepping the walls for paint.
Take a good look at this picture of the kitchen, because it’s the last you’ll see of it!
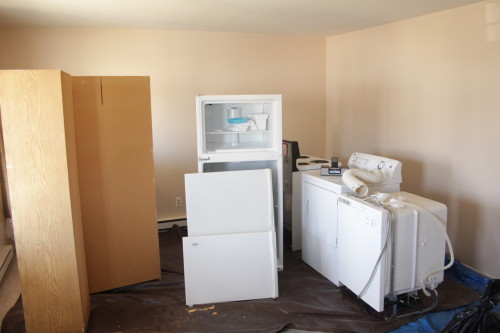
First we removed all the appliances and put them in the living room. I was really glad I had my dad and another handy friend with us, because I had no idea how to remove a dishwasher. Additionally, the shutoff valve for the dishwasher water supply failed, spraying water everywhere. Thankfully there is very easy access to the main water shutoff, and we could use my in-laws’ bathrooms next door.
Appliance Party!
Next we took off the doors and started taking the cabinets apart. The sink came out and then we ripped off the countertops.
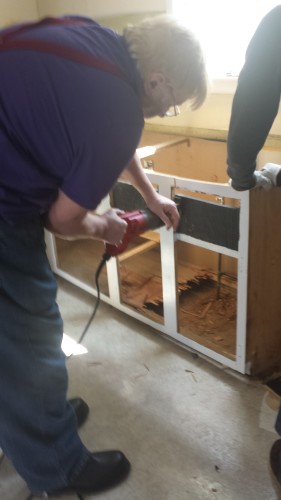
Some of the cabinets came out in one piece, and those will be donated to Habitat for Humanity’s ReStore along with the dishwasher, stove, sink, and garbage disposal. Other cabinets were not so lucky.
My dad using a sawzall on one of the cabinets
Removing the cabinets revealed that there were not two layers of vinyl flooring, as we’d thought, but actually three.
Top layer on the bottom, middle layer on left, original flooring on the right
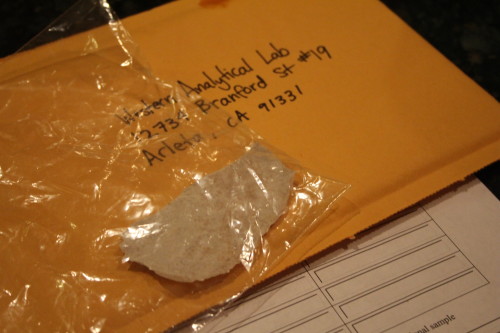
I took samples of the layers of flooring and had them sent to a lab for asbestos testing. Thankfully they came back negative, but it’s still gross dirty work so we wore respirators. The plan was to take up the top two layers and leave the one beneath that. There are only so many surprises I can take in one day.
Between each layer of vinyl was a layer of plywood underlayment. The plywood was held down with approximately 1000 staples. It took four of us at least four hours to get all the goddamned staples out. Each staple was at least an inch long and had to be pried out with vice grips. Regular pliers were completely useless for the task.
We had one of these on Saturday. We went to the hardware store on Sunday and bought 4 more.
After pulling out staples forever we pulled up the middle layer. Because it was glued down (surprise!) the bottom layer started coming up with it. Thankfully the bottom layer came up mostly intact so it wasn’t too terrible. I don’t know what the moral of this story is, because I don’t think it’s “leave your floor covered in 40 years and 2 inches worth of vinyl.” My takeaway is that we should build a time machine and stop everyone from putting a million layers of flooring down.
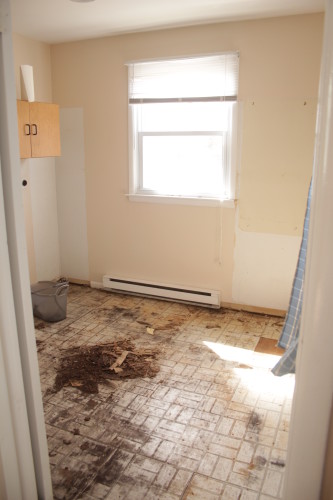
Thanks to water damage on the floor, the plywood in the laundry room came up without taking much of the asbestos tile with it. The pile of debris in this photo is actually plywood that had decomposed into dirt. On the right side you can see a spot that jettisoned an old tile.
Laundry Room
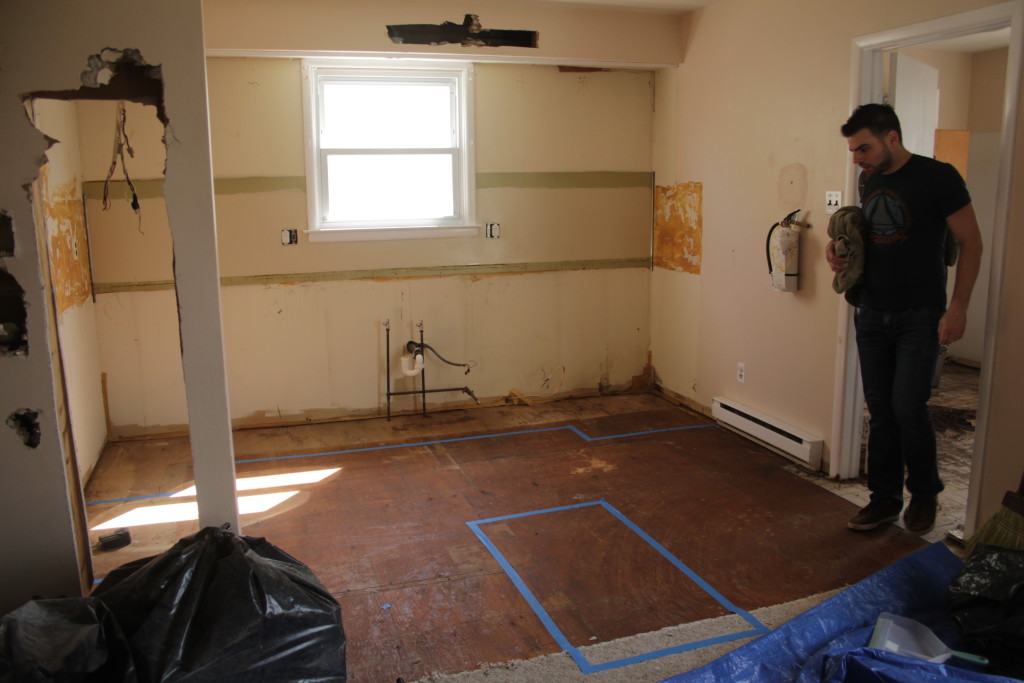
The last major items to demolish are the soffit above the cabinets and the wall next to the fridge. And electrician came in and removed the wires that were running through the wall so that we could safely remove it. He’ll be back in a few weeks to button it all up.
Goodbye Wall
With the kitchen emptied out I taped off where the new cabinets are going to go. I wasn’t sure about the island before, but now I think it’ll fit comfortably.
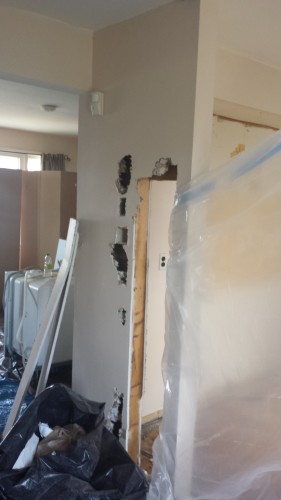
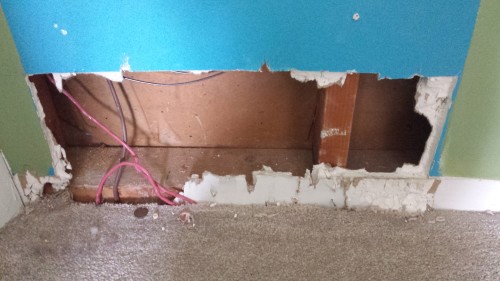
There is still some work to do but it’s coming along. In addition to the kitchen demo there was also a ton of spackling and sanding happening upstairs. I salvaged some of the drywall from the kitchen wall in order to make a patch which will go in this charming space where someone ran wires and didn’t close it back up. Or paint around it.
I don’t even know what’s happening here.
In the meantime I’ve got a million contractors scheduled. The crawlspace needs work (which we knew about before purchasing) and originally I was going to put it off because it’s not urgent. After spending 5 minutes under there I think we should do it sooner rather than later. It’s very damp all the time due to the fact that the soil has eroded below the bottom of the foundation and water has no way to escape.
Other big-ticket items are the heating system. I want to convert to gas, and then if we convert to gas the question is do we replace the aging hot water heater now. And if we do, do we get a tankless system. The tankless system is wayyyyyyy more expensive but in a house where we’ll regularly have 8+ people sleeping/showering a tankless system is very appealing. Even if we can only run one shower at a time (a complaint I’ve heard with tankless), 8 warm showers is better than 2 warm showers and 6 cold showers.
Right now I’m feeling a liiiiiittle bit overwhelmed by the scope of this project. We can talk about my sticker shock over the price of countertops another day.
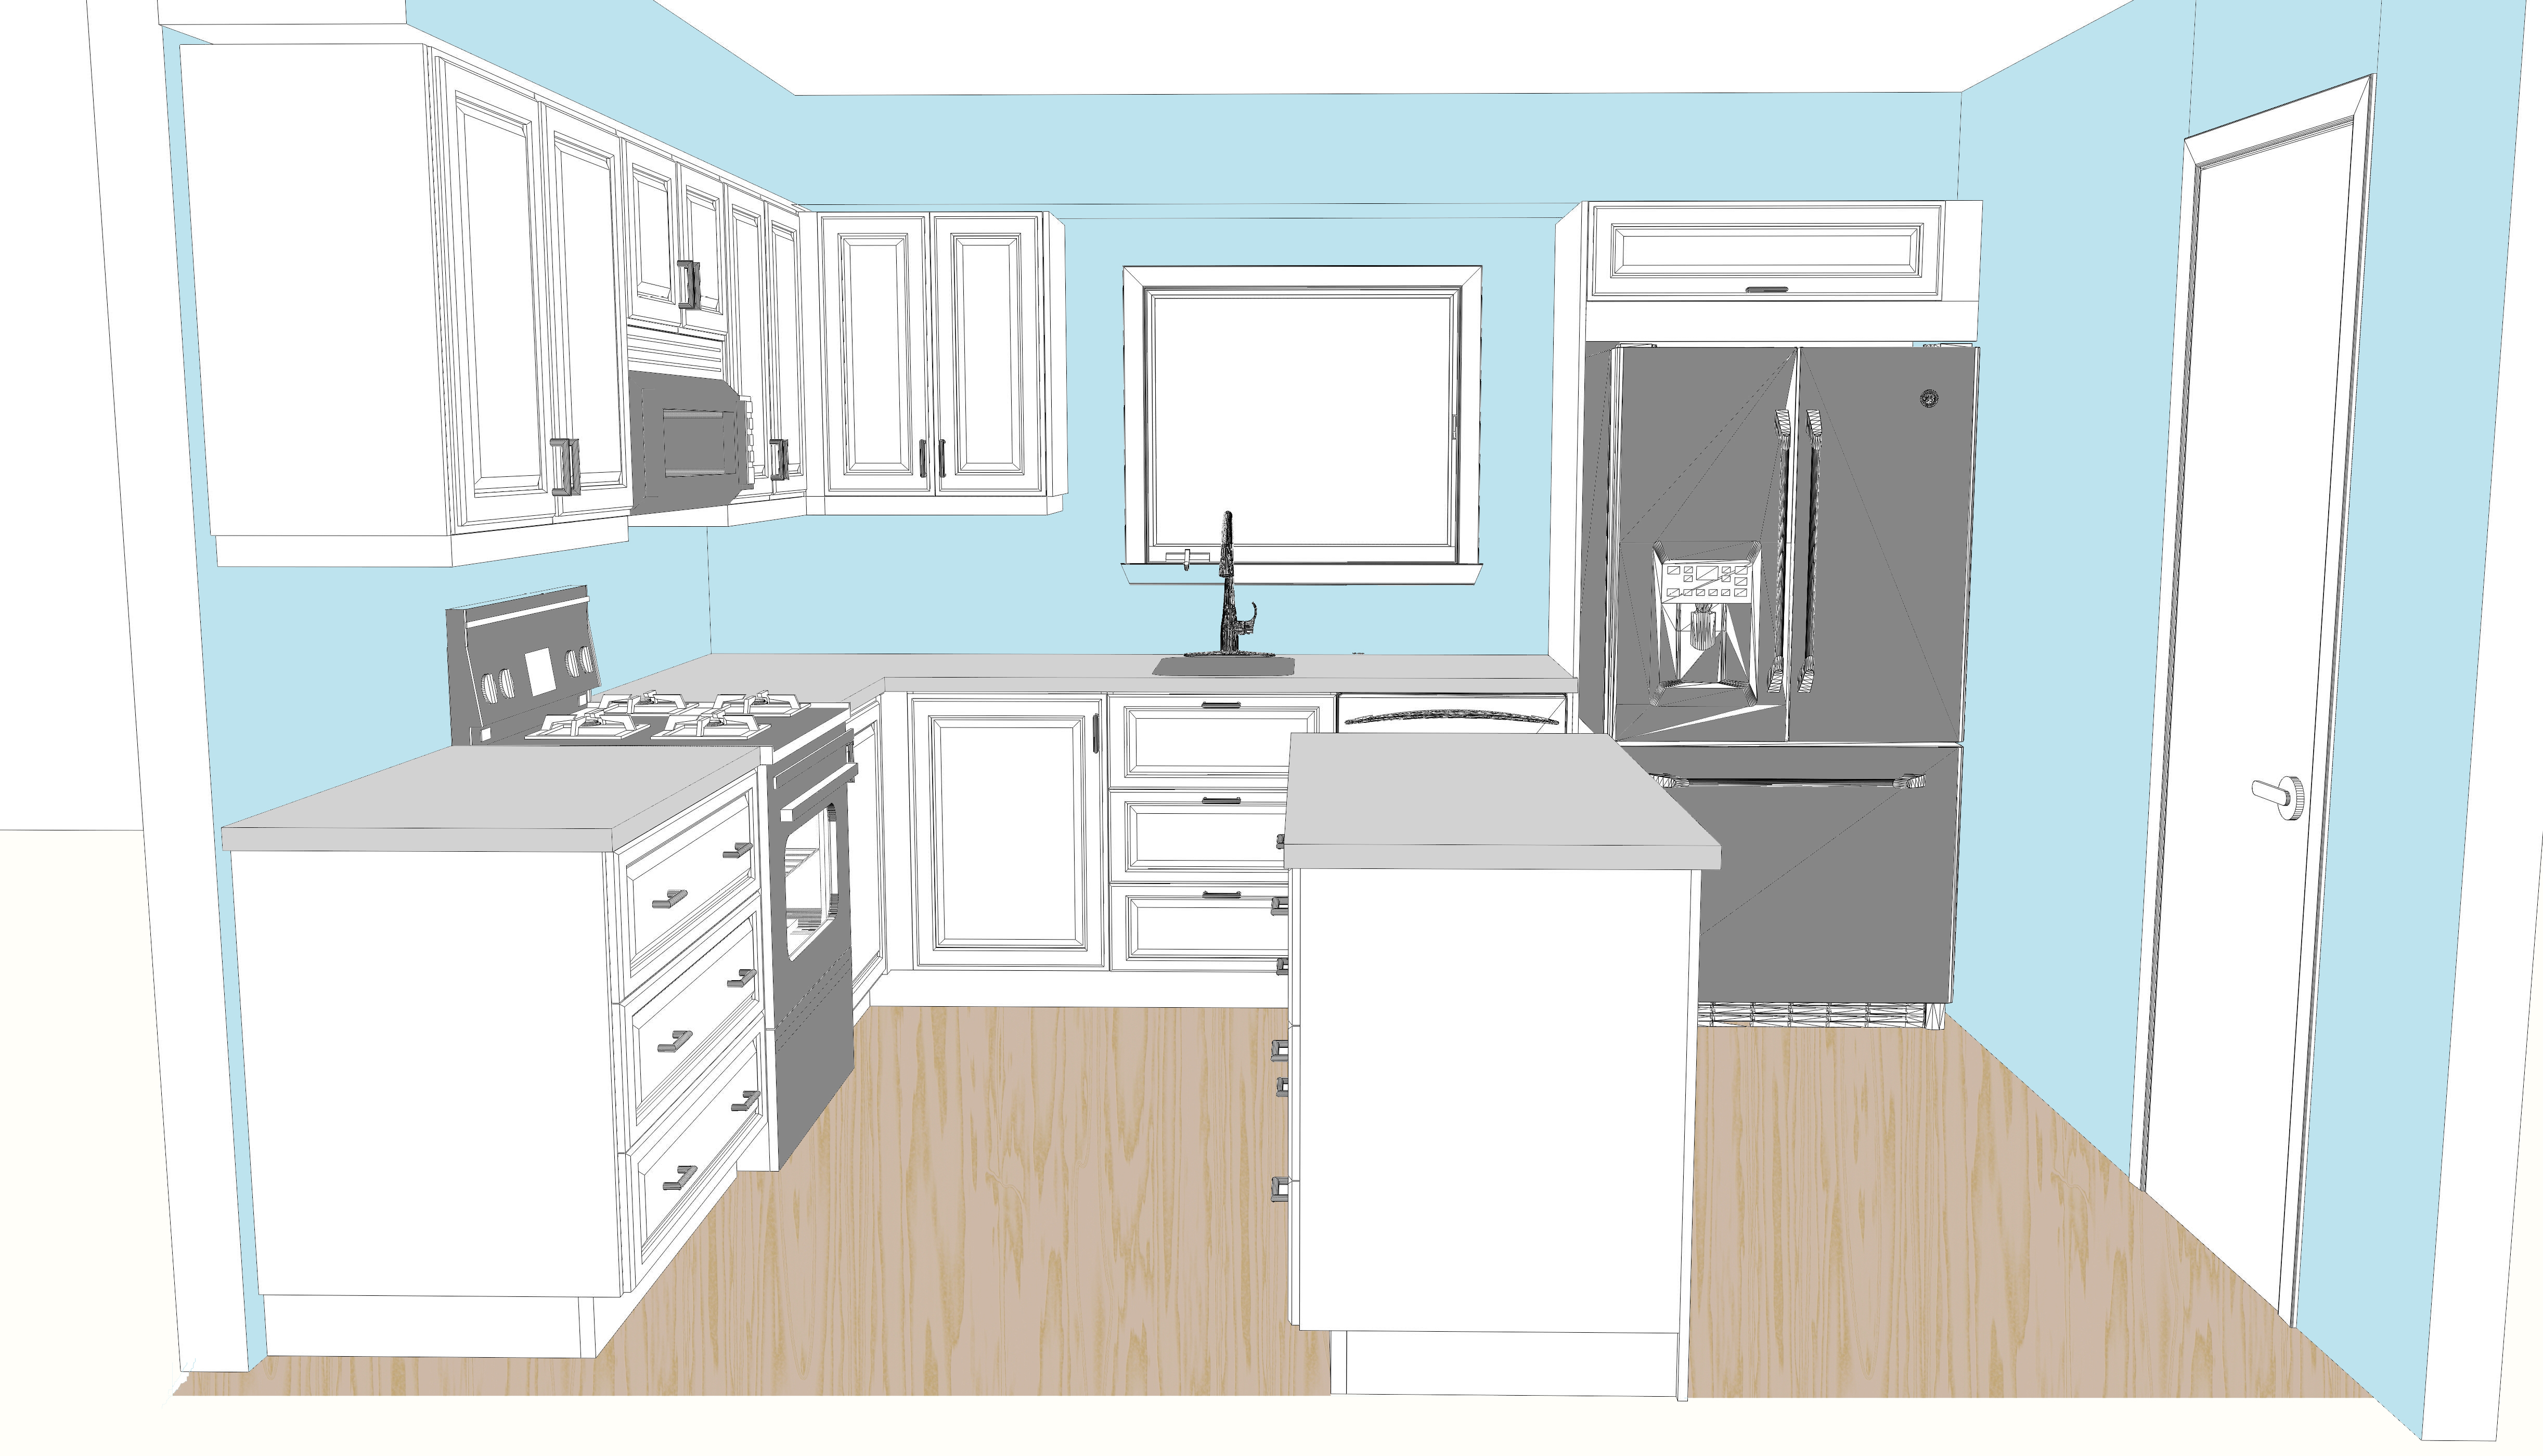
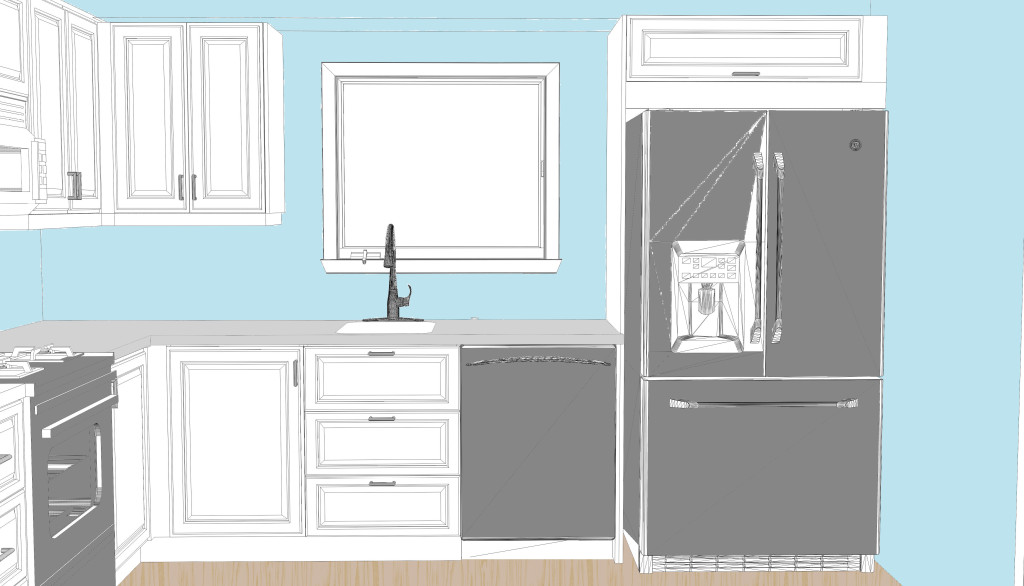
The first draft of the kitchen layout came in tonight. It’s a start, but there’s definitely some stuff I want to change (and a few things I realize I forgot to tell the designer). The coloring is all mine, it came to me black and white.
Perspective View
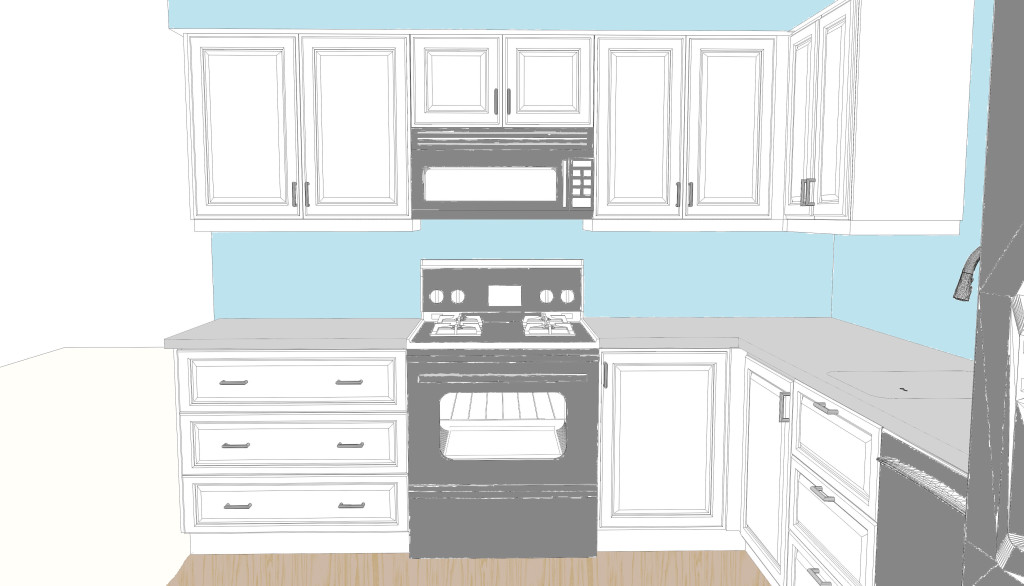
I totally forgot to tell them we plan to remove the soffit (i.e. the drywall box above the cabinets), which would make the space above the refrigerator way less awkward. I’m not sure if we’d raise the cabinets up higher, maybe just the ones above the oven? I’m short so I don’t want to put stuff too high, but it would be nice to have more clearance between the microwave and the range.
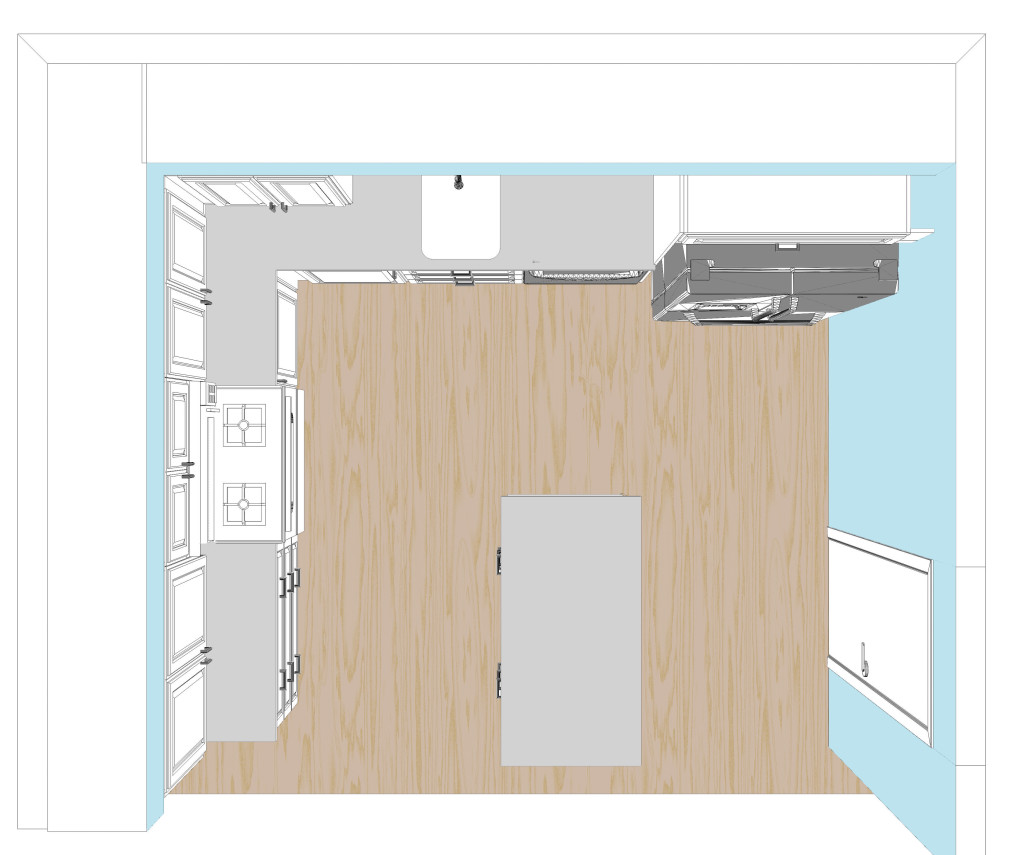
Top View
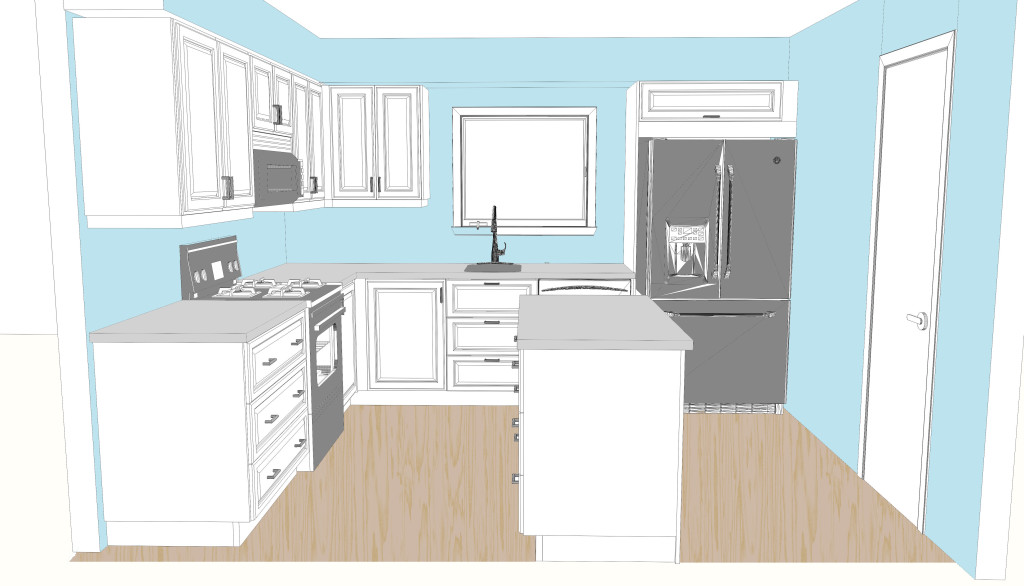
I’m really not sure how I feel about the island. I plan to tape it out this weekend to see how it feels in the space. It adds some much needed counter area but I’m worried it will feel awkward. I do like that one person could be cooking at the range, one person could be cutting veggies by the sink, and one person could be prepping on the island without anyone getting in each others’ way.
Back Wall
I forgot to tell them to put in a double sink, and I just generally don’t like the layout for the area by the window. One solution would be to move the dishwasher into the island (easy since the kitchen is above an open crawlspace). It would mean running extra water and electrical lines, but it might be worth it to get that space a little less awkward. Alternately I could just pick out a smaller refrigerator which would free up some space and give us more room for a bigger sink (but it would still be off center, which I might just have to live with). The off-center-ness of the sink would be a lot less irritating with a lower profile fixture as well.
Left Wall
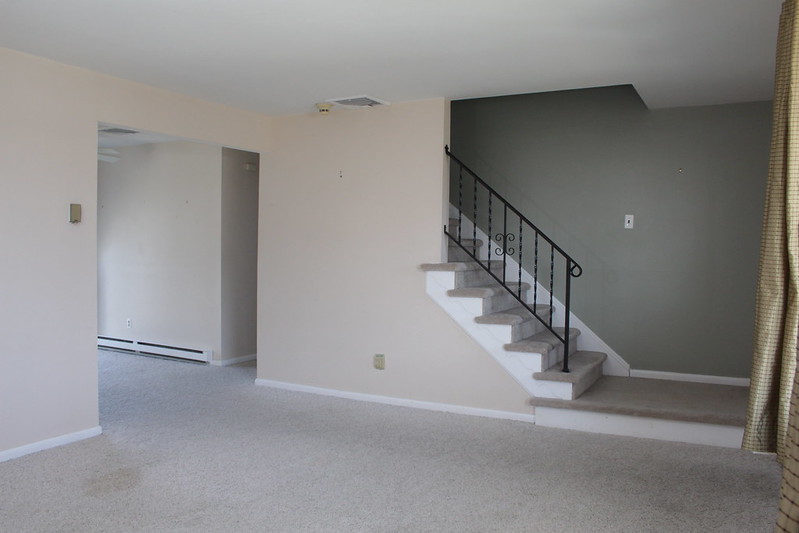
Seeing this drawing has me convinced we should remove the little partial wall that is currently next to the fridge (visible here). It makes no functional difference but it makes the room seem much more open without it. The wall does have some electrical in it so I’d have to have that moved. An electrician is coming down on Friday to quote everything.
I spent a while tonight trying to pick paint colors using the Sherwin Williams tool, which served us well before. It’s harder with this place though. I love bright bold colors but the rooms down the shore are so small that it could easily feel overwhelming. The furniture is also much more mis-matched hand-me-downs so I need colors that play well with random sofas.
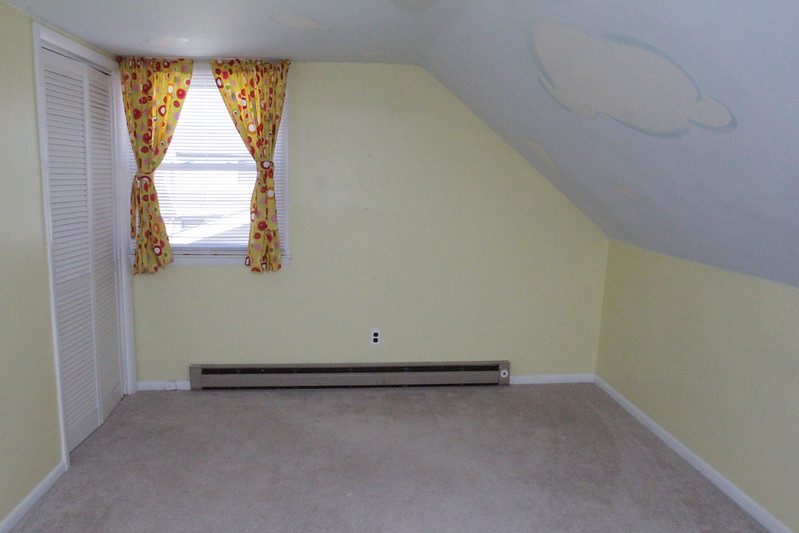
For the upstairs bedrooms I’m thinking of going with a shade of grey, and then using duvet covers to add colors. The beige carpet is killing me. It is a slightly warm shade of beige so I have to be careful to pick walls that compliment it well or else it will just look dirty (jk it is dirty). The color currently stops below the slanted part of the ceiling, which makes it feel like it’s caving in of you. Whatever color we pick will be extended all the way up to the flat part of the ceiling.
I love love love the blue color we used in our guest room in Philly (“Drizzle”) but I wouldn’t want to do it in all four bedrooms, and I’m not sure how I like it with the carpet.
Mineral Deposit
Gray Clouds
Drizzle
Classic French Gray
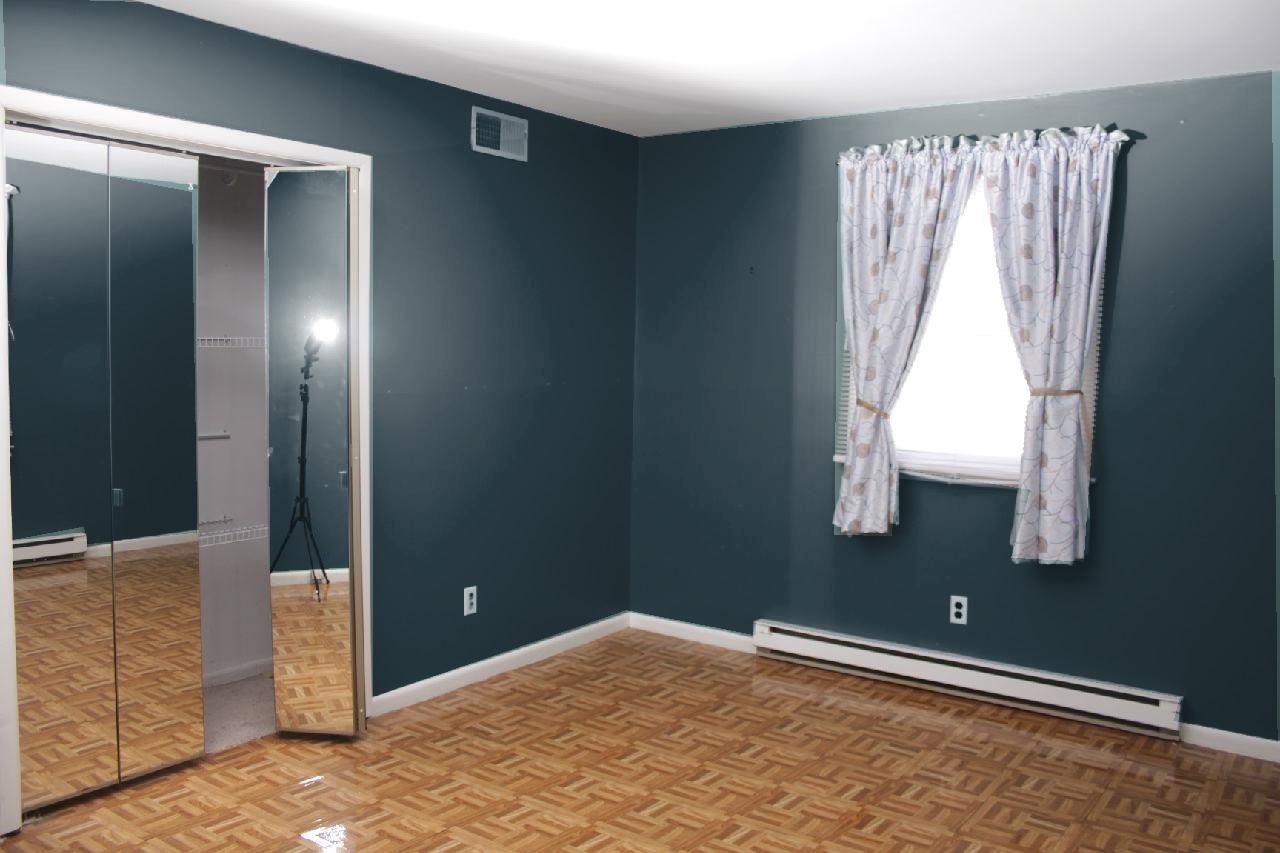
The downstairs “master bedroom” is the largest bedroom in the house. It has parquet floors which I haaaaaaaaaaate but given the amount of other work the house needs I’ve gotta live with them. My favorite of the choices is the dark color, but I feel like a dark bedroom isn’t very ‘beachy.’ My beloved Drizzle doesn’t look so great against the orange wood of the parquet floors. I’ll probably go with the lighter of the two grays below.
Jubilee
Drizzle
Serious Grey
Dark Night
Meanwhile I’m trying to get everything ready for the weekend, which is Demolition and Contractor Extravaganza. Friends are coming down on Saturday to help rip out the kitchen and prepare the walls for painting. I have two different HVAC estimators coming out, an electrician, and a crawlspace guy. It’s gonna be a busy weekend.
It’s cheap, lasts forever, fireproof, what more could you want from a miracle material? – My dad, on asbestos
I knew this going in, but oh god nothing is ever easy with home repairs.
Let’s start with what we knew going into this: the house is covered in asbestos. Literally. It has asbestos siding, but it’s in good shape so who cares just leave it alone and we’re fine.
We also knew the house had inadequate flood venting. Aside from driving up the cost of flood insurance the inadequate venting traps moisture under the house which makes the wooden structure rot faster. So we knew we’d be spending about a thousand dollars on replacement/additional vents.
What we did not know is that the vents are placed in such a way that they can’t be replaced without cutting into the siding. Which is made of asbestos. Therefore the cost of replacing vents is more like $2500. Ouch. “But,” the venting contractor said “if you were planning on replacing the siding anyway I could do the venting while the siding is off and that would save you a lot of the labor charges.” I assure you, with the laundry list of things to fix on the house I was not intending to replace the siding.
From what I’ve read asbestos siding lasts damn near forever, so I’m leaning towards not replacing it. I’m going to have someone come out and give a quote tomorrow but I can’t imagine the cost being worth it. Opinions from anyone who has done this before are appreciated.
Speaking of asbestos, did you know that some vinyl floor tiles contain asbestos? Me neither! I cut a chunk of vinyl out of the kitchen floor and am sending it off to a lab to have it tested. We should get the results in a week or so. I don’t even want to have someone look at the roof (which will need replacing within the next few years) because I’m afraid to find out how much asbestos it is full of.
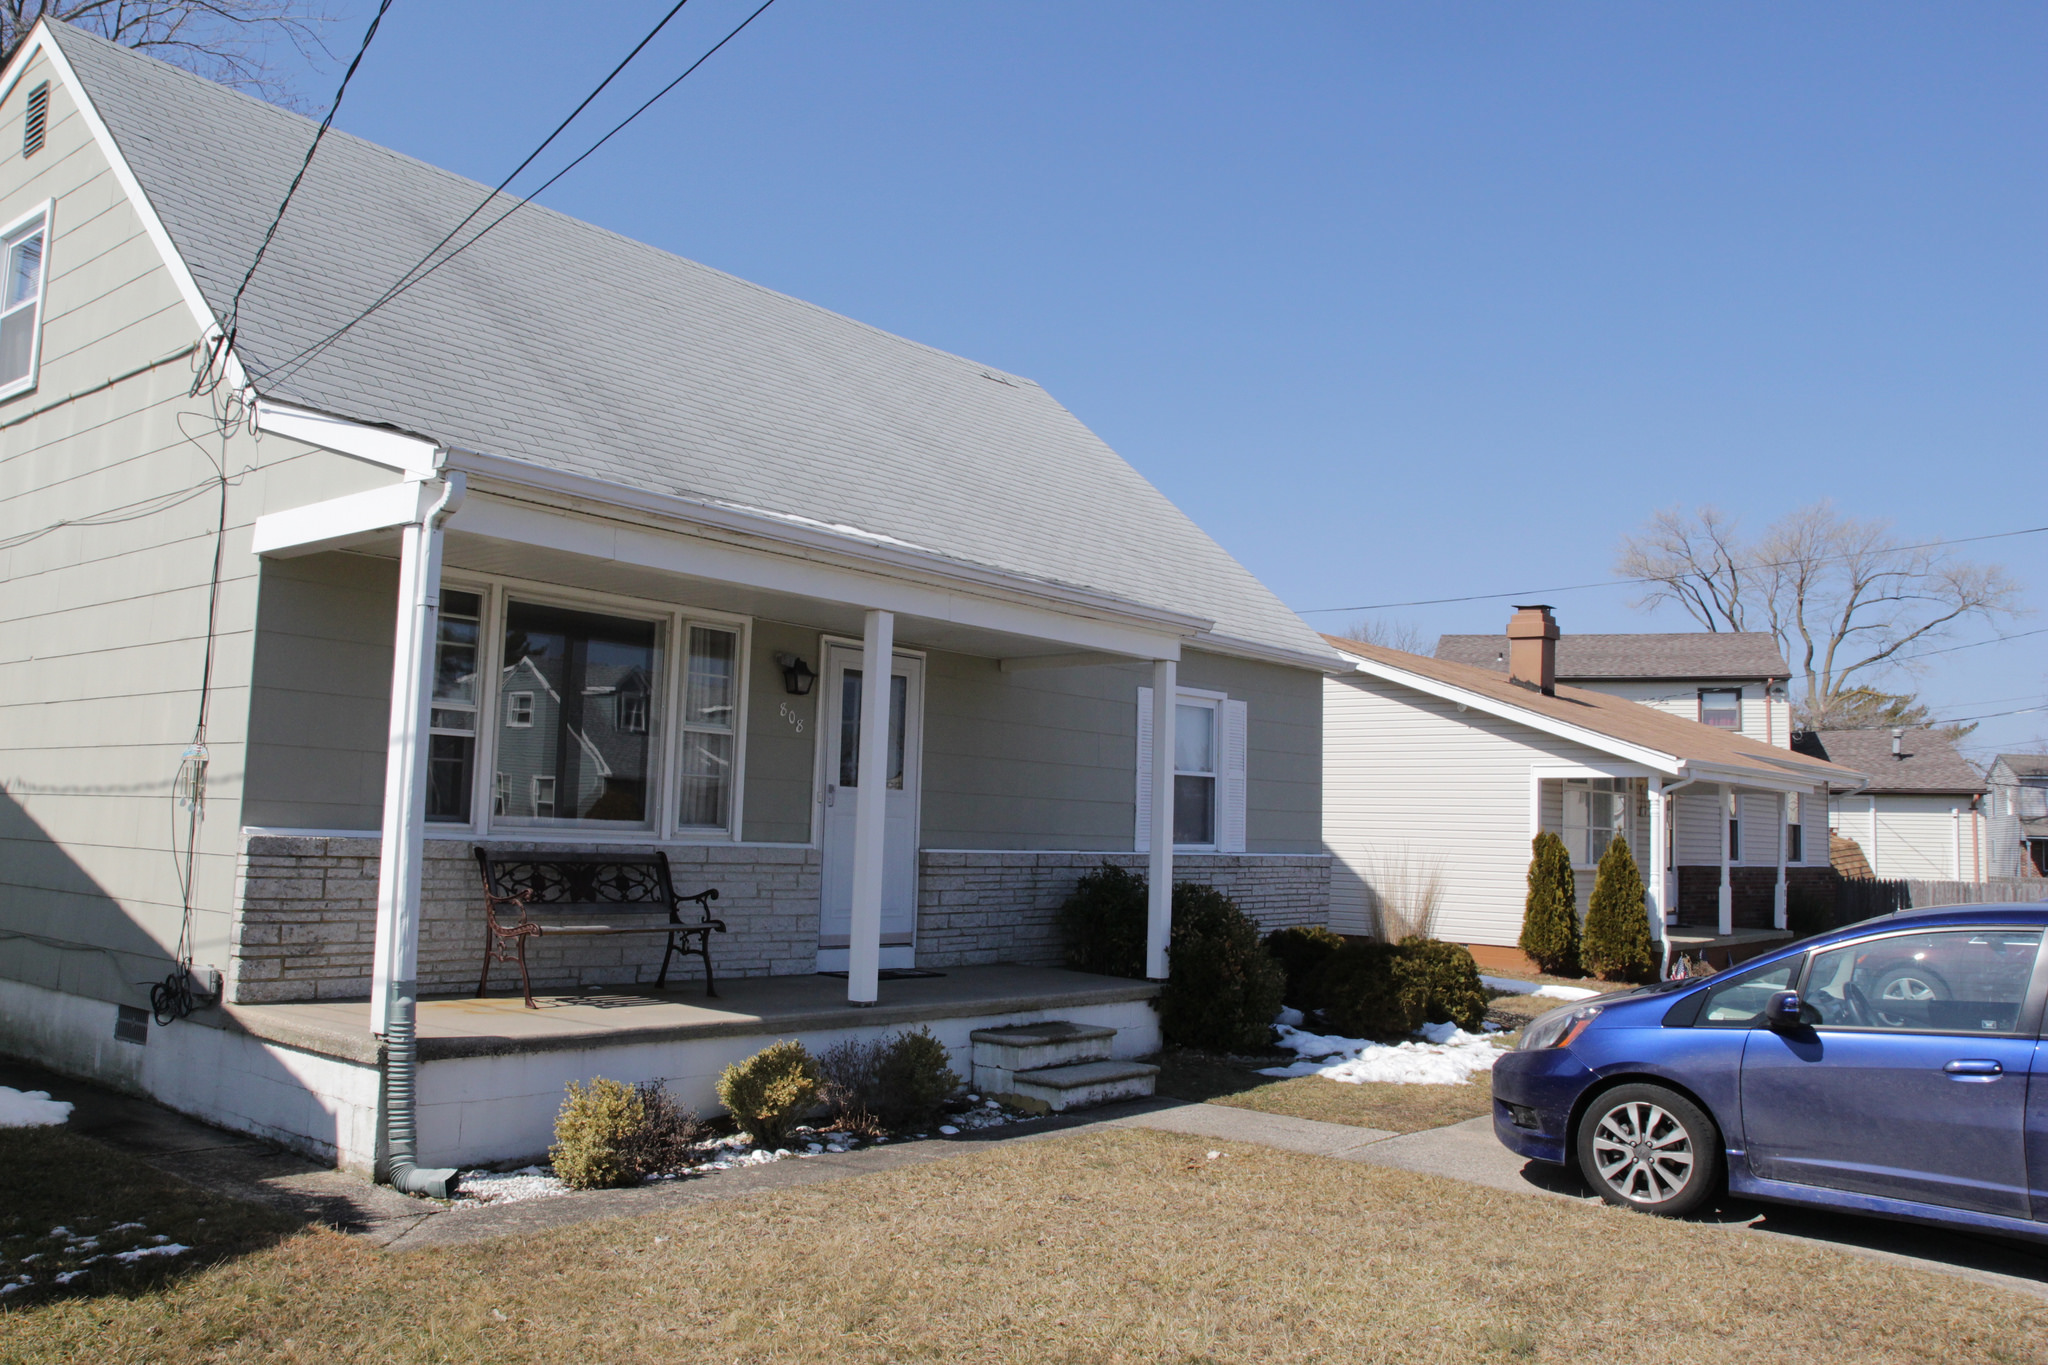
It’s official, we are now the proud owners of a shore house next door to my in-laws!
Closing took a while. Aside from the usual shenanigans we had to sign 30 pages worth of affidavits saying that we were not various other people who share our names and owe many other people lots of money. I’m not sure if this is unique to this area or not, it was definitely new to us. The title agent was also so disorganized I won’t be surprised if we get called back to fix some of the paperwork later. But we’ll deal with that later … it’s ours!
After closing my dad helped me take photos and measurements. I got some OK photos but honestly by the end of it all I was so exhausted I could barely function. Here’s the nickel tour…
So planning a kitchen is exciting stuff, which is good because dealing with structural problems is pretty boring (but also expensive). But today I’m taking a break from the real world of home improvement and diving into insane(ly cool) stuff. Because I need a break from researching gas installation and hot water heaters. Here’s 3 things we’ll probably never actually do to the house, but would be pretty cool.
Idea 1: Dormers
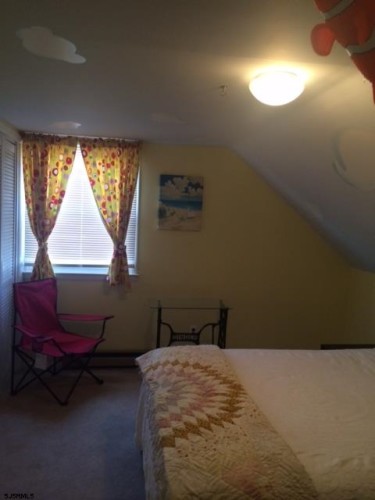
The house has a very steep roof in order to accommodate the 2nd floor. It makes the upstairs bedrooms feel a little claustrophobic.
This bed is not for all people
One way to open the room up would be to add dormers to the roof. Check out the difference it made in another cape cod style house with a similar roof:
The downside is that adding dormers is crazy expensive and it can be tough to do without making the outside of the house look completely stupid. We’d probably need to hire an architect to design something I don’t hate, and the permits could be a pain. Permits are always a pain.
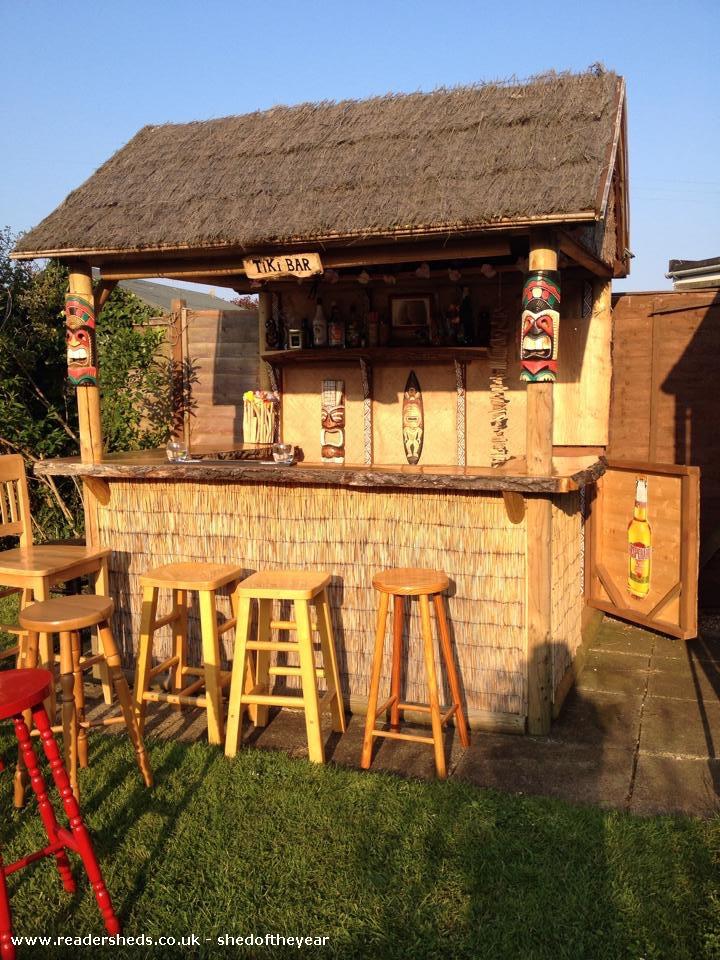
Idea 2: Pub Shed
We’re about to have a huge back yard, which is totally new territory for us (no pun intended I swear). In addition to the decent sized yard the house comes with, we’re removing the fence between us and the house next door. For the time being it will just be a nice large area for my in-laws’ dogs to run around, but I won’t lie: a bar shed is a mighty enticing idea:
I like the idea of a pub shed because it gets parties out of the kitchen and into the back yard. There’s already a shed on the property, converting it probably wouldn’t be TOO hard… but I’d want a fridge out there and then it suddenly becomes a much more complicated project. Also, flood zone.
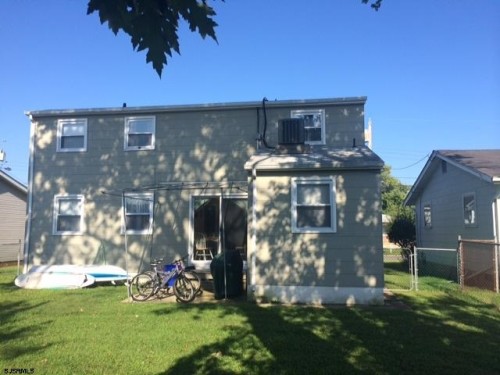
Idea 3: A sweet deck and maybe a pool
I thought the idea of having a pool at a shore house was completely absurd and redundant. Then I visited my coworker’s beach house with a pool and completely changed my mind. I mean the ocean is cool and all, but you can’t stand in the ocean with a refreshing alcoholic beverage. Or at least you really shouldn’t.
The back of the house. It wants a deck.
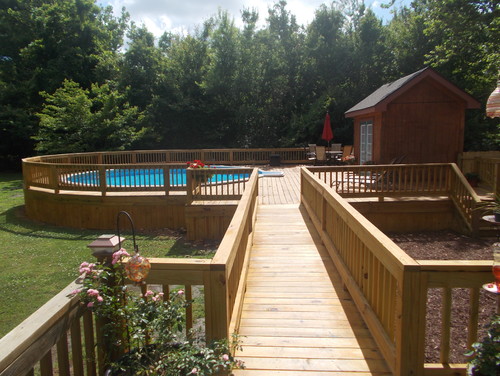
An in-ground pool isn’t practical on the island but above ground pools are really ugly. The best solution I’ve seen is to build a deck around the pool. With this idea we could even incorporate the bar shed in a way that has it elevated out of the flood danger zone! Or put the shed on the ground for a swim-up bar. The possibilities!
In reality I don’t really want a pool badly enough to deal with the maintenance, but we’ll probably put a deck in eventually.
With my home improvement palette refreshed I now have the energy to return to more mundane real world decisions. And deal with the utility companies. And the contractors. It’s shaping up to be a very busy spring.
I feel like I spent half the day on the phone today. A bunch of it was getting the utilities set up down the shore. The best part of the process was getting transferred to 3 different people at the water department, only to finally learn that the water bill transfers automatically with the deed.
The house currently does not have natural gas hooked up. I’ve been looking at electric ranges and cooktops, and in order to get something I can stand to cook on we’d have to go fairly high end. Meanwhile it turns out if I get a gas range the gas company will hook it up for “free” (in quotes because they know they’re getting a customer so it’s more of an investment with guaranteed returns on their part). This is of course assuming there’s already gas in the neighborhood, which is yet to be determined. Apparently the rep I talked to on the phone has to turn that question over to someone else with a divining rod or something.
Ash has found a gas line!
Assuming gas is available, I turn my attention to the heating system. Right now the heating system is a heat pump with a broken auxillary heating element. On the one hand, the aux heat is basically a big toaster and should be an easy fix. On the other hand the heat pump is over a decade old and those things only have a lifespan of 10 years or so. In general the heating system is pretty low on our priority list; we won’t be there much in the winter and there’s electric baseboard heat to supplement the heat pump. BUT if we were to get a gas furnace put in to replace it there are some nice rebates and incentives from the gas company. Also gas heat is much cheaper than electric.
The hot water heater was also on the inspector’s list of appliances near the end of their life expectancy, and that would also benefit from being converted to gas. I looked into tankless heaters but I’m not sold on the proposition. It’s very likely we’ll have both showers in use at the same time and it sounds like a tankless would have trouble keeping up with that.
There are so many expensive appliances to replace. None of them are urgent, so we can spread the costs over a few years, but still. The stove is the only non-negotiable thing that has to be upgraded sooner rather than later. The one in there is an ancient electric coil stove and I just can’t with those things.
The gas company’s spiritual medium, or whomever keeps track of what lines are where, will be in touch by Monday to let me know whether gas is even a legit option for us. Then I have to decide whether to start down that rabbit hole. So many expensive decisions to make.
Update: The gas company got in touch with me on Thursday. They left an inaudibly garbled message on Chris’s cell phone and emailed me a bunch of PDFs. One of the PDFs is literally a one page document that just says “For Rebate Information, visit our website” in 72 point font. At no point did they confirm whether or not gas service is available to the house. Looks like Friday will be another day of phone calls.
We’re still a week out from closing on the house, but due to the timing of the Ikea kitchen sale (now) I’m trying to line up as much as I can so we can hit the ground running and take advantage of the sale.
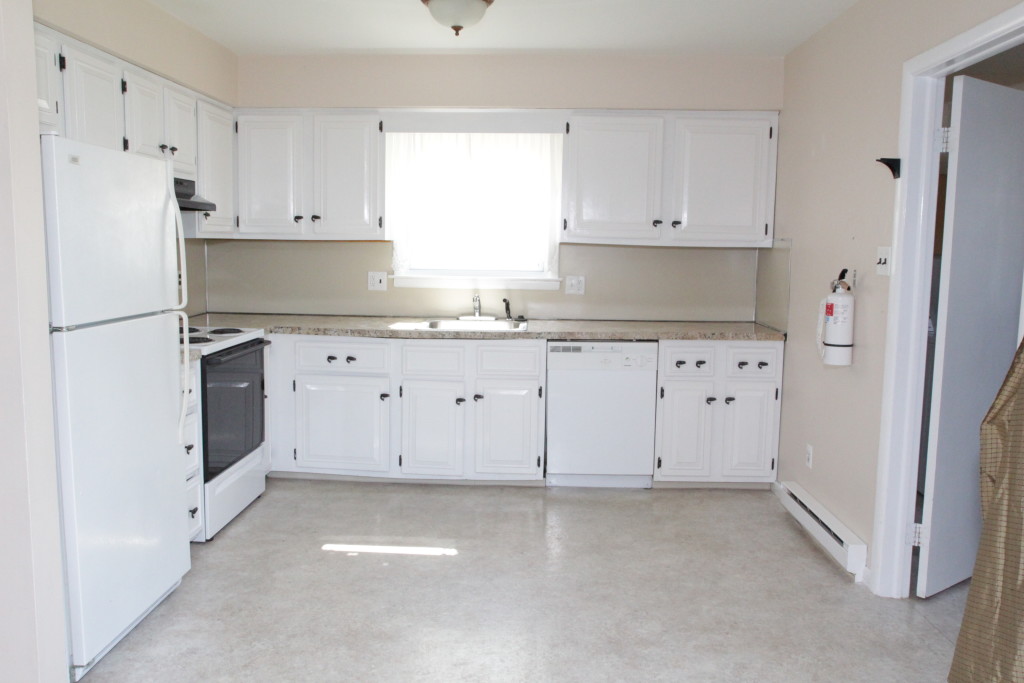
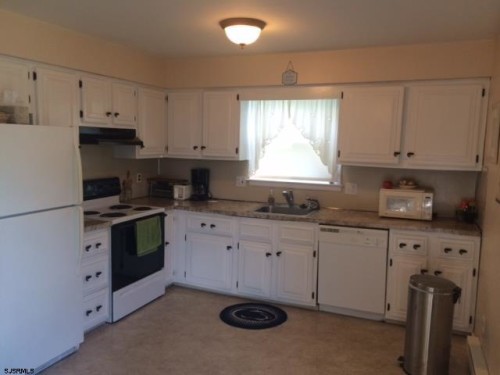
If you remember from the huge to-do list the kitchen currently looks like this:
I mean, it’s not the worst.
It actually doesn’t look too bad in this picture, but in person the cabinets are all sagging at odd angles and the counter top is some sort of faux-stone print laminate. I’ve seen much worse but for somewhere we’ll be cooking big family meals I think we can do better.
We’re going with Ikea for the new cabinets because they hit a good spot between price and quality. I know there’s much higher quality stuff you can get, but since the house is in a flood zone I’m not about to put fancy all wood custom cabinets in it. The modular sameness of Ikea is actually appealing because should the worst happen we can just replace the damaged cabinets ourselves.
I plan on installing the cabinets myself but I’m hiring a designer to do the layout. There’s a ton of important stuff to consider in a kitchen design that I’m just not familiar with. Also the more time I spend with the Ikea kitchen planning tool the more I want to scream and run away. Reviews for Ikea’s in-house planning service are a mixed bag so I’m going with a third party designer.
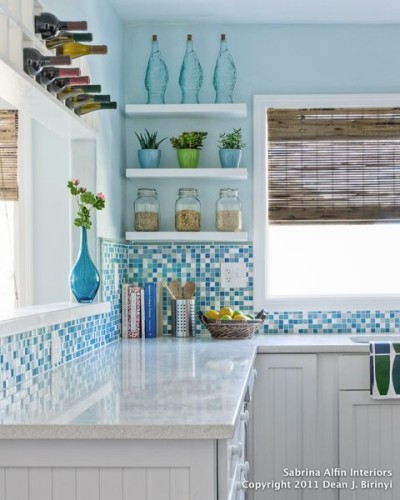
At this point I have spent a ton of time on Pinterest looking at kitchens. Here’s the general style we’re going for:
I’m not a huge fan of open shelving but I like the blue beachy look here and the tile backsplash.
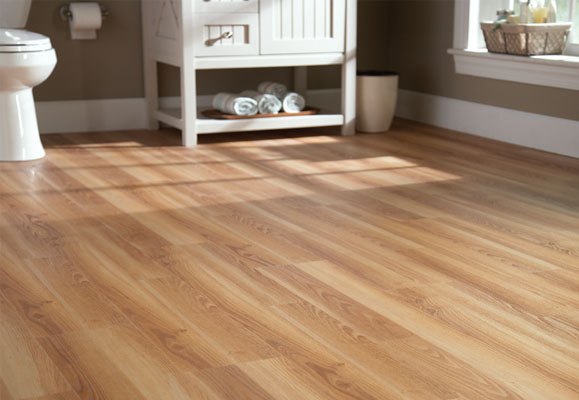
For flooring I’m 90% sold on wood-look vinyl plank. I like the way wood looks but the kitchen floor extends into the laundry room and that just seems like asking for trouble. Vinyl tolerates water much better than something like Pergo and isn’t as much of a pain to install as tile. From what I’ve read 80% of the work is in the floor prep. If your floor is flat then everything is easy and it looks good for years. If your floor is not flat then it pops and warps and looks awful. I guess I’ll be spending a few weekends this summer elbow deep in leveling compound.
TrafficMaster Allure from Home Depot
Not really sure what we’ll do about appliances. I hate hate hate electric coil stoves like the one that’s there. I’m debating springing for an induction cooktop. The rest of it seems fine, if a bit old. It’s tempting to move the fridge into the laundry room to use as a beer fridge and get something a little nicer for the kitchen. This is where I start to hyperventilate with the kitchen planning. In order to plan cabinets you need to know the size of your appliances, but the cabinet layout influences the appliance choices!
My next step, after closing, is to take a million measurements of the kitchen and adjacent room (which is sort of a dining room I guess) to send to the kitchen designer. Start to finish usually takes 3 weeks for design/revisions, during which I’ll remove the existing cabinets and poke around in the walls to see if there are any nasty surprises. I told the designer I’m willing to consider moving plumbing / electrical or cutting a passthrough window into the living room, but it would be a pain in the ass. All three walls are load bearing so having anything done to them won’t be cheap or easy.
So yeah. DIY kitchen installation with professional design. I know just enough to know that I have no idea what I’m getting myself into. Friends who have been though this: TELL ME ABOUT YOUR KITCHENS!