When I was in high school I used my dad’s Nikon F camera a ton. It weighed approximately a million pounds and was twice my age but I loved the hell out of it. I was particularly proud of the fact that it was entirely mechanical and my dad had a huge collection of lenses for it (also completely mechanical; to this day I still find autofocus to be a little foreign).
Most of the lenses sat in the closet when I finally moved to a digital SLR, until a couple years ago when I got an adapter ring that lets you used the Nikon F-mount lenses on a Canon EOS body. Obviously none of the computerized features work, but the through-lens metering on my T4i does a pretty good job at exposing the shot. This weekend I pulled it out to use with my dad’s Nikkor 500m f/8 lens. It’s a short (for a 500) fat lens which we affectionately call “the Hubble because it’s really best suited for taking pictures of the moon and other distant, slow-moving objects.
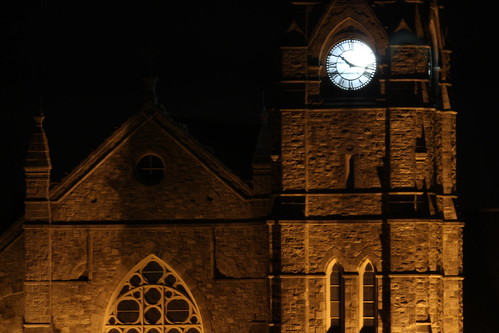
The church down the street (about 5 blocks away) fit that description well so I stuck the camera on a tripod and tested things out. I used the 2 second self-timer function on my camera so I wouldn’t jiggle the camera when pressing the shutter release. Because at 500mm even a tiny bit of jitter looks like a lot.
It turns out the church is actually much too close to be able to do much shot composition. I had to back up about 15 feet from the window just to fit that much of it in the frame. What’s incredible to me is that you can see the individual bricks that make up the church. This church is far enough away that I can’t read the clock from my bedroom window. Turns out it’s wrong anyway.
Focusing the lens was a challenge. My camera has a “live preview” feature which lets you zoom in on sections of the frame, so I used the edge of the clock face to get things as sharp as I could (which isn’t very sharp with this lens).
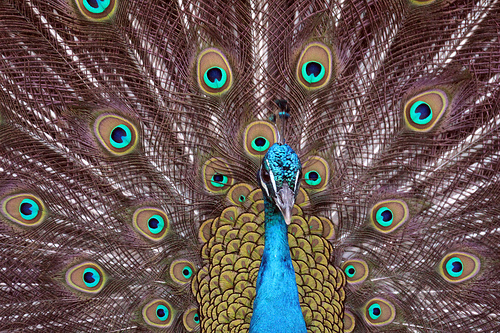
The next day I took it to the zoo and got up close and personal with some of the animals.
It’s not the most practical lens but it’s a lot of fun, and I’m glad to be able to use the older lenses in my dad’s collection. The flexible and super high ISOs of modern SLRs make the lens more useful now than it ever could have been with film.
This short and somewhat boring clip is the result of playing around with CHDK (Canon Hack Development Kit). I’m working on a stop-motion animation for Tinysaur, but sadly neither of my cameras (a Canon Digital Rebel XT and a Canon SD1100IS Point and Shoot) had a built in timer that would shoot over and over indefinitely. Using the CHDK Ultra Intervalometer script I set my camera to take a shot every .5 seconds. Although it didn’t quite go that fast… I’ll get to that in a bit.
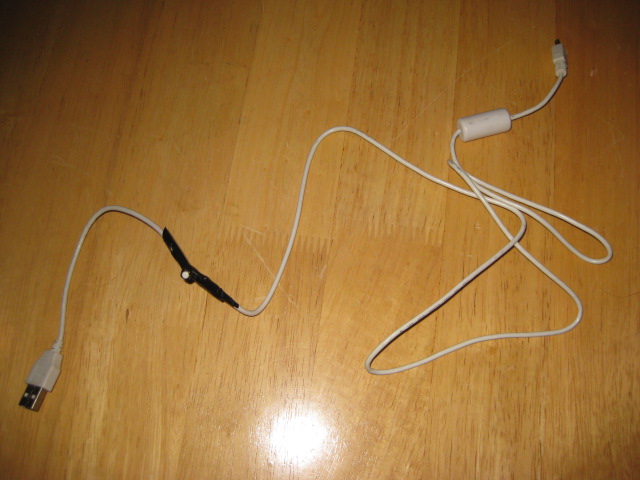
CHDK is a firmware add-on for Canon point and shoot cameras that lets you control absolutely every aspect of the shot. It loads from your SD card at boot, so it’s non-permanent (although you can set it to auto load). It gives you access to a plethora of fine tuning options and display monitors, and also lets you run scripts to take pictures based on time, motion detection, etc. But the most exciting thing I found is that there’s a script which will let you trigger the camera with a hacked USB cord with a switch.
Mine is shown on the left, it’s not very pretty. I spliced a reset switch into the +5v (red) wire. It uses a USB port for power, which makes it a little silly, although ok for my uses. Ideally you’d rig up a power supply along with the switch. I would have but I only had AA battery holders and it needs between 3.5V and 5V of juice. There are some neat hacks listed on the CHDK wiki for making remote cables out of old joysticks and flashlights and whatnot.
There’s a ton of documentation, but it’s a bit scattered around the CHDK wiki. Here’s what I did to get the Ultra Intervalometer script up and running. The instructions are almost identical for the USB remote script:
Getting CHDK going:
Grab a spare SD card and format it. If it’s >2 gig and you think you’ll want to auto boot CHDK, format it as FAT16 (‘format X: /fs:fat’ from the comand line). Leave it in your machine’s SD reader (which, by the way, you need for this).
Make sure you have a CHDK compatible camera. My SD1100 works well with it (and without it, for that matter), apparently the latest version of that camera (SD1200) doesn’t yet have a version of CHDK for it. CHDK isn’t available for SLR cameras.
Check your camera’s firmware version. Create a blank file called ver.req on the SD card. Put the card in your camera. Make sure the camera is set to playback mode and turn it on. Press “Func Set” and “Disp” at the same time. A screen with the firmware version should pop up.
Download the appropriate version of CHDK. Unzip it onto your SD card.
While not necessary to get CHDK running, now is a good time to stick the Ultra Intervalometer script on the card, so you don’t have to take it out to do it later. Copy the script code and save it as something like ‘ult_interval.bas’ in the SCRIPTS subdirectory on the SD card.
Pop the SD card in your camera.
Make sure your camera is set to playback and turn it on. Hit ‘Menu’ and scroll down, you should see an option to update the firmware. Do it!
When you update the firmware, the ‘print’ button will blink for a bit, strange things will happen, and you should see the CHDK splash screen. Hooray!
Now you can use the ‘print’ button to switch between the normal boring Canon menus / normal shooting and “<ALT>” mode, which brings up a totally different list of options when you press the Menu button, and triggers a script when you press the shutter release rather than taking a picture.
Using Ultra Intervalometer
Make sure you’re in <ALT> mode
Press Menu and scroll down to Script Parameters
Select “Load script from file” and select ultra_interval.bas or whatever you called the script.
Set the script parameters (those under the heading Ultra Intervalometer) to your whim. Use left/right to increase or decrease parameter values.
Delay 1st Shot (mins) – this is the time between when you start the script and the first shot, in minutes
Delay 1st Shot (secs) – As above, but seconds
Number of Shots – how many to take
Interval (minutes) – number of minutes between shots
Interval (seconds) – number of seconds between shots
Inerval (10th seconds) – as above, with 10ths of seconds
Exit out of the menu (by hitting menu)
Press the shutter to start the script. The camera will fire at the interval you chose, hooray! Press the shutter again if you want to stop the script before it finishes.
When I set the interval to 1 second I noticed that the camera wasn’t actually shooting that often. The ‘review’ period, where it shows you waht you just took, seemed to be getting in the way. I exited out of <ALT> mode and was able to set the review time to 0 seconds in the camera’s normal menu. I also turned off AF-Zoom. It still takes a little bit of time to auto focus between each shot, I haven’t dug through enough of the CHDK documentation to find out how to only focus at the start of the sequence.
Here’s a short (ok, still boring) clip of my walk from NYC Resistor down the street, in search of some tacos:


 Mine is shown on the left, it’s not very pretty. I spliced a reset switch into the +5v (red) wire. It uses a USB port for power, which makes it a little silly, although ok for my uses. Ideally you’d rig up a power supply along with the switch. I would have but I only had AA battery holders and it needs between 3.5V and 5V of juice. There are some neat hacks listed on the CHDK wiki for making remote cables out of old joysticks and flashlights and whatnot.